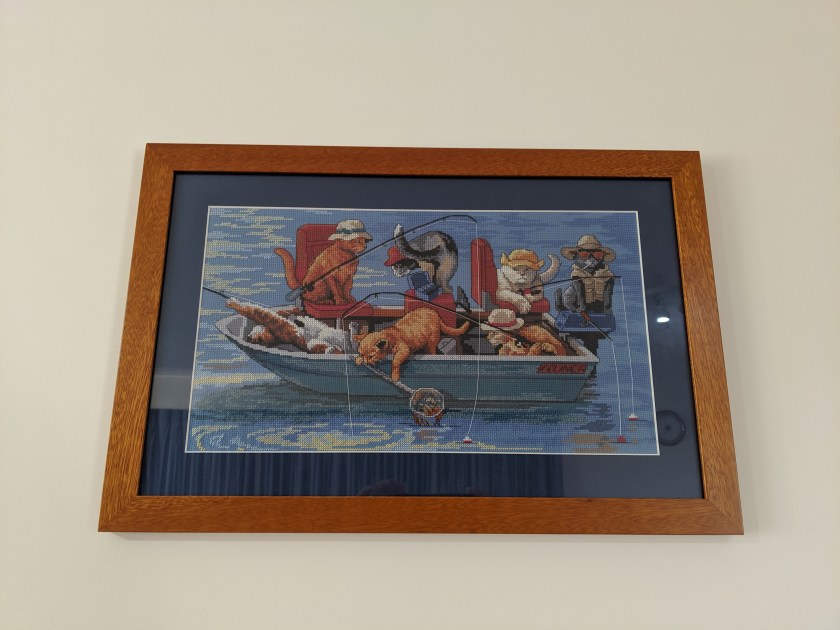
Framing my finished cross stitch projects has been my go-to finish for many years. The flat-ish finish enables me to easily and conveniently display my awesomeness on walls, shelves and other flat spaces. Also, framing can be as low cost or expensive as you want it to be or can afford it to be. Nine times out of ten I will frame my projects myself because I want to improve my framing skills and I’m impatient. However, the one project I have had professionally framed was done very well. The people who framed it had a big challenge on their hands, as I had done a major stitching faux-pas. I had the right measurements for my fabric, however, when I started stitching, I got my horizontal vs vertical around the wrong way and it wasn’t until I had stitched a significant amount of the project, that I had realised that I didn’t have enough fabric horizontally and had too much fabric vertically!
Professionally framed fishing cats project
That said, I like being quirky and unconventional at times. My logic is ‘who says I have to?’ or ‘just because they did it, doesn’t mean I have to!’ So the question is, how many variations, alternatives and options are there to framing?
Alternatives to framing…
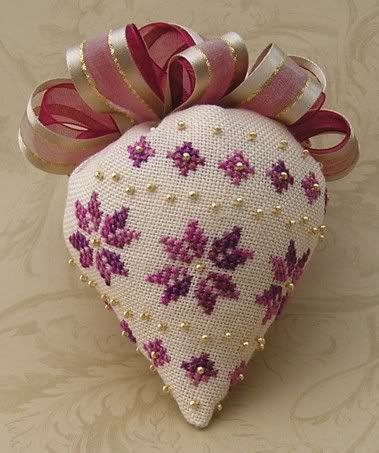
Biscornus (aka fancy pin cushions)
I’m starting to develop a love obsession with biscornus. When I first came across them, I was starting out in cross stitch and didn’t really understand how awesome and beautiful they are, let alone how many designs are available!
Biscornu
Strawberry biscornu
Wall hangings
Not quite the same thing as framing your works of art, but we’re getting close. The Youtube clip below by BexBox Stitcher will hopefully give you some ideas!
Clip by BexBox Stitcher – published on 23 April 2018
Quilts
I’ve been working on my own cross stitch country themed quilt for many years and there are two awesome things about this – 1) it’s nearly finished!; and 2) there are so many different options with quilt patterns, that as long as it turns out the way that I want it, that’s all that matters!
Seasonal/special event decorations
This includes Christmas tree decorations, celebrating the four seasons (winter, spring, summer and autumn), Mothers Day, Fathers Day, Easter, welcome home, farewell, happy anniversary and many other celebrations!
Three possible decorations options…
Cards
Cards can say as much or as little as you want them to. They can be a way of you saying thank you, sorry, congratulations, happy anniversary, happy birthday, farewell, bon voyage, welcome home, declarations of love, happy new year, happy hanaka etc. The other awesome thing is if you’re feeling a bit stuck, books and magainzes like the Ultimate Cross Stitch Magazineand the Internet more broadly speaking, can provide you with bucket loads of ideas and inspiration!
Bed coverings
Have you ever considered embellishing your pillow cases and doonah covers like the images below?
All of these images have been obtained from Pinterest. Many of these products can be obtained from eBay and Etsy.
For those of us in the know, this has been an option for a while. Thankfully, places like the Fox Collection, provide us with the ability to make our bed coverings unique and colourful.
As an introvert, revealing my name to people in anyway, shape or form to people I don’t know and not know how my name will be used, is scary and daunting. If however, you’re attending an event that requires a name tag, creating your own can be a creative way of telling people who you are and that you’re awesome at cross stitch!
Also, if the event allows, why not add your favourite quote, symbol, flower or decorative border to make your name tag even more interesting? The world’s your oyster!
Table settings
What can’t we do with our cross stitch and table settings? The options for us are endless! We can make our tables shine with, table cloths, table runners, napkins, wine bottle bibs and baby bibs to name a few. More ideas can be found at sites like Fox Collection, Needleworkersdelight and OzStitch to name a few!
Bags
Reusable bags are one of the most popular accessories a woman can have and it’s all good and well that we can purchase these bags from where-ever they’re available. But what if you could rock one that you made? Or you were able to support someone who could make one for you? Etsy for example is an awesome place to start!
Book covers and book marks
I’m an avid reader and I love writing – I should probably be writing more! Surprisingly though, I’ve not stitched many bookmarks and I’ve never done a book covering. I have however, fallen in love with the image below. Partly because purple is my favourite colour and I love the choices the designer/s of the image below have made and how they have covered the book.
Book cover by Larisa
Honourable mentions
The above list is just a sample of the options available to you. There are soooo many more options for finishing off your projects and the awesome thing is that there are many more websites, tutorials and videos you can watch to help you decide.
My go-to favourites is Pinterest and Flosstube, which has result in the following list:
Hands On Design is a website that is all things embroidery – especially cross stitch and I love the possibilities of what we can do with finishing our projects, let alone the projects we can do from Hands On Design! The additional awesomeness is that Cathy Habermann (from Hands On Design) has her own flosstube channel!
The Twisted Stitcher – aka Vonna Phiffer has her own flosstube channel as well and does some amazing finishes and she shows us how!
The flosstube clip below for example, shows you how to mount your project on artists canvas…
Alternative to Framing Tutorial by Stitcherista – published on Youtube on 22 September 2017
Have I missed anything?
There’s a pretty good chance that I’ve missed some awesome finishes out there. So I would love it if you could let me know what your favourite finishes are and why you love that particular finish – especially if I haven’t mentioned them in this post!
It’s been a while since I’ve posted anything for this blog. Looking back on what I have posted, it will have been about a month between drinks! I’ve been drafting a few more posts for this blog, I’ve been stitching like mad, taking short trips to Melbourne and to the South Coast, NSW and working towards changing my career direction. Not much running, but I have been doing a lot of fitness alternatives until my body is ready for it!
Stitching like mad…
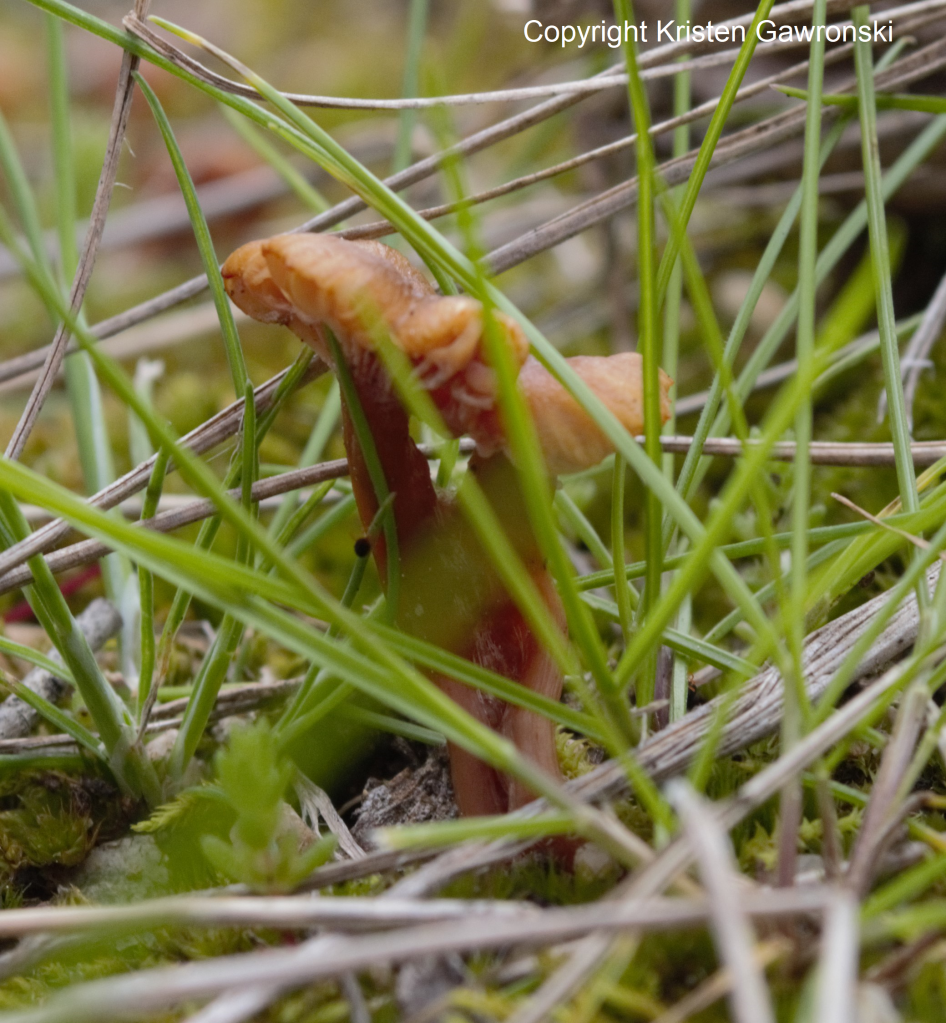
I’ve been stitching like mad on a photo I’ve converted to a cross stitch picture. The image below shows the progress I’ve made on the first page of the pattern and the following image is the photograph I’m basing this project on.
Work in progress cross stitch projectMini Mushrooms – copyright Kristen Gawronski
As I continue to stitch this project and referring back to the original image, I can’t help but make myself nervous about how it’s going to turn out. Whenever I start to get nervous, I remind myself that I am testing this out and I’ll be able to make alterations for future projects – whether it be this project or similar ones!
Trip to Melbourne…
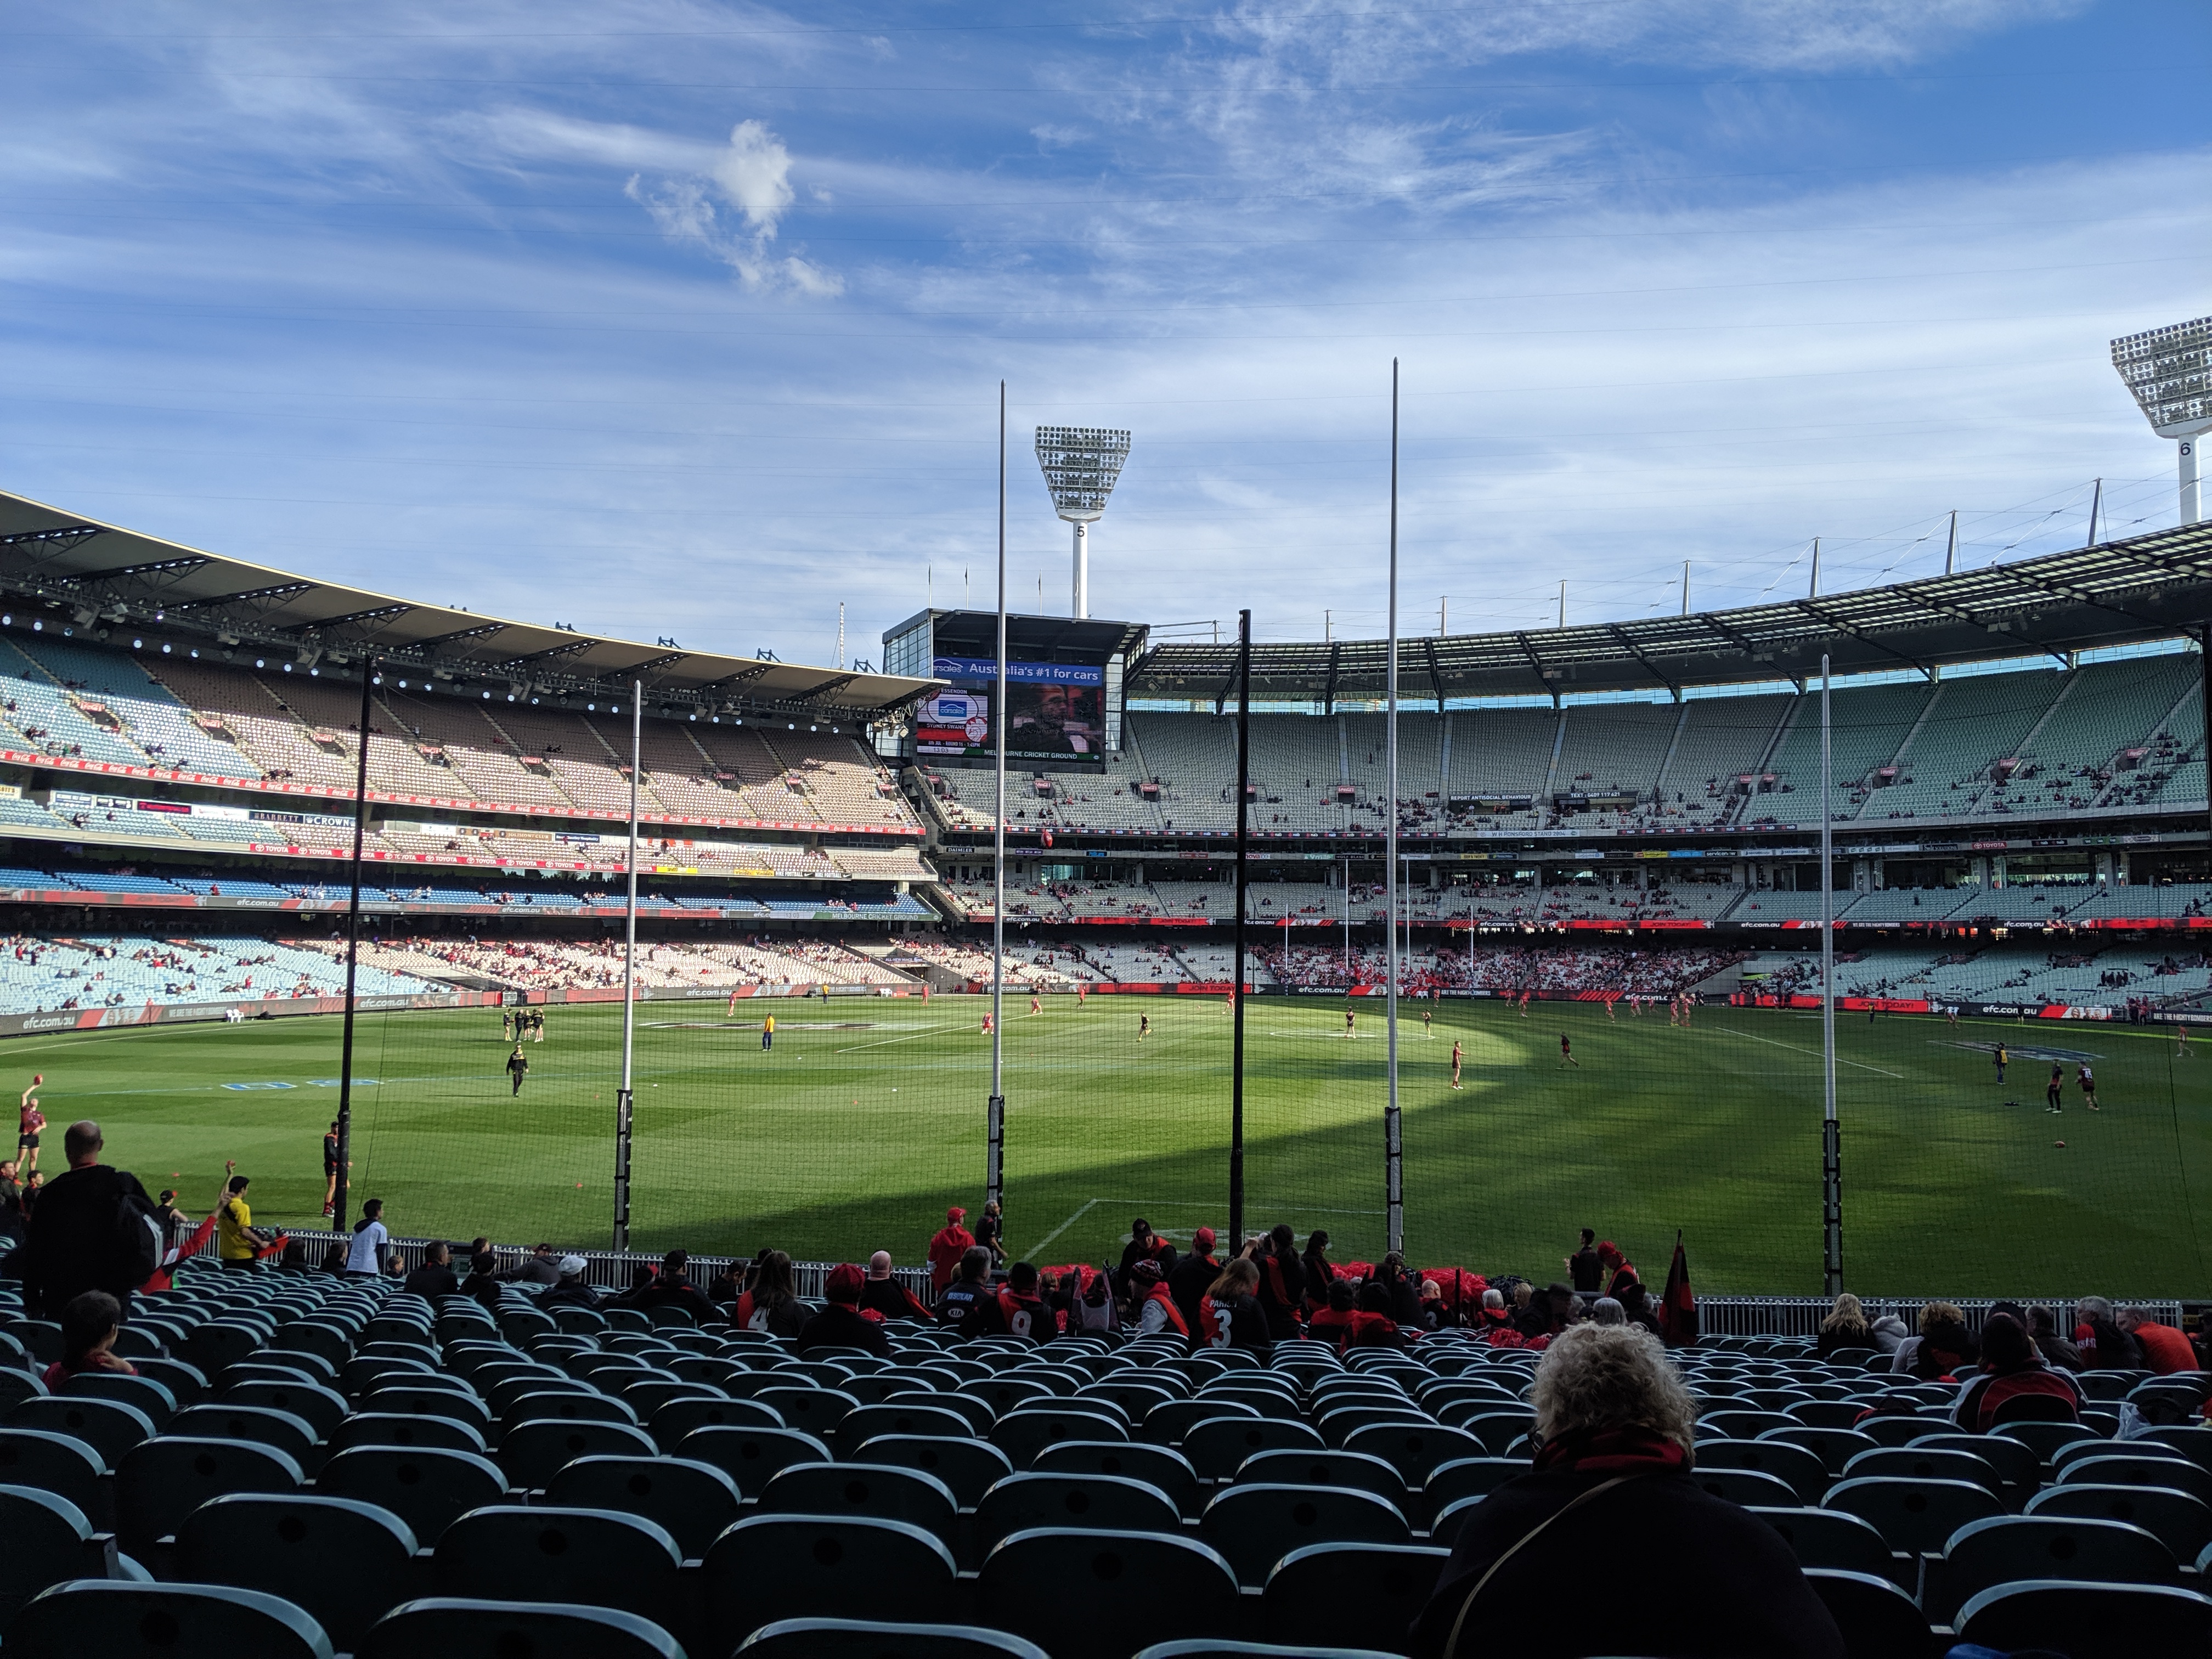
My boyfriend is a keen supporter of the Sydney Swans (an AFL (Australian Football League) team). Since we’ve been together, I’ve really gotten into watching it with him and going to a number of their games up in Sydney. By getting a feel for what it’s like to watch the match live, I’ve been really keen to watch at least one match in Melbourne at the MCG (Melbourne Cricket Ground, aka the G). The importance of this is the MCG is the mecca for the AFL and the grand final is always played at the MCG! So going to see a match at the MCG was on my bucket list. The challenge will be seeing the Swans play at the MCG in a grand final!
Swans vs Essendon at the MCG – We had seats in enemy territory
It was fantastic seeing the game at the MCG. Unfortunately we lost by 10 points and we were sitting in enemy territory – something we didn’t know until we got there and sat down at our seats. So the loss of the game was felt a lot more than if we were sitting anywhere else in the stadium.
However, the weather for the entire weekend was beautiful and we did a lot of walking around – especially along the Yarra River (aka The Yarra). Below are images of what we came across as part of our walks:
Left image – A view up the Yarra, looking towards the MCG; Centre image – a cool sculpture; and Right image – the Yarra, looking under a bridge at the MCG
The unfortunate thing with all of the walking we did, was the muscles around my left knee decided to let me know that they were very unhappy about the amount of movement it was doing. It swelled up and became stiff and very uncomfortable to walk. It thankfully has settled down since then and I can walk around with minimal problems.
I have tried running on the treadmill with limited success. About a week ago I went for a jog on the treadmill and within the first 50 to 100 metres it became too uncomfortable to run. Since then the elliptical machine/cross-trainer has become my favourite machine and I’ve really enjoyed listening to my music and the Zombies, Run! app. One of the things I have had to be careful of when listening to Zombies, Run! is how I react to it. There have been many times when I’ve been close to jumping out of my skin, or cringing significantly because of the sound effects or even wanting to talk to the characters (like I would if I were watching the t.v.)! I realise it shouldn’t matter too much since I’m at the gym early in the morning, my back is to the back of the gym and most of the gym-goers are too busy with what they’re doing to worry about what I’m doing!
So all in all, I’m still here, alive and kicking! Hopefully in a few months time I’ll be able to share with all of you an update on how my mini mushrooms picture is progressing. I’m also hoping that I’ll be running soon – quite probably in enough time to start being worried about swooping season!
When I think of mixed media cross stitch, I immediately think of the addition of buttons, ribbons, beads and different thread textures (e.g. metallic threads, silks, cotton) to a project. And we’ve been incorporating these things into our projects for a very long time to highlight different areas of the pattern and create a new level of interest! So as a curiosity, I Googled mixed media cross stitch to see what’s going on out there and if anything has changed regarding mixed media cross stitch and what others are doing. The results immediately remind me of the use of mixed media in scrapbooking, quilting, painting and other craft mediums. For example, the Artists Network website has a Technique Tuesdays page and they have a post on Mixed Media Stitching!
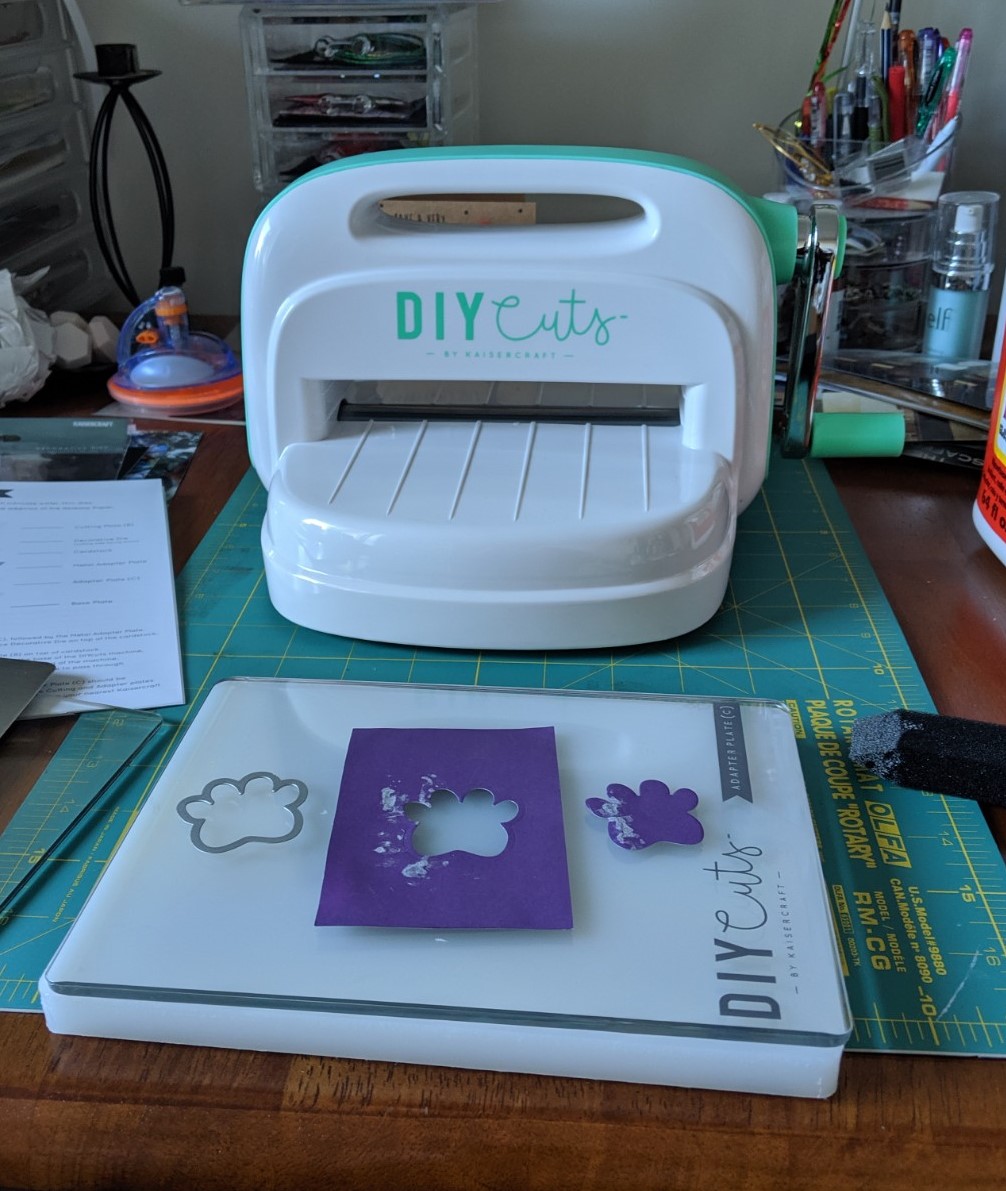
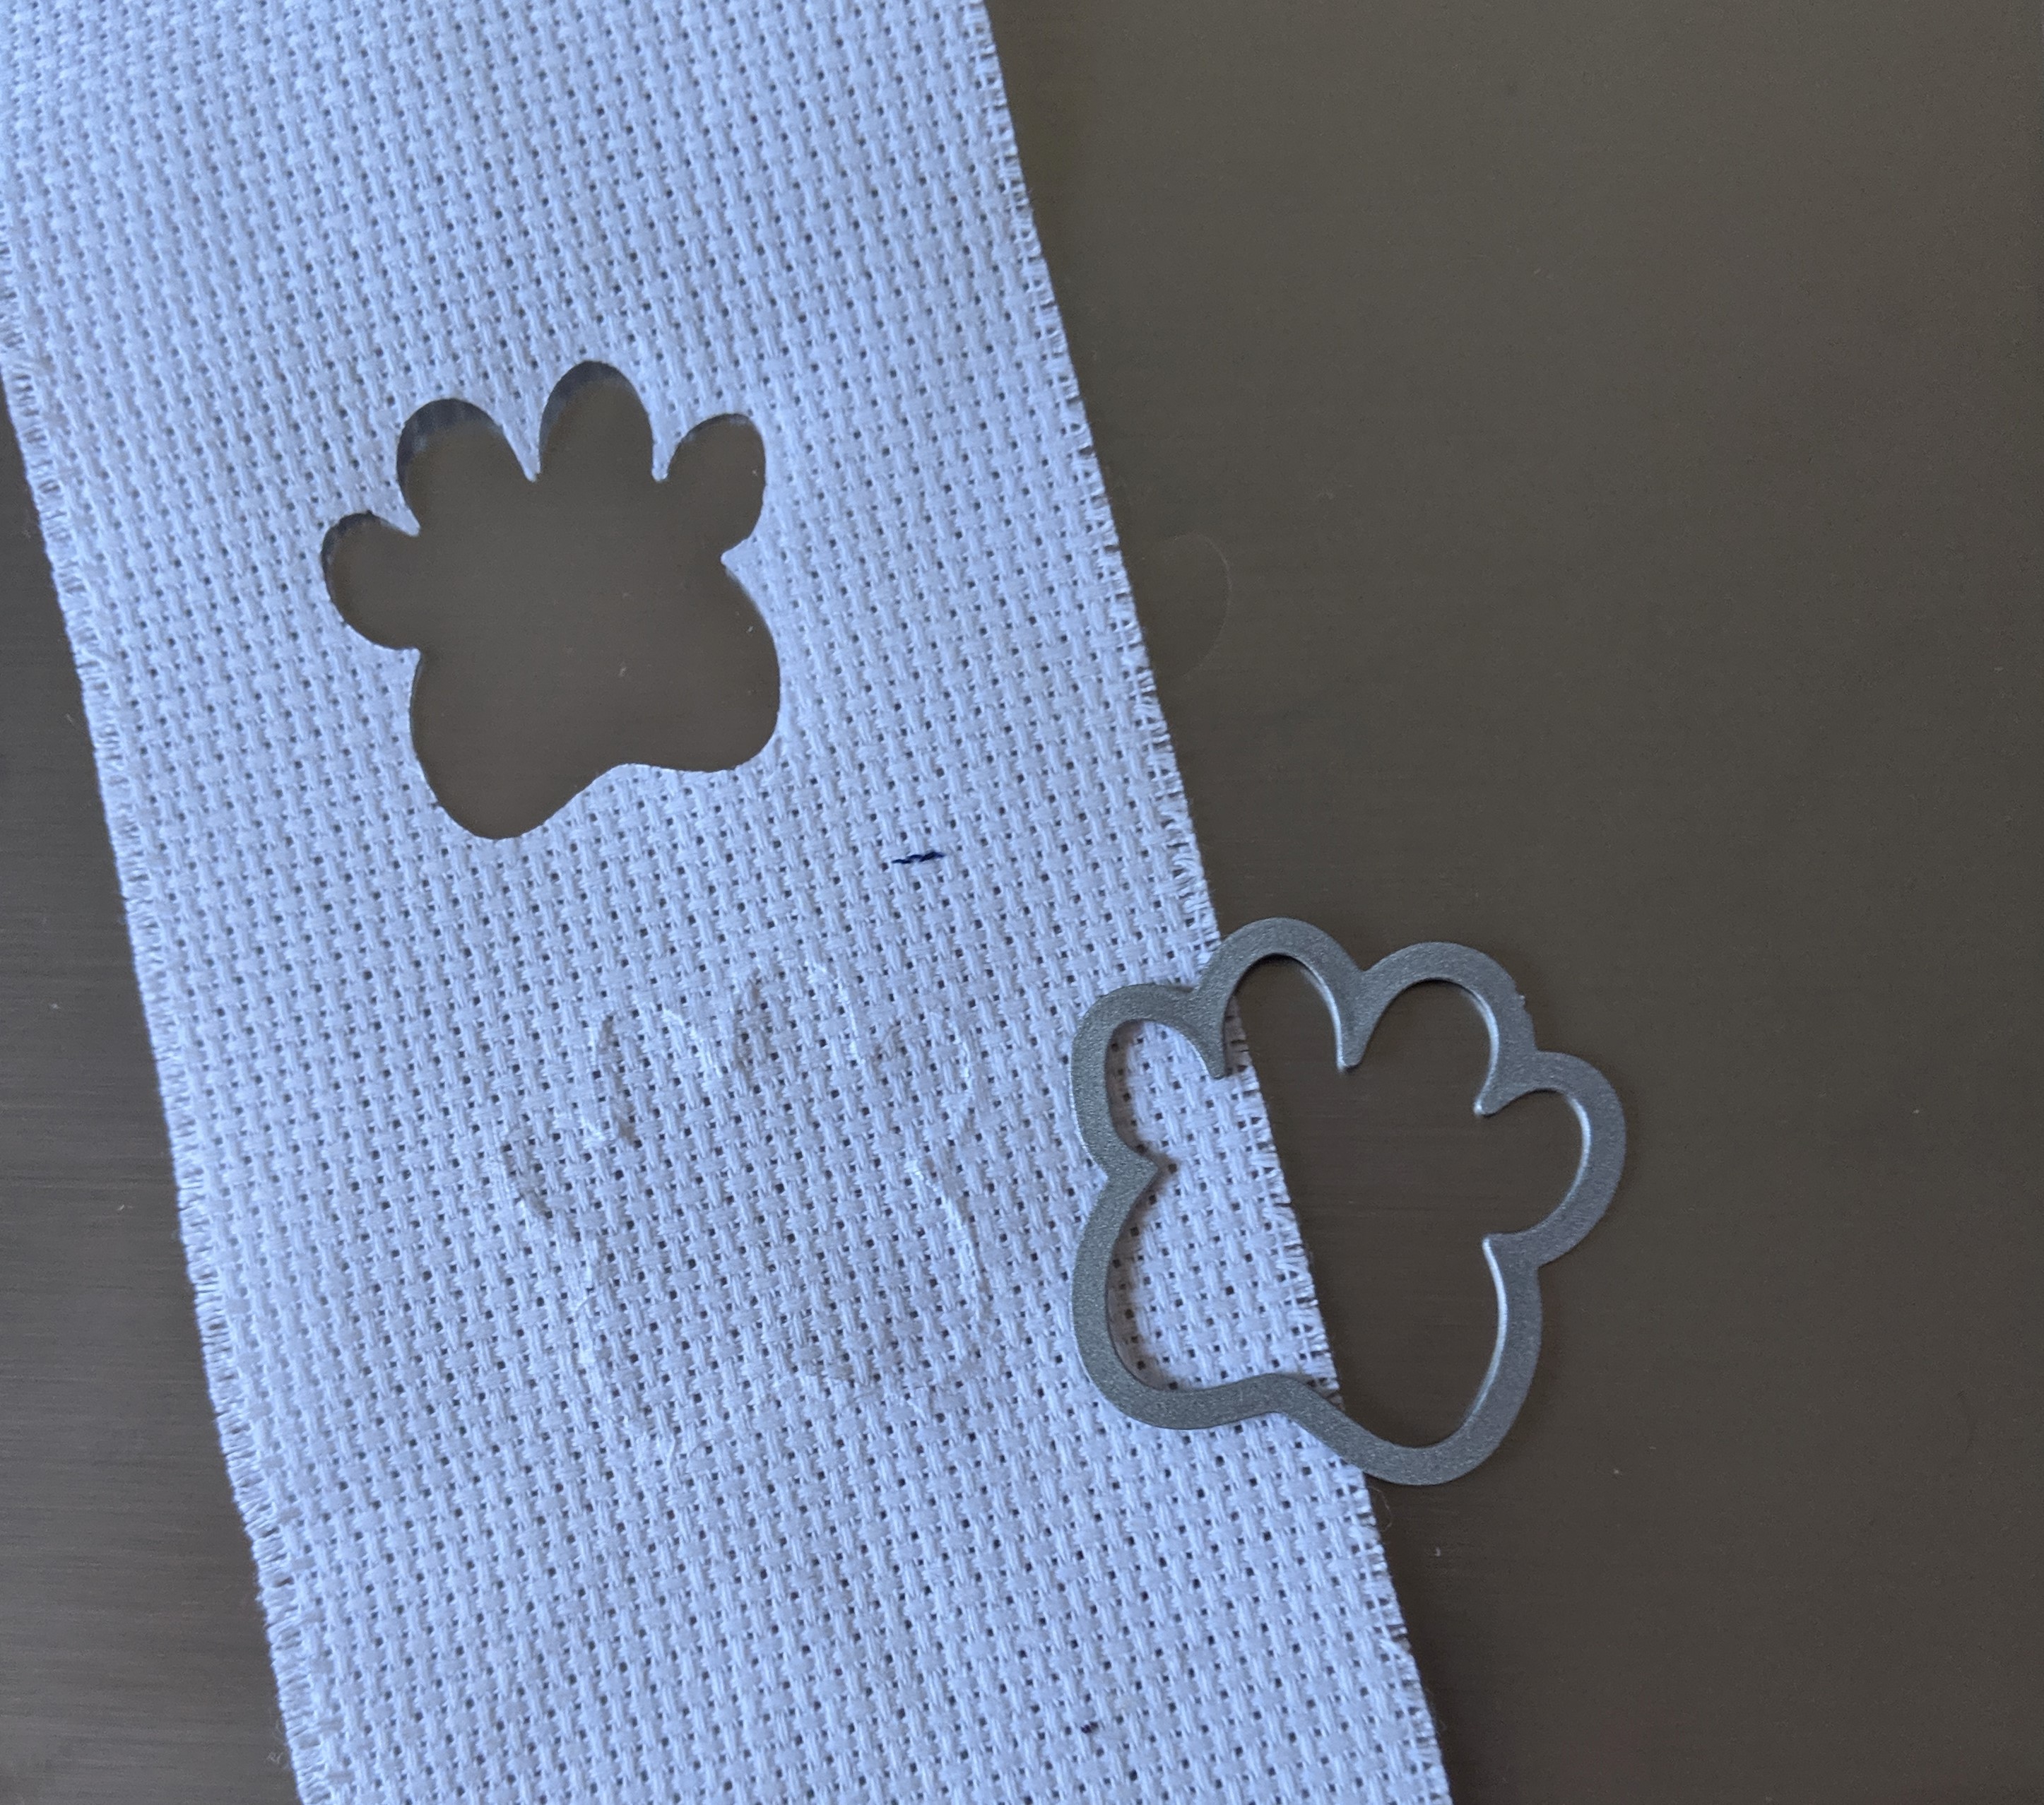
With all of this in mind, some of you may remember a post I did a few weeks ago about the ‘Top 10 Crafty Things I’m Crushing On Right Now‘ and at one point, I talked about the Kaisercraft sale, and how I was looking forward to playing around with DIY Cuts and the tools that come with it. Well, it arrived a few days after that post and over the weekend of 22nd and 23rd June 2019 I started playing around with the DIY Cuts using the paw print cutters and paper and Aida fabric.
Below are images of how I went…
First attempt with paperOverhead view of first attempt with paperFirst with Aida fabricFirst attempt embossing on Aida fabricClose-up of embossing on Aida fabric – fraying
I was really excited to see the results and how easy it was! I have found that with the Aida fabric – regardless of whether it’s embossing or the cut out piece, I need to be careful of fraying. The good thing however, is that I have a huuuuge tub of Mod Podge (it’s about 1kg!), which works wonders with sealing the fabric and I figure that I’ll use it to decorate the old, cheap desk I’ve had for over 10 years, with pages from old books and other crafty things. However, if I don’t use the Mod Podge, I should be able to use a variety of stitches to keep the fraying at bay.
One of the other things I’m keen to test out with the DIY Cutter, is using it for stamping on Aida fabric as a different way of stitching patterns. I’ve just purchased from Kaisercraft’s 50% off sale this weekend (29 to 30 June 2019), some ink that I hope will work with the stamping. I’ll keep you posted!
The other fun part will be incorporating my current tests as you have seen in the earlier images, into cards, bookmarks and some other projects. I’m not sure what it will be or how it will look, but I’m looking forward to seeing the results!
In the meantime, if you have used the DIY Cuts as a way of embellishing your cross stitch or other crafty projects, I would love to see how it’s worked out for you and if you would continue doing it.
I’m writing this piece somewhat off the cuff compared with many of my other pieces, which I try to plan and mull it over a bit before I hit the publish button. To date, this blogging about cross stitch has been an interesting experience and somewhat of a roller coaster ride! I’ve had fun learning about the blogging process and trying to figure out what works and what doesn’t subject-wise and when to post my pieces via WordPress, Pinterest and Facebook.
One of my challenges with writing my posts for this blog is trying not to be so much like everyone else, that for anyone coming across my posts, they aren’t thinking ‘oh, another post on how to… or how not to…’ I definitely want to share my experiences with cross stitch with all of you, but do it in a way that has you thinking a little differently about cross stitch – in a good way! So the challenge for me is to make the journey for all of you fun and interesting without losing any of you along the way or scratching your heads, wondering what on earth I was thinking whilst writing my pieces!
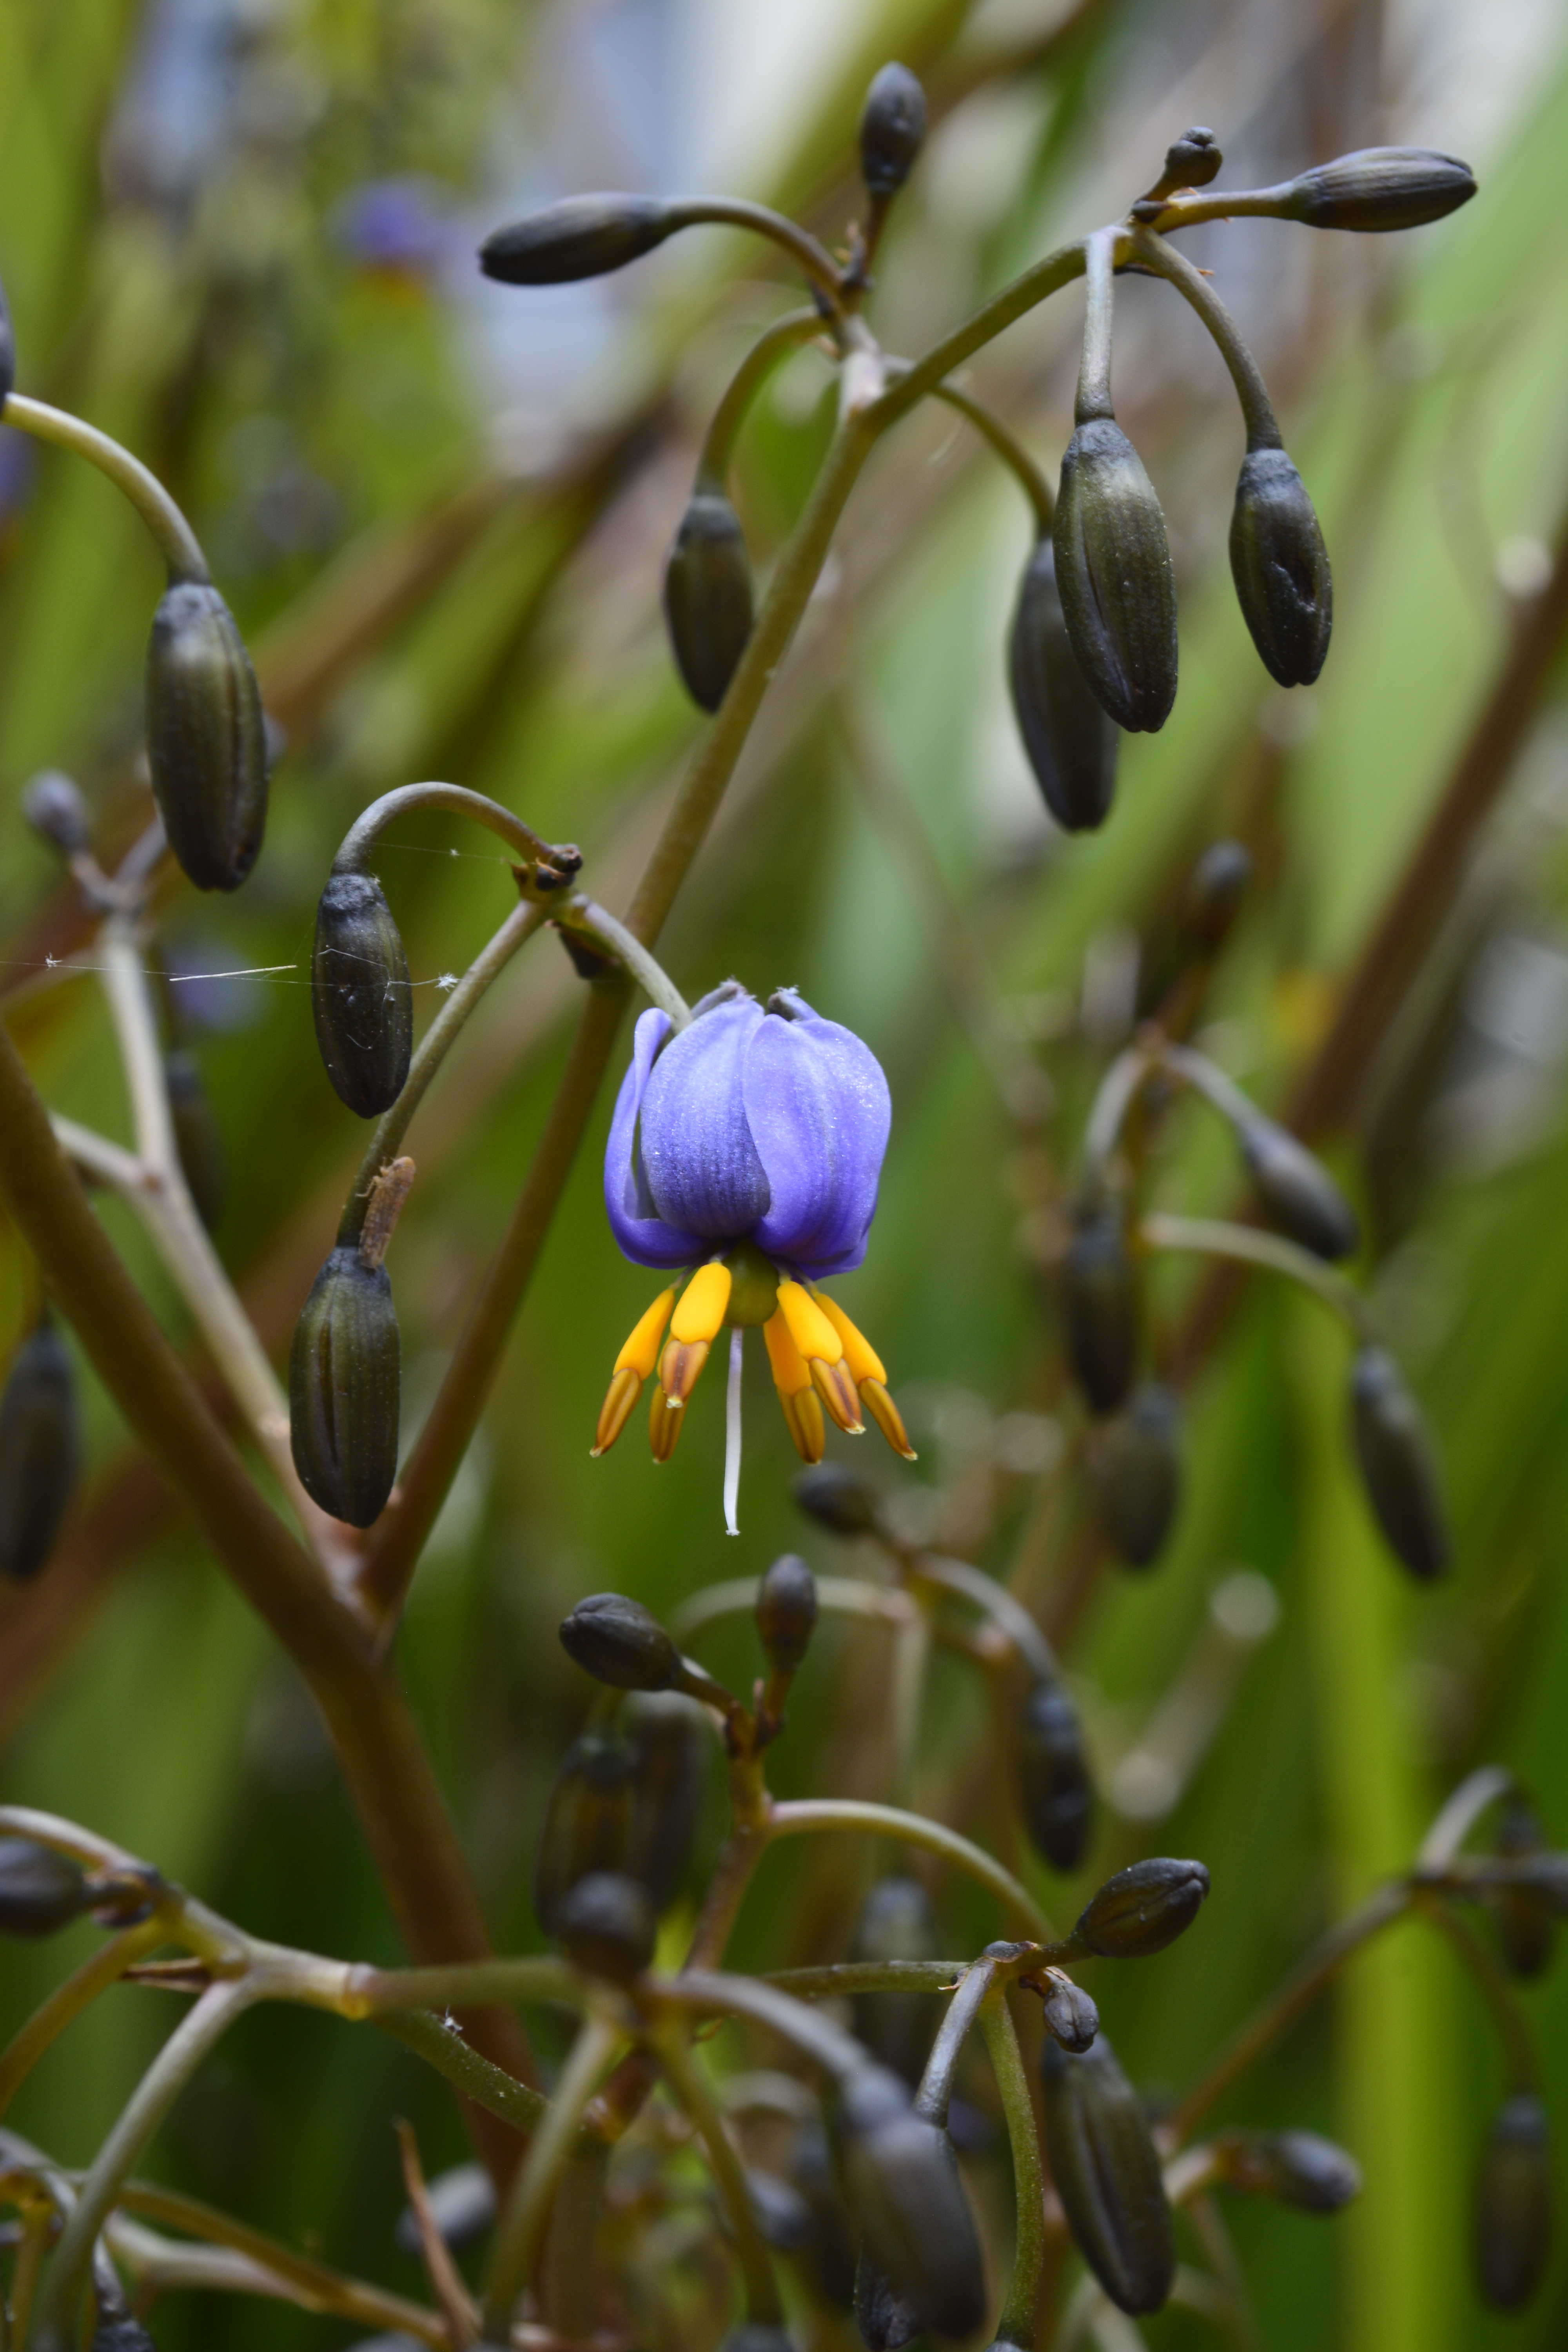
Another challenge I’ve been having an interesting time with, is converting my photos to cross stitch patterns and making them easy and fun to stitch, whilst ensuring they are as realistic as possible. I’m using the software program PCStitch and I’m annoying myself with trying to get it the way I want it to be. Yesterday for example, I was playing around with the image below, trying to convert it into a pattern.
Photo by Kristen Gawronski – Name of flower unknown – photo taken at CIT Reid Campus, Canberra, Australia.
At the moment, it’s a 40 page pattern (roughly) because I’ve wanted it to be stitched on 14 count fabric and the measurements are about 40 to 45 inches wide and 20 to 30 inches high. I’ve also trimmed the image down to incorporate more of the flower and less of the background. The additional challenge I’ve found with this is trying to get the colours right and the detail as I love the contrast of colours in this picture. I’m very detail orientated when my brain is in the right gear and it’s something that frustrates me at times, as it can take me forever to get something done – if at all! The hilarity is that cross stitch is one of those things that requires time and patience!
The cross roads I’m at, at the moment are trying to figure out what I want to do. I’m at a really good stage of my life and I want to make the most of it. Career wise I feel like I’ve achieved most of what I want to do in my profession and I’m ready for a change. The challenge is figuring out how much of a change that is going to be! For a long time now I’ve had a keen interest/passion for conservation and preservation of cultural heritage information. Which means working with places such as the National Archives of Australia, the National Library of Australia, the Australian War Memorial and the National Museum of Australia. If I go down this path, I will be able to maintain my comfortable lifestyle with minimal disruption and I’ll be pretty happy. I’d still be working as a public servant – something I’ve been doing for the majority of my working career, I’m familiar with the office politics and the benefits are very nice.
The other direction would be developing my photography and graphic design skills (which are quite basic at the moment) and building a business around cross stitch and photography. This concept is super scary and exciting. I’ve never started up or owned my own business before and from what I’ve seen and heard I know that it’s a lot of hard work and responsibility.
However, I’d be doing something I’m super passionate about – writing and cross stitch and being creative. Which translates to continuing with this blog, producing and selling patterns, cards, images and finished products which are are just a few of the possibilities. Then there are finishing services, lessons and videos to name a few.
Additionally, the arts and crafts industry can be extremely fickle. For many people, it is a nice to have rather than a necessity. So when times get financially tough, they are less inclined to spend money on a nice picture to hang on their wall or pattern to stitch. Additionally, if the true monetary amount was placed on a stitched picture that represented the amount of time spent on it and the resources used, the average amount would be in the hundreds to thousands of dollars. Which leaves me wondering who would buy it? Who is my audience? Who are my customers?
Off and on for a few years now, I’ve been working on business plan to try and figure out some of these issues and questions I’ve just raised and there’s still quite a lot I need to figure out and develop. I do feel like I’m on the right path though with getting this sorted out and this blog is a big part of that!
Meanwhile, I’m reminded of what a dear friend of mine said recently via live Facebook post. She talked about valuing what we do and the experiences we bring to our roles – regardless of what they are – and being rewarded for our time, experiences and the services we provide. These rewards can be in the form of money, gifts, the people we are working with, the pride within ourselves and seeing the differences we are making to those who are receiving our services and products. Additionally, she talked about quality over quantity and the value that something gains over the quality of it rather than the quantity of it. To me this means not being afraid of putting a high price on my products and services because my products will be originals. It also means putting the time, love and effort into my products and services to produce such beautiful and quality work, that the monetary factor shouldn’t be an issue.
In summary, I appreciate that it sounds like I’ve made my decision about my career direction. My gut instinct tells me that I have. My head and heart however are regularly fighting with my gut and I’m needing/wanting to get a lot more things sorted out in the background (e.g. finances and sussing out this archival side of things to see if it’s the right fit for me) before I take the terrifyingly big leap. If nothing else, this can be my side-hussle until I’m earning enough to be able to support my current lifestyle.
Thank you all for bearing with me while I find my voice and until next time…
Have you ever considered if your crafty collection has a shelf life? For example, the patterns or kits we purchase to stitch and create, state that we can make one copy of the pattern to use as our working copy. When I’ve done this, I’ve held onto the original copy I purchased and put the working copy into the shredder or recycle bin. That way I’ve got a reminder that I’ve done this project – especially if I forget to take a picture of the finished project and have given it away to friends or family. Alternatively, is it your changing tastes or preferences in what you want to stitch that end up dictating the shelf life of your patterns and projects?
Professionally…
Professionally, a part of my role is to appraise information (with the use of resources that has been created by internal and external stakeholders) that has been created by the organisation I work for, to determine how long that information needs to be kept for. The aim of the appraisal is to ensure we are keeping the information that is necessary for the organisation to aid current and future decision making. The retention of the information can also aid the telling of the social history of the organisation and its impacts on the world around it. The outcome of the appraisal can mean the information is ready for destruction now, in months to come or years to come or it needs to be kept forever
Personally…
I’ve never done a formal stock take or inventory of my personal collection of patterns and kits. The closest I’ve gotten to conducting a stock take or appraisal of my collection, has been when I’m looking for something new to work on or when I’m purchasing something. What I have found however, is that my tastes or interests in what I’m stitching has changed from when I first started stitching to now. For example, the first kits and books I’ve purchased were teddy bears and faeries. Partly because I like both of these themes and I had special people in mind when I bought the kits and books, thinking that I would be able to stitch cards and similar gifts for them. I’ve certainly done that and as the years have gone on, I have found my own interests kicking in and I’ve purchased patterns and kits that I want to stitch for myself. These themes include horses, Christmas, myth and magic, and more recently, quotes I’ve seen on the internet and converting photos I’ve taken to cross stitch patterns.
Are there any consequences?
Professionally, if organisations don’t conduct regular appraisals of the information they hold, then there can be significant issues which include, storage (digital and physical) costs, increased scrutiny from internal and external sources, deterioration of information and loss of control of knowing what is in the collection to name a few.
Personally, the consequences aren’t as significant – i.e. internal or external scrutiny. However, the money you have invested in your collection and to some extent, your health can be affected. You do need to be aware of how your storing your collection and where its stored to ensure you can continue to access it without any issues. And that your collections lasts for as long as possible. For example, have any of your patterns or kits been affected by sunlight, heat, dampness, mites or rodents? If you’re not sure, have you noticed your patterns or books being brittle, discoloured or the texture of them being warped? Alternatively, have any parts of your collection (including works in progress) started growing mold, or do they have little bite marks in any areas?
How do you go about appraising your collection?
There are many different ways you can go about appraising your collection and the aim here is to suggest a few different ways that I’ve found on the Internet and what works for me.
Consider it as a spring clean…
Like you might do it for your wardrobe or on a grander scale, your home, pulling out your entire collection and laying it all out in front of you. You may get a lot of grumbles from your family and friends. If you have pets, they may want to try and ‘help’! Group your collection by patterns, books, threads, fabric, hoops, lights, scissors etc. and putting it into sub-groups such as fabric colours and counts, themes/subjects of your patterns and books and any multiples of your threads. This can give you a visual of what you have in your collection. You will be able to see if you have any gaps in your collection and you will be able to refresh your memory regarding any parts of your collection you haven’t seen or used for many years. From there you will be able to gauge how much of it you really need or want and start moving those parts of your collection to the side.
Another consideration is whether any parts of your collection have started deteriorating because of the way they have been stored, and disposing of those parts of the collection as a result of their deterioration.
KonMarie your collection
Earlier this year there was a lot of hype about the Marie Kondo way of organising areas of your home. This may be a way of helping you to determine if there are any areas of your collection you need to dispose of (if none of it has been affected by the way it’s been stored).
10 Amazing Tips from Tidying Up with Marie Kondo – posted on YouTube on 16 January 2019 by Ms Mojo
Disposing of your collection
Are there any crafty people in your life who could benefit from your collection? What about charity stores, schools, or community groups? You could also begin considering if there are any other crafty people you know who could benefit from your collection that you no longer need or want.
Keeping tabs of what you’ve got
If you’re unable to part with any area of your collection and you’ve found things you’ve completely forgotten about, it may be worth improving the way you store your collection and how you keep tabs on it. Thankfully there is no shortage on how you can organise your collection and the tools you can use to keep yourself organised.
Organizing your crafting supplies and creating a stamp inventory using Evernote by ScrappyDiva – posted on YouTube on 27 August 2018
I use a combination of open bookshelves, boxes, bags, my laptop and a four drawer filing cabinet to store my collection. If I’m running low on any area of my collection – especially threads and fabric, I write them down on my hand or a post-it note so that I can pop down to the shops or order what I need on line. Occasionally I’ll have the pattern I want to work on with me to ensure I don’t miss anything and a pen or pencil to tick off what I’ve gathered.
Storage considerations
As I’ve hinted at earlier in this post, if any areas of your collection have been affected by the places you have stored your collection, before you put away your collection, consider if there are any other areas of your home you could store your collection. For example, are there other cupboards, rooms, boxes or shelving you could use to ensure the longevity of your collection? For your patterns, is it possible for you to scan them and save them to your preferred IT device?
Final note…
I hope that there are elements of this post that helps you with your collection or at least, provides you with some things to think about if you want to update the management of your collection!
It’s been 10 years since the Cross Stitch Crazy magazine has released their 120th issue with the article titled A-Z of Stitching pages 42 to 44. Which got me thinking about how much cross stitch has or hasn’t changed over the last 10 years at least. This is my take on the A to Z of Cross Stitch…
A Aida, Apps and Anchor threads, Accessories, Acronyms and Anchor patterns. Without them we wouldn’t have such awesome and amazing projects to share with everyone.
B Backstitch, Biscornus and Blogs. Backstitch can make the world of difference to a picture. Providing an added element of detail that other stitches are unable to provide. Biscornus (aka fancy pin cushions) are beautiful. And blogs about all things cross stitch, are a modern way for all of us to share and read about the different things we’re up to and learn a few tips and tricks along the way!
C Charms, Cross-Country stitching, Confetti Stitches, Craft Fairs, Country Threads, Counting and Community. **deep breath** So many C’s! Aside from backstitch, charms are another way to embellish your project and a non-stitchy element to your project. Via our communities, we can learn about we can deal with confetti stitches, when the next craft fair is on and the importance of counting for any project while we share some of the Country Thread patterns we’ve stitched. Meanwhile, cross country cross stitching is just one of the many ways in which you can stitch your project as shown in Pam’s Crafty Corner clip below.
D DIY and Digital Patterns, DMC Threads and Dimensions cross stitch kits. In recent years, we have seen an increase in the promotion of making your own patterns and the use of digital born patterns. Both of which have been aided by the IT devices we use and the necessity of the Internet. Meanwhile, DMC threads are the most commonly/frequently used threads on many commercial patterns and personal choice by many stitchers. Lastly, I love Dimensions kits because of the beautiful patterns they make and the challenge of blended threads – e.g. one strand of red with two strands of orange – that create shades and highlight areas of a project that could not be otherwise achieved.
E for Evenweave and Embracing the messy back of your work. Evenweave was also part of the Crazy Cross Stitch’s A-Z and necessary to include it here. It can be difficult to stitch on, but the affects of it can be amazing! All the while embracing the messy back of your work and remembering that how the back of your work wont matter if you have it framed…
F for Frogging, FFO’s (Framed Finished Objects) or Finished Objects. Unpicking unfortunately is a necessary evil of our craft at times. However, celebrating our framed finished objects or finished objects can be rewarding
G Get Moving. Our craft means that we sit still for long periods of time. We need to take care of our selves to ensure we can continue stitching for decades to come. How you move is up to you. I run when I can and regularly go to the gym and train with an awesome group of people and trained by two awesome trainers. The trainers and the people I train with are supportive and bring a high level of positive energy and fun to the sessions. I strongly encourage you all to find a way of moving and keeping fit and healthy that works for you and your lifestyle.
H Hoops and Heaven and Earth Designs (HAED). Hoops are just one of the ways in which we can keep tension on our WIPs such as our HAEDs. Additionally, hoops have been used as an alternate way to framing our finished objects. Peacock and Fig in their clip below provide a great tutorial on how to use hoops to frame your finished projects.
A unique way of framing your projects – published on 26 September 2016
Meanwhile, how can I not mention HAED! In my mind at least, their team of designers and artists create some of the most beautiful and intense patterns on the market. And for many people I’ve spoken with, blogs I’ve read and YouTube clips I’ve watched, they all aspire to work on a HAED one day or they have completed one or are working on at least one.
I Internet. A necessity in today’s modern world. I love that it enables us to share so many different things with each other. Which in turn means that we have information at our fingertips and it is so much easier to see and speak with someone who is in a different time zone. Let alone be part of the world when we may not always be able to physically step out into it.
J Join a club. The Cross Stitch Crazy magazine suggests this back in 2009 and it’s still very much relevant today. It can be an official club or a social/unofficial one that you have with your friends who share an interest in hand crafts. The Internet has assisted this with widening the size of the group and the areas in which their members live. Additionally, attending face-to-face club meetings or social gatherings (where possible) is vital for everyone’s health and well-being.
K Kits and Knots (not always the good kind). Whether you kit up a project yourself or purchase one, having all of your tools together for a project your working on makes life so much easier. You can just pick up the bag you have your project in and move it from one room to another or wherever you want to work on the project. Meanwhile, knots can be a good and bad thing. It just depends on what your intention is! The good kind would be French Knots and similar ones that are used to enhance a project. They are the kind of knots we want people to see. The bad kind are ones at the back of our projects when our threads have gotten twisted and tangled up.
L Lighting and the loop method. Lighting is so important to all of us – especially when we’re working on our projects. Meanwhile, I love the loop method as a way of starting off on a new colour on a project I’m working on when I’m stitching two over one. The clip below by Needlepointers shows how the loop method is used.
Published on YouTube on 10 February 2014
M Mill Hill Seed Beads, Magnifiers and Metallic Threads. Many years ago I stitch a fairy garden picture for my Mum and it had a lot of metallic threads and seed beads in it. Throughout the entire time I was stitching it, I was cursing the seed beads and the metallic threads because the beads kept going everywhere and I wasn’t use to stitching with metallic threads. The good thing is that it turned out to be a beautiful picture. Below is a sample of the Garden Fairy project I worked on…
Page 7 of the Cross Stitch Fairies book – Design by Joan Elliott – (C) 2005
Meanwhile, magnifiers are a wonderful tool to have in your stash. Especially if you are working on intense projects (e.g. a HAED or project on small count/linen) or you feel that your eye sight isn’t what it use to be or it’s the end of the day and you’re feeling a bit tired.
N Needle Minders/Needle Nannies, Needles and New projects. I love starting new projects because they’re a clean slate and it’s the excitement of starting something new. I have also fallen in love with needle minders and I wish I had come across them sooner. I received my first needle minder as a birthday gift in 2018 and purchased some more this year at the Canberra Craft Alive Fair. Meanwhile, how can I not talk about needles! Their size will always have an impact on how our projects look and potentially how many times we swear if we use sharp needles and have a tendency to poke ourselves with them! But we wouldn’t be able to do our craft without them and the clip below by Penguin and Fish provides us with an insight to the difference between embroidery and cross stitch needles…
O Online shopping, Ooos and aahs and Organisation. The Cross Stitch Crazy magazine highlighted the importance of being organised and it’s still important now. The awesome thing is that many people have written about the ways they have organised their craft rooms and how they organise their threads generally speaking and for their projects. Ultimately, organise your space and projects in a way that works for you. That way you can be sure to receive the ‘oooos and aaaahs’ you deserve when you share your WIPs and finishes with everyone! Meanwhile, I love online shopping. Especially if I’m unable to make to the shops or they don’t have what I need and what I need is only available interstate or overseas.
P Preservation, PDF patterns and Pinterest. I have an addition to Pinterest. I could spend hours and hours scrolling to the various pins and searching for inspiration for craft and fitness. Which has enabled me to fall in love with some patterns that are available as PDFs and I’ve purchased through an Etsy shop. Which has me contemplating how I’m going to preserve the digital and physical patterns I have and the longevity of projects I’ve finished…
Q Quick gifts and Q snaps. The Cross Stitch Crazy magazine loves quick gifts as their Q item and their magazine for years has provided us with beautiful and amazing patterns that we can stitch and have completed within a day through to a week. Meanwhile, I’ve recently been made aware of Q snaps as an alternate to the hoops we can use while we’re working on our projects.
R Resizing a pattern. Sometimes we can come across a pattern we love, but the recommended count size may be too big or too small. Pam Anderson on The Spruce Crafts blog has recently written about how you can adjust the size of pattern and fabric count in accordance with your preferences.
S Scissors, storage and stitch-all-the-things. At times I get overwhelmed with all of the amazing and beautiful patterns out there and I want to stitch all of them at the same time. If I had the time, I could and if I had a very organised storage system. Like the letter ‘O’, the way you store your collection of threads, fabrics, patterns and tools, will have a huge impact on how you achieve the end result! Meanwhile, scissors are one of my most valued and important tools in my kit. I’d hate to think how my projects would look if I didn’t have any scissors!
T Take your time and Travel. One of the things I love about travelling by bus from Canberra to Sydney is that I can work on my cross stitch for about 3 hours. I’ve also gone on road trips with family and friends to Mittagong, Mogo and various craft stores around Canberra to get the supplies I need. Meanwhile, when you can, take your time and enjoy the project you’re working on. Try not to rush your project because it can result in the threads being pulled too tight and causing gaps and uneven crosses.
U Unique stitches and Unfinished Objects (UFO’s). What would cross stitch be without these two things? All stitches in embroidery/needlepoint could be considered unique because of their appearance and what they add to each project. One of the most special or unique stitches I’ve come across since I’ve been watching YouTube clips is called Jessica Stitches. The clip below shows how these stitches are done:
Clip by Needlepoint Now – Published on YouTube on 1 May 2015
To help put this unique stitch into context, a blog post from October 2017 by A Stitching Love Affair shows how they can really add to the project.
Meanwhile, for many of us stitchers, we can have quite a few UFO’s that we have the best of intentions of coming back to to work on. Then a new pattern catches our eye and it spirals from there!
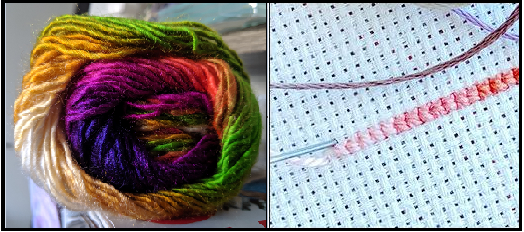
V Variegated threads are beautiful – Cross Stitch Crazy loved them in 2009 and nothing has changed since then. Below is an image of what variegated threads look like and how they can look when used in cross stitch:
Variegated yarn on the left that I picked up from the Canberra Craft Alive Fair and the image on the right is from Peacock and Fig.
W Waste material that comes from us trimming our projects once we’ve completed them. In 2009 Cross Stitch Crazy they were fully supportive of reusing waste Aida and similar fabrics for other projects such as book marks, tags for gifts, cards and Christmas decorations to name a few. Then there’s the waste threads we have from our projects that we could use for the filling of pin cushions, pillows, Biscornu’s and similar projects.
X Could this be one of our favourite letters in the alphabet? Without the X what would our craft be called? Then there’s the X stitching websites, businesses and blogs such as The XStitching Runner!
Y Your stitching thoughts. It was relevant in Cross Stitch Crazy in 2009 and it is well and truly relevant in 2019. The internet has enabled all of us to share our thoughts and perspectives on cross stitch through social media and I for one is more than thankful for this ability!
Z Zombies, Run! This app is amazing for helping me getting up and moving and taking a break from stitching. You are Runner 5 and you are part of Able township. With the help of Sam and a team of runners, you are searching for a solution to the zombie apocalypse and saving any survivors.
One of the many things that I love about cross stitch, is that it enables me to be creative in so many ways. This ranges from adjusting the colours in a pattern through to fudging parts of the pattern when I’ve made some minor mistakes. Then there’s the swapping out of French Knots for beads because I’m avoiding doing the French Knots when all I really should do is practice them!
Changing colours
In earlier blog posts when I’ve talked about my WIP (work in progress) I’ve nicknamed Jingle Bells (because I keep forgetting the official name which is Christmas Toys, designed by Irina Zagorodskaya), I’ve swapped out a couple of colours for two reasons – 1. because I thought that the silver thread highlights would add a different dimension or flare to the picture and 2. I didn’t have the shade of blue that the pattern required, so I went through my stash and found another one that seems to work just as well!
Blue Swap and Metallic Highlights
Sometimes when my friend and I talk about swapping colours around in cross stitch patterns, she says that the idea of it freaks her out. She’s worried about getting it wrong and that she would rather stick to what is on the chart and go out and buy any threads that she’s missing. All of that is totally fine and plausible. I worry about getting the colours wrong sometimes as well – especially if I don’t have the colour at all and I have no idea what it should look like. Saying that, I should just look it up on the Net and all would be well!
Things to remember if you’re going to change colours
Keep within the same brand of thread you’re using. Over the years I have found that whilst other brands have tried their best to provide us with a conversion chart from their brand to DMC, the colours don’t always match up the way that I at least would like. Which means that if I’m stitching a pattern using DMC threads, I’m going to stick with that brand, regardless of what colours I use. This ensures consistency with the feel of the cotton and vibrancy of the colours. Additionally, if I run out of a DMC colour, I’m going to make sure I purchase the same colour from DMC and not interchange it with a similar shade from a different brand.
Sometimes the brands get it wrong. When I was stitching the Fire and Ice horse (pictured below), I was using DMC threads and I ran out of a particular colour. Also, it had been a while since I’d picked up the project to stitch, so when I got around to stitching it again and purchasing the colour I needed, DMC had slightly altered the shade as part of the dying process. Which meant that the colour I had purchased was slightly lighter than what I had previously stitched with, even though it was the same number! This completely threw out the appearance of the picture and by luck, a vendor at the Canberra Quilt and Craft Fair was able to supply me with the colour I needed, because she had a few skeins left over.
Fire and Ice – Designed by Dyan Allaire – produced by Kustom Krafts
Limit the amount of changes you’re going to make and use a colour chart. Peacock and Fig wrote a fantastic article on changing colours in a pattern and they strongly recommended limiting the number of colours that are changed. To aid the changes made, they also recommended the use of a colour chart. Especially if you’re not quite sure on how to go about it or what colours would work well in place of the charted colour.
Note down what colours you have changed. The point is particularly important so that you don’t get confused and waste a lot of your time, energy and thread.
Fudging a pattern
In a recent blog post titled ‘The Top 5 Cross Stitch Things I’m Yet to Perfect (and 5 I probably won’t!)’, I talked about my need to go back to school and learn how to count. I’ve never really kept count of the amount of times I’ve “stitched myself up” and needed to undo parts of a project because I’ve been completely out with my counting. Regardless of whether I’ve stitched too many or not enough, I try to find a way to fudge it in a way that means it won’t be too obvious what I’ve done and doesn’t throw the rest of the project out of balance.
For example, the most recent fudging I’ve had to do is stitch an “extra” four lines for the Four Season Kittens project because I hadn’t stitched enough. Unfortunately this is a significant muck up and I’ve already stitched a significant amount of the Winter quarter. So in my mind, this is too much for me to go back and figure out where I’ve gone wrong and frog it (another ‘formal’ term meaning to rip it all out, or ribbit like the sound a frog makes!). Now, if I don’t show people what the final picture looks like, it shouldn’t be too obvious. However, if you take a look at the pictures below, you’ll see what I mean…
Swapping types of stitches and embellishments
In a recent blog post titled ‘The Top 5 Cross Stitch Things I’m Yet to Perfect (and 5 I probably won’t!)’, I talked about my ability to do French Knots. In many projects that have called for French Knots, I’ve used the small Mill Hill beads for the eyes of teddy bears, embellishments on flowers and buttons on outfits to name a few.
Meanwhile, I’ve also been known to adjust the way that I do my back-stitch on pictures like the teddy bear one shown above. In some parts of the picture, you’ll see that I’ve stitched around most sides of the cross and when there has been more of a straight line longer than one cross, I’ve gone from point A to D without stitching point B and C. For short distances, I think that this has worked well as it has not diminished the finished piece in any way and it’s saved me a little bit of time.
There’s no right or wrong…be aware of your intentions
The aim of this post has been to let you know that it’s okay to make alterations here and there and that mistakes are okay as well. You will need to remember why you bought the pattern or kit and what you intend to do with the completed project. The point here is that making an alteration to a project – intentional or not – does not then mean you can claim it to be your own design – especially if you’re going to broadcast it to the world and attempt to make money out of it. If you are wanting to broadcast to the world the alterations you have made to any designs you’ve purchased, make sure you do it legally.
What do you do? Do you stick to the pattern or make your own adjustments?
If you have made any adjustments to your projects, what have they been? Did they work out the way you wanted them too?
Before I go any further, I need to say I really big thank you to everyone who responded to my last couple of posts about the top 10 things I’m crushing on and the 5 things I’m yet to perfect (and things I may never!). Also, a very big hello and thank you to new and existing subscribers and followers. The responses I have received via the likes, views, new and existing readers has been something I was not expecting and all of you have helped to reassure me that I’m on the right track with the topics I’m writing about. Thank you!
Cross stitch quilt progress…
It’s been a long time coming for me to dedicate another post to my quilt. I’ve talked a little about the progress of my quilt in earlier posts, but it’s been a splash here and there.
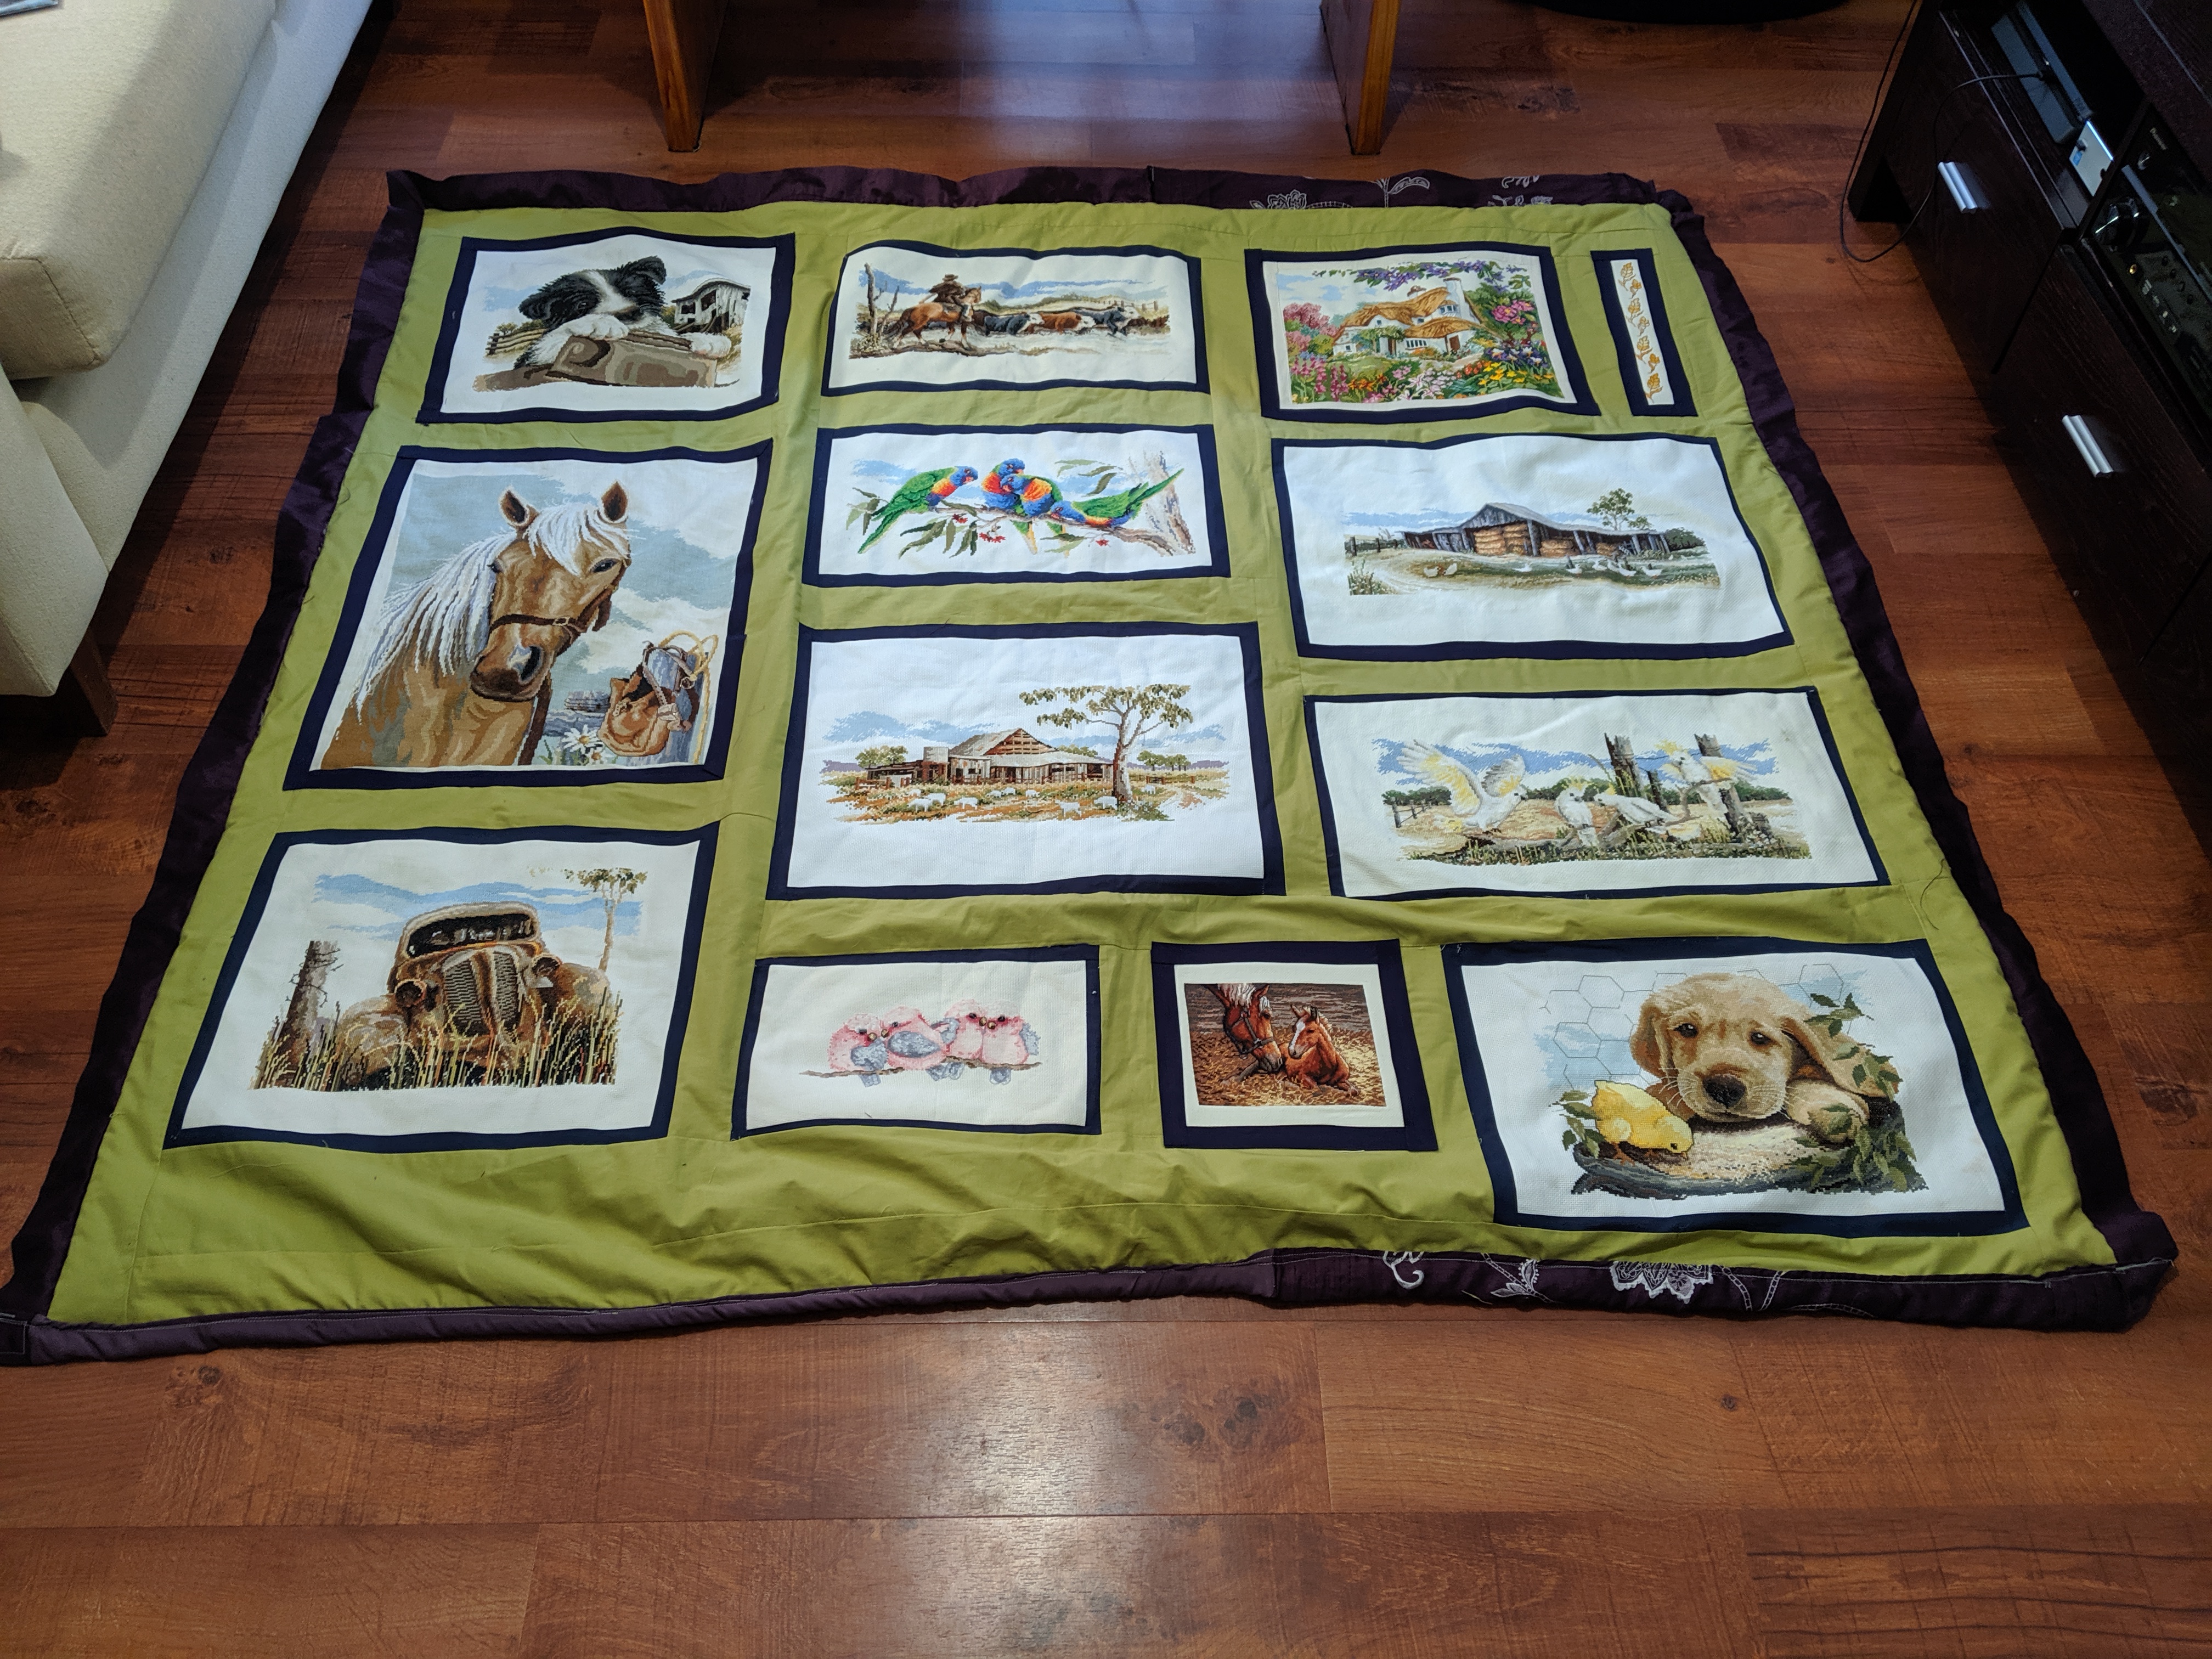
Last weekend I was really excited about finally finishing the binding on the bottom of the quilt. For a number of weeks, I had been putting off bringing out the quilt to try and complete that part of the quilt. Initially I had wanted to have it all symmetrical, but it just wasn’t going to happen because of the way I had attached the back of the quilt to the front and how the other three sides had been attached. However, I’m happy with how I’ve finished it off now and the picture below was taken this morning and shows my current progress…
Quilt progress as of 2nd June 2019
Blue borders around the cross stitch pictures
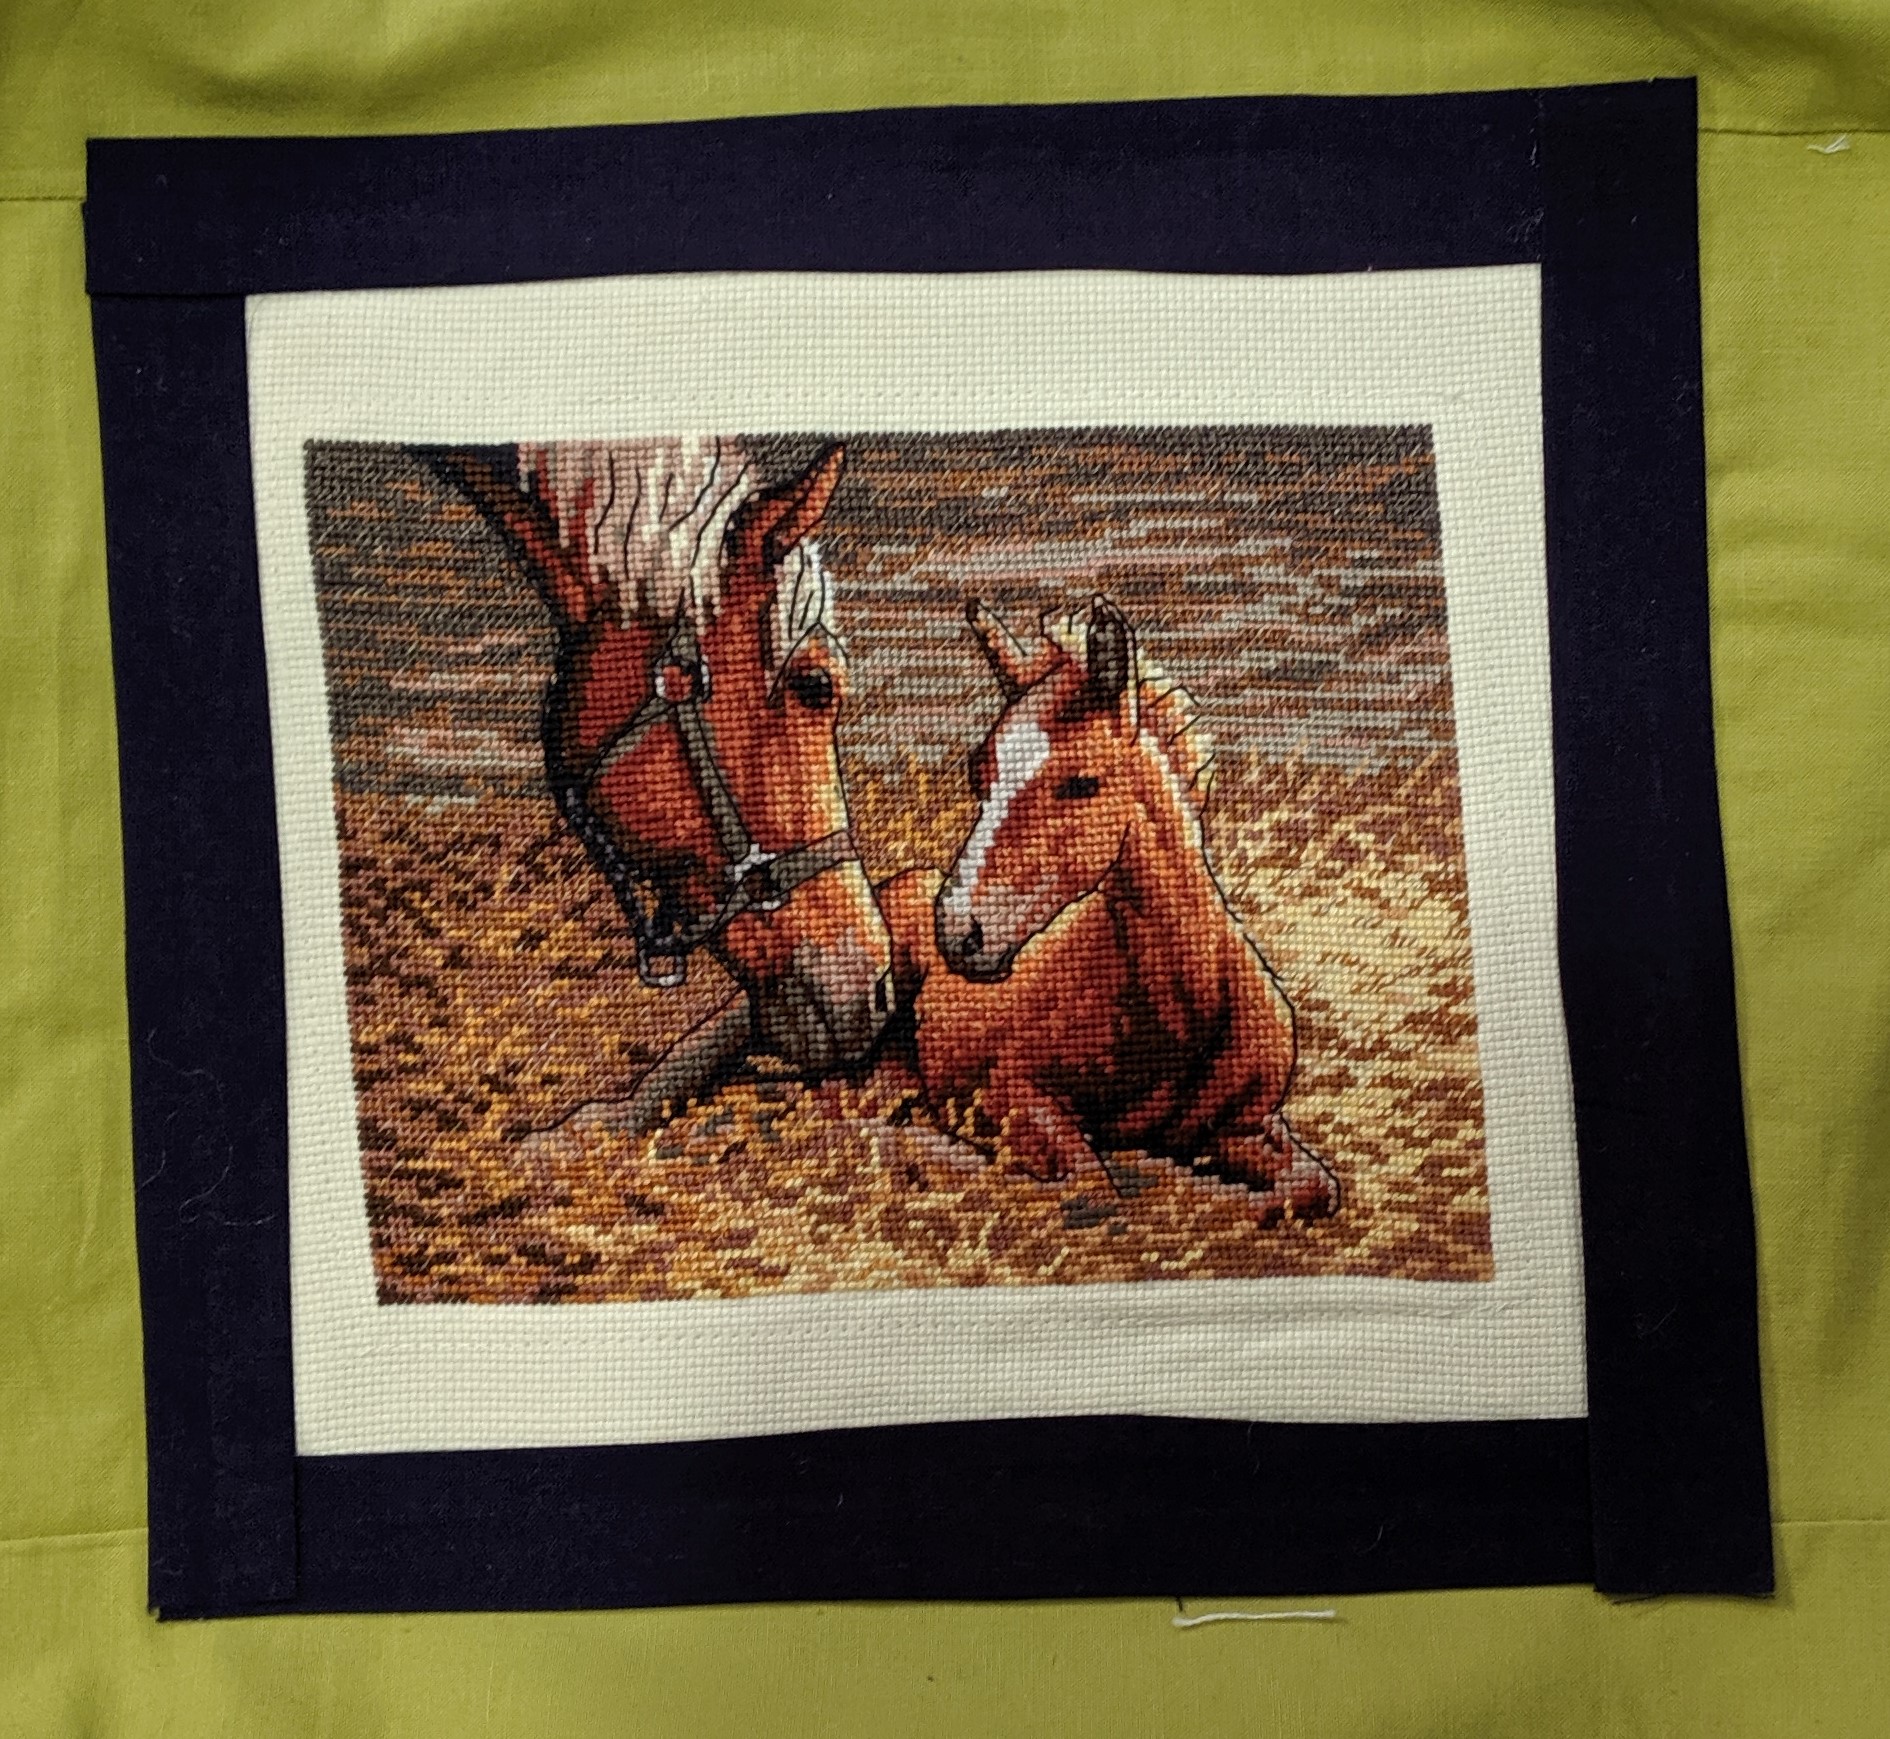
In the above image, you may notice that some of the borders around the cross stitch pictures are looking a little thicker or symmetrical. A few months ago I had bought some more navy blue quilting fabric and I cut it into strips of about 2.5 centimetres (cm) to 3cm wide. For ages I was trying to figure out how I was going to attach the strips to borders and have them be neat and straighter than how they are at the moment. During one of my stitch ‘n’ bitch sessions, my friend reminded me about the special heat activated binding tape and that I already had some! Below are pictures of how I’ve used the tape.
Heat activated tape attached to the back of the blue fabric before I attached it to the quilt.Mare and Foal – updated border with the heat activated tape.Palamino with the heat activated tape.
Light at the end of the tunnel…
The good thing is that I have about 8 more borders to go! Internally I’m groaning because I have a lot more ironing to do. But it’s only 8 and if I motor along I will hopefully have it all sorted by the end of next weekend! What makes next weekend extra special, is that it’s a long weekend for many parts of Australia! We’ll be celebrating the Queen’s birthday (even though her actual birthday was earlier in the year) and for my boyfriend and I, we’ll be heading to the coast and/or celebrating my brother’s birthday!
The next question will be how to celebrate the completion of the quilt? What do you think I should do?
Until next time,
Happy stitching!
Related Posts:
To see how this quilt started out, check out my post from the 23rd February 2019.
As I’m writing this post, it’s a long weekend in Canberra and the weather is finally going to start feeling like winter. In preparation for the cold change – however long it may last – here is my list of crafty things that I can’t wait to get my mitts on. These are the things I’m crushing on right now…
10. Kaisercraft. This weekend they had a 50% off sale on many of their items and I couldn’t help but splurge a little. In a few days time the package will arrive and I’m keen to have some fun!
9. Creating my own patterns. Using inspiring quotes I’ve found on the Internet, I’ve had a lot of fun turning them into patterns for me to stitch using some software on my laptop. Such quotes include:
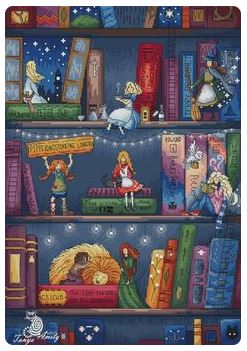
Image from Pinterest
Quote from Alice in Wonderland – Image from Pinterest
Image from Pinterest
8. Pinterest. Broadly speaking I love all of the different images people have posted and are sharing. I’m also loving the ability to organise my boards in a way that I can have a broad topic on cross stitch and then categorise them to patterns or pictures I want to stitch, urban cross stitch and finishes I want to try out.
7. Digital patterns. There are so many awesome and amazing patterns out there that I would love to stitch. The challenge is to find the time for them all! Some of the patterns I’ve discovered this morning are:
Pattern available from mybobbin.com – image found on Pinterest
Image from quilted-with-love.blogspot.com.au that had been shared on Pinterest
Fight Like a Girl pattern from etsy.com – Image from Pinterest
6. Finishing my first country quilt. I’m really wanting to finish this off. Last week I talked briefly about my last endeavours with the quilt, when I had last paid it some attention in April. One of the things that’s holding me back is finishing off the border on the bottom of the quilt. Because of the way that I’ve attached the back of the quilt to the front, I’ve not made it easy for myself. So I’ve been procrastinating for nearly a month…
Note the bottom of the quilt. This is what I need to crash tackle and finish.
5. Blogging and being creative. Ever since I was a kid, I’ve loved writing – especially stories. Many years ago, I remember my sister admitting that she would sneak into my room and have a peak around to see if she could find any of my notebooks, to see if there were any stories and other things she could read that I’d written. Now days, I’m loving the freedom that blogging brings and the creativity that can come from it. I also get a kick out of the notifications of new people following this blog and seeing if there are any comments or likes with any of the posts.
4. My current projects. At the moment I’m rotating through 3 projects – the Four Seasons Kittens, a project I’ve dubbed Jingle Bells and the HAED Fairy. As I pause one project and move onto the next, I try to pause and take in the pleasure of how far I’ve progressed and the thrill of what it will look like at the end.
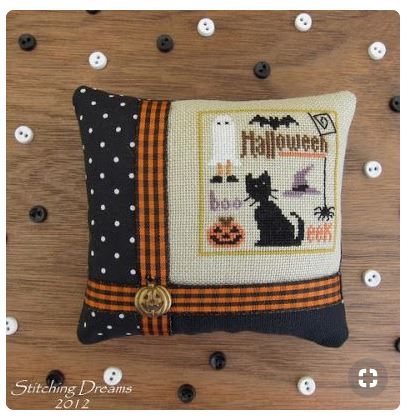
3. Potential finishes. Like the digital patterns I talked about in number 7, I love how creative people are with their cross stitch finishes and I can’t wait to be able to try out similar finishes on my own projects. Such finishes include…
The Halloween Pillow by Stitching Dreams – image found on Pinterest
15 sided biscornu from Etsy.com – image from Pinterest
Book cover as shown on La Risa’s blog site blog.larisa.org.ua – image found on Pinterest
2. Stitching while the weather is rotten outside. I’m loving the prospect of this. The down side of this is I’m potentially going to go a little stir crazy and I’ll want to either brave the weather and walk down the road to the gym or buzz madly around the house doing some house work to get rid of the extra energy, to then justify or make up for me sitting on my bum for most of the day!
1.Multi-media cross stitch. Aside from cross stitch and quilting, I like to try my hand at card making and scrapbooking. In recent months I’ve purchased some things that could be used for scrapbooking or card making. However, when I was at the Craft Alive Fair in Canberra last year, one of the vendors gave me a great idea for potentially new patterns. By inking up some of the stamps that are traditionally used for card making or scrapbooking, and stamping them onto Aida or evenweave fabric, I could then use them to make some quick and easy cards or other gifts for family and friends!
Have you ever found yourself stitching one block of 10 stitches row by row then the next block cross country style? Alternatively, have you started a project with the aim of using the parking method, only to find that you’re getting bored and are jumping all over the place with your colours? Are you then finding that the way that you’re stitching your crosses varies from one area of the pattern to the next? For example, for one colour you may stitch it row by row like the diagram below, and then the next colour you stitch it one cross at a time like the second image below?
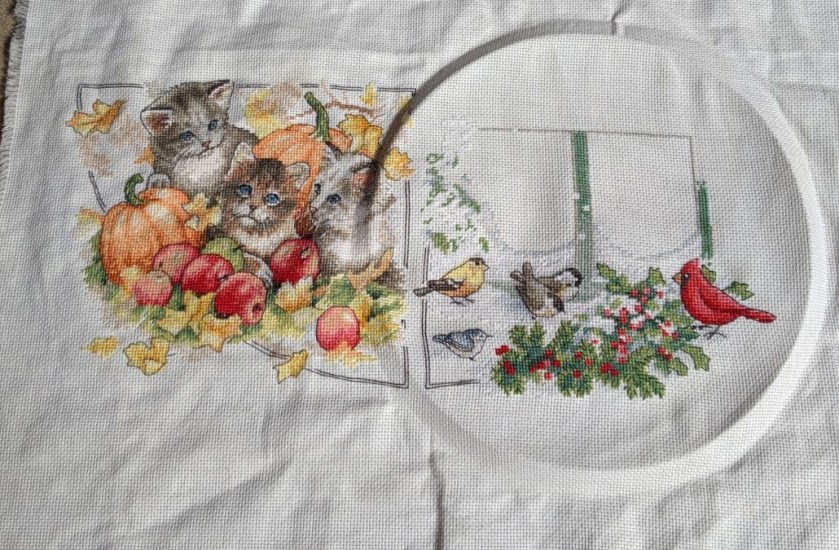
As I’ve been stitching Dimensions Four Seasons Kittens (pictured below), the phrase ‘consistently inconsistent’ has come to my mind quite a lot. It stems from a variety of things in the pattern. For example, some areas call for three threads of one colour to be stitched as half stitch (aka tent stitch), while other half or full cross stitches may have one white thread and one light green thread. The brilliant thing is that this works! It adds a brilliant texture to the overall picture and highlights different areas that the traditional two stranded half or full crosses wouldn’t normally provide.
Four Seasons Kittens as of 14 April 2019Four Seasons Kittens as of 25 October 2019
However, I have increasingly found myself stitching the full crosses or half stitches in a variety of ways to see if it makes any difference with the way the stitches sit on the fabric. This is where I’ve started thinking more and more about the way that I stitch and the impact it may be having on the final picture.
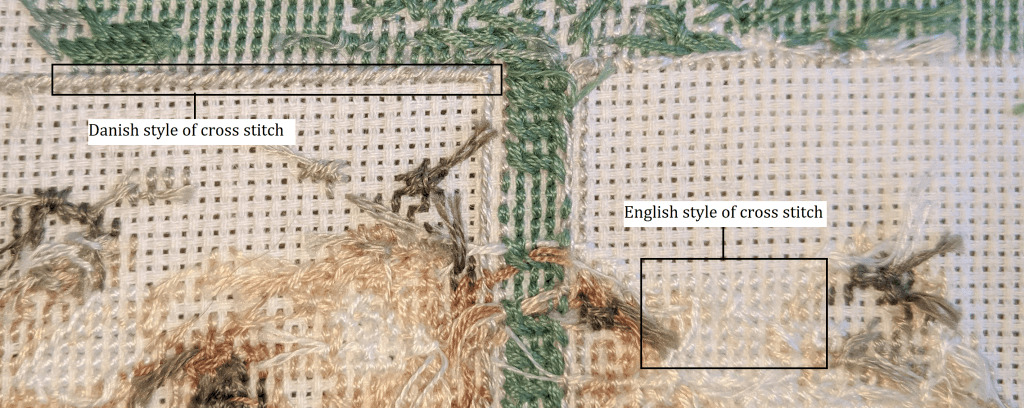
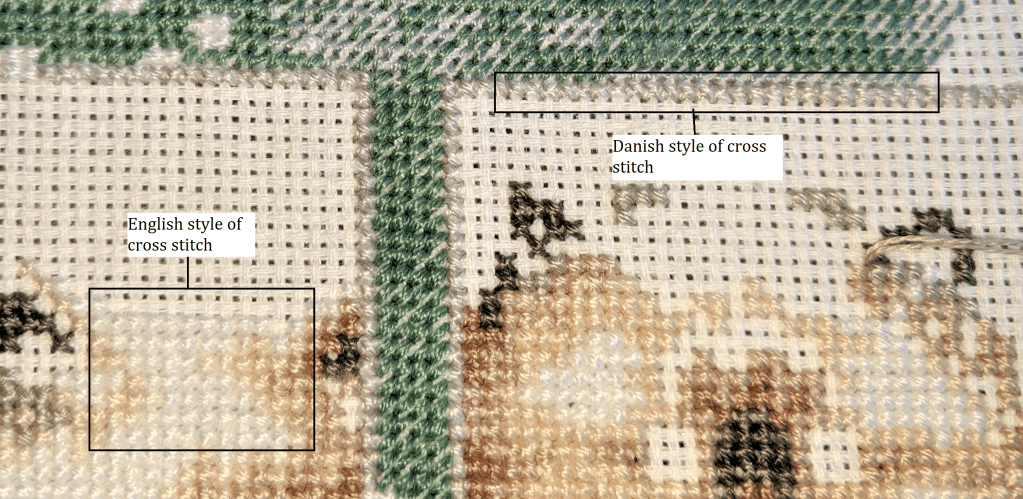
To show you what I mean, Dana from Peacock and Fig posted a YouTube clip on 4 April 2017, showing us the English and Danish methods of cross stitch. Until now, I’ve been unknowing using both methods interchangeably throughout all of my cross stitch projects:
Following this clip by Peacock and Fig, below is close up of an area of the Four Seasons Kittens (front and back) where I’ve used used the Danish and English style of cross stitch interchangeably:
Back view of the projectFront view of the project
The more I’ve thought about being consistently inconsistent and looking into what it means, I’ve found that as far as cross stitch is concerned, it’s okay to be regularly mixing things up. Because I’m still doing cross stitch, it just happens to be that the way I do my stitches may be a little inconsistent to the norm. But it keeps things interesting for me. For the most part, I’m able to keep the motivation going and trying to keep the crosses as uniformed (shape wise) as possible.
What are you wanting to achieve?
As part of reading up on being consistently inconsistent, it has led me to wonder what I’ve wanted to achieve as part of my style of stitching (let alone other areas of my life that are like this)? As I’ve touched on earlier, my aim is to stitch my stitches whichever way works best for me, whilst trying to ensure that they are as uniformed as I can make them. Additionally, I just like stitching and I’m going do continue to do it in a way that works best for me!
Consistently inconsistent or boredom?
I have wondered if the consistently inconsistency has anything to do with boredom or the inability to focus on one project for an extended period of time? Additionally, I appreciate the phrase ‘consistently inconsistent’ seems redundant and strange to say considering what cross stitch is all about! I do however, find that I get bored with a project after a while and lose my focus and my eyes start to wander. I start thinking about the other projects I have in my collection and what I want to do with them. It’s not just boredom though. I’ve found that it can be seasonal. For example, when I know that someone’s birthday is coming up or an event such as Christmas, I’m thinking about presents and cards for people.
Flosstube has a huge influence as well! Some of the projects that people are working on look awesome! This is my inspiration at times to continue working on existing projects or purchase/start a new one.
I guess that at the end of the day, the important thing is to keep stitching, regardless of which way you go about it and how many projects you have on rotation!