Hi Everyone
We’re now getting to the fun part of teaching someone to cross stitch! Well, fun in my opinion anyways! In this part of the series we’re going to take a look at pattern choices, starting a cross stitch project and the different ways to do cross stitch.
I’ve always loved the prospect of starting something new and seeing something new come out of a blank canvas. I love the different options available to us regarding fabric, patterns and the tools of the trade. It may be part of why it takes me a while to fully finish a project, because there are so many options out there and I want to stitch them all! But I digress…
Choosing a pattern or a kit
By now, I hope that you and your student have gotten to know each other and you know what their interests abilities are, which will enable both of you to pick out a pattern that will suit them and keep them interested long enough to finish it.
For someone who is completely new to cross stitch, it would be best for them to start with a kit, because the majority of what they need will be in the kit – i.e. fabric, threads, a needle and most importantly, the pattern. The question is…which one when there’s so much to choose from?
Patterns and kits for kids
When kids are concerned, the simplest pattern design with a few different colours is probably the best one to go with. Because it has at best, 3 to 4 different symbols on a chart they need to worry about and the simple design means that the chart should be easy enough for them to read.
Examples of simple patterns and kits for kids include the following:
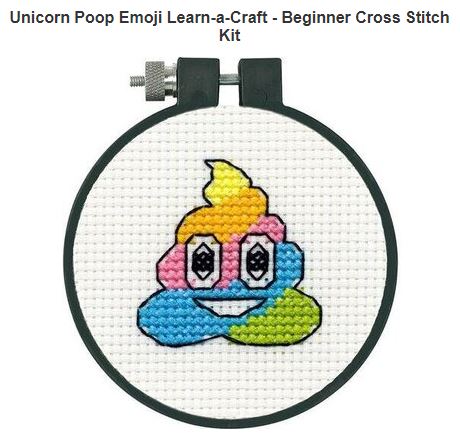
According to the 123Stitch.com website, this Unicorn Poop Emoji kit comes with everything, including 11 count Aida, the black hoop we see in the picture and all of the things needed to complete the project. This particular kit I think ticks alot of the boxes for kids these days because it’s poop! Also, in Australia at the moment, the unicorn theme has been strong and emojis seem to be here to stay, so why not embrace them?!
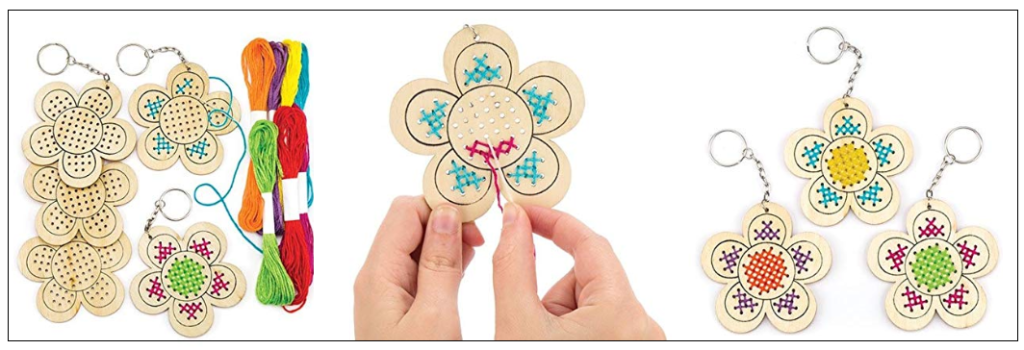
These particular kits are from the UK Amazon site and they could be a fantastic way of introducing kids to cross stitch and embroidery. With these kits, there’s no pattern they have to follow. The holes are already drilled into the wood. All the kids need to do is decide what colours they want to use where because the kit comes with the threads and needle.
Scrolling through the Net…
Another idea is to jump onto the Net and have a scroll through some different websites that may spark some inspiration. The website OzStitch.com.au for example, has a couple of pages dedicated to kits that can be stitched by kids. Meanwhile, The Fox Collection has some pages on kids crafts and mini kits that could be of interest.
Patterns and kits for teenagers and adults
If your student is a bit older, then you have a bit more wriggle room for options in design. This is a lot to do with the complexity in the designs and your student’s potential ability to more patience and time to sit down and work on the project. It also means that your older student may be able to cope with a larger count size – e.g. 14, 16 or 18 count.
Personally, I’ve found the Country Threads patterns and kits by Fiona Jude to be absolutely awesome. The patterns are easy to read and they are comfortable size to work on. Meaning, it took me an average of three months to complete one of Country Threads patterns and that’s all the while working full time and in many circumstances, studying online part-time as well. The other thing that attracts me to the Country Threads designs is that there’s little to no backstitch and it’s a mix of full cross stitch and half stitch (aka tent stitch) and some patterns may require some French Knots.
Subversive cross stitch
This is something that may be of interest for teenagers and adults who may be more into quotes or words rather than images. The main challenges in this case, will be deciding on which font to use, how much swearing there is and which quote or word fits best with your student! Because the Internet and the stitching community has fully embraced subversive cross stitch and it doesn’t look like slowing down any time soon!
On a related note to the swearing, even if there isn’t any swearing in actual pattern, there may be a bit of swearing as the stitching commences because of the number of times that you or your student stabs themselves with the needle, the amount of un-picking that may happen and figuring out where you or they are on the pattern!
If you and you’re student still aren’t sure on what to stitch because nothing’s really jumped out at them, another idea is that your student could try designing their own pattern. All you and your student need is some graph paper and some colour pencils and some creativity and imagination to bring it to life!
A kit has been chosen…Now what?
Hemming the edges of the fabric*. Washing the fabric and threads*. Finding the middle of the fabric. Sorting or organising the threads*. Getting the rest of your supplies together. Understanding the pattern.
*These things are optional and may suit the preferences of you or your student. Personally, I’ve been really lucky with the threads I’ve used from kits and purchased individually either online or instore. When I have washed my project after completion, none of my threads have run and adversely affected the project. I have read in different forums that for some people, their threads have run and had a negative impact on their projects. Additionally, in some kits, the threads may not be as organised as you or your student need them to be.
Finding the centre of your fabric
The main times I bring out my iron and ironing board is to do something with cross stitch! When I’m finding the centre of my fabric, I prefer to iron out my fabric so that it’s as flat as possible because of the way it’s initially been folded and stored in my collection. By doing this, I know that I’ll be able to easily fold up my fabric in half and then half again, then run the iron over it while it’s folded up, so that I can cleanly see the centre.
The clip below by Stitcherista shows you what I mean…
Additionally, if your student wants to use a hoop while stitching, the clip below by Spot Colours, will show them how to find the centre of their fabric and how to put it into the hoop…
Hoops, Qsnaps and Frames
It’s important to note that depending on the size of the project your student is working on, that the size of the hoop, qsnap or frame will have a large impact on how well the fabric fits. For example, the smaller the size of the fabric, the smaller the tool you use to keep the tension. This may also depend on personal preference and what your student is able to use.
Personally, I have always used hoops of various sizes and I’ve recently started using a stand to hold the hoop.
Understanding the pattern
The first time your student sees the cross stitch pattern, it may look really confusing to them. Thankfully, some patterns have colours on them to make it easier to see the different areas they need to stitch with the different threads. However, if it’s a black and white pattern with a series of symbols, helping your student understand that each symbol represents a different colour in the key will be crucial. The YouTube clip below by Love Crafts shows people in a really easy and simple way how to understand and read a pattern, to enable them to start stitching:
Tip – Drawing the symbols from the pattern on the thread sorter
One of the things that may help – regardless of your student’s age – is to go through the key and draw the symbols on the thread sorter (if the kit came with one). I’ve found this to be really useful for some of the Dimensions kits I’ve worked on due to the way the chart and key have been written up.

Starting to stitch…
The earlier clip by Love Crafts shows people one of the ways that they can start stitching a pattern. What you will need to show your student is what they will need to do with their thread so that it doesn’t accidentally come straight through the hole of the fabric.
Floss, cotton and strands
You and your student will find that the majority of patterns and projects will require it to be stitched with two strands of cotton (aka floss). To help put things into perspective, the image below shows that the floss can be split into 6 individual threads or grouped into 3 lots of 2.

The Loop Start Method
This relates to the way the amount of strands you or your student has pulled out of the cotton and the way it has been threaded into the needle. For the loop method to be most effective, you or your student will need to pull out just one strand and then fold it in half, so that ends meet up evenly. The clip below by Mr X Stitch explains the loop method really well:
Personally, I love the loop method if I’m using two strands on a project. It makes the back of the project a lot neater and I find it to be a fantastic anchor for the first few stitches. The caveat with using this method though is that it’s only useful if I need to use two strands of floss.
Finishing off your crosses and changing colours
You may need to help your student with the first time they go to finish off their crosses in accordance with the pattern or because they’ve run out of enough thread on their needle. The aim is to fully finish the cross and then flip the project over so that you’re looking at the back of the project. Then have the needle move between the fabric and some of the crosses that have just been stitched. I’ve found this to be a very neat way of finishing the crosses and it helps to secure them. To put this into perspective, the clip below by Rainbowlune, shows us how to just this:
Meanwhile, changing colours is reasonably easy in cross stitch. The difficulty sometimes is deciding which colour to do next or threading the needle – depending on the size of the eye of the needle! The way that your student would start off and finish on a new colour is very much the same as they would with any other colour.
Which way to stitch – left to right, up and down, right to left, cross country or parking
If you’ve been stitching for a while, you’ll hopefully know what I mean by this heading! When you’re chatting with your student, you will be able to work with them to find out what is most comfortable for them and what the pattern allows you to do too.
Stitching left to right and right to left (aka horizontal cross stitch)
This predomenantly means that the first half of the stitches will be done left to right – just like when we’re writing something. Once we’ve reached the designated number of stitches, we then complete the crosses by stitching right to left.
Meanwhile, the stitching right to left is when you start the first half of the crosses by moving right to left and then completing the crosses by moving left to right.
To help put this into perspective, the clip below by Peacock and Fig help to put these words into motion by showing you the English and Danish methods of cross stitch (aka left to right/right to left or one cross at a time):
Stitching up and down (aka vertical cross stitch)
This way of stitching may depend a little bit on the pattern your student may be working on. Personally, I’ve found it easiest to stitch the full cross before I move above or below the first cross. To help explain what I’m talking about, check out the clip below:
Cross Country and Parking
The good thing with cross country cross stitch is that we don’t need to leave our chairs to do this. The main exertion with this method is keeping track of where you are on the pattern!
The aim of cross country cross stitch is to stitch as much as possible of the pattern with the one colour and where possible, using the same strand without the stopping and starting. This can make the picture look a bit pixelated or scattered. Below is an image on how cross country stitching looks on a project:

Meanwhile, the parking method means that your student may prefer to read the pattern line by line, like they are reading a book, and stitch each symbol on that line. This will mean a lot of threading the needle with different colours as the pattern requires it. The benefit of using the parking method is that the thread will be ready when your student next reaches the corresponding symbol on the pattern.
To help put this into perspective, the clip below will show you and your student what cross country stitching and parking looks like on a project and which methods may be most effective on which projects.
Deep breath… you’ve finished your project, now what?
This post was surprisingly challenging to put together, which is something I had never expected! I think a lot of it has to do with cross stitch being so much of a hands-on activity, that to just write about how to do cross stitch doesn’t do the activity justice! Which is why I think that there are so many more videos out there on how to cross stitch than there are written posts.
My next post in this series will hopefully be a little shorter. In the next post of this series we’ll be looking at the finishing touches of your student’s project, which may include back-stitching, the inclusion of some beads or special stitches. There may also be questions about whether it’s worth washing the project before your student then completely finishes it.
Thank you for sticking with me during this post and the series so far!
Until next time, happy stitching!
Related resources:
- 5 Tips for Choosing Your First Cross Stitch Supplies – blog post on the Spruce Crafts by Connie G Barwick – posted on 2 October 2019
- How to Put Cross Stitch Fabric in a Hoop – blog post on the Spruce Crafts by – Connie G Barwick – posted on 19 November 2019
- Cross Stitch Tips – Choosing a Pattern – blog post by Julie – posted on the website Julie’s X Stitch Cross Stitch and Supplies – Date released online not known
- A beginner’s guide to cross stitch – blog post on Red Gate Stitchery by Susan Fitzgerald – posted on 20 March 2017
- Subversive Cross Stitch – blog and website for cross stitching supplies to carry out your subversive cross stitching
- Subversive cross stitch patterns and kits on Etsy by various designers