Posted in Tips and Tricks

5 Things I’ve learnt about Flosstube as a content creator

Hi Everyone

For a bit over a year now, I’ve been regularly-ish (roughly every 2 to 3 weeks) creating content for my flosstube channel – The XStitching Runner. Similar to this blog, my channel predominantly is about cross stitch with some life stuff thrown in. Some weeks I’m full of enthusiasm and excitement. Other weeks not so much. But that’s life right!

As the title of this post suggests, this is all about the things I’ve learnt about Flosstube as a content creator. I’ve also published a video on my channel about these things as well. Check out the link at the end of this post for more!

1. It’s all about the numbers

To some extent, anything that goes up on YouTube is a popularity contest – regardless of what anyone else says. Over time, the more comments, shares and views you get, the more subscribers you get and the higher up the pecking order you go. Your content is recommended more to others who may not of heard about your content and there’s a chance they may be interested in it and become another statistic. All of this is part of the algorithms (I’m told) of how YouTube works.

Photo by Markus Spiske on Pexels.com

The other extent – in my view – is personality and what your intentions are for your channel. There are millions of wonderful creators out there and every single one of them brings a unique twist to the table because of who they are. It’s their personality we are engaging with, their life experiences and their ability to convey a message to camera. This – at the end of the day – is what the numbers are measuring, to enable your channel to grow and potentially make money out of it, if that’s something you’re interested in.

2. Personality and confidence

I have gained more confidence in presenting to camera since I started my channel and it’s had a positive impact on my professional life. Professionally, I spend 99% of my time in front of the computer and 10% of that time is spent presenting training via Microsoft Teams. I have become more comfortable in front of the camera and speaking up in meetings. I haven’t however, increased my conciseness. My flosstube episodes average 40 minutes – usually 60 minutes. I waffle a lot and I have a lot but not a lot to say about cross stitch. I have this feeling of needing to bring something different to the table nearly every time I sit down to film. I don’t want to get stuck in the ‘cookie cutter’ mode of the flosstube recipe of each week showing how much progress I’ve made on a project. What finishes I’ve done and any new starts made.

Photo by Andrea Piacquadio on Pexels.com

My episodes are raw with limited editing. Which is probably why they go for so long! My episodes are an insight to who I am and what I have to say and share with anyone what I’ve been up to with my life and a bit of cross stitch.

3. Knowing my ‘why’.

The down side of trying to bring something different to the table nearly every time I sit down to film is that I have lost sight of what my channel is about. It’s still very much about cross stitch, but I’ve lost the focus of trying to promote my own patterns and my own business – Hot Cross Stitching. I’ve for a little while, forgotten about having fun and improving my ability to be concise and focus on the stitching.

Additionally, over the last month or two – perhaps longer – I’ve started to do a ‘welcome to Country’. It’s an Australian thing that is done at the start of many sporting events and meetings that happen in the public service. It’s possible that it happens in other situations as well that I’m not aware of. The welcome to Country is an acknowledgement of the Indigenous Australians who are the traditional owners of the land we call Australia and the region/area that an event or meeting is taking place. The welcome acknowledges their leaders and elders from the past, present and emerging. The importance of doing this is to aid in the reconciliation between the Indigenous Australians and everyone who has come after them and taken over the land.

Since I’ve been doing this acknowledgement, I feel like it’s unfortunately hurt my channel. I really hope it hasn’t been the case and that there are other factors that are contributing to the downturn in numbers I’m seeing for my channel. I also feel that it would be quite shallow of me to stop doing this, all because I’ve become so focused on the numbers instead of what my channel is really about. Cross stitch and trying to build my side-hustle!

4. Technology and lighting

I have a love/hate relationship with technology and related devices and my boyfriend has been fantastic with trying to help me out with it where he can. Over the last 12 months or so, I’ve had issues mostly with the sound and it not being loud enough. Depending on what camera and microphone combination I’m using, sometimes the sound will start to lag after a few minutes and I’m yet to figure out why. I want to know why, because the little camera I’m thinking of with this problem is really cool! It has a ring light as part of the camera. It’s compact and my eyes feel a little funny after looking at it for so long.

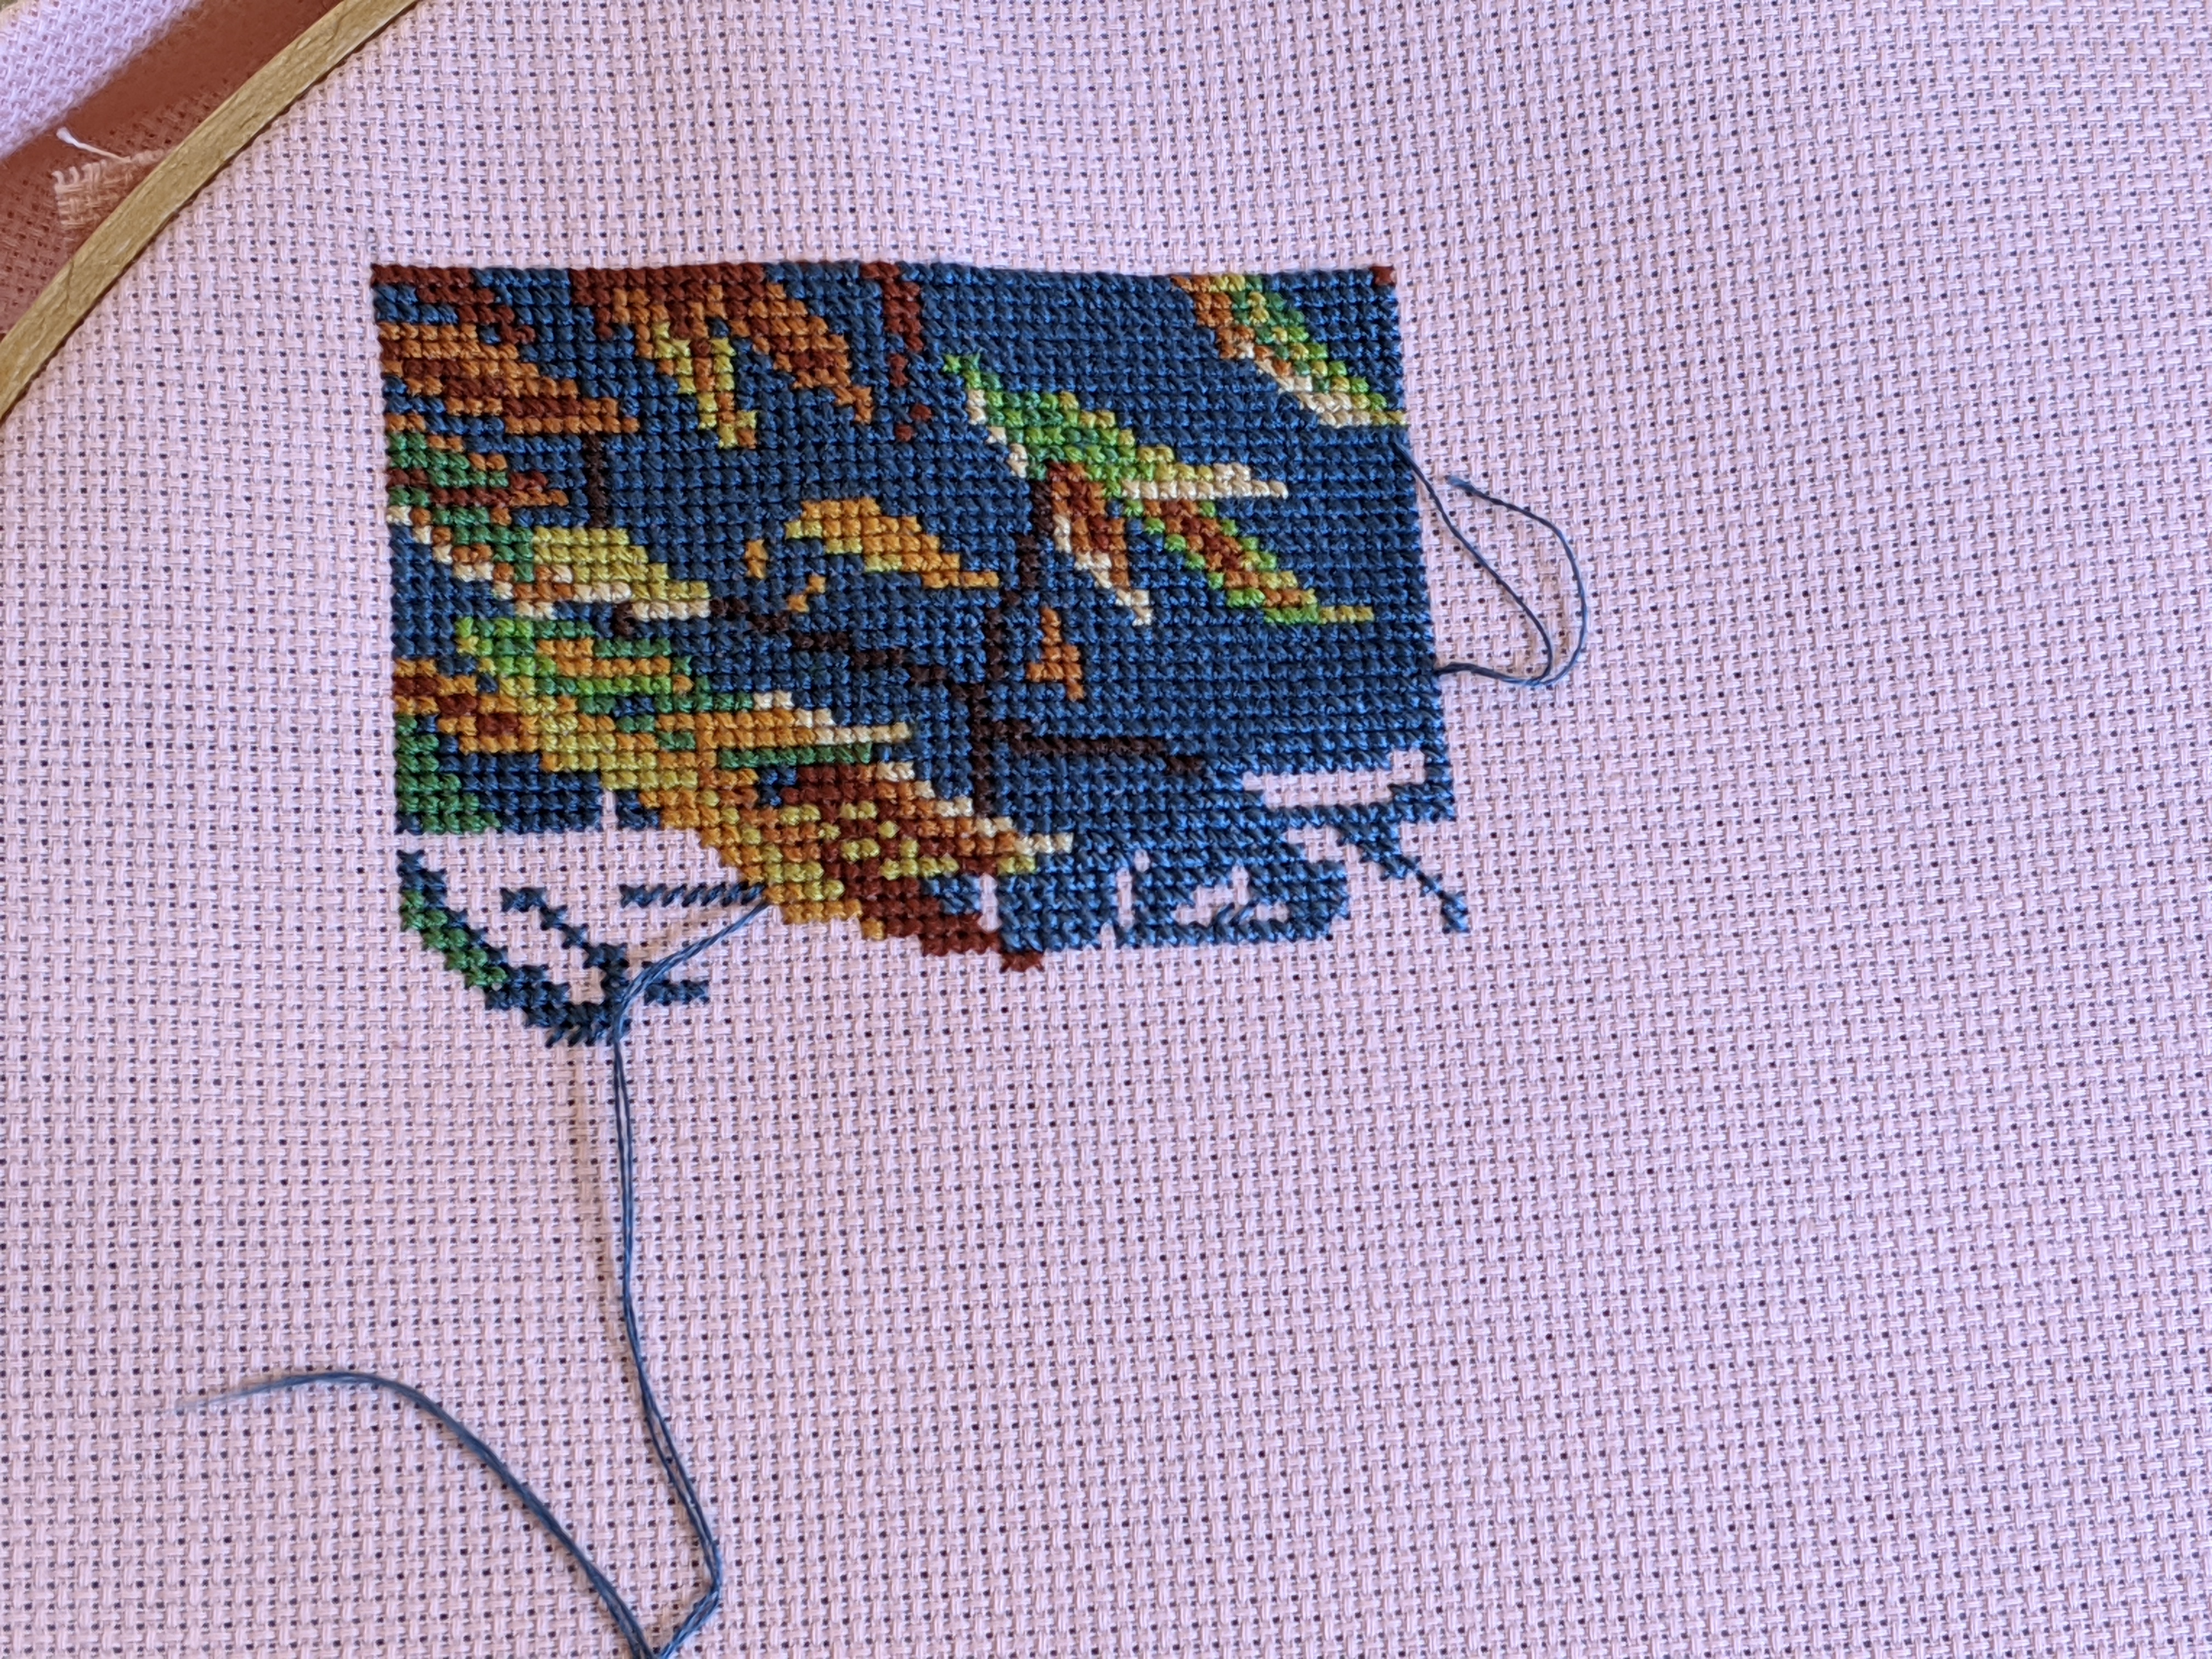
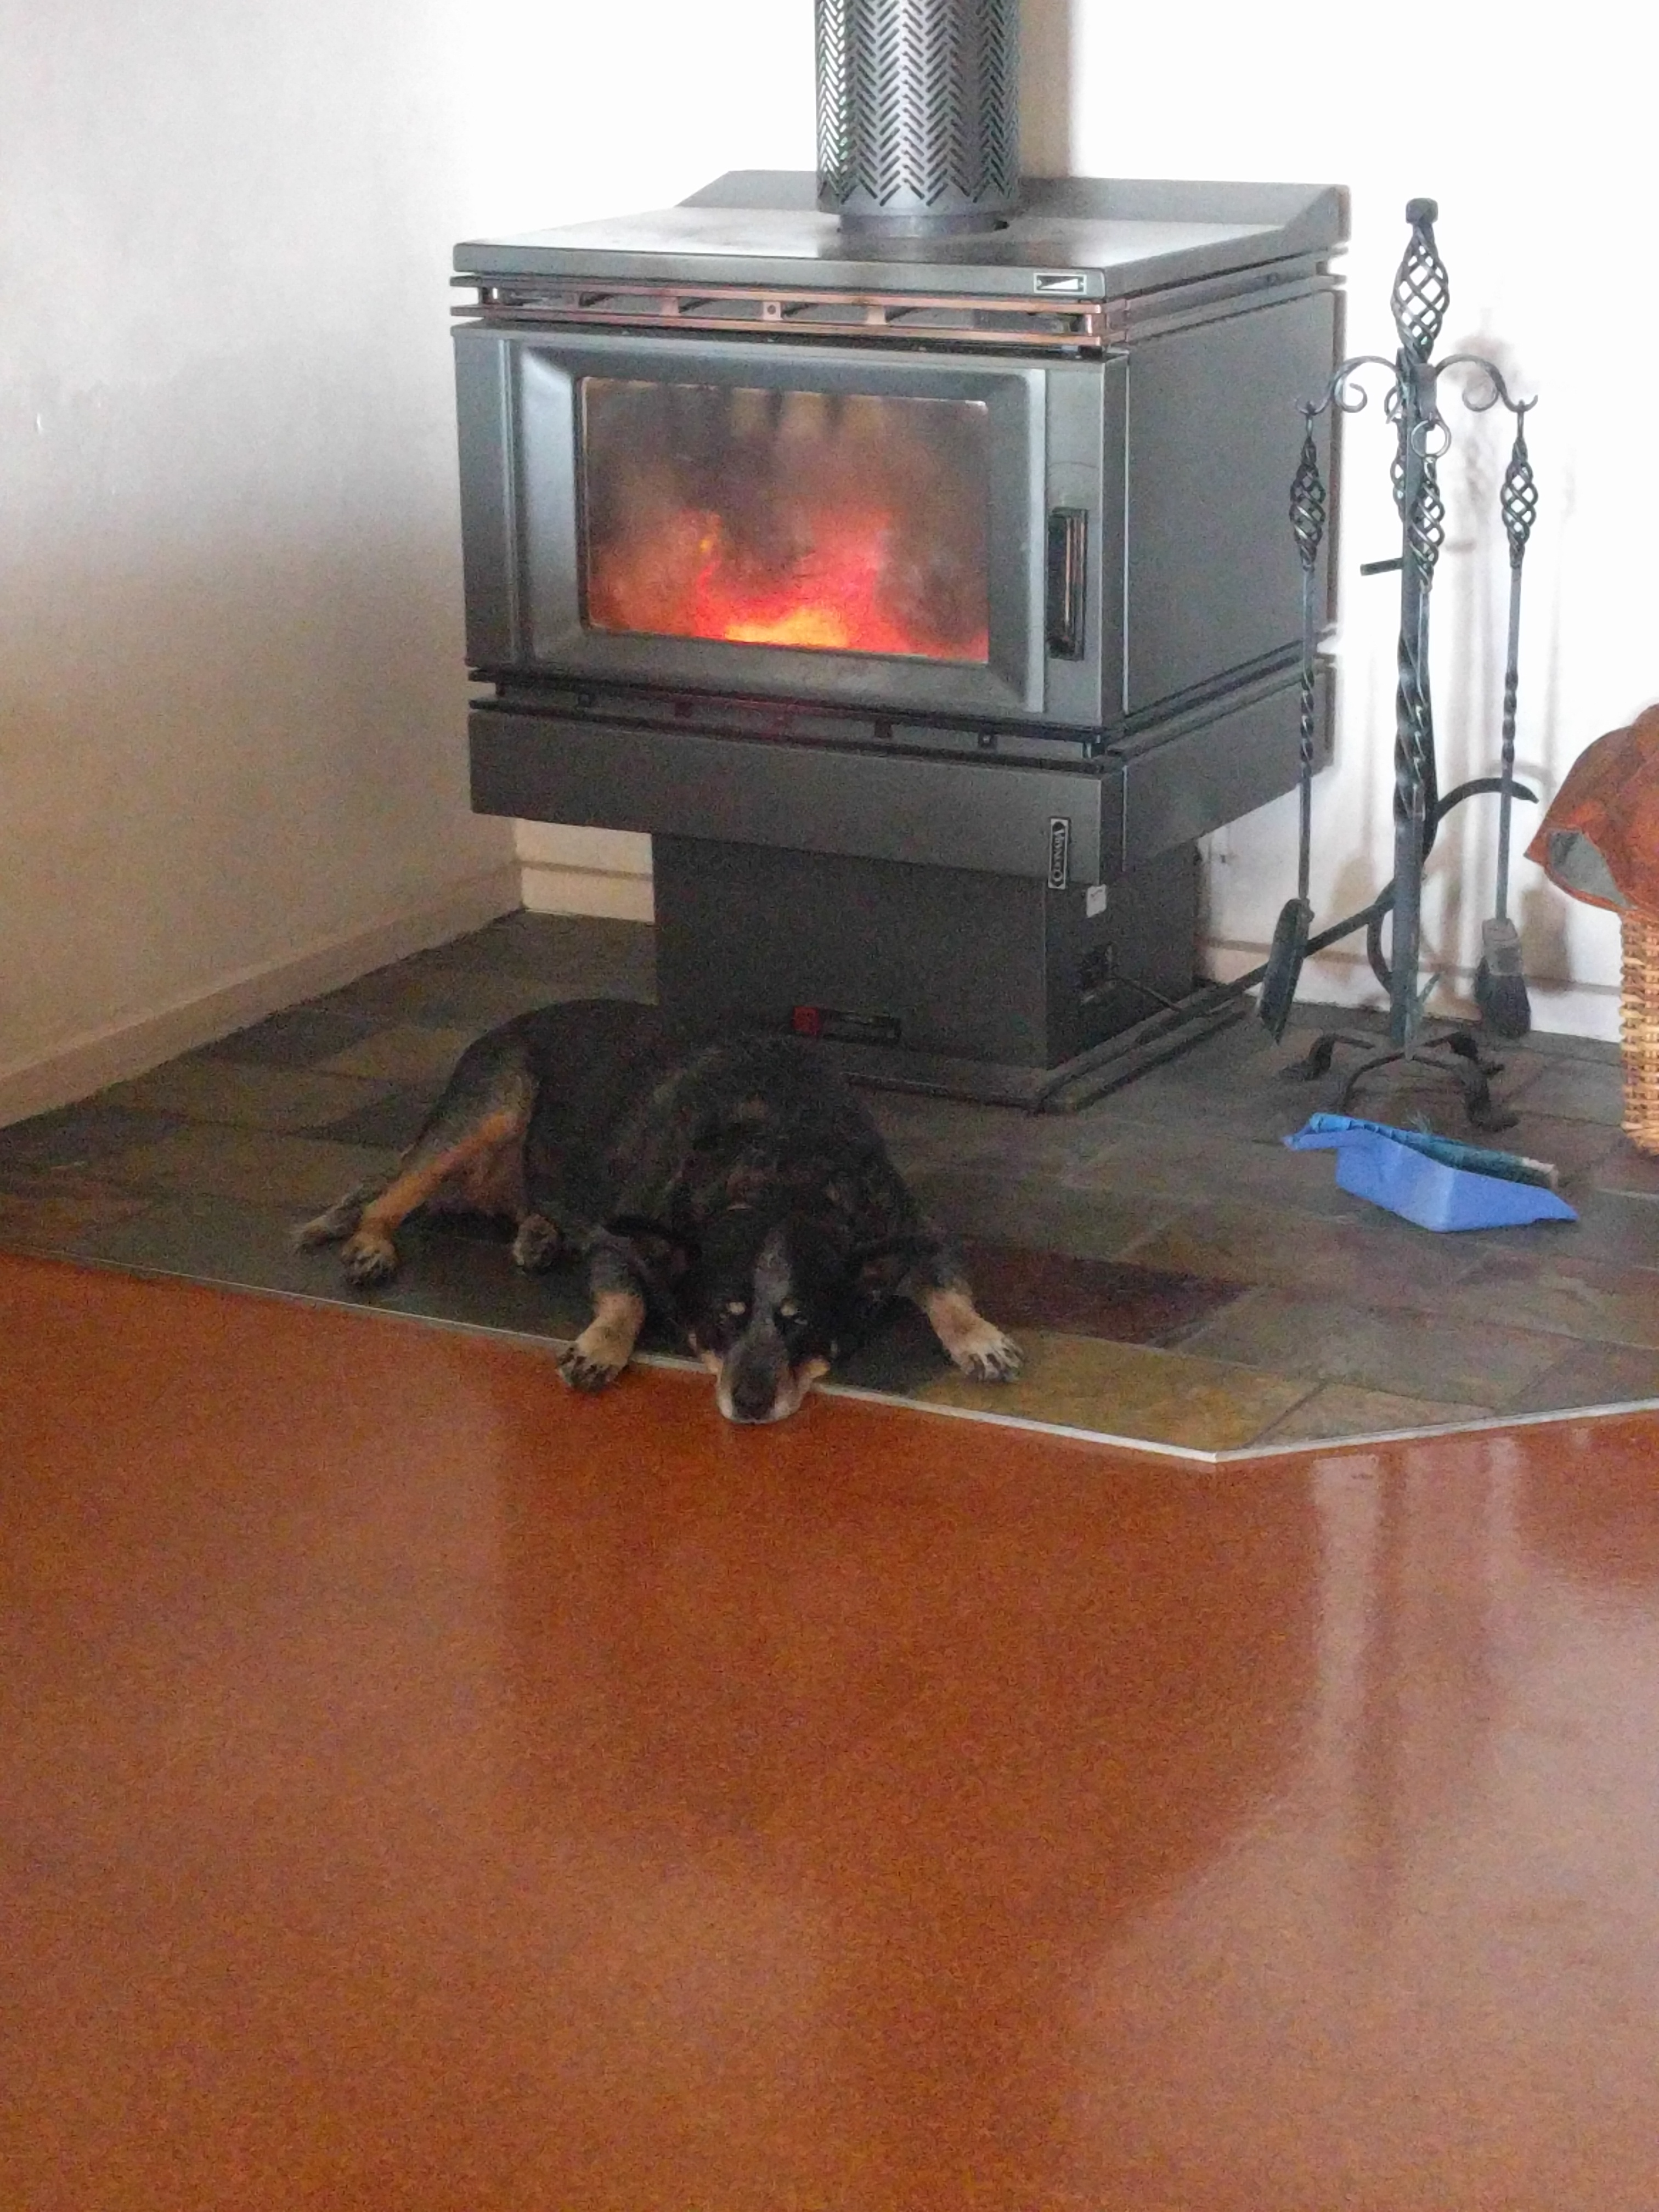
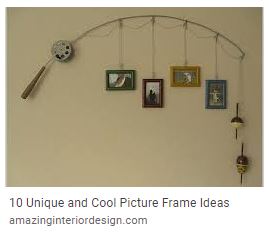
The funny thing is that at times I feel like it’s a huge production with all of this equipment and product around me to help make the magic happen – a little like the image below!

Photo by Brett Sayles on Pexels.com

Then there are times when I remember to try and keep it simple – to the point where I’ve contemplated filming from my phone. My biggest problem with this is storage and the joys of connecting my phone to my laptop to reduce the problem.

At the end of the day, I need to go with what works and pick my timing to do the filming!

5. Craft-avism and stitching challenges

It’s activism via the mode of crafting. As a viewer, I’ve seen this to be quite a fickle thing in the Flosstube world. Over the last 12 months or so, Flosstubers have:

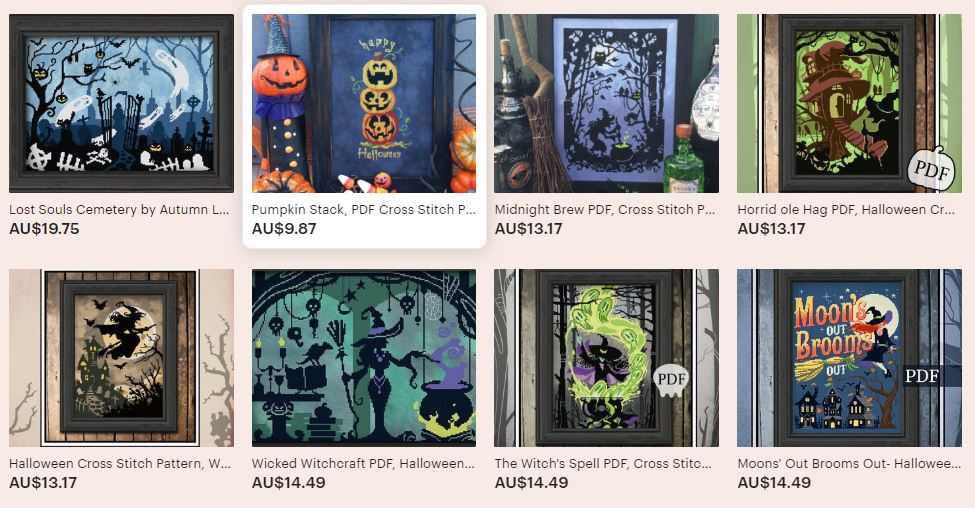
  • Rallied against the owners of the platform Etsy because of the fees that sellers have to pay to use the platform. Resulting in minimal profit margins. The irony is that the people who talk about rallying against Etsy, tend to shop there exclusively if they’re shopping online!
  • Raised awareness of the importance of bees in the ecological system by designing and stitching many bee related projects.
  • Supported the LGBTQI+ community by stitching things designed by people in the community and talking about the challenges people in this community deal with and face daily.
  • Supported Australia’s black summer of 2019/20 by donating money, designing charts that have proceeds that go to specific Australian charities and stitching Aussie patterns, to name a few.
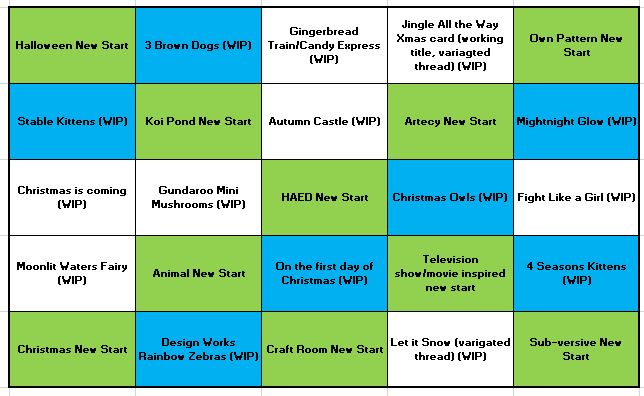
  • Participated in a huge variety of stitching challenges to keep motivated and see progress in the variety of projects we have.

I’ve even become a joiner in some of these challenges and been a supporter of some of these events. I’ve set my own challenge based upon the Australian Football League (AFL) for this year and some of my projects have gotten a lot more attention than I expected! I’m also participating in the 22 in 22 – 22,000 stitches on a specific project in the year 2022.

Reflection

I still have a long way to go with this flosstube thing! At the end of the day I just need to be me and remember that I will never be everyone’s cup of tea and that’s okay! I will find my feet and have fun while I’m doing it. Because my main goals with this blog and the flosstube channel is to build a brand that is leading to bringing people together from all walks of life, who have cross stitch in common. Who find peace and enjoyment by siting down and stitching and connecting with others who enjoy cross stitching as well, and can learn organically from each other.

The biggest dream is to have two places where people can come to connect and stitch – in the country and at the beach. The places will be able to host stitching retreats that can be for a week or a weekend. People can come and go as they need and participate as much or as little as they want.

I hope you’ve found some entertainment in all of this and learnt something along the way! In the section below, there are some links to my channel and related topics that you may find interesting.

Until next time,

Happy Stitching!

References / Further reading:

Aboriginal Australia map – Shows the different countries that make up Australia. This particular blog is written in Canberra – Ngunnawal (pronounced Nunawal or Nunawol) Country.

Hot Cross Stitching website

What I’ve learnt from flosstube so far – my flosstube episode this post is based upon

Posted in Tips and Tricks

Why do you procrastinate your cross stitch?

Hi Everyone

I’ve been having a bad case of analysis paralysis over two projects I’m keen to start but scared to at the same time. Which has me wondering how many other stitchers have similar experiences?

Finding the right piece of fabric

Having the right piece of fabric for a pattern can make the world of difference with the finish for the project. This can range from the count size to the physical dimensions and ensuring there’s enough of a border to help with finishing it – e.g. framing. It can also be the colour of the fabric. Many people have trouble with stitching on dark fabric regardless of what the count size is and how awesome the project may look on that colour.

I’m currently stitching a project on a 32 count Belfast linen that I’ve dyed myself and I’m finding that without some really good light and regular breaks from it, my eyes are getting tired and I’m struggling to properly focus.

This is the linen I’m stitching on that requires good light and regular breaks.

I had considered using this fabric for my Dew Drop Daisy project, but seeing how my current projects are working out on it, I’ve made the right decision not to use it for Dew Drop!

Hand dyed purple fabric by Kristen Gawronski

I’m also considering using the purple fabric I’ve dyed myself for Dew Drop Daisy or the Pink Bottlebrush (aka the Pink Grevillea). It’s roughly 25 count fabric and I don’t think I have enough fabric for the pattern. That has me wondering, ‘should I adjust the pattern to fit the fabric?’ or ‘purchase the fabric I need for the pattern?’

It’s a daunting pattern

It may be your first Heaven and Earth Design or similar pattern and you may not know where to start. Or there’s a lot of colour changes and you may not have all of the tools you need to make a start. Alternatively, you’re working on a Chatelaine (see European Cross Stitch Company) and they are beautiful, big and challenging in a positive way. Check out the Flosstube channels Teresa Little Stitcher and Jessie Marie Does Stuff – both of them are working on Chatelaine’s and they’re going to be beautiful!

In my case, one of the patterns I want to work on is huge and I’m wanting it to be part of the Hot Cross Stitching collection. So my challenge is to try and reduce the size of the pattern and number of colours required without losing any of the key features that make it such a good looking picture. If I don’t make any changes to the picture, I would need over a meter’s worth of material (including enough to frame it) and over 300 threads. Some of those threads would be for just 1 stitch! To me that’s not cool and if the pattern is going to be part of the Hot Cross Stitching collection, then some significant changes need to be made!

Too many patterns to choose from

How big is your collection? Are you in a situation where you have many patterns to choose from, but none of them are pulling at your hands to say ‘stich me!’, ‘stitch me!’?Which results in spending a lot of time on the internet or your local craft store searching for a pattern that grabs your attention. Alternatively, are all of the patterns wanting you to stitch them at the same time?

I’ve certainly told myself on multiple occasions that I’m not going to purchase another pattern until I’ve finished some of the ones I’m currently working on. Let alone started ones that have been in my collection for many years. Then I see an ad or I’m told about a designer or pattern that looks really cool. Before I know it, I’m looking things up and buttons are pressed and I have another PDF pattern in my collection!

The good things is that I’m not alone in this. I regularly hear people in the stitching community talking about ‘being enabled’ by other stitchers. It’s what we do and one of the best forms of marketing!

Time, space and health

Work and / or family may be your key focus at the moment, and the main time you have to set aside for yourself is when you’re tired and need to rest. If you do have some flexibility with your time and money, space to do your stitching and store your supplies may be limited because of where you live. Alternatively, there may be other factors affecting your ability to try and stitch. Some of which may be associated with the current crisis the world is experiencing.

Personally, I’ve lost a little bit of my stitching mojo because of some discomfort I’ve been experiencing with my right wrist. I’m right hand dominant and a few weeks ago I spent nearly all day stitching and I haven’t done something like that for a very long time. It resulted in my wrist letting me know that it wasn’t happy about it! My wrist is on the mend thankfully, but it put a bit of a dent in my desire to stitch.

Another example is my analysis paralysis about the work I’m doing and what work I need to do next. Ultimately, it’s my fear factor and my logic of the world that is stopping me from doing what I need to do.

Mistakes are made in the project

Mistakes regularly happen in stitching projects – hence the term ‘frogging’, we are regularly ‘ripping’ things out because we’ve mis-counted or used the wrong colour thread. Some people draw the line at how much frogging they do and consider the mistakes as personalisations rather than mistakes and leave them as they are. Which is where fudging happens – working around the personalisation to make it fit into the rest of the pattern.

However, how significant is the mistake that it causes you to pause it and procrastinate? Is the project off my a number of squares and you don’t know where the mistake happened? Alternatively, the mistake happened a while ago and you’re too far gone to frog it and personalising it is significantly difficult? Stitching over the mistake to try and correct it makes the stitches look really bulky and more often than not, the underlying colour shows through revealing the cover-up.

Another mistake could be the mis-calculation of fabric and you’re about to run out of fabric just when the pattern gets exciting. Adding more fabric to where you need it, but there’s the risk of the stitches not holding the join. Or you and non-stitchers can see the crease or join line. The image below is a perfect example of this.

Example of a project where I’m most likely going to run out of fabric.

I had been working on it for quite some time and I’ve put it on an extended pause because of the amount of fabric I have compared with the amount I still have to stitch. You will also notice that I don’t have any space above my stitching at the top of the pattern. If I choose to frame this project, I may need professional help!

Something got lost

Have you lost a part of the pattern or something critical to help you start or finish the project?

I have a zebra project that I started many years ago and I may not pick up again because I lost half of the pattern, and as Murphys’ Law would have it, that’s the part I need to finish the project!

Half finished Zebra project

I have considered purchasing a second kit so that I could finish the project. It would also mean that I would have additional fabric and thread. How awful right?! More fabric and thread! I had also considered and tried as you can see in the above image, trying to stitch the pattern off the cover page. It started becoming a bit difficult because the cover page is framed and I’m thinking it may partly covered by the frame the finished project is in.

As a result, I’m pausing it because I have a lot of other projects I’m enjoying and I’ve started the Rainbow Zebras (my name for the project), so I’m still getting my Zebra fix!

Are you comfortable with this procrastination?

The key question though, is how comfortable do you want to be with your procrastination and reasons why you’re procrastinating? If you jumped in and tested the waters, what could go wrong and what could go right? Are the things that could go right, scarier than the things that could go wrong?

If you don’t do anything with the procrastination, then nothing really happens. Ultimately, you’re stuck. Are you okay with this?

However, if you do make a start on the project or pick it up again, then you have the opportunity to make things right – if there’s an error in the project – or you at least start moving forward. By making things right, you’re no longer feeling uncomfortable because of the procrastination. You have the opportunity to see if your worries or fears are founded. You also have the opportunity to see how awesome the project actually is. It could even be something you’re proud of and want to tell people about!

Until next time,

Happy Stitching.

Related Posts

Posted in How To, Tips and Tricks

How can board games help to prompt you with your cross stitch?

Hi Everyone

When I’ve been watching some flosstube clips, people have talked about homework and their involvement with an online group called ‘Magical Stitches’. My understanding is that the Magical Stitches group focus on certain authors or books throughout the year and they have prompts that come from those books that translates to their stitching. For example, a book may be Red Riding Hood and one of the prompts could be ‘200 stitches on a project with red in it’. Another prompt may be ‘work on a project that starts with the same letter/s of the author of the book’.

Similarly, I’ve seen some people use the decision maker app on their phones to help with deciding what project to work on next; especially during Stitch Maynia. I’ve considered using a similar app for the next time Stitch Maynia comes around, because it leaves a bit of mystery around what I’m going to stitch next.

More recently though, I’ve seen some people on Flosstube talk about WIPGO. The premise is drawing up a bingo card that has all of your works in progress (WIP’s) and potentially some new starts, depending the size of the board you want to have. The image below is a mock-up of what the board could look like. I’ve inserted my own WIPs and potential new starts. The new starts are in green and the blue squares are animal based WIPs.

WIPGO inspired board based upon my own works in progress and potential new starts

Monopoly as a decision maker?

The traditional game of Monopoly has been around for decades. In recent years, variations of the game have been created, including DMC’s version called Stitch-opoly. The premise for Monopoly – regardless of what version or variation you’re playing is to become a real-estate mogul and force the other players into bankruptcy. But what if you also used it as a way of deciding what you were going to stitch, when and how long for?

Classic Monopoly Board Game – image from Amazon.ca website

How it would work:

Using the traditional board, each property represents different projects in your stash. The price to purchase each property is the number of stitches you need to apply to or stitch on that project. For example, one of the projects in my stash is the Gundaroo Mini Mushrooms. It’s a big, intense project that has taken me over a year so far to get nearly half way. Using the Monopoly board, I would apply that project to the Mayfair and if I landed on it and ‘purchased’ it, I would have to put 400 stitches into it because of its purchase price.

Alternatively, the colours used for each property series – red, green, dark blue, light blue, yellow, orange, purple, mauve, railway stations and utilities – could be applied to the projects in your stash. For example, you may have three projects that have a lot of orange in them or the name of the projects or the name of the artist/creator have a strong connection to the word orange and how it’s spelt. The idea behind this link to your projects and the colour is based upon a Facebook group called ‘School of Magical Stitches and Literature‘. Each year the theme changes and this year the group is for people who wish to read and Cross stitch the Disney Kingdom Keepers by Ridley Pearson and the Villans series by Serena Valentio. A reading list is available for the group so that you can read along with your fellow group members and help you with understanding where the prompts come from for what, when and where you apply your stitches.

The additional variation to the Monopoly game and how you could apply it to your projects, is the meaning behind the roll of the dice. For example, you roll the number 3 and that could mean you have 3 days to complete the number of stitches required for the project (property) you land on.

What if I go to gaol (jail) or land on free parking?

If you go to gaol, then the following things could happen:

  • You work on a project you’re struggling with. The amount of time you spend on that project is based upon how many times it takes you to roll a double to get out of gaol. If you’re unable to roll a double within 3 turns, then you stitch an additional 50 stitches because the game traditionally requires you to pay $50 to get out.
  • You work on a project that is connected to reasons why you could go to gaol or the people or services who protect people from others who try do the wrong thing. For example, tributes to emergency service workers. The amount of time you spend on that project is based upon how many times it takes you to roll a double to get out of gaol. If you’re unable to roll a double within 3 turns, then you stitch an additional 50 stitches because the game traditionally requires you to pay $50 to get out.

Meanwhile, if you land on Free Parking, then you can do whatever you want. You can take a break or start a new project or purchase a new project. Or anything else you want to apply to that square.

Chance, Community Service, Taxes and Passing Go or Landing on Go

The Chance and Community Service cards could be awesome wild cards to make things interesting by helping or hindering the choices you make with your projects and how much time you spend on them.

Meanwhile, the taxes squares will remain as the squares you don’t want to land on because they are the penalty squares that will determine how much longer you spend on your projects.

Normally in the game of Monopoly, you get $200 for passing or landing on Go. This can be a blessing if you’re struggling and need the money to stop you going bankrupt. Alternatively, the additional funds can help you with purchasing more houses and hotels for the sets you’ve purchased. In the context of how this can help you with your cross stitch projects, this will depend upon how you’re progressing in the game. If you have a ‘set’, then your additional funds could be used to make your ‘competitors’ squirm. If you have a ‘set’ and someone lands on your property/project, they will have to stitch the amount of ‘rent’ allocated to that property that has however many houses or hotels on it. Alternatively, if you’re at the other end of the scale, the additional credits can help you with being able to ‘afford’ the ‘rent’ of the ‘property’.

What about ‘sets’ and landing on other ‘properties’?

Like the traditional game of Monopoly, how you obtain property sets remains the same for this style of the game. You can negotiate with the other players if they have a colour or property you need to complete your set. Alternatively, you can wait until you have landed on that square.

Meanwhile, if you land on someone else’s ‘property’, then you need to stitch the amount of ‘rent’ that would be traditionally paid to the owner. If another player lands one your ‘property’, then you receive credits or ‘rent’ and that player would have to stitch the ‘rent’ owed.

How do you know when someone has won?

Like the traditional game of Monopoly, it can be based upon the amount of ‘credits’ each player has left to the point where all players except for one has ‘credits’. Alternatively, before the game starts, all players can agree to a set period of time that the game lasts for. Another option is all players agree upon some modern rules that other varieties of the game use make it interesting.

What if I don’t have anyone to play with?

The beauty of technology means that the Monopoly game can be played on most gaming consoles. This means that you can play against the computer or you can play online with people from around the world.

It’s been a while since I’ve done any gaming, but I do love playing Monopoly on Playstation 3 and 4. If I were going to play Monopoly in the context of what we’ve talked about here, I would make sure I’m prepared enough for most of the scenarios that could happen in the game.

For example, I would allocate all my WIP’s and other potential projects to the different properties. Any properties I’m able to purchase I highlight and properties that are purchased by the computer, I cross out. Next to each property I do purchase, I note down what number I rolled to get there and what I paid for it. I also mark what is paid to me if any of my components/competitors land on what I’ve purchased.

PropertyProjectProperty purchase priceDice RollRent receivedTotal number of stitches
Old Kent RoadChristmas Cards$200 = 200 stitches5 = 5 stitches$2200 over 5 days and 2 days credit
MayfairHalloween$4004$1000400 stitches over 4 days and 10 days credit
Park LaneGundaroo Mini Mushroom$3506$500350 stitches over 6 days and 5 days credit
Bond StreetMoon Lit Waters$3002$200300 stitches over 2 days and 2 days credit
PiccadillyThree Puppies$20012$22200 stitches over 12 days and 2 days credit
Example of how to track actions taken during the came of Monopoly

Related Reads:

Posted in Tips and Tricks

What does a crafty de-stash in the digital age look like?

Hi Everyone

Last year I went to a craft de-stash was held roughly every three months or so, that’s roughly a 20 minute drive away from where I live in Canberra, ACT. It was interesting to see what crafty things were for sale and it gave me an insight to what tools, patterns and projects were popular many moons ago. There were quite a lot of stalls that had various styles of stamps for card making or scrapbooking, quilting or dress making fabric, dress making patterns, some scrapbooking papers, folk art and knitting supplies.

As I’m writing this post and reflecting on the last paragraph, I realise I’ve talked about this a little bit in an earlier post about the possibility of our projects having a shelf life. However, this post is somewhat different because I’m curious about how our de-stashing will look like and be in the years to come.

Digital vs Physical De-Stash

Our craft is very much a tactile, physical thing that can be replaced with an electronic version, but it’s not the same. On the Internet there are apps that we can download and we can pretend that we are doing digital stitches by pressing buttons on our screens. What we love about our craft through, is feeling the fabric, the needles (as much as it might hurt when we poke ourselves!), the floss and holding the projects in our hands. We don’t have the glare of our screens – unless we’re using Pattern Keeper and it’s a different story then!

What I’m questioning here is how will our destash look in the future as we go ever deeper down the digital rabbit hole?

I love the PDF patterns that many designers and shops provide. I also love the instant gratification of being able to download the pattern as soon as I’ve paid for it and our current climate very well. But what if I want to move the pattern onto someone else? Especially if I’ve already stitched it or I have stitches remorse and my tastes have changed over time and I’m not interested in stitching the pattern any more?

For physical patterns and kits for as long as we’ve all been doing cross stitch, we’ve been giving away our stashes or selling them for a small amount of money to recoup the costs of the initial purchase. Theoretically, this should be the same for digital patterns – especially if they’re out of stock and the designer is unable to or not wanting to release or create more copies of the pattern.

The Internet

Thankfully there are soooo many different ways in which we can connect via the internet and with the movement towards digital patterns for many of our crafty things, theoretically it’s easier to transfer or share what’s in our stash that we want to get rid of. A quick Google search has found a number of sites that could assist you with any stash you might want to get rid of. The two main sites I found was the Etsy Destash Market and Facebook Cross Stitch Destash Group.

The great thing with these two groups and many others like it is that it’s for anything connected to cross stitch that people have in their stash. Ranging from patterns and kits through to needle minders, fabric, floss or threads and anything in between!

Stitchy-kindness

On Flosstube I’ve heard people talk about Stitchy-kindness, where they have received some things in the mail from viewers and friends who had been thinking about them and some stitching related things that they might like. Similarly, I’ve heard people talking about exchanges or swaps that people have participated in that has enabled them to swap some threads for fabric or a pattern for a needle minder. Things like that.

Be aware of Copyright with your de-stash

Ninety-nine percent of us are honest people and we want to do the right thing (I think). When we are looking to move on some of stash – especially if it’s something that’s out of print, theoretically there should be no harm in asking for some money from our years of collecting and creating. Especially since the Facebook and Etsy links show people asking for some money for the stash they are wanting to move on. My point here is more about not to making a profit out of the re-sale if you’re not a business and trying to make a living out of it.

The conundrum is what can of worms am I opening up by mentioning copyright?

ThreadBare.com wrote a really good article on the legalities around this dilemma, published on 24th August 2017 titled “Cross-Stitching Legalities: Copyright, Artwork, Licencing and Copying.” It’s a really well written article and I’ve learnt a lot from it especially when Thread Bare talk about the Digital Millenium Copyright Act and the reason why there is such as big price difference between some of the websites that sell the PDF patterns. It’s important to note that Thread Bare are strong advocates for promoting the fair and legal use of images on the internet and ensuring that any images acquired for cross stitch patterns have been purchased from a licensed and reputable source.

It’s also important to note that if you find an image on the internet that you think will make a really good cross stitch pattern, I agree with what Thread Bare were saying in their article, and make sure you take all reasonable steps to try and find out who the artist is and seek their permission to use that image.

What do you think? What are your experiences with digital de-stashing? What do you think the future holds for the digital world and cross stitch?

Until next time,

Happy Stitching!

Related Posts:

  • How to host a successful Instagram destash – blog post by Blossom Heart Quilts. Posted in March, 2019. Whilst this post talks about the destashing of quilting supplies, the same principles could be applied to any craft – including Cross Stitch!
  • Crafters Destash – website. This may be an alternate option to using social media if you’re wanting to make space in your collection.
Posted in Cross Stitch Haul and Stitching Progress, Stitch Maynia, Tips and Tricks, WIP's and Plans

Stitch Maynia Wrap Up

Hi Everyone

I’m not sure about you, but I’m sad that Maynia is coming to an end for this year and a tad relieved. Towards the end I felt like I was trying to keep a number of plates spinning at the top of sticks, by trying to make sure I had spent enough time on all of the projects I had started during May or continuing to work on from previous starts.

Stitch Maynia Stats

In May, I started Fight Like a Girl, Candy Train, Who’s Been Good? and Autumn Castle as my new projects and continued with Moon Lit Fairies, Four Seasons Kittens, Gundaroo Mushroom, Barnyard Kittens and Three Dogs as my continued WIP’s.

Autumn Castle designed by Evgenia Kolesnikova

Most of my time was spent on Autumn Castle designed by Evgenia Kolesnikova. I think I’ve raved about this project before. What I’m loving about it is the colours and it’s something different to what I normally work on. But it makes sense that I’ve started working on something like this, because I love spooky things, ghosts and things relating to the supernatural/paranormal!

I was able to stitch about 884 stitches, which works out to being nearly half a page and I’m stitching it on 18 count pink Aida. When you look at the cover picture, you will see that I’ve started in the top left corner.

Gundaroo Mini Mushroom designed by Kristen Gawonski

I feel like I’ve been working on this project for ages. It doesn’t help that I’ve now got so many other projects to distract me! In May, I was able to work on it for 7 of the 31 days and I was able to get a total of 1000+! I’m actually quite surprised that I got so many stitches in because there were certainly times where I felt guilty for not stitching on this project and I some days I felt like I needed to guilt myself into stitching it because I really wanted to stitch the shiny new ones! The pictures below show my progress and what it will look like when I’m done:

For anyone who’s new to my blog and reading this for the first time, the special thing with this project, is that it’s my own design. The image on the right is a photo that I took on my parents farm at Gundaroo, NSW, Australia and using the software PC Stitch 11, I was able to convert it into a cross stitch pattern. The thing that I’m testing with this project is how well it will turn out on 14 count Aida. My additional aim with this project is to enter it into the Canberra Royal Show. Fingers crossed it gets there!

Fight Like a Girl Designed by Tanya Amity

I’ve really struggled with this project which is surprising me. I really thought that I would have an easier time with getting into it. The main challenges I have with it is the amount of fabric this project potentially needs, the colour of the fabric and how I’ve loaded the pattern into Pattern Keeper.

Tanya has been fantastic with providing me (and I’m assuming anyone who purchases the pattern) with 3 versions of the pattern – black and white without the back stitch and special stitches, a colour version without the back stitch and special stitches and a colour pattern with the back stitch and special stitches. Me not thinking, loaded the whole PDF onto Pattern Keeper and I’ve stitched myself up as a result! Pattern Keeper has done well to interpret the pattern the best way that it can and what I will need to do is see if it’s possible to separate the PDF into the 3 versions and see if that makes any difference for me. The biggest challenge with that will be the way Pattern Keeper interprets the key for the chart. At the moment, Pattern Keeper is able to highlight the symbol on the chart, but at the moment it’s unable to tell me what the corresponding thread colour is. So I’m needing to refer to the paper version and progress from there. Below are the pictures of my progress and the cover picture to show what it will look like completed:

I’m stitching this pattern on 18 count navy blue Aida and I’ve stitched 744 stitches according to Pattern Keeper. The pattern recommends 28 count Navy Blue Lugana. I haven’t figured out how much fabric that would be, but the fabric I am using (from Victoria House Needlecraft) measures 76cm wide by 79cm high. I figure that if I have roughly an 8cm border, I should have enough fabric!

You may notice in the image on the left that I’ve had to do some frogging as part of the struggles I’ve had with mis-counting. A lot of which is to do with me working on it when I’ve been a bit tired and awkward. Because there’s so much fabric (see image on the right), I tend to try and roll it up a bit and have the project up side down and I’m reading the pattern right side up. It’s a weird quirk of how I stitch sometimes, but it works – mostly!

Barnyard Kittens by Dimensions

I’d started this project what feels like ages ago and put it down for a while. When I’d first started it, I had made the wise decision of updating the floss holder by drawing the symbols on it.

Floss card from Barnyard Kittens by Dimensions (kit)

This has helped me so much more than I had initially thought it would. The only reason why I need to refer back to the key on the pattern is when I need to check how many strands of each colour I need to use. And as I’m writing this, I’m making a mental note to add to the floss card, how many strands I need for each symbol. For many Dimensions kits, the number of strands per colour vary from 1 to 3. Sometimes 4. It can also vary in terms of the combination of colours. E.g. 1 strand of white and 3 strands of pink or 1 strand of black and 1 strand of light blue. This helps to create texture and depth to their designs. Below are pictures of how I’ve progressed and what it will look like at the end:

I’ve started in the middle of this project and 90% of the time I’ve stitched this during my lunch break when I’ve had the sun streaming in and it’s felt nice and warm on the couch. I’ve stitched a reasonable 891 stitches on the black 14 count Aida the kit came with. This is definitely one of those projects I need to stitch when I’m awake enough and with plenty of light!

Four Seasons Kittens by Gold Collection Dimensions

This project is taking a lot longer than it should to complete. One of my struggles with this project is that there’s not enough space on the floss card to update it like I’ve done for Barnyard Kittens. I could put all of the details on the other side of the card where there’s nothing printed…I probably should and will after this post!

Meanwhile, I’ve been able to get about 792 stitches in – about 137 of which has been back stitch – and when that’s compared with some of the other projects, my desire to stitch other projects shows! Below is my progress in comparison with the finished picture:

Santa’s Coming! – Designed by Durene Jones

This was a new start and a project I’d been eyeing off since September or so last year. The pattern is in the Ultimate Cross Stitch Christmas magazine/book (volume 19, 2018) that I picked up when I was at coast – before all of the bush fires and “fun” we’ve been experiencing.

I’ve decided to stitch it on some 14 count Aida that I purchased online from the Australian company Threaded Needle and unfortunately I’ve lost the slip that came with the fabric, so I’m not sure what the name of the fabric is. I’m using DMC threads to stitch the pattern and if all goes well, I will hopefully have it finished by Christmas this year!

When I get around to it, one of the challenging things will be stitching my nephew’s name instead of the name Angela, as you may see in the above image on the right. You may also notice with the fabric I’ve chosen to stitch on, is marbled green. This is how the fabric came and why I chose to purchase it.

So far, I’ve been able to stitch about 304 stitches…hmmm. I was not expecting such a low number. I can’t believe that I’ve neglected this project! But I have a plan…check out my next post and you’ll see what I have in store for it!

Candy Express! – Designed by Shannon Wasilieff

This project also comes from the Ultimate Cross Stitch Christmas book/magazine, volume 19, 2018. Every time I look at the finished picture in the book or when I’m looking at the pattern, I just want to eat it! It looks so yummy! That could also be my sweet tooth talking…

Like the ‘Santa’s Coming’ project, I’ve decided to stitch this on the same fabric – 14 count Aida, marbled green (My name for the fabric. I’m still not sure of the exact name). The pattern recommends the use of 28 count sky high evenweave. I have 28 count fabric, but I really like the marbled look the image in the magazine/book has, so that’s why I’ve chosen to go with the 14 count marbled green Aida.

During May, I was able to get 818 stitches done!

Three dogs – Designed by Luca S

I hope I have the designer right for this project. It’s an Anchor kit that I think I purchased through the Fox Collection website many moons ago and I had started it not long after I’d finished a fishing project.

I’ve had a love/grumble relationship with this project. I love that the fabric is pre-gridded. I’ve never stitched on anything like it before. What I’ve struggled with is the thread becoming too thin and breaking. A part of it’s my fault because I’ve had the thread too long for what this thread needs to be. The other thing I’ve struggled with is the background of the project. In hindsight I should have decided to go with half stitch because it would make it so much quicker. Then there’s the colours…so much brown! Especially after stitching some of my other colourful projects.

What I do like about this project is the pattern has been printed on A3 paper and it makes my life a lot easier to see the symbols. Which should mean that I’ve been able to get about 800 or so stitches in…but unfortunately no. I was able to get 631 in.

Moon Lit Waters – Artwork by Julie Fain, charted by Michele Sayetta, Heaven and Earth Designs

For anyone who has been following my blog for a while, will know that I’ve been working on this project for a long time – with limited progress to show for it. At the start of May I purchased the digital copy of this pattern and loaded it into Pattern Keeper. This has been a good thing and a bad thing. Pattern Keeper is awesome! If you haven’t tried it yet, I strongly recommend you give it a go.

The app has made it a lot easier for me to clearly see where the symbols are on the pattern for the colour I’m stitching at the time. I’m able to clearly mark off where I’ve stitched and frog areas that I’ve made mistakes on. What I hadn’t initially counted on, was the incorporation of some new colours that DMC had released within the last 12 months or so. This is where I have a small grumble and yet another page of my project will have a heavy amount of creativity going into it to balance out what I’ve already stitched with the areas that are yet to be stitched. The incorporation of the new colours has meant that the symbols have changed and what colours are stitched where has thrown me off balance by one or two stitches in some places and about 3 to 4 stitches in other places.

Thankfully with HAEDS, there are so many colours that make up the big project, that I can get away with a bit of creative license. And I end up being the only one at the end of the day that has an idea of what I’ve needed to change around. So without further adieu, below is what I’ve stitched during May and what the finished picture will be.

At the moment I have no idea how much I’ve stitched in May and because of how small the crosses are I’m not going to count them all. If anyone knows how I can find the monthly total in Pattern Keeper, please let me know!

What’s next?

Now that May is done and as I’m finishing this post, it’s 1st June 2020 I’m looking to figure out what I’ll do for June and the rest of the year. For June at least I’ll definitely keep working on the WIP’s I now have from May and I’ll stitch what I feel like stitching, rather than needing to keep the projects on a regular rotation.

This month I might also start some of the other projects I had wanted to start in May, but didn’t get around to it. The projects I have in mind are the really colourful ones and a spooky one:

This of course will most likely change. Especially since travel restrictions in Australia are slowly easing. I live in Canberra (aka the Australian Capital Territory (ACT)) – Australia’s capital – and we are surrounded by the State of New South Wales (NSW). As of today, Monday 1st June, we can now travel anywhere we want in NSW and as far as we want in NSW, as long as we abide by social distancing and health and safety requirements! This is huge news for everyone living in NSW and ACT because we can travel to the coast, go bush, go to the snow (when the snow fields open up in about a week or two) and anywhere in between.

What my boyfriend and I are planning on doing is going to the coast as soon as we practically can. We could travel today, but about half of Canberra will be travelling to the coast and we have to work tomorrow (we’re still working from home). Also the weather today is true Canberra winter weather! So we’d rather stay home and enjoy the warmth and comfort of our home and worry about the stresses of travelling later. Practically, we’ll most likely travel to the coast in about 2 weeks. This will give us enough time to get our logistics sorted out and it’s my brother’s birthday next week – Queen’s Birthday long weekend – and he has the coast house booked for that weekend. Lucky duck!

Before I completely wrap things up for this post, I just want to do a quick shout out to Jemma Jones, Dreaming in Aida. Thank you for mentioning me in your post from 17th May 2020! I hope you continue to have such awesome results in your Cross Stitch Diploma Course!

Until next time,

Happy Stitching!

Posted in Stitch Maynia, Tips and Tricks, WIP's and Plans

Stitch Maynia Progress and What I’ve Learnt So Far

Hi Everyone

As I’m writing this post, it’s Sunday 17th May 2020 in Australia and we have about two more weeks until then end of May and a long weekend!

My experience with Stitch Maynia so far has been a whirlwind and I’m now appreciating why so many participants have been talking about making plans and rotations etc. When I’ve watched some of the flosstube clips on Stitch Maynia, I’ve admired people who have known which projects they’re going to work on which days and sticking to those plans. I’ve found that I can plan something within an inch of its life, but executing those plans is something best left to someone else. Alternatively, if someone else has planned something, for the most part I’m able to follow through on those plans. I’ve found that it’s a lot to do with the amount of energy I’m able to apply to either the plans or executing the plans – rarely both!

Progress so far…

With that in mind, a few weeks ago, I had written a post about Stitch Maynia and whether it was better to big, small or medium projects throughout May or to do a combination of all three. I’d also mentioned that I was going to to a mixture of existing WIP’s (works in progress) and new starts. I have been able to stick to that. I have changed a little in terms of what the new starts would be based on what I’m feeling on the day and my available supplies.

For my physical patterns, I’ve found it easier to use a coloured pencil to track which days I’ve stitched on a pattern and how much I’ve stitched. Below is an example of what I’ve done with some of my patterns:

How I use coloured pencils to track how much I’ve stitched on which days

What I haven’t done is properly track (at a quick glance) which patterns I’ve spent what time on and which ones need more attention or starting. I’m thinking that it may be easier to have a printed calendar style page stuck to the wall or a convenient place for me to use the coloured pencils to visually see what’s going on. Below is an example of what I think could work:

SundayMondayTuesdayWednesdayThursdayFridaySaturday
12
Gingerbred Train
(Started – yellow)
3
Autumn Castle
4
Barnyard Kittens (coloured pencil) and
Autumn Castle (coloured pencil)
56
Gundaroo Mini Mushroom (yellow)
7
Gingerbred Train
(Cherry Red)
89
10
Gundaroo Mini Mushroom (Cherry Red)
1112
Barnyard Kittens (yellow)
131415
Fight Like a Girl
(Pattern Keeper)
16
Moon Lit Waters
(Pattern Keeper)
17
Gingerbred Train
(Rose Red)
181920212223
24252627282930
31
Example of calendar style as a visual tracker of what I’ve stitched

Meanwhile, I’ve seen that some people like to use something digital like a spreadsheet or pattern keeper. I’ve also seen some people use a project picker wheel spinner app to help them pick what project to stitch next.

I am using pattern keeper for some of my projects, where the patterns work for that app. What I’m trying to figure out is if the app can tell me when I’ve last worked on a pattern. If you know if the app has that feature and how I can get it to work, I would love to hear about it!

I’m thinking that the project picker wheel spinner app could be useful if I’m undecided about which project to stitch on next – especially when Stitch Maynia comes around next year!

What I’ve learnt…

Having enough tools of the trade

The importance of having enough hoops, needles and needle minders!

Swapping things around for the projects that I’ve not kept a needle, hoop and needle minder with has been challenging. So much so that within the second week of Stitch Maynia, I’ve lost the backs of two needle minders! Thankfully I’ve got some spare magnets that I had purchased a while ago to try and make my own needle minders and it’s made the world of difference.

Preferential Treatment

I’ve also found that I’m starting to preference some of my newer projects for some of my older ones. Mostly because they’re new and exciting and I haven’t lost my interest in them yet. Which is a good thing and a bad thing. The bad thing is that the older projects are getting set aside for longer and one of my goals for the Gundaroo Mini Mushroom project is to have it finished, framed and ready for the next Canberra Royal Show. At this rate, I probably wont have it ready for the required cut off date to submit the project. Also, who knows what the shows will be like next year with social distancing, restrictions on public gatherings etc?

Working from home

Being at home for longer has been a good thing and a bad thing. I’m saving money by not travelling as much and the temptation to stitch more than working has been stronger than ever. As a compromise, I’ve stitched a bit before work – if the weather isn’t great for a long walk – and getting some stitches in at lunch time. This has helped me with sticking as closely as I can to the goal of 200 stitches per day to my project of the day, resulting in 200 stitches for each project throughout the week before I change the colour of the pencil. If I’m able to add 200 stitches to the project of the day and I’ve still got some hours before bedtime, I’ll make a start on another project that needs some attention.

Being too ambitious

Had I not been working, being able to work on 20 different projects for the month of May would be reasonable and achievable. I’m now appreciating why many people this year are choosing to do MonogoMaynia or doing a similar variation that makes it manageable for them – e.g. focusing on a page finish.

I really wanted to be able to work on 20 projects for this month and I still have time to be able to do it, as this particular post will be released on the weekend of 23rd/24th May. The pressure I’m putting on myself for this, if I choose to have 20 projects for May because of the year 2020, I need to be able to keep working on them and finish as many of them as possible. Preferably by the end of this year or May next year at the latest!

So what I’ll do for next year if I can, is to focus on smaller projects – preferably cards. By memory I had mentioned this at the start of this year, when I was talking about my plans for the year. Whether or not I stick to this is yet to be seen!

Wrap up

How are things going for you with Stitch Maynia? What version of it have you chosen to do?

Until next time,

Happy Stitching!

Related Reads

Posted in Tips and Tricks, Uncategorized

The Joys of More Stitching. What are you gaining?

Hi Everyone

I hope you’re all doing as well as you can at the moment. As I’m writing this post, it’s Good Friday and it’s been raining steadily for a few hours and it’s wonderful! I’m loving the sound of the rain and knowing that there’s barely a breeze to blow it all away. The Bureau of Meteorology (BOM) is predicting a range of 8 to 20 millimetres of rain! This is where I’m so thankful to be home to enjoy the rain, have Flosstube playing on the tv, be surrounded with my cross stitch stuff and be writing this post.

Meanwhile, by the time I publish this post, we will have experienced Easter and Australia and New Zealand will have celebrated/commemorated Anzac Day on Saturday 25th April. It will have been the first Anzac Day that Australian’s and New Zealander’s will not have been able to have special dawn services and parades that are typically held at National/State and Territory memorials. Many people however, chose to stand in their driveways with candles to hear the last post and special service being played online.

Technology

I have a love hate relationship with technology. It has made life 10 times easier for many of us until it stops working and something breaks! When technology is working, I love that I can still talk with friends and family over the phone or by using apps such as Skype and Zoom. Technology enables me to find out what’s happening around me without actually getting out there and “getting my hands dirty”. There’s a time and place for that and Bear Gryles will always be in the back of my mind when it happens!

Technology also means that I can catch up on what’s happening in the world of cross stitch. You Tube and similar applications has for many years, been a fantastic platform for all crafters to share with each other what we’re working on, what we’ve learnt and how to do things. Flosstube has also helped me come across so many other designers that I otherwise would not have known about, based upon my own interests and Google searches. Because of Flosstube, my stitching collection will continue to grow and I’m going to need a number of companies and individuals to sponsor me so that I can stitch on all of the things full time!

Things I want to stitch because of Flosstube…

Because of Flosstube, I want to stitch:

  • Many of the Halloween patterns from Autumn Lane Stitchery (available on Etsy);
  • Sky Blue Street by Soda Stitch Canada;
  • all of the colourful cats by Kitty and Me Designs (available on Etsy);
  • Fight Like a Girl by Tanya Amity;
  • Halloween Night by Alena Koshkina;
  • Fright Night by Lewis T Johnson; and
  • Colourful Zebras by Artecy Cross Stitch.

This is not an exhaustive list by any means. There’s still so many more I want to stitch that many Flosstubers have shown and talked about. Let alone the numerous patterns I have had in my collection for years that I haven’t started yet and the projects I’m currently working on!

Nature

I’ve always had an appreciation for nature and what it can offer – even though it’s a struggle to get me out there at times! If I can’t leave my home or I don’t want to venture too far, I love being able to sit out in my backyard and enjoy the sunshine. Or on days like today, I love being able to sit hear the window and listen to and watch the rain coming down nice and steadily. Also, without nature, I wouldn’t have some of the beautiful photographs I have on my walls. More broadly speaking, as cross stitchers, we wouldn’t have some of the beautiful projects to work on that have been inspired by amazing landscapes, animals and gardens the world has to offer.

Right here, right now

Mindfulness has been a big thing for many years and is more important now than it has ever been. What are you thankful for right now? What did go right for you today? Do you have a roof over your head? Some warm blankets and a comfortable bed? Do you have running water – hot and cold – and food in your pantry? Do you feel comfortable in the clothes you’re wearing right now? What sounds can you hear right now?

These are a lot of questions, but ones that I ask my self a lot and very similar ones as I’m putting one foot back into reality, to test the waters and remind myself that life is still pretty good!

My other ‘right here, right now’ moments tend to come when I’m going for walks with my boyfriend or I’m sitting out in the backyard or generally chilling out at home. I’m really lucky to live near some bush land and we have kookaburra or family of them that lives nearby. Some days we can hear the kookaburra laughing away or we’ve spotted it as part of our walks around the block. We also have a number of houses around the neighbourhood who have dogs and early in the morning or early evening (the typical witching hours!), the dogs will have a howling session. It’s awesome! The howling sessions always make my boyfriend and I laugh and it reminds me of my family’s Jack Russell, Russell. In Russell’s younger years, I would get to have a howling session with him whenever I arrived home at my parents farm or would head out there to visit. If Holly the Blue Heeler was around, she would join in and howl along too. These sessions would always make us laugh and howl along with them.

Dream on

Many years ago I use to dream about what I would do if I won the lottery. Like many people, I would have done the standard things like travelling, buying a house, sharing it with family and friends and make some donations.

Now, I still dream of travelling, but it involves taking a year or so off work to do it and road tripping to many parts of Australia I’ve never been to or I want to see again. I’ll still have my moments of wanting to hibernate and needing a few days to recharge the batteries. Which will work out perfectly, because that would enable my boyfriend to go fishing and I can get a bucket load of cross stitch done.

Saving time and money

As much as I miss the freedom at the moment to be allowed to go out and do whatever I want (within reason), I am not missing the journey I have to take to get to work and paying for parking. On average, I pay $39 per week for parking and however much money it is for fuel consumption and the general wear and tear my car experiences when I drive it. Additionally, I’m not missing what my imagination does to me when I’m walking through Civic when it’s dark to get to the gym. In my mind, I worry about people jumping out at me from the shadows and being assaulted in whichever shape it may be. Civic is the centre of Canberra and a central location for many homeless and low income people to be, because of the services that are available to them. Towards the end of the working week, Civic is also known to be the location for people to go to unwind, catch up with friends at the pub or a food place. So, early Thursday or Friday mornings at Civic can be an interesting place to navigate (especially in the warmer months) because of the number of people recovering from the night before. Being a short female, and keeping an eye out for potential dangers isn’t fun! I’ve been lucky to not be severely impacted by this. I have had the occasional encounter with someone asking me for money and they’ve been good when I’ve told them I don’t have any on me.

That said, as you can see in the image above, Civic can be pretty at night if you forget about any of the dangers that the location may have. For about a week each year, we have an event called Night Fest, that encourages people to come out at night and experience Civic and nearby locations under different lights.

Because of this stress, time and money saving, I’m able to sleep in a bit and go for more shorter walks with my boyfriend and we’re able to meet in the kitchen for tea/coffee and lunch.

What about you? What are some of the things you’re happy to be missing out on? What have you been able to do as a result of what’s happening at the moment?

Until next time…

Happy Stitching!

Related Reads:

Posted in How To, Tips and Tricks

What do you need to know about framing your cross stitch?

Hi Everyone

How many variations are there for you to use to frame your cross stitch? Using the phrase “how to frame cross stitch” – including the quotation marks – 21,000 results came up in my Google results. Many of the results in this search talk about the possibilities of using glass, not using glass, stretching your project over canvas, using sticky board to assist with the framing, using matting board and not using matting board.

Considering how many posts and YouTube clips there are on how to frame cross stitch, the aim of this post is to share with you, some of the most popular ways to frame your cross stitch on a shoestring budget.

The most common threads from the most popular results will tell you about:

Washing your finished project

This can be a personal choice and be dependant upon your choice of fabric and threads. There are some threads may run if they are washed or weren’t pre-washed before you stitched with them. I’ve been really lucky with all of the projects I’ve washed before framing. I’ve only used Anchor or DMC threads, mostly because they’re the most accessible brands to me and up until the last 12 months or so, I hadn’t known about or heard of any other type of threads to stitch with! Tapestry wool being the exception!

I have accidentally spilt coffee and chocolate crumbs on my projects and I’ve been very lucky to have them easily wash out. Or I’ve been able to stitch over the spots without any worries – if a mark has been left after the washing.

One of the important things I want to note is that for the majority of my projects, I’ve hand washed them in the basin of my bathroom with a little bit of hand soap – liquid or bar – in warm to cool water. I’ve tried not to rub my stitches too much, but enough to remove any crumbs or marks if there had been any. I’ve also rinsed my project with warm to cool water to remove any soap residue. I’ve then lightly squeezed my project to remove the excess water and laid it flat on a towel to dry over night.

From an audio-visual perspective, below are a couple of clips that may help you with washing your projects, if you’re feeling a bit uncertain about what to do…

‘My gridding pen washed out super easy…’ by Stitching Jules – uploaded to YouTube on 8 December 2017
‘Washing your cross stitch and embroidery’ by Peacock and Fig – uploaded to YouTube on 17 September 2016

Once dry, I’ve ironed the front and back side of my project, taking care with areas that have beads and backstitch. You may find that some people are quite particular about which side of their project should be ironed – if at all. I’ve been lucky and not had any problems. It’s also been the main times I’ve brought out the iron and ironing board!

Measurements

How large your finished project is will have a major influence on the frame size you choose. The measurements will also impact your choice in mat board and what board you have to back your project. It’s also important to note that the amount of excess fabric you have around your project will have an impact on how you frame it. For example, do you really need a metre of fabric around your project? This example is excessive, but you get my point! On average, having an inch or two – 4 maximum (5 to 10 centimetres) around your project is the perfect amount because it gives you enough room to effectively stretch your fabric and have it centred in the frame.

Choosing acid-free materials

The acid-free materials will range from the foam and mat boards to the sticky board or threads you use to lace your project. This is important because they will ensure the longevity of your project and hopefully it will become a family heirloom!

Lacing

When I first started cross stitching and the term ‘lacing’ was mentioned, I thought it was something to do with lace in fashion and homewares. But it’s actually to do with the process of stretching your project over some foam board or cardboard, so that it’s nicely centred in your frame. Below is a clip to help further explain how lacing works and how you can do it too!

‘Lacing the lazy way’ by Lindy Stitches – uploaded to YouTube on 8 August 2019

Mat board

This can be a personal choice as well. Many frames you can purchase from the shops come with its own mat board. When you have pulled apart the frame, place the matting board over the top of your project to see if the matting board enhances or detracts from your project. It’s also important to note that the purpose of mat board is to stop your project from touching the glass – if you choose to frame your project with glass. According to the Frame Shop, mat board can protect your project from moisture because of the small gap it creates between the project and the glass.

If you find the perfect frame, but you need to adjust the mat board it comes from, Peacock and Fig has put together a great clip on how to customise the mat board to suit your needs.

‘How to cut a mat’ by Peacock and Fig – uploaded to YouTube on 28 May 2015

Frames

Whenever I’ve decided to frame a project, I’ve taken my project with me to the shops I want to get my frame from. This enables me to see what’s on the shelf and see if the project works with the frame. Felt Magnet recommends this in their post about framing your project as well. The aim is to find a frame that compliments your project. Tip: choose a colour in your project that you have used a little bit of. Find a frame in that colour or find some paint that you can use to paint the frame you’ve chosen. Alternatively, you may choose to wrap the frame in fabric or paper or any other medium that suits your project. Additionally, your frame can be made out of whatever materials you think suit and compliment your project. I’ve seen on the internet, how creative people have gotten with their frames. Some people have chosen to utilise materials from around their home or local stores that enhance their projects. Below are some images of what people have done:

Image from Google search. See diyinspired.com for a closer look at this frame and more ideas.
Image from Google search. See websiteherpetologistsleague.com for a closer look at the image and more framing ideas.
Image from Google search. See amazinginteriordesign.com for a closer look at this idea and more framing ideas.

Summary

When I’ve framed my own projects, I’ve taken a stab in the dark. I’ve not looked up anything on the internet. I’ve usually had an idea of how I’ve wanted the project to look in the frame and had a go at making it right. I’ve made the mistake of racing out to purchase a frame without my project with me and purchased a frame that’s been too big or too small. I still have some of those frames hanging around my home, in the hope that one day I’ll have a project that will suit it.

I’ve kept the glass in all of my projects and I’ve taken the risk with some of the projects by not using matboard and having the project right up against the glass. This is a huge risk with ‘The World’ project (see image below) because I’ve got it hanging up in my ensuite.

I’ve rarely used the lacing method of securing my projects in the frame. More often than not, I’ve used acid-free double sided tape to secure the project to the paper or board that has come with the frame. I have had to be careful to not have the standard picture that’s come with the frame showing through my project. I made that mistake with my ‘The World’ project (see below), but I think it’s worked out for the better. What do you think?

‘World Map: The Elements’ designed by Maria Diaz – notice the darker background. This was unintentional. The darker colours you see in the background are because of the side I used for backing the cross stitch project.

I also recommend you check out YouTube for tutorials on how to frame your cross stitch projects. They will give you the confidence and guidance on how to do what you want with your project. They may also enhance what this post has touched on.

Until next time, happy stitching!

Related reads:

Posted in How To, Tips and Tricks

How Do You Teach Someone to Cross Stitch? Part 5 – The Final Touches

Hi Everyone

This is the last post of the series and looking at the date (in Australia, it’s Sunday 29th December, 2019), the last post for this year!

We’ve come a fair way in this series. We’ve considered who our student is and what their learning styles and abilities are, and some of the tools of the trade that may help them with starting out in cross stitch and hopefully enjoying it! We’ve had a quick look at some of the different patterns that are out there, with the strong recommendation of starting your learner out on a kit before embarking on chart and kitting things up themselves. Let alone embarking on a project that has a fabric count size 20 or over!

With these things in mind, we now need to have a chat with our learner about how they want to finish their project and the potential for back-stitch, beads, French Knots and what should be done with it when we’re done.

Back-stitch – is it overrated or a necessary evil?

Over the years I have definitely complained about doing back-stitch on many of my projects. Sometimes it’s because there’s so much of it and it’s felt like I’ve been working on the project for a really long time. Other times it’s because I’m just really keen to get moving onto a different project and I’m procrastinating the inevitable. That said, I know that really, back-stitch isn’t really all that hard. Tedious at times yes, but not hard. It also makes the world of different to a project and makes things stand out in a way that other stitching wouldn’t be able to do – that I’m aware of. If anyone does know of another stitch similar to back-stitch that can be used in cross stitch, I challenge you to show me!

Reading the pattern however, for doing back-stitch on a project – that may be another reason why I grumble about it. Because the pattern will remind me where I’ve fudged things on the project and when I go to try and follow where the back-stitch needs to be, I get annoyed at myself all over again. To help you understand why this is, the two clips below by Peacock and Fig, explain how back-stitch works in cross stitch projects:

“Backstitch tutorial for embroidery and cross stitch” by Peacock and Fig – uploaded to YouTube on 14 November 2015
“Intermediate backstitch techniques: handling long runs of backstitch” by Peacock and Fig – uploaded to YouTube on 31 October 2017

For some of the projects I’ve worked on that have had long runs or long lines of back-stitch, I’ve carried my thread from point A to point B without any stops in-between. This could cover a number of centimetres and I’ve then gone back and put some small anchors along the line to secure the thread. I’ve found this to have a bit more of a cleaner view rather than stitching the individual stitches and it saves a bit of time. You may need to help your student with starting and finishing the back-stitch to ensure the stitches stay put.

French Knots or Beads

This is something you and your student will need to have a chat about, regarding whether or not your student wants to give them a go. Personally, it’s taken me a very long time to get the hang of doing French Knots and I have used beads instead of the knots. An example of how this can look is shown below:

“Angel Bear with Candle” – design by Joan Elliott (C)2006 – stitched by Kristen Gawronski (The XStitching Runner)

The additional tip I can provide you and your learner with if either of you choose to use beads, is the smaller the bead, the fiddlier they are going to be to use in the project and you’re going to need to use a thinner needle than what was used to stitch the project. The image below shows the needle I use for beading. Unfortunately I’ve lost the packaging that the needles came in, so I’m unable to let you know the details of the brand and needle size. What I do like about these needles is that they are a little longer and thinner than the regular embroidery needle and I’m able to get a little Mill Hill Seed Bead on the end of the needle. Which helps a lot when I’m trying to pick a bead out from the packaging and adding it to the project, like the ‘Angel Bear with Candle’. I like to grow my fingernails a bit and I find it difficult to pick out just one of the little beads out of the packaging because of my nails!

Needles I use for beading. Brand and needle size unknown.

Additionally, I use one strand of cotton that’s the same colour (or as close as possible) as the bead I’m attaching to the project. My logic for doing this is to make it as seamless as possible and the centre of the bead is sometimes so small that it can only handle one or two strands at the most.

Washing your final project

Have you ever taken a project out of a stand, hoop or frame and found that your hands weren’t as clean as you thought they were – even though you thought you were diligent about washing them before working on the project? Don’t worry. Accidents happen. Even with the best of intentions!

Washing a project after it’s been finished is a personal preference for many people. If I’ve been working on light coloured fabric, I prefer to wash my projects to be absolutely sure I’ve not left any grubby marks on it. My logic behind this is I want the project to last for as long as possible. By removing any contaminates from the fabric, it puts my mind at ease knowing that I’ve done what I could to remove anything that could increase the deterioration of the fabric or threads.

It’s important to note that whenever I’ve washed my projects, I’ve hand washed them in the basin with some warm water and hand soap. Nothing fancy. I’ve rinsed the project in cool to warm water and gently wrung the project out and laid it out flat on an old, clean tea towel. I’ve usually left it overnight and then used an iron to smooth it all out. I’ll usually iron the back side of the project to ensure the iron doesn’t catch on any of the back-stitch or cause any problems with the French Knots or beads.

However, this is a personal preference and you will need to have a chat with your student about what they want to do about washing their finished project. Aside from potential marks from dirty hands or accidental spillages, another deciding factor will be what your student wants to do with the finished project. Do they want to frame it? Make a card? Turn it into a pin cushion? No decisions have to be made straight away. There are a lot of options out there regarding the way a cross stitch project can be fully finished. In the related posts section at the end of this post, is a link to an earlier post I wrote on what finishing options there are, if you or your student choose not to frame.

End of a series, but not goodbye…

It’s been fun and interesting writing this series. I hadn’t anticipated parts of it being so difficult to write – mostly the parts about doing the actual stitching! I’ve likened it to teaching someone to drive. Whilst the two activities are very different, it’s the fact that both activities are so hands on, that at times it can be easier to just jump straight in and make adjustments as you go!

Thank you for bearing with me throughout this series. I hope that you have picked up on some different things that help you and your student. I’ve certainly learnt a bit about different learning styles and going through my stash has reminded me how much I have and how much I want to stitch!

So until next time, happy stitching!

Related posts:

Posted in How To, Tips and Tricks

How do you teach someone to cross stitch? Part 4 – Patterns, Projects and Stitching

Hi Everyone

We’re now getting to the fun part of teaching someone to cross stitch! Well, fun in my opinion anyways! In this part of the series we’re going to take a look at pattern choices, starting a cross stitch project and the different ways to do cross stitch.

I’ve always loved the prospect of starting something new and seeing something new come out of a blank canvas. I love the different options available to us regarding fabric, patterns and the tools of the trade. It may be part of why it takes me a while to fully finish a project, because there are so many options out there and I want to stitch them all! But I digress…

Choosing a pattern or a kit

By now, I hope that you and your student have gotten to know each other and you know what their interests abilities are, which will enable both of you to pick out a pattern that will suit them and keep them interested long enough to finish it.

For someone who is completely new to cross stitch, it would be best for them to start with a kit, because the majority of what they need will be in the kit – i.e. fabric, threads, a needle and most importantly, the pattern. The question is…which one when there’s so much to choose from?

Patterns and kits for kids

When kids are concerned, the simplest pattern design with a few different colours is probably the best one to go with. Because it has at best, 3 to 4 different symbols on a chart they need to worry about and the simple design means that the chart should be easy enough for them to read.

Examples of simple patterns and kits for kids include the following:

Image from the website 123Stitch.com – Designed by Dimensions

According to the 123Stitch.com website, this Unicorn Poop Emoji kit comes with everything, including 11 count Aida, the black hoop we see in the picture and all of the things needed to complete the project. This particular kit I think ticks alot of the boxes for kids these days because it’s poop! Also, in Australia at the moment, the unicorn theme has been strong and emojis seem to be here to stay, so why not embrace them?!

Baker Ross Wooden Flower Cross Stitch Keyring Kits for Beginners (Pack of 5) Embroidery For Kids – images from the Amazon UK site

These particular kits are from the UK Amazon site and they could be a fantastic way of introducing kids to cross stitch and embroidery. With these kits, there’s no pattern they have to follow. The holes are already drilled into the wood. All the kids need to do is decide what colours they want to use where because the kit comes with the threads and needle.

Scrolling through the Net…

Another idea is to jump onto the Net and have a scroll through some different websites that may spark some inspiration. The website OzStitch.com.au for example, has a couple of pages dedicated to kits that can be stitched by kids. Meanwhile, The Fox Collection has some pages on kids crafts and mini kits that could be of interest.

Patterns and kits for teenagers and adults

If your student is a bit older, then you have a bit more wriggle room for options in design. This is a lot to do with the complexity in the designs and your student’s potential ability to more patience and time to sit down and work on the project. It also means that your older student may be able to cope with a larger count size – e.g. 14, 16 or 18 count.

Personally, I’ve found the Country Threads patterns and kits by Fiona Jude to be absolutely awesome. The patterns are easy to read and they are comfortable size to work on. Meaning, it took me an average of three months to complete one of Country Threads patterns and that’s all the while working full time and in many circumstances, studying online part-time as well. The other thing that attracts me to the Country Threads designs is that there’s little to no backstitch and it’s a mix of full cross stitch and half stitch (aka tent stitch) and some patterns may require some French Knots.

Subversive cross stitch

This is something that may be of interest for teenagers and adults who may be more into quotes or words rather than images. The main challenges in this case, will be deciding on which font to use, how much swearing there is and which quote or word fits best with your student! Because the Internet and the stitching community has fully embraced subversive cross stitch and it doesn’t look like slowing down any time soon!

On a related note to the swearing, even if there isn’t any swearing in actual pattern, there may be a bit of swearing as the stitching commences because of the number of times that you or your student stabs themselves with the needle, the amount of un-picking that may happen and figuring out where you or they are on the pattern!

If you and you’re student still aren’t sure on what to stitch because nothing’s really jumped out at them, another idea is that your student could try designing their own pattern. All you and your student need is some graph paper and some colour pencils and some creativity and imagination to bring it to life!

A kit has been chosen…Now what?

Hemming the edges of the fabric*. Washing the fabric and threads*. Finding the middle of the fabric. Sorting or organising the threads*. Getting the rest of your supplies together. Understanding the pattern.

*These things are optional and may suit the preferences of you or your student. Personally, I’ve been really lucky with the threads I’ve used from kits and purchased individually either online or instore. When I have washed my project after completion, none of my threads have run and adversely affected the project. I have read in different forums that for some people, their threads have run and had a negative impact on their projects. Additionally, in some kits, the threads may not be as organised as you or your student need them to be.

Finding the centre of your fabric

The main times I bring out my iron and ironing board is to do something with cross stitch! When I’m finding the centre of my fabric, I prefer to iron out my fabric so that it’s as flat as possible because of the way it’s initially been folded and stored in my collection. By doing this, I know that I’ll be able to easily fold up my fabric in half and then half again, then run the iron over it while it’s folded up, so that I can cleanly see the centre.

The clip below by Stitcherista shows you what I mean…

‘Cross Stitch 101 – Finding the center of your fabric’ by Stitcherista – uploaded to Youtube on 9 October 2018

Additionally, if your student wants to use a hoop while stitching, the clip below by Spot Colours, will show them how to find the centre of their fabric and how to put it into the hoop…

‘Cross Stitch – How to Find the Center and Hoop’ by Spot Colours – Uploaded to YouTube on 22 June 2017

Hoops, Qsnaps and Frames

It’s important to note that depending on the size of the project your student is working on, that the size of the hoop, qsnap or frame will have a large impact on how well the fabric fits. For example, the smaller the size of the fabric, the smaller the tool you use to keep the tension. This may also depend on personal preference and what your student is able to use.

Personally, I have always used hoops of various sizes and I’ve recently started using a stand to hold the hoop.

Understanding the pattern

The first time your student sees the cross stitch pattern, it may look really confusing to them. Thankfully, some patterns have colours on them to make it easier to see the different areas they need to stitch with the different threads. However, if it’s a black and white pattern with a series of symbols, helping your student understand that each symbol represents a different colour in the key will be crucial. The YouTube clip below by Love Crafts shows people in a really easy and simple way how to understand and read a pattern, to enable them to start stitching:

‘How to read a cross stitch pattern for beginners’ by Love Crafts – uploaded to YouTube on 14 October 2019

Tip – Drawing the symbols from the pattern on the thread sorter

One of the things that may help – regardless of your student’s age – is to go through the key and draw the symbols on the thread sorter (if the kit came with one). I’ve found this to be really useful for some of the Dimensions kits I’ve worked on due to the way the chart and key have been written up.

Symbols I have hand drawn on the card sorter that came with a kit

Starting to stitch…

The earlier clip by Love Crafts shows people one of the ways that they can start stitching a pattern. What you will need to show your student is what they will need to do with their thread so that it doesn’t accidentally come straight through the hole of the fabric.

Floss, cotton and strands

You and your student will find that the majority of patterns and projects will require it to be stitched with two strands of cotton (aka floss). To help put things into perspective, the image below shows that the floss can be split into 6 individual threads or grouped into 3 lots of 2.

Image shows that floss can be grouped into three lots of 2 strands.

The Loop Start Method

This relates to the way the amount of strands you or your student has pulled out of the cotton and the way it has been threaded into the needle. For the loop method to be most effective, you or your student will need to pull out just one strand and then fold it in half, so that ends meet up evenly. The clip below by Mr X Stitch explains the loop method really well:

‘Start your cross stitch with the Loop Technique’ by Mr X Stitch – uploaded to YouTube on 18 July 2018

Personally, I love the loop method if I’m using two strands on a project. It makes the back of the project a lot neater and I find it to be a fantastic anchor for the first few stitches. The caveat with using this method though is that it’s only useful if I need to use two strands of floss.

Finishing off your crosses and changing colours

You may need to help your student with the first time they go to finish off their crosses in accordance with the pattern or because they’ve run out of enough thread on their needle. The aim is to fully finish the cross and then flip the project over so that you’re looking at the back of the project. Then have the needle move between the fabric and some of the crosses that have just been stitched. I’ve found this to be a very neat way of finishing the crosses and it helps to secure them. To put this into perspective, the clip below by Rainbowlune, shows us how to just this:

“How to Finish a Thread – Cross Stitch” by Rainbowlune – uploaded to YouTube on 23 February 2013

Meanwhile, changing colours is reasonably easy in cross stitch. The difficulty sometimes is deciding which colour to do next or threading the needle – depending on the size of the eye of the needle! The way that your student would start off and finish on a new colour is very much the same as they would with any other colour.

Which way to stitch – left to right, up and down, right to left, cross country or parking

If you’ve been stitching for a while, you’ll hopefully know what I mean by this heading! When you’re chatting with your student, you will be able to work with them to find out what is most comfortable for them and what the pattern allows you to do too.

Stitching left to right and right to left (aka horizontal cross stitch)

This predomenantly means that the first half of the stitches will be done left to right – just like when we’re writing something. Once we’ve reached the designated number of stitches, we then complete the crosses by stitching right to left.

Meanwhile, the stitching right to left is when you start the first half of the crosses by moving right to left and then completing the crosses by moving left to right.

To help put this into perspective, the clip below by Peacock and Fig help to put these words into motion by showing you the English and Danish methods of cross stitch (aka left to right/right to left or one cross at a time):

“Cross Stitch Techniques: English method and Danish method of cross stitch” by Peacock and Fig – posted to YouTube on 4 April 2017

Stitching up and down (aka vertical cross stitch)

This way of stitching may depend a little bit on the pattern your student may be working on. Personally, I’ve found it easiest to stitch the full cross before I move above or below the first cross. To help explain what I’m talking about, check out the clip below:

“Full Cross Stitch Vertical” by MonkeySee.com – posted on YouTube on 8 August 2008

Cross Country and Parking

The good thing with cross country cross stitch is that we don’t need to leave our chairs to do this. The main exertion with this method is keeping track of where you are on the pattern!

The aim of cross country cross stitch is to stitch as much as possible of the pattern with the one colour and where possible, using the same strand without the stopping and starting. This can make the picture look a bit pixelated or scattered. Below is an image on how cross country stitching looks on a project:

Example of cross country stitching

Meanwhile, the parking method means that your student may prefer to read the pattern line by line, like they are reading a book, and stitch each symbol on that line. This will mean a lot of threading the needle with different colours as the pattern requires it. The benefit of using the parking method is that the thread will be ready when your student next reaches the corresponding symbol on the pattern.

To help put this into perspective, the clip below will show you and your student what cross country stitching and parking looks like on a project and which methods may be most effective on which projects.

“Cross Country vs Blocks with Parking” by Pam’s Crafty Corner – uploaded to YouTube on 18 January 2017

Deep breath… you’ve finished your project, now what?

This post was surprisingly challenging to put together, which is something I had never expected! I think a lot of it has to do with cross stitch being so much of a hands-on activity, that to just write about how to do cross stitch doesn’t do the activity justice! Which is why I think that there are so many more videos out there on how to cross stitch than there are written posts.

My next post in this series will hopefully be a little shorter. In the next post of this series we’ll be looking at the finishing touches of your student’s project, which may include back-stitching, the inclusion of some beads or special stitches. There may also be questions about whether it’s worth washing the project before your student then completely finishes it.

Thank you for sticking with me during this post and the series so far!

Until next time, happy stitching!

Related resources: