
Hi Everyone
How many variations are there for you to use to frame your cross stitch? Using the phrase “how to frame cross stitch” – including the quotation marks – 21,000 results came up in my Google results. Many of the results in this search talk about the possibilities of using glass, not using glass, stretching your project over canvas, using sticky board to assist with the framing, using matting board and not using matting board.
Considering how many posts and YouTube clips there are on how to frame cross stitch, the aim of this post is to share with you, some of the most popular ways to frame your cross stitch on a shoestring budget.
The most common threads from the most popular results will tell you about:
Washing your finished project
This can be a personal choice and be dependant upon your choice of fabric and threads. There are some threads may run if they are washed or weren’t pre-washed before you stitched with them. I’ve been really lucky with all of the projects I’ve washed before framing. I’ve only used Anchor or DMC threads, mostly because they’re the most accessible brands to me and up until the last 12 months or so, I hadn’t known about or heard of any other type of threads to stitch with! Tapestry wool being the exception!
I have accidentally spilt coffee and chocolate crumbs on my projects and I’ve been very lucky to have them easily wash out. Or I’ve been able to stitch over the spots without any worries – if a mark has been left after the washing.
One of the important things I want to note is that for the majority of my projects, I’ve hand washed them in the basin of my bathroom with a little bit of hand soap – liquid or bar – in warm to cool water. I’ve tried not to rub my stitches too much, but enough to remove any crumbs or marks if there had been any. I’ve also rinsed my project with warm to cool water to remove any soap residue. I’ve then lightly squeezed my project to remove the excess water and laid it flat on a towel to dry over night.
From an audio-visual perspective, below are a couple of clips that may help you with washing your projects, if you’re feeling a bit uncertain about what to do…
Once dry, I’ve ironed the front and back side of my project, taking care with areas that have beads and backstitch. You may find that some people are quite particular about which side of their project should be ironed – if at all. I’ve been lucky and not had any problems. It’s also been the main times I’ve brought out the iron and ironing board!
Measurements
How large your finished project is will have a major influence on the frame size you choose. The measurements will also impact your choice in mat board and what board you have to back your project. It’s also important to note that the amount of excess fabric you have around your project will have an impact on how you frame it. For example, do you really need a metre of fabric around your project? This example is excessive, but you get my point! On average, having an inch or two – 4 maximum (5 to 10 centimetres) around your project is the perfect amount because it gives you enough room to effectively stretch your fabric and have it centred in the frame.
Choosing acid-free materials
The acid-free materials will range from the foam and mat boards to the sticky board or threads you use to lace your project. This is important because they will ensure the longevity of your project and hopefully it will become a family heirloom!
Lacing
When I first started cross stitching and the term ‘lacing’ was mentioned, I thought it was something to do with lace in fashion and homewares. But it’s actually to do with the process of stretching your project over some foam board or cardboard, so that it’s nicely centred in your frame. Below is a clip to help further explain how lacing works and how you can do it too!
Mat board
This can be a personal choice as well. Many frames you can purchase from the shops come with its own mat board. When you have pulled apart the frame, place the matting board over the top of your project to see if the matting board enhances or detracts from your project. It’s also important to note that the purpose of mat board is to stop your project from touching the glass – if you choose to frame your project with glass. According to the Frame Shop, mat board can protect your project from moisture because of the small gap it creates between the project and the glass.
If you find the perfect frame, but you need to adjust the mat board it comes from, Peacock and Fig has put together a great clip on how to customise the mat board to suit your needs.
Frames
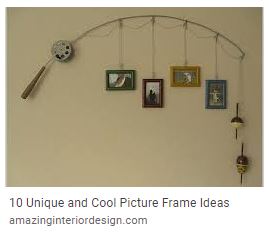
Whenever I’ve decided to frame a project, I’ve taken my project with me to the shops I want to get my frame from. This enables me to see what’s on the shelf and see if the project works with the frame. Felt Magnet recommends this in their post about framing your project as well. The aim is to find a frame that compliments your project. Tip: choose a colour in your project that you have used a little bit of. Find a frame in that colour or find some paint that you can use to paint the frame you’ve chosen. Alternatively, you may choose to wrap the frame in fabric or paper or any other medium that suits your project. Additionally, your frame can be made out of whatever materials you think suit and compliment your project. I’ve seen on the internet, how creative people have gotten with their frames. Some people have chosen to utilise materials from around their home or local stores that enhance their projects. Below are some images of what people have done:


Summary
When I’ve framed my own projects, I’ve taken a stab in the dark. I’ve not looked up anything on the internet. I’ve usually had an idea of how I’ve wanted the project to look in the frame and had a go at making it right. I’ve made the mistake of racing out to purchase a frame without my project with me and purchased a frame that’s been too big or too small. I still have some of those frames hanging around my home, in the hope that one day I’ll have a project that will suit it.
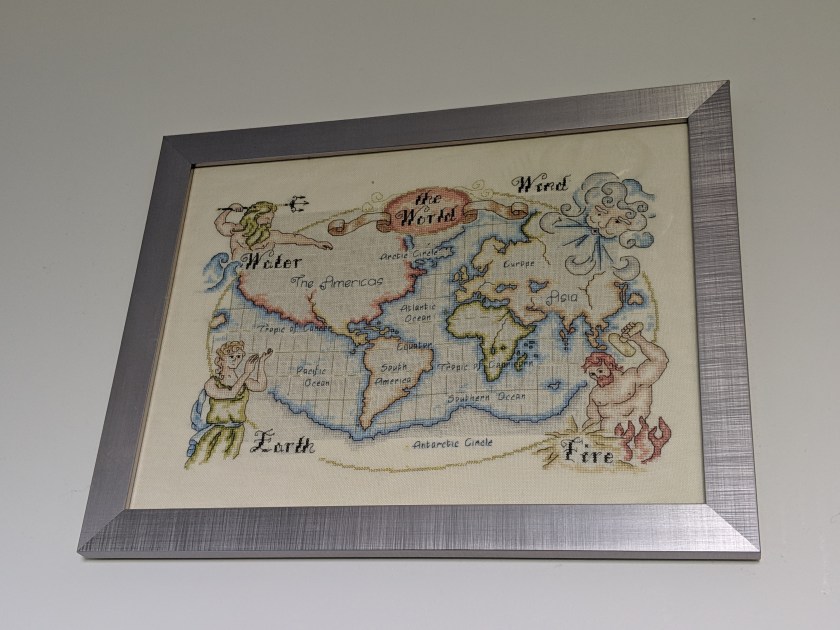
I’ve kept the glass in all of my projects and I’ve taken the risk with some of the projects by not using matboard and having the project right up against the glass. This is a huge risk with ‘The World’ project (see image below) because I’ve got it hanging up in my ensuite.
I’ve rarely used the lacing method of securing my projects in the frame. More often than not, I’ve used acid-free double sided tape to secure the project to the paper or board that has come with the frame. I have had to be careful to not have the standard picture that’s come with the frame showing through my project. I made that mistake with my ‘The World’ project (see below), but I think it’s worked out for the better. What do you think?
I also recommend you check out YouTube for tutorials on how to frame your cross stitch projects. They will give you the confidence and guidance on how to do what you want with your project. They may also enhance what this post has touched on.
Until next time, happy stitching!
Related reads:
- Eckersleys – website for purchasing some of your framing needs (Australian store)
- Frame Shop – website for purchasing some of your framing needs and guidance on why their products will be useful for you (Australian store)
- How to Frame Your Cross Stitch – blog post by Kymberly Fergusson on Felt Magnet
- How to Frame Cross Stitch: 7 Steps – blog post by Ikoerper
- How to Frame Your Own Cross Stitch – blog post by Tiny Modernist Cross Stitch
- Care and washing instructions – DMC website
- How to clean your finished cross stitch – Tiny Modernist website
- Why you should choose acid free products – blog post by Mark Rogers

