
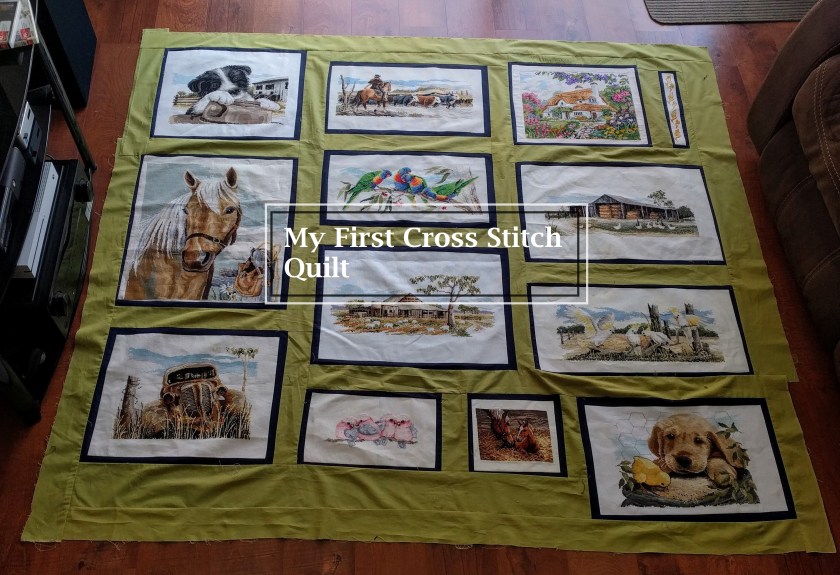
Years in the making
This quilt has been years in the making. Each picture has taken me an average of 3 months to complete, whilst working full-time and studying part time (for 6 years) and other projects in between. The pictures that make up this quilt are mostly Country Threads. The cottage and cat at the fish pond are from two different cross stitch magazines I’ve had for years. The mare and foal are a Dimensions Gold Collection kit (aka Dimensions Good Morning (Horse and Foal)).
Representations
Each picture represents an element of my family’s farm. Growing up we always had two dogs, two cats, many horses, many cows and bulls, chooks (aka chickens), ducks, geese and briefly, a flock of sheep. We’ve also had wild foxes, wombats, cockatoos (that love eating the oats and grass seeds in the round bales of hay), lorikeets, rosellas, galahs, crows, rabbits, hares, the odd echidna and once a pelican! On the farm, we also have a shearing shed that we’ve never used as an actual shearing shed. Instead, it has been a fantastic place for us to store our horse-riding gear, cattle drenching equipment, a place for chooks and ducks to hatch and raise their young, places for the cats to snooze (sleep) and catch mice and rabbits, a place to store square bales of hay, a place for the horses to shelter from the weather and mend from illness or injury. The shearing shed has also been a place for us to store bits and pieces we have wanted to store from the weather.
The creative process
For years I’ve known that I’ve wanted to make a quilt out of these pictures, but I’ve never had a firm idea of how it would look, how big it would be and how many pictures it would exactly it would have. As the pictures progressed and accumulated, I started thinking about the farm on a broader scale and the common colours they involve. Which is how I decided upon the blue and green shades you see in the pictures.
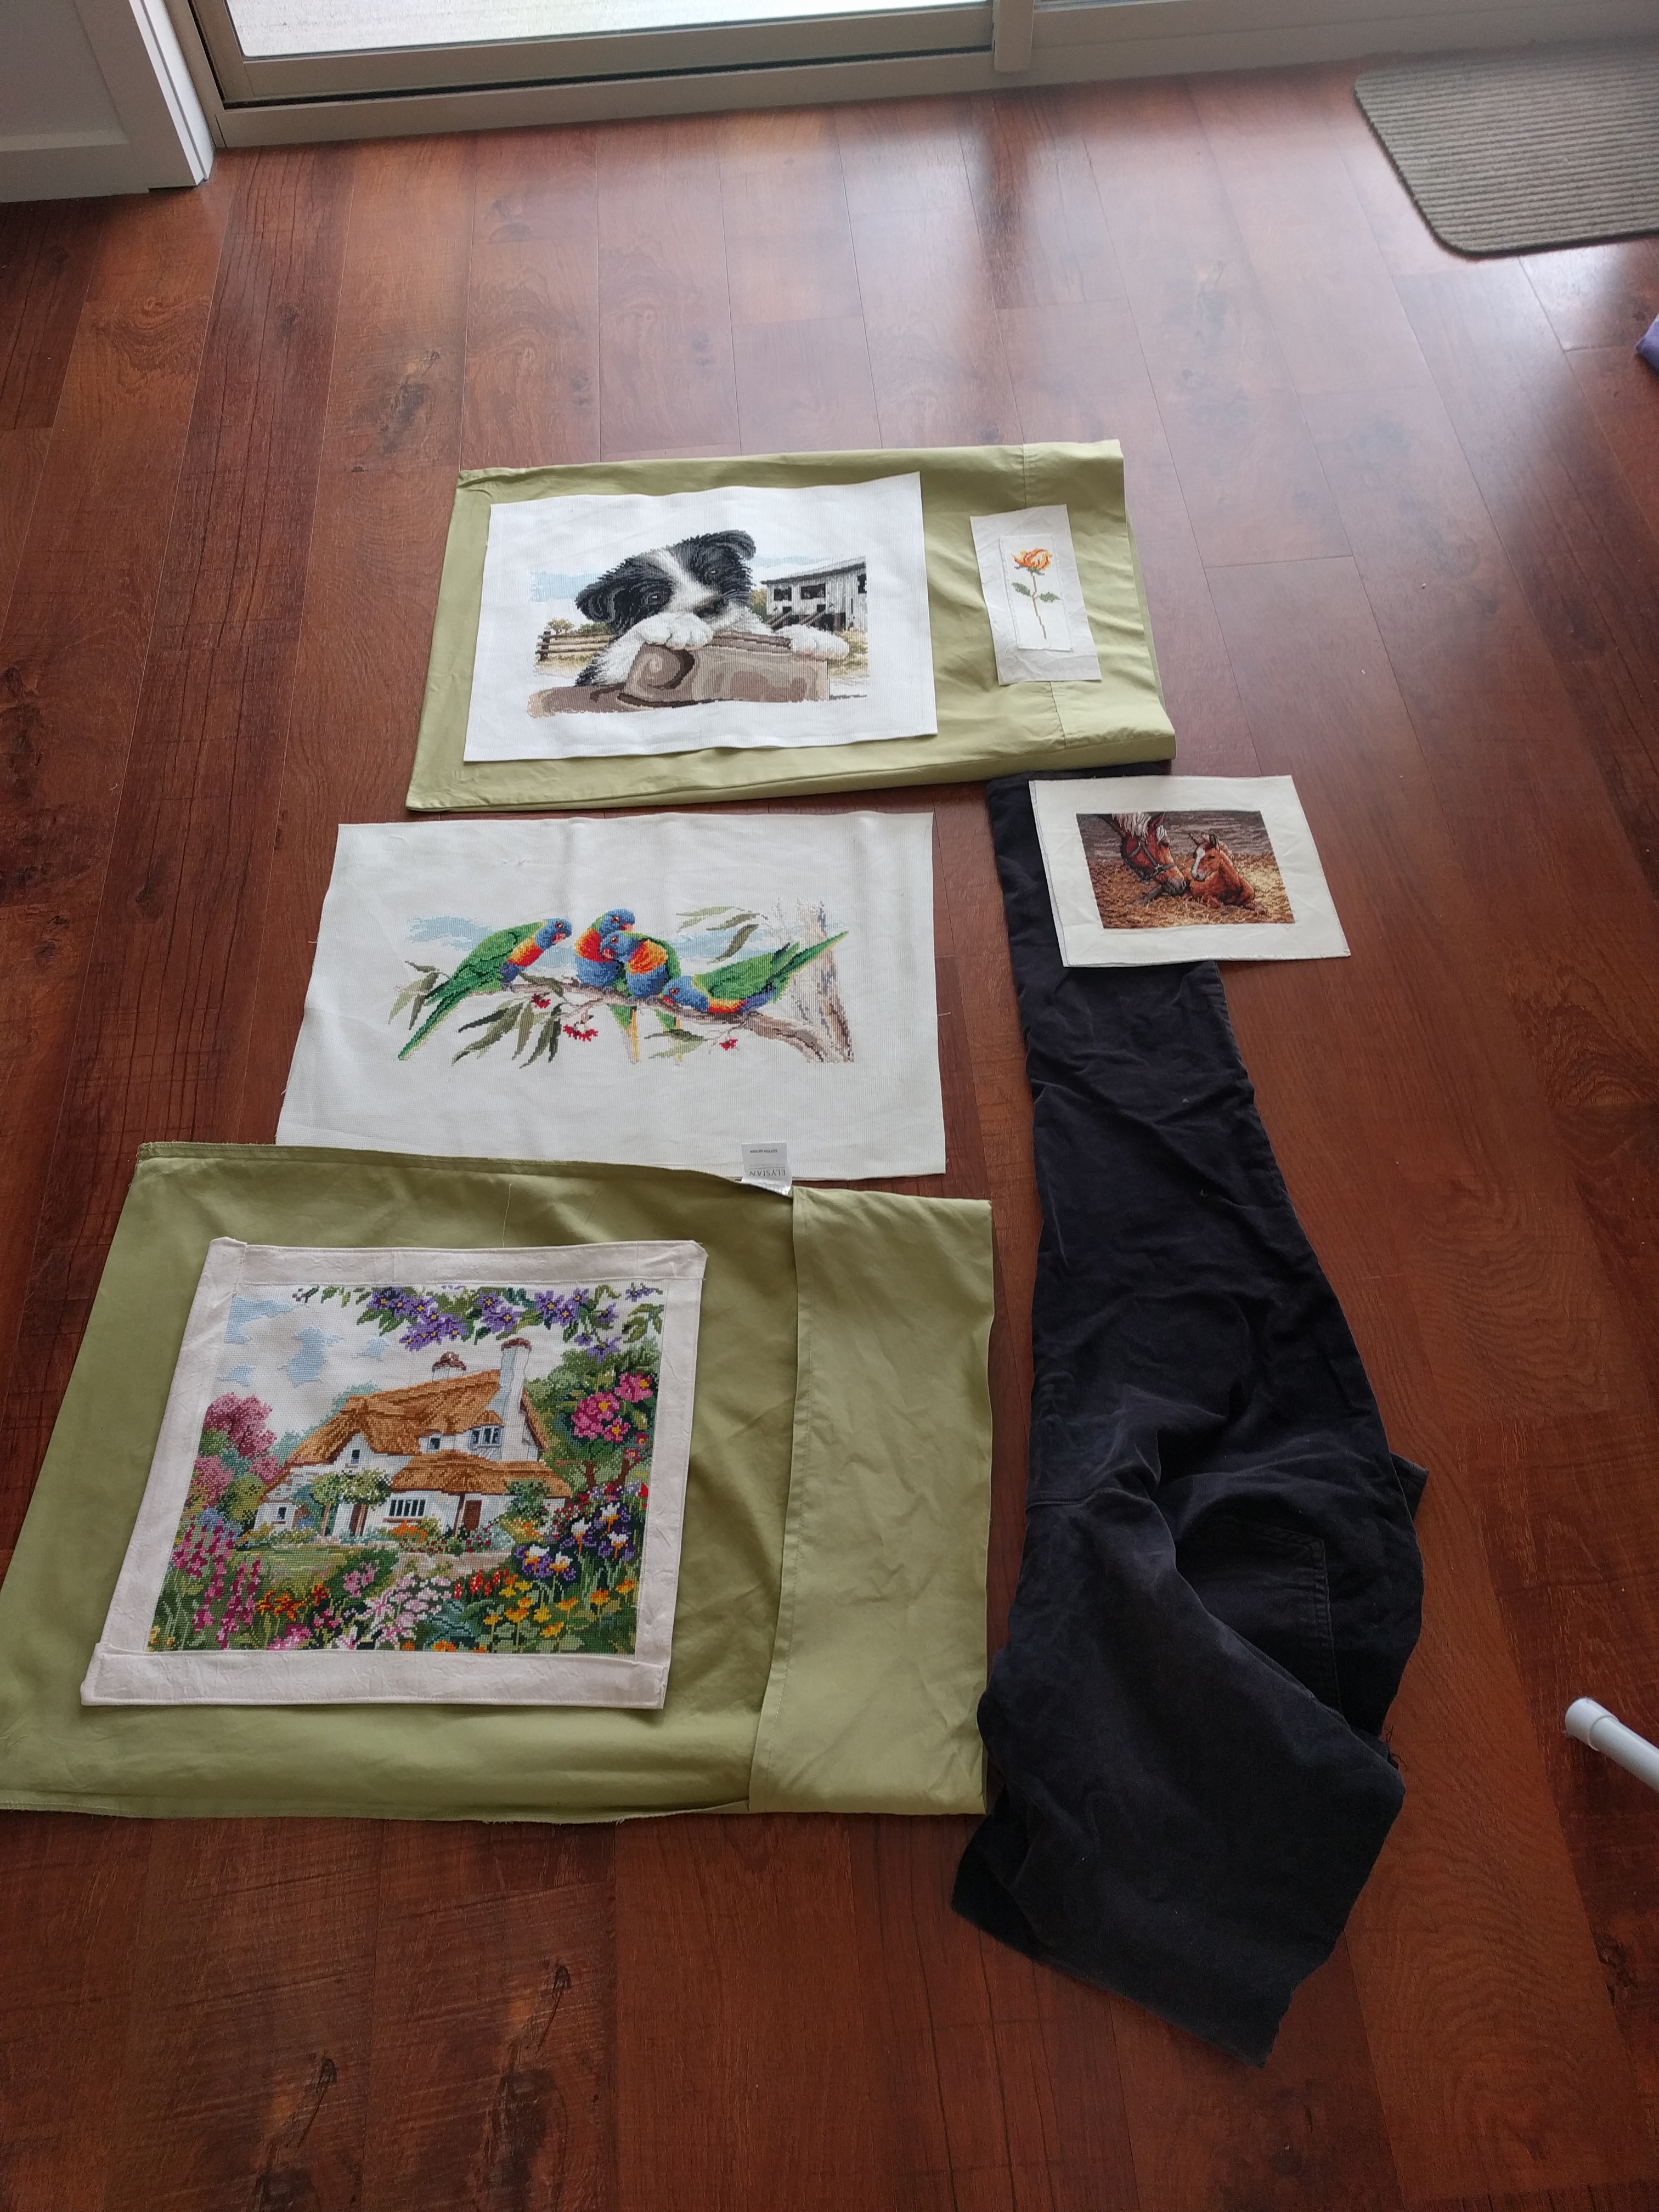
The closer I got to finishing the pictures and being ready to assemble the quilt, Pinterest became my best friend for all quilt related things – to the point that I created a board on Pinterest! I also decided that I would back/line the cross-stitch pictures with calico before I attached the navy blue and green borders. Below is how I attached the pictures to the calico and I made the most of the huge floor space at my parents space.

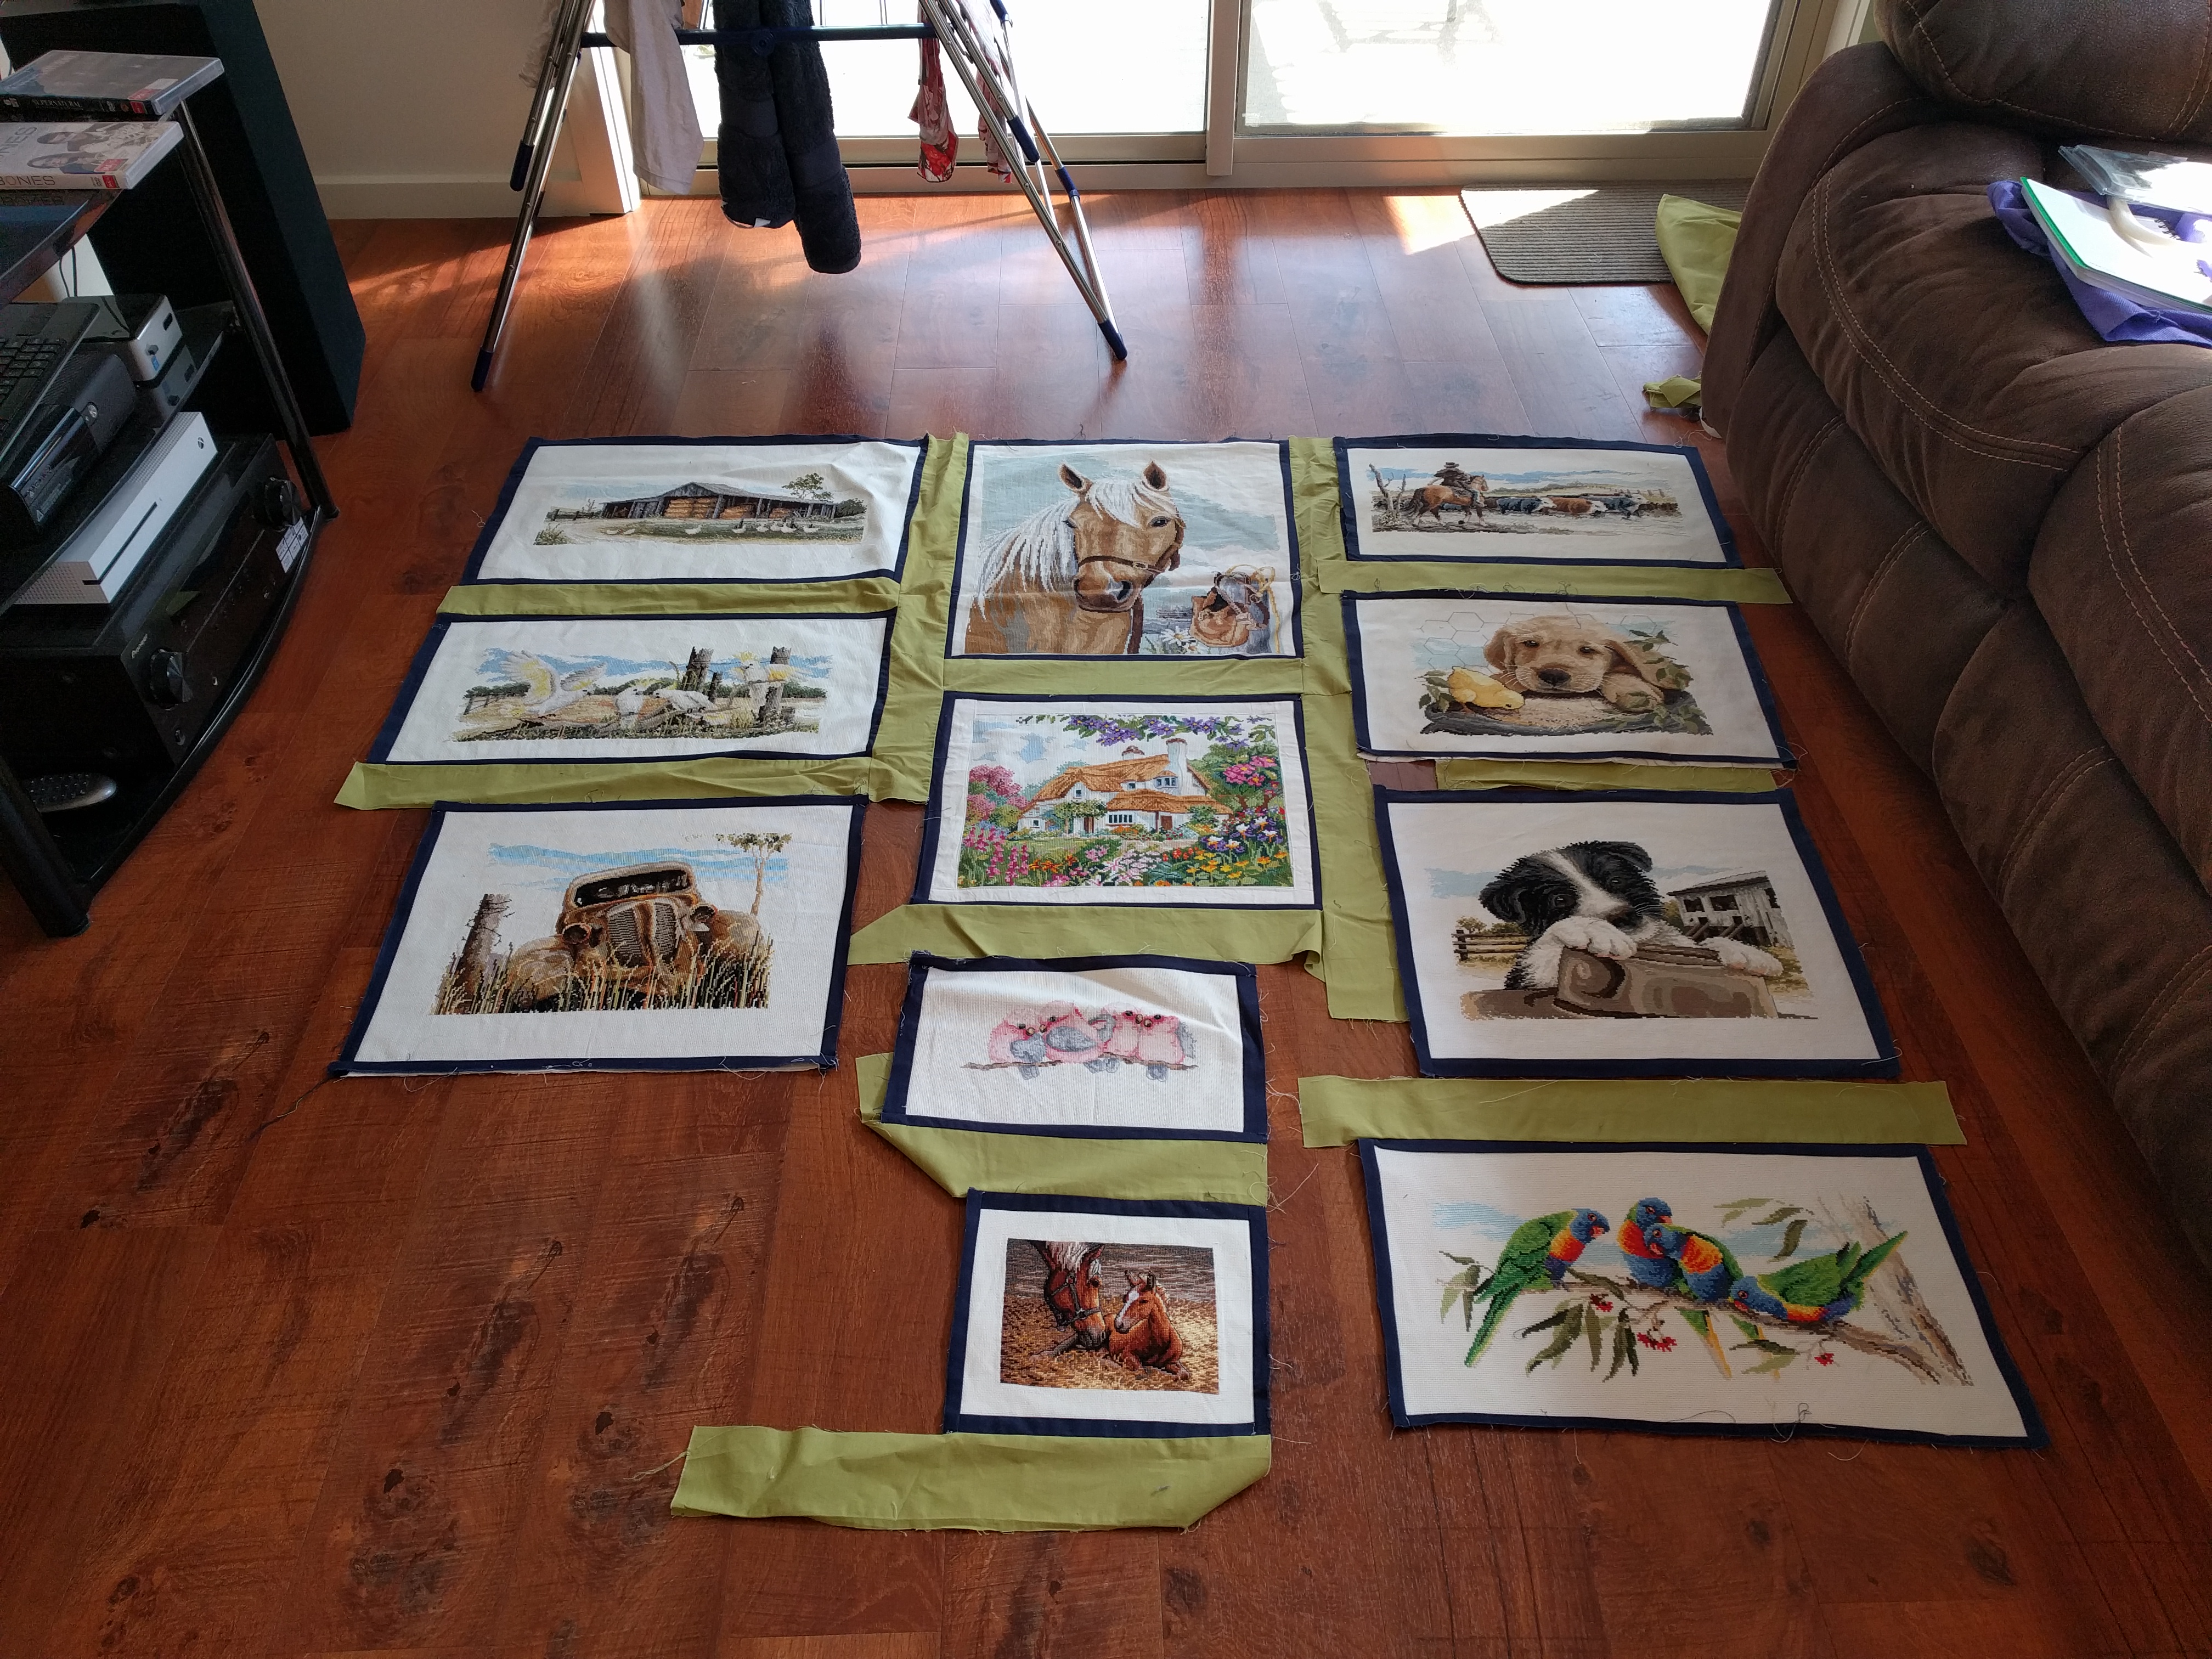
Layout options
Once I had the cross stitch pictures lined with calico and the pictures had the navy blue borders, I had a lot of fun and stress with trying to figure out how it should be set out. The images below are just a few of the ways I had the pictures set out before I decided on the final setting…


Once I was happy with the layout, joining it all together with the green fabric proved to be harder than I thought it would be – mostly because I wasn’t following an official pattern and I didn’t have any specific measurements in mind. All I knew was that I wanted it to be as square as possible in the end.
Things I have learnt to date about this quilt.
To date, this quilt has taught me a lot about myself and as much as it may frustrate me, I can make decisions on the fly. Other things I have learnt include:
- Patience when I’m frogging something (a cross stitch term I’ve recently learnt that refers to un-picking something – aka ‘ribbit’ like the sound a frog makes);
- The amount of thread I’ll go through for the sewing machine because of the amount of frogging and because I’m not following a set pattern;
- How heavy the quilt becomes the more it comes together;
- Best intentions with sewing straight (including having pre-determined guidelines to follow) doesn’t always mean that I will sew straight!
- Perfection. In quilting I’ve found the need for it is more important than ever – especially if I want things to be square and line up just so;
- Where there’s a will there’s a way. I accept that this quilt will not be as perfect or as flat or as straight or as square as I want it to be. However, I have found that there are alternate ways to achieve what I want.
Where to from here?
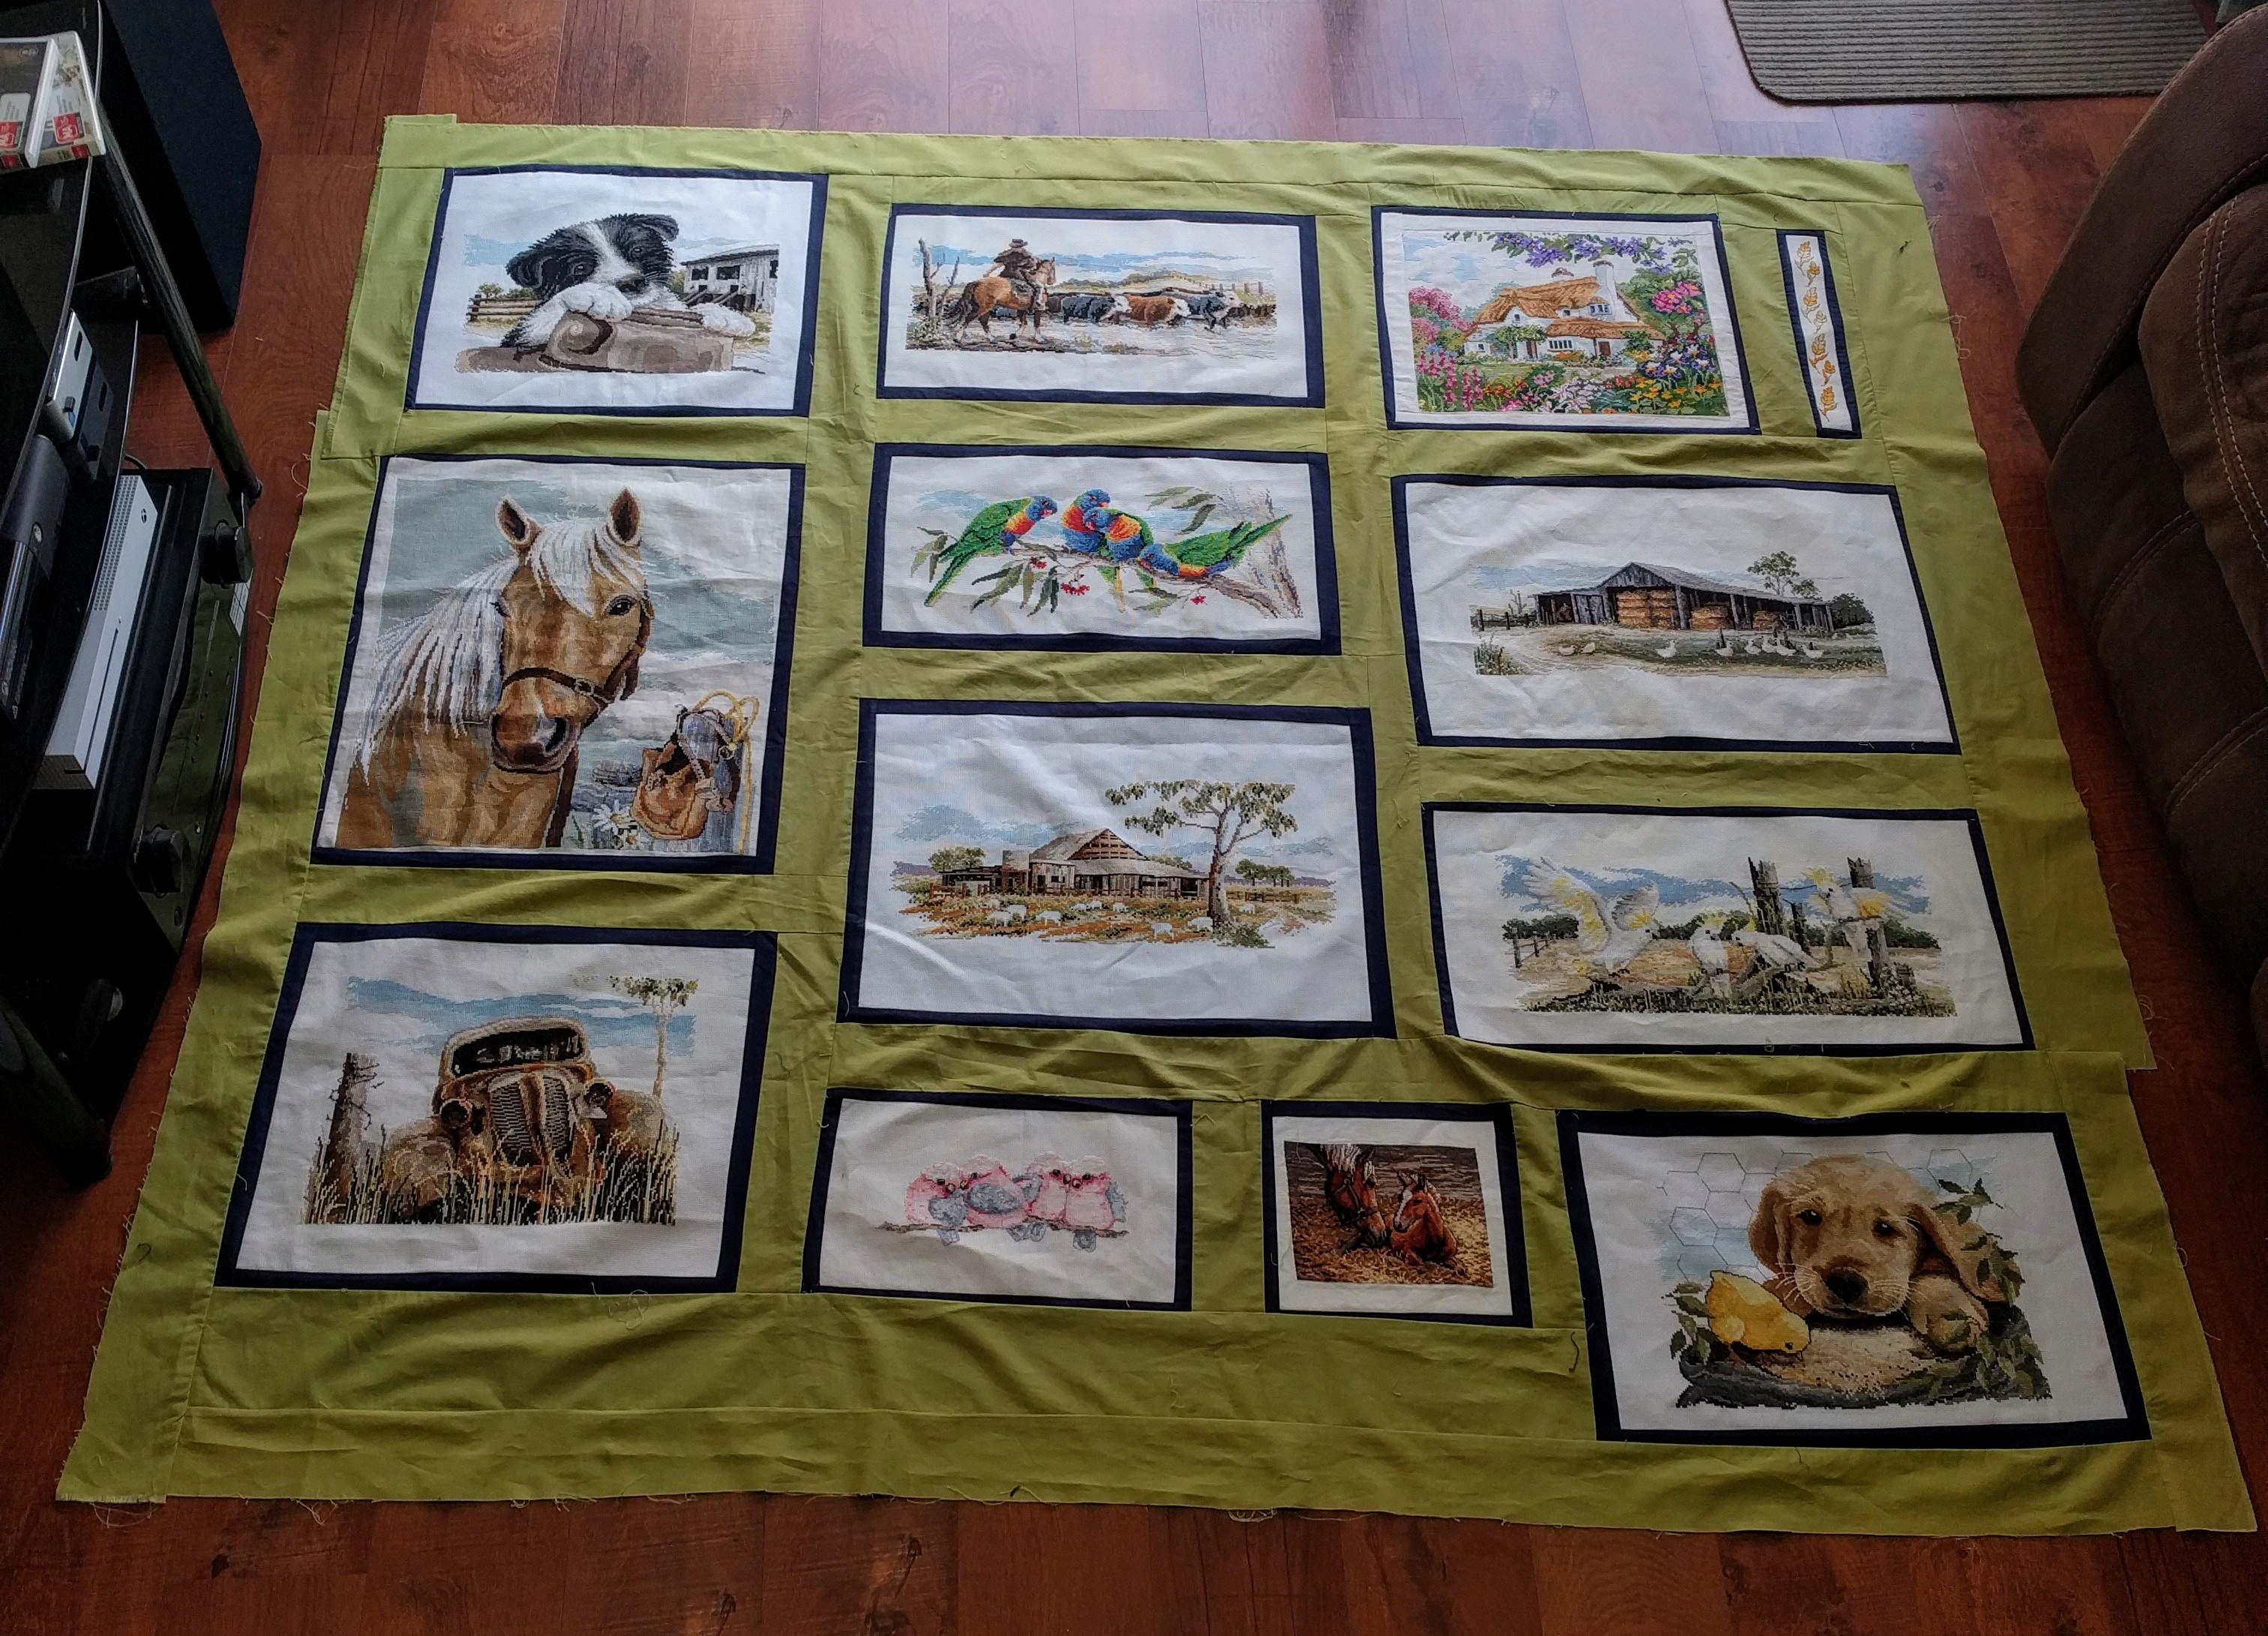
Now that the quilt is reasonably square, I can now measure it up for batting that I aim to purchase soon. Meanwhile, I have purchased additional navy blue quilting fabric that I will sew over the top of the existing navy blue borders around each cross stitch picture. My aim is to have the borders as even as possible whilst trying to flatten out the quilt as much as I can. In the image above, I’ve tried to flatten it out as much as I can with no avail. To try and ensure that the borders don’t slip as I’m sewing them, my aim is to use double sided tape to hold the fabric in place. My additional aim is to sew the borders on whilst the batting is attached, to reduce any potential movement that the batting may do over time.
Once I’m happy with the borders and the batting, I’ll attach the back of the quilt and the trim/final border and it should then be finished!

