Posted in Uncategorized

Top 5 Cross Stitch Things to Perfect (and 5 I may never)

This post reminds me that mistakes are a good thing, as it means that I’m still learning and that I have the ability to do what I love and share these things with like-minded people. I also accept that I may never perfect these top 5 or they may be replaced with a new 5!

5. Keeping track of needles and pencils

Prior to receiving a needle minder as a birthday gift, I was regularly dropping needles and jumping up from the couch or chair to look for the needle amongst the cushions and dust and dirt on the floor. I would be doing a similar thing with the lead pencils when the couch would eat them or I’d accidentally drop them on the floor.

4. Counting Crosses

Every so often I joke with family and friends that I need to go back to school and learn how to count and get my eyes checked. This is based around me miscounting how many stitches I need to do and tracking where I am in the pattern when I’m tired or distracted, resulting in me needing to unpick parts of the picture and re-stitch it. I’ve also been clever enough to mark off parts of the pattern that I’ve not even stitched yet!

3. Getting my measurements right

If you’re anything like me, you’ll love to make the most out of your fabric stores that have been built up from trimming up other cross-stitch projects. This means that at times I come up a bit short when I’m trying to find the right amount of fabric for a project I’m working on or I have just completely misread the measurements at the front of the pattern.

White Horse

This has often left me stressing as I’m stitching, whether or not I’ll have enough fabric to fit the design on it. I’ve even made the mistake of stitching a picture around the wrong way! This happened when I first started the picture and didn’t pay enough attention to which way I had the fabric in the hoop. Which meant that I stitched a landscape picture in a portrait view and I give full credit to the professional framers who framed up this picture for me. They have done an amazing job with the product I gave them.

“Catch of the Day” by Bryan Moon – published/distributed by Dimensions

2. French Knots

When done well, French knots can really add that extra bit of detail to a picture that other types of stitches may not. It is also the one type of detail/stitch that I’ve never mastered! Admittedly, I’ve not practiced them much to help my cause. If anything, I’ve either avoided or delayed stitching some patterns that have this stitch or I’ve used beads in their place.

One of the things that I love about living in this day and age, is having IT devices and an internet connection at my finger tips and being able to look up anything that I need to. Which means that I can watch numerous YouTube clips on how to do French Knots. I’m also able to purchase a variety of needle minders and related tools to help me keep track of my lead pencils. I also love that technology enables me to have digital cross stitch patterns and digitally mark off the areas that I’ve stitched.

1. Cutting/Sewing Straight

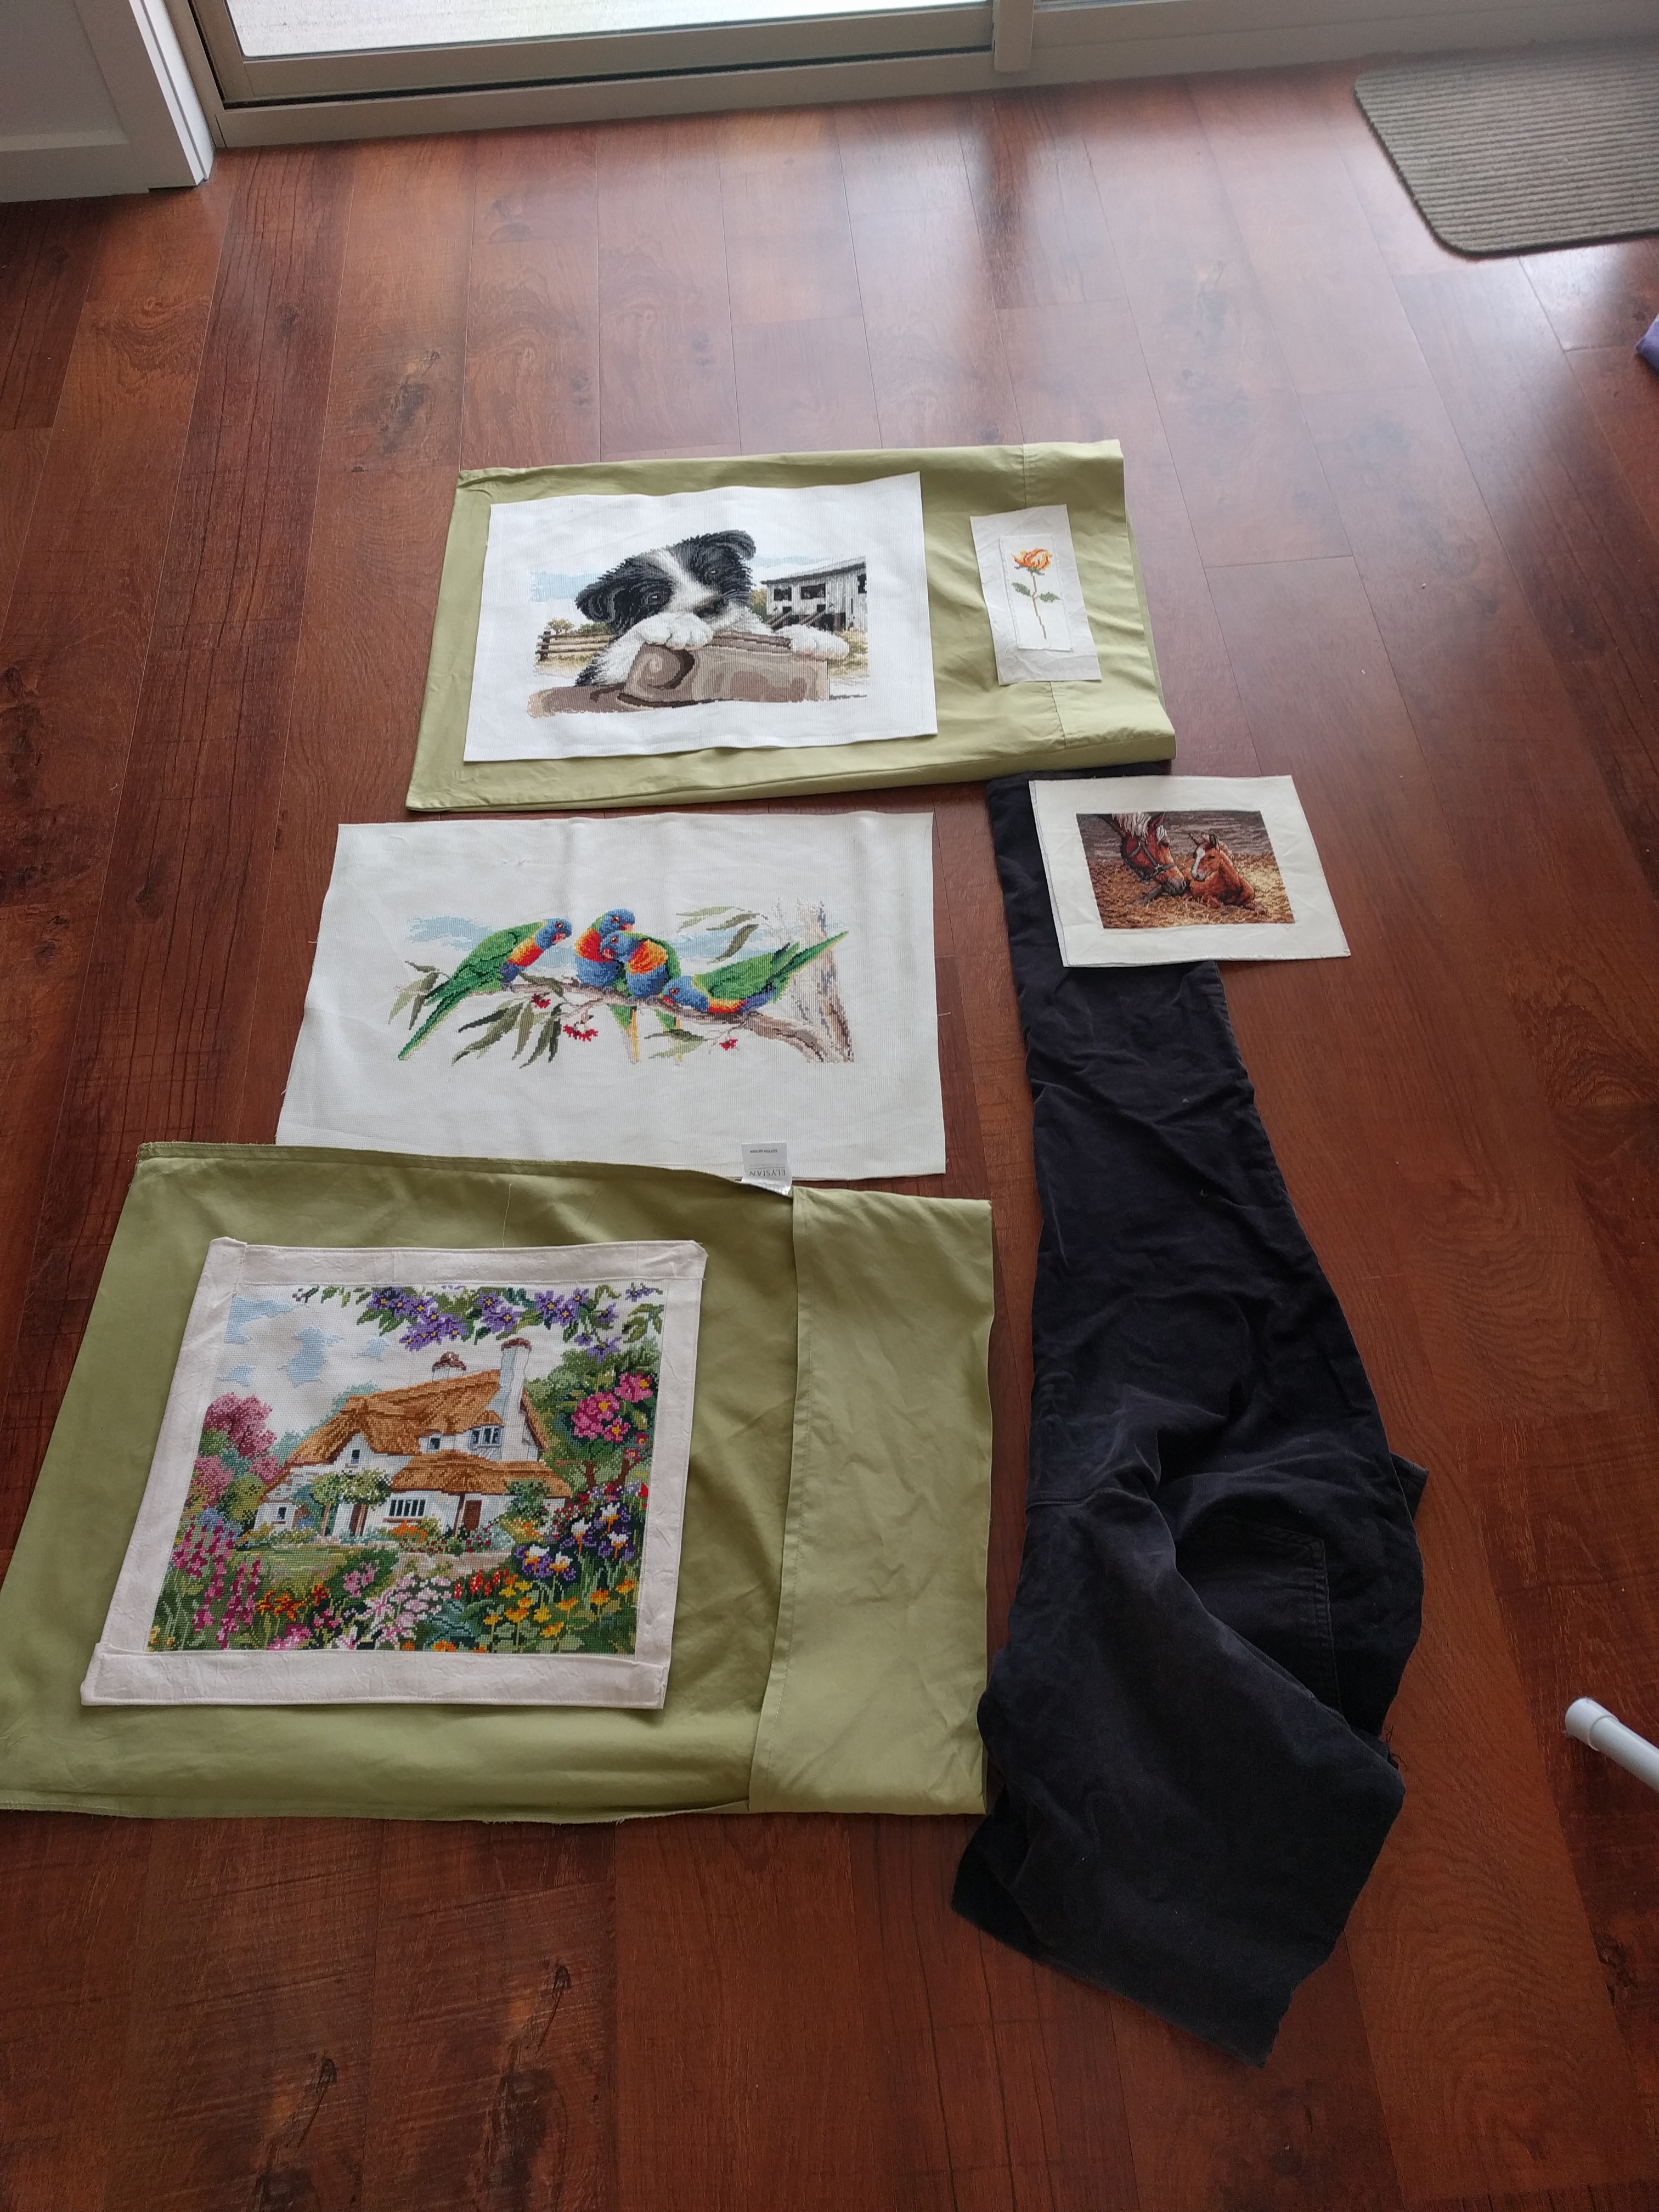
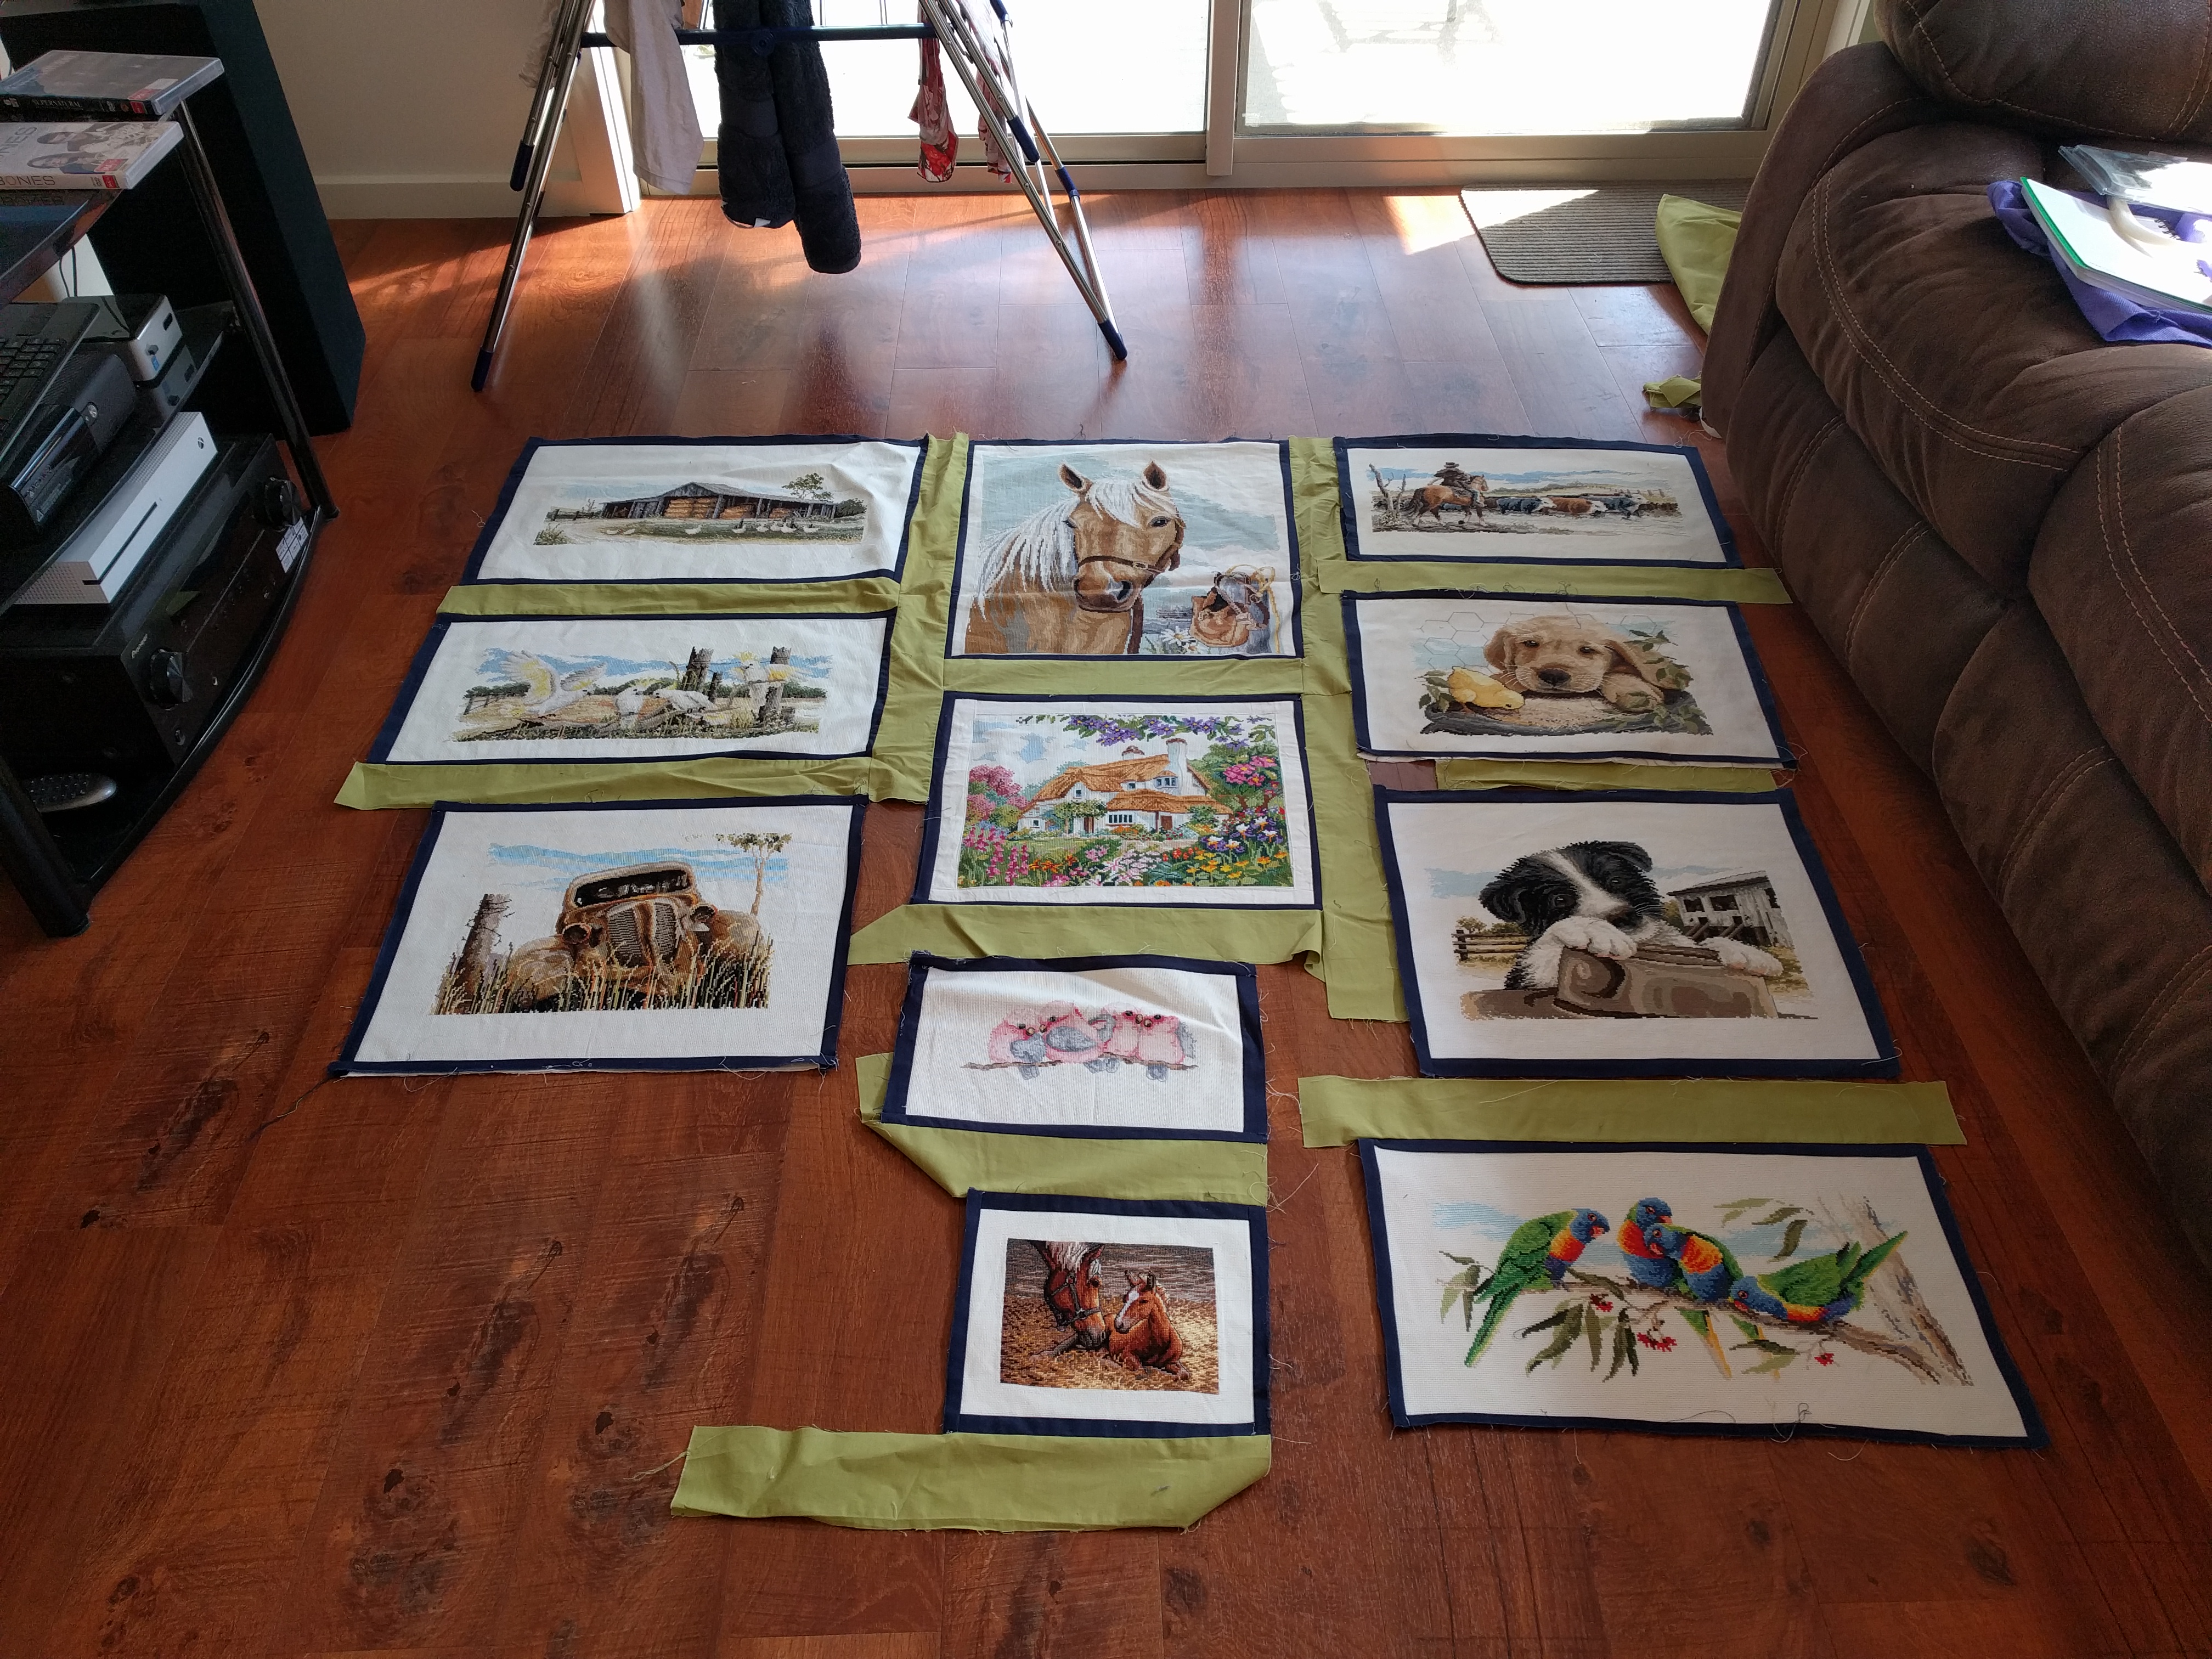
For many years I’ve joked with family, friends and colleagues that if I can’t walk straight when I’m sober, then so help me when I’m drunk! This inability to walk straight extends into my ability to cut straight, sew straight and draw a straight line. This is causing me headaches, as I’m attempting to make a quilt out of the various country themed cross stitch pictures I’ve stitched over the years. I’m not following a specific pattern or plan which is adding to the fun of trying to cut and sew straight! Instead, the images below are what I have in my mind of how I want the quilt to look – both images I came across on Pinterest.

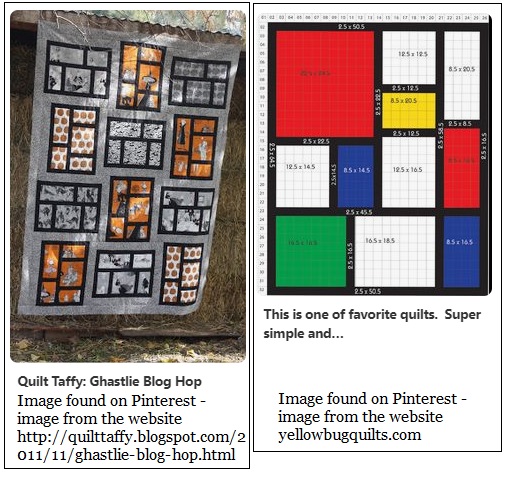
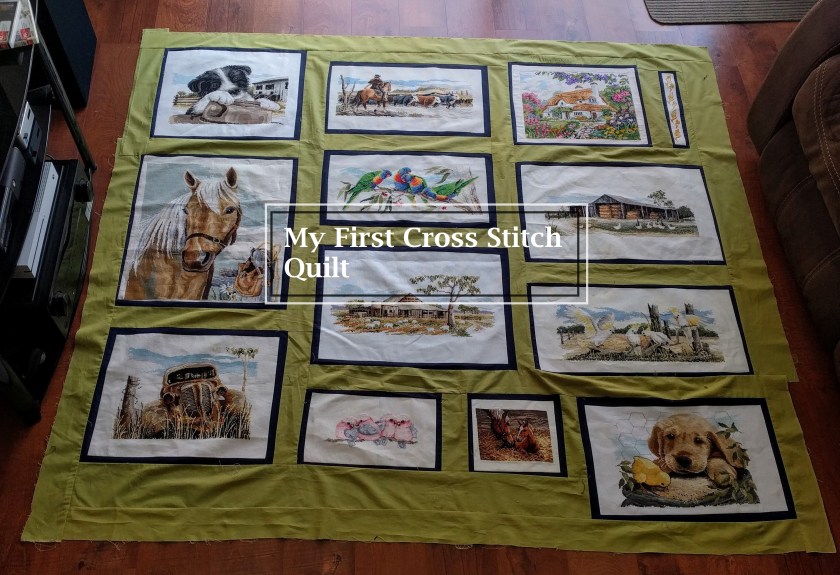
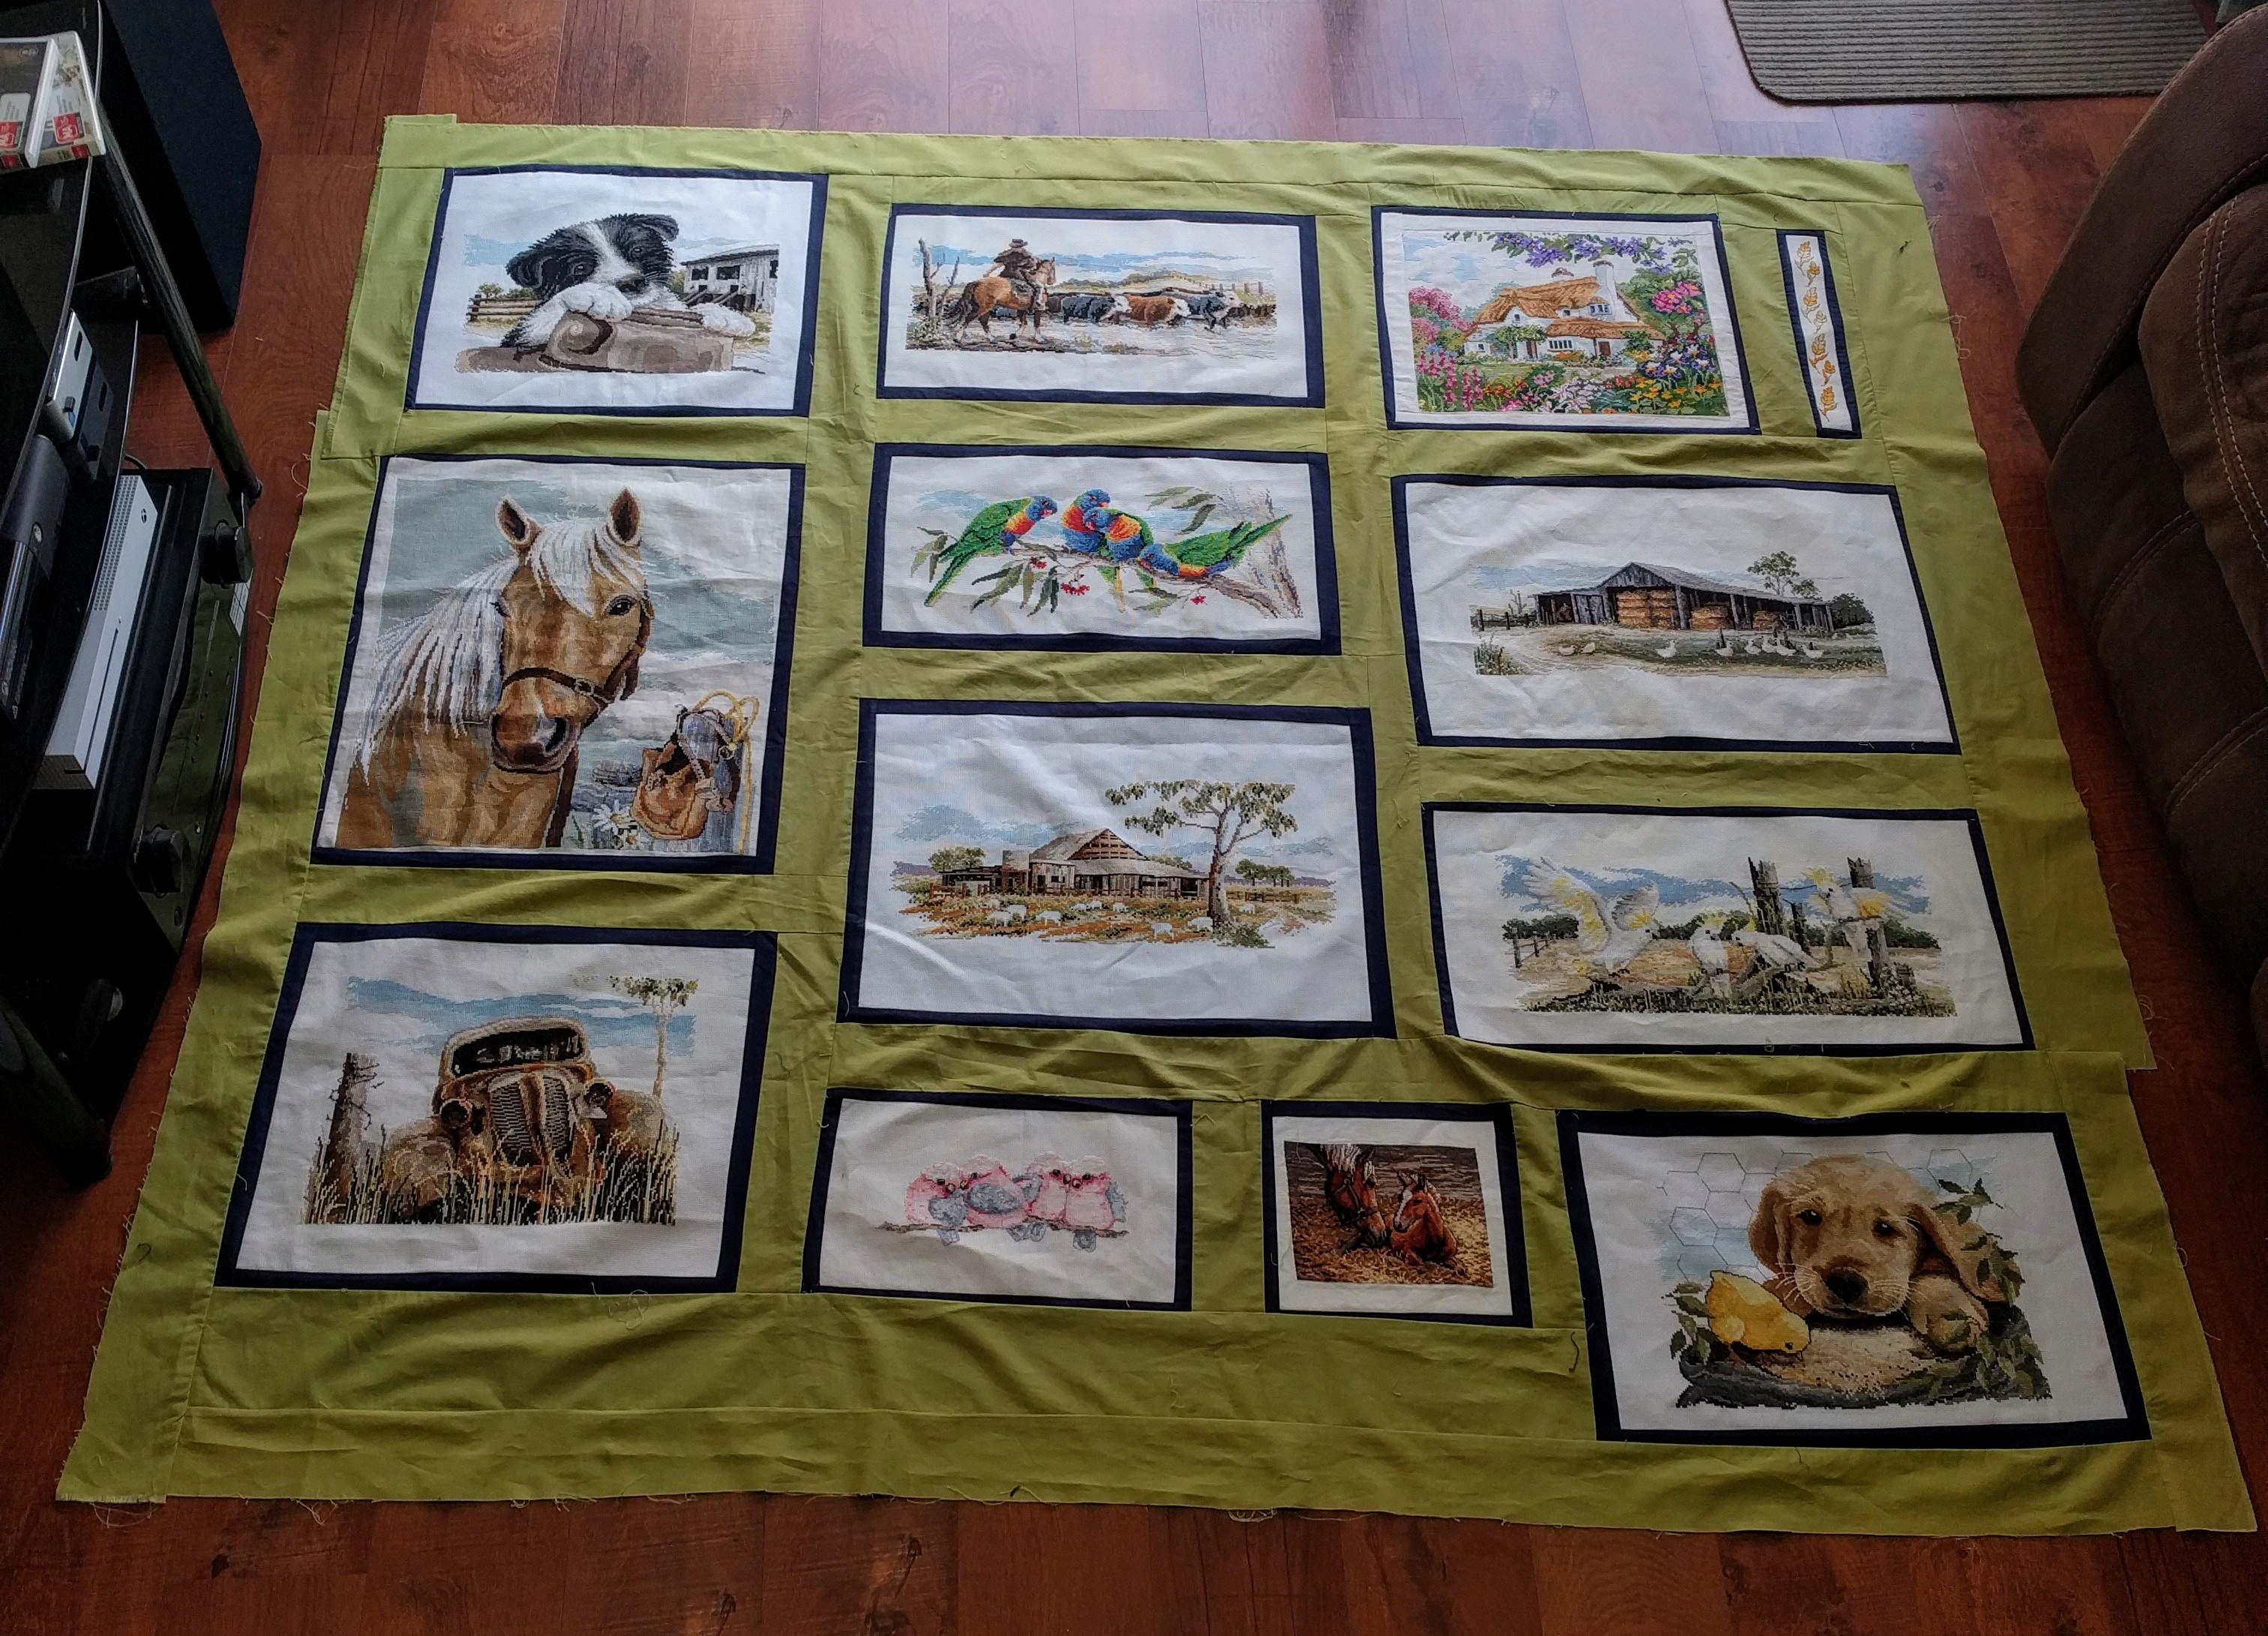
With these two images in mind, below is progress to date for my country quilt and you’ll see that sewing or cutting straight really isn’t my thing!

Country quilt progress as of April 2019

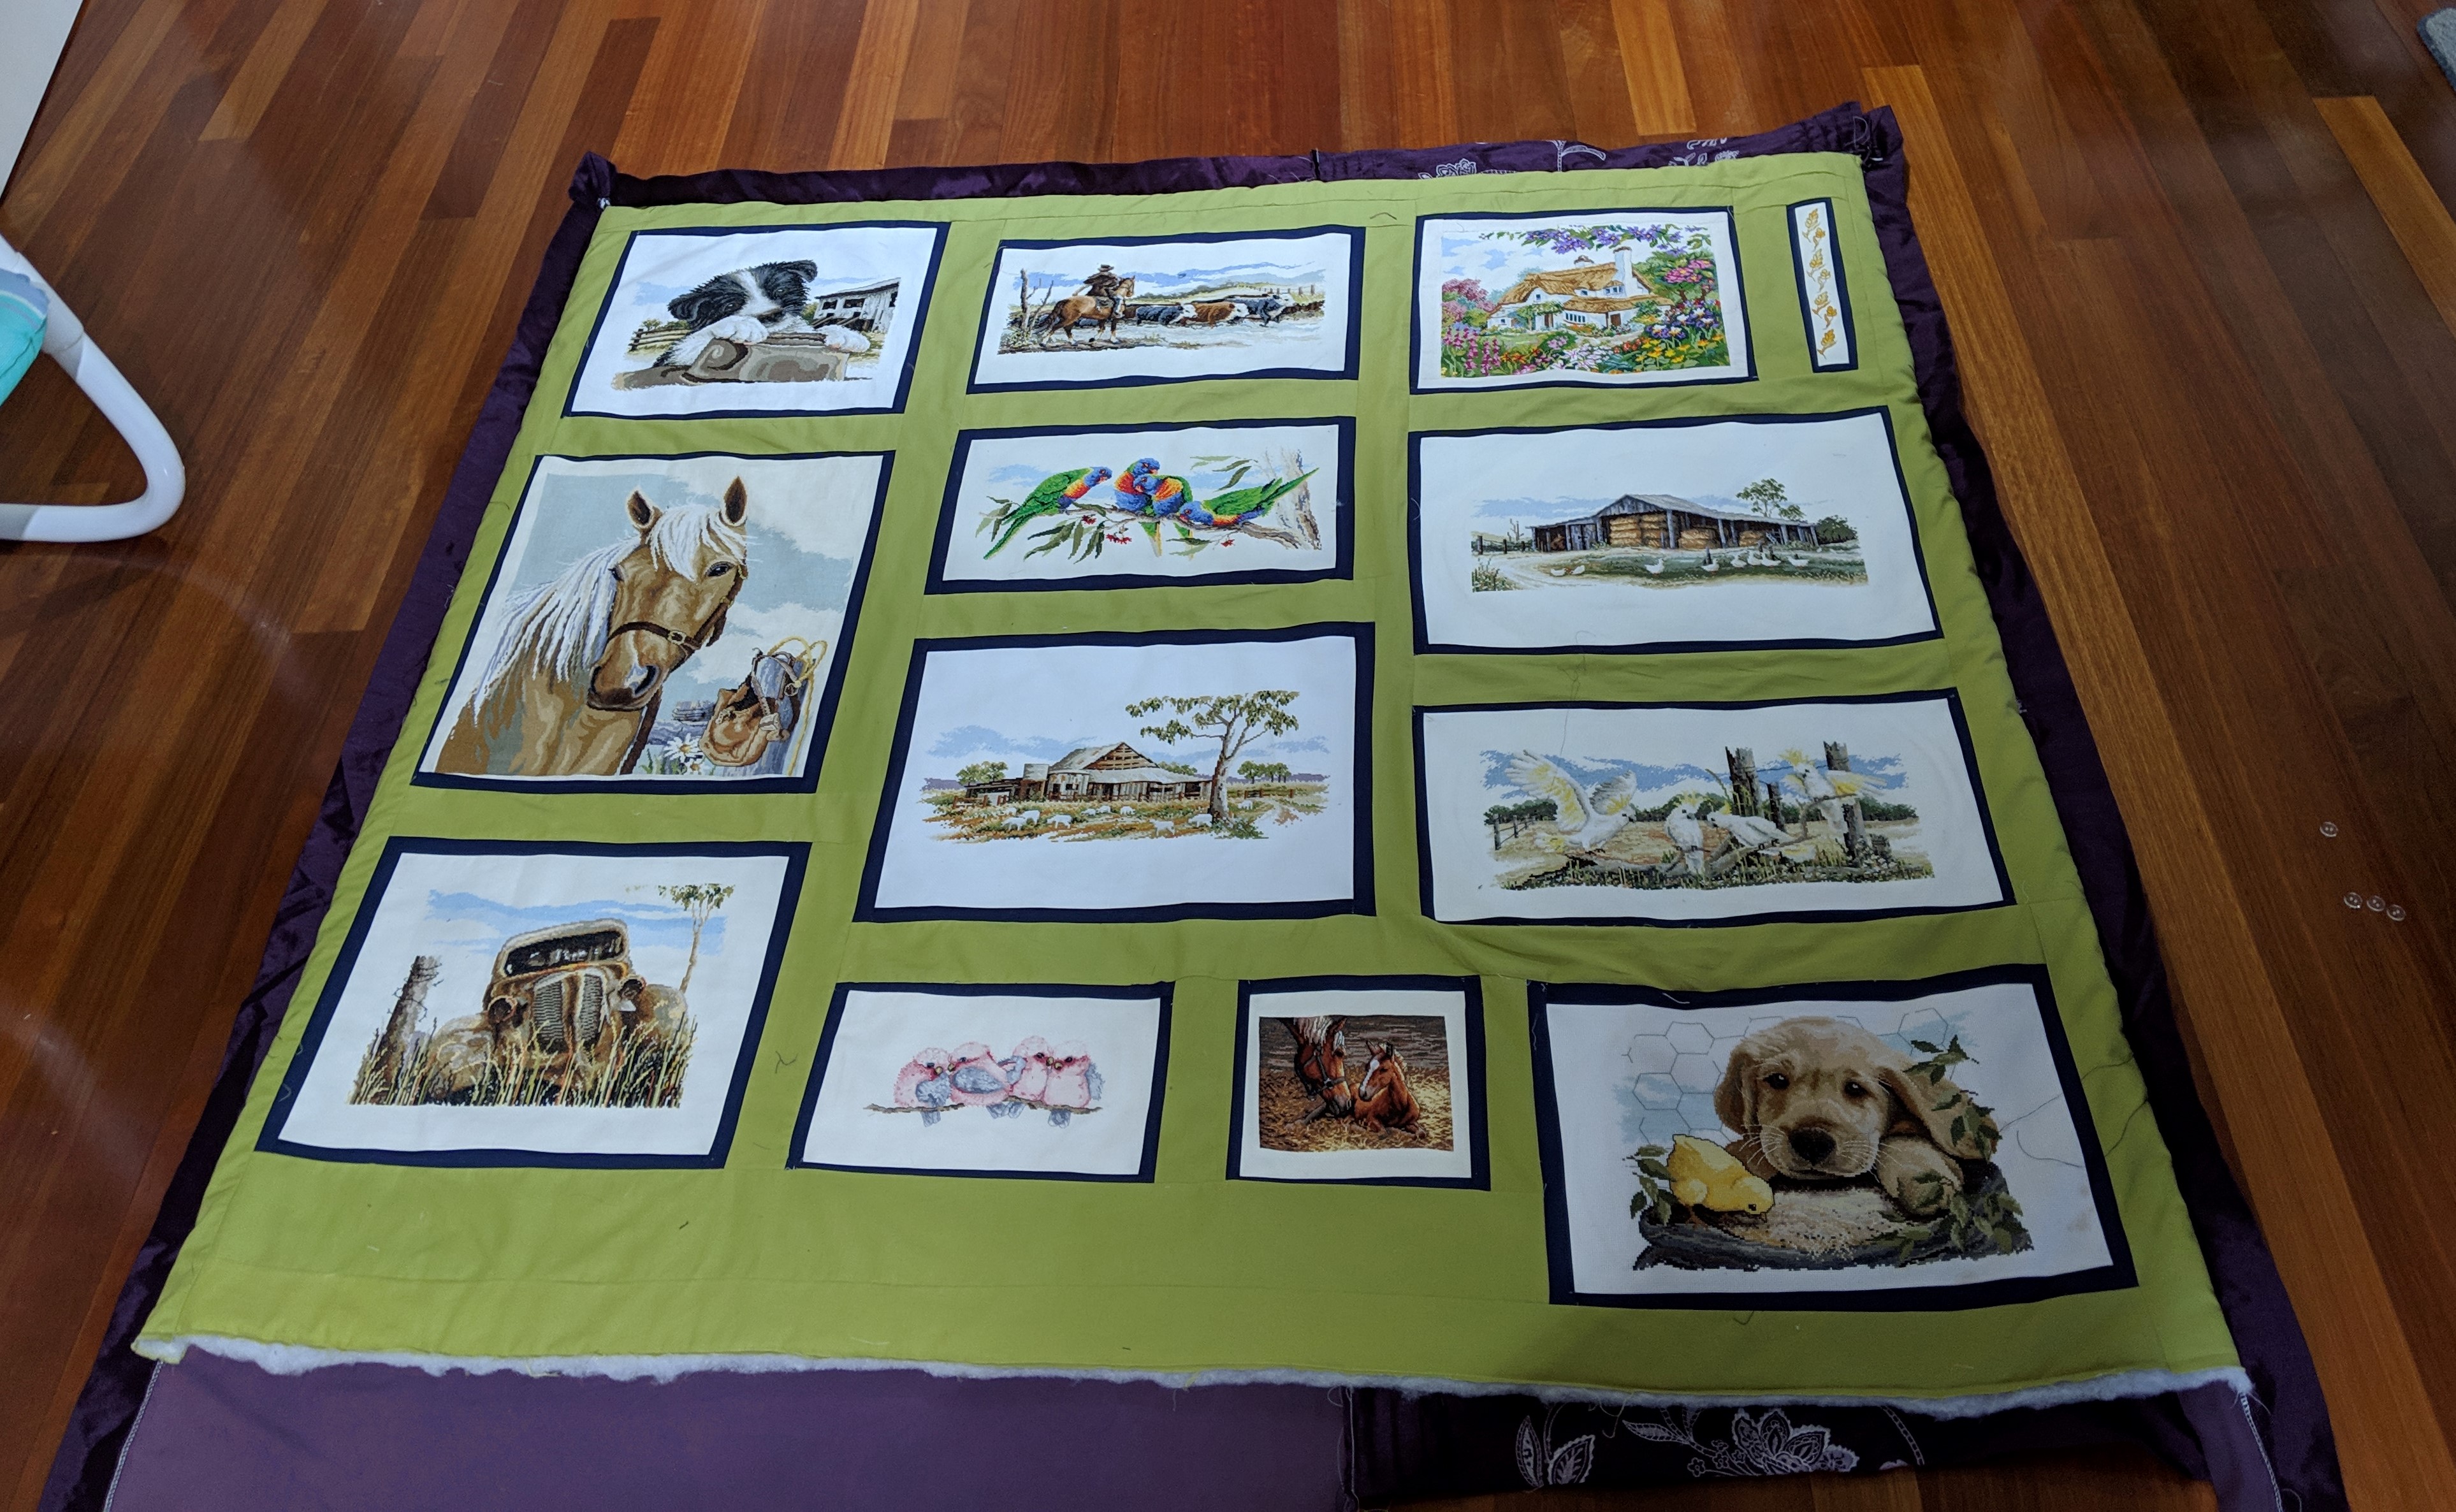
What I’m really excited about with this quilt is that I’m getting closer to finishing it. Also, by not strictly following a pattern, I’ve been able to problem solve on the go and talk with a variety of people to try and figure out how I can get past my creative blocks. Which means, watch this space to see how I fix the blue borders around the cross stitch pics!

Until next time, happy stitching everyone!

Posted in Uncategorized

My First Cross Stitch Country Quilt

Years in the making

This quilt has been years in the making. Each picture has taken me an average of 3 months to complete, whilst working full-time and studying part time (for 6 years) and other projects in between. The pictures that make up this quilt are mostly Country Threads. The cottage and cat at the fish pond are from two different cross stitch magazines I’ve had for years. The mare and foal are a Dimensions Gold Collection kit (aka Dimensions Good Morning (Horse and Foal)).

Representations

Each picture represents an element of my family’s farm. Growing up we always had two dogs, two cats, many horses, many cows and bulls, chooks (aka chickens), ducks, geese and briefly, a flock of sheep. We’ve also had wild foxes, wombats, cockatoos (that love eating the oats and grass seeds in the round bales of hay), lorikeets, rosellas, galahs, crows, rabbits, hares, the odd echidna and once a pelican! On the farm, we also have a shearing shed that we’ve never used as an actual shearing shed. Instead, it has been a fantastic place for us to store our horse-riding gear, cattle drenching equipment, a place for chooks and ducks to hatch and raise their young, places for the cats to snooze (sleep) and catch mice and rabbits, a place to store square bales of hay, a place for the horses to shelter from the weather and mend from illness or injury. The shearing shed has also been a place for us to store bits and pieces we have wanted to store from the weather.

The creative process

For years I’ve known that I’ve wanted to make a quilt out of these pictures, but I’ve never had a firm idea of how it would look, how big it would be and how many pictures it would exactly it would have. As the pictures progressed and accumulated, I started thinking about the farm on a broader scale and the common colours they involve. Which is how I decided upon the blue and green shades you see in the pictures.

Image shows how the navy blue and lime green looks as the border and connecting pieces for the cross stitch pictures.
Choosing the colours for quilting fabric.

The closer I got to finishing the pictures and being ready to assemble the quilt, Pinterest became my best friend for all quilt related things – to the point that I created a board on Pinterest! I also decided that I would back/line the cross-stitch pictures with calico before I attached the navy blue and green borders. Below is how I attached the pictures to the calico and I made the most of the huge floor space at my parents space.

Five metres worth of calico flat on the floor with cross stitch pictures pinned to it for me to cut out and sew.
Cross stitch pictures pinned to calico.

Layout options

Once I had the cross stitch pictures lined with calico and the pictures had the navy blue borders, I had a lot of fun and stress with trying to figure out how it should be set out. The images below are just a few of the ways I had the pictures set out before I decided on the final setting…

Quilt lay out option 1. Row 1 - left to right: Mare and foal, lorikeets, rose and border collie. Row 2 - left to right: Butterflies, small cat, Palamino horse, wheat, rusty old car and galahs. Row 3 - left to right: Labrador puppy with chick, English cottage, droving cattle across a creek.
Quilt layout option 1.
Quilt layout option 2. Row 1 - left to right: Hay shed, palamino horse, droving cattle across a creek. Row 2 - left to right: cockatoos, English cottage, labrador puppy with chick.
Row 3 - left to right: Rusty car, galahs, border collie.
Row 4 - left to right: mare and foal, Lorikeets.
Layout option 2
Layout option 3
Layout option 3

Once I was happy with the layout, joining it all together with the green fabric proved to be harder than I thought it would be – mostly because I wasn’t following an official pattern and I didn’t have any specific measurements in mind. All I knew was that I wanted it to be as square as possible in the end.

Things I have learnt to date about this quilt.

To date, this quilt has taught me a lot about myself and as much as it may frustrate me, I can make decisions on the fly. Other things I have learnt include:

  • Patience when I’m frogging something (a cross stitch term I’ve recently learnt that refers to un-picking something – aka ‘ribbit’ like the sound a frog makes);
  • The amount of thread I’ll go through for the sewing machine because of the amount of frogging and because I’m not following a set pattern;
  • How heavy the quilt becomes the more it comes together;
  • Best intentions with sewing straight (including having pre-determined guidelines to follow) doesn’t always mean that I will sew straight!
  • Perfection. In quilting I’ve found the need for it is more important than ever – especially if I want things to be square and line up just so;
  • Where there’s a will there’s a way. I accept that this quilt will not be as perfect or as flat or as straight or as square as I want it to be. However, I have found that there are alternate ways to achieve what I want.

Where to from here?

Quilt progress as of 3rd February 2019.

Now that the quilt is reasonably square, I can now measure it up for batting that I aim to purchase soon. Meanwhile, I have purchased additional navy blue quilting fabric that I will sew over the top of the existing navy blue borders around each cross stitch picture. My aim is to have the borders as even as possible whilst trying to flatten out the quilt as much as I can. In the image above, I’ve tried to flatten it out as much as I can with no avail. To try and ensure that the borders don’t slip as I’m sewing them, my aim is to use double sided tape to hold the fabric in place. My additional aim is to sew the borders on whilst the batting is attached, to reduce any potential movement that the batting may do over time.

Once I’m happy with the borders and the batting, I’ll attach the back of the quilt and the trim/final border and it should then be finished!