The creative writing bug left me for a while and I felt that I didn’t have much to write about regarding cross stitch and what I’ve been doing – especially things that would make any of the posts interesting!
Thankfully it doesn’t mean I’ve been idle, because I cleaned out some of my cupboards and found some quilting fabric I’d forgotten about and tried my hand at making some project bags:
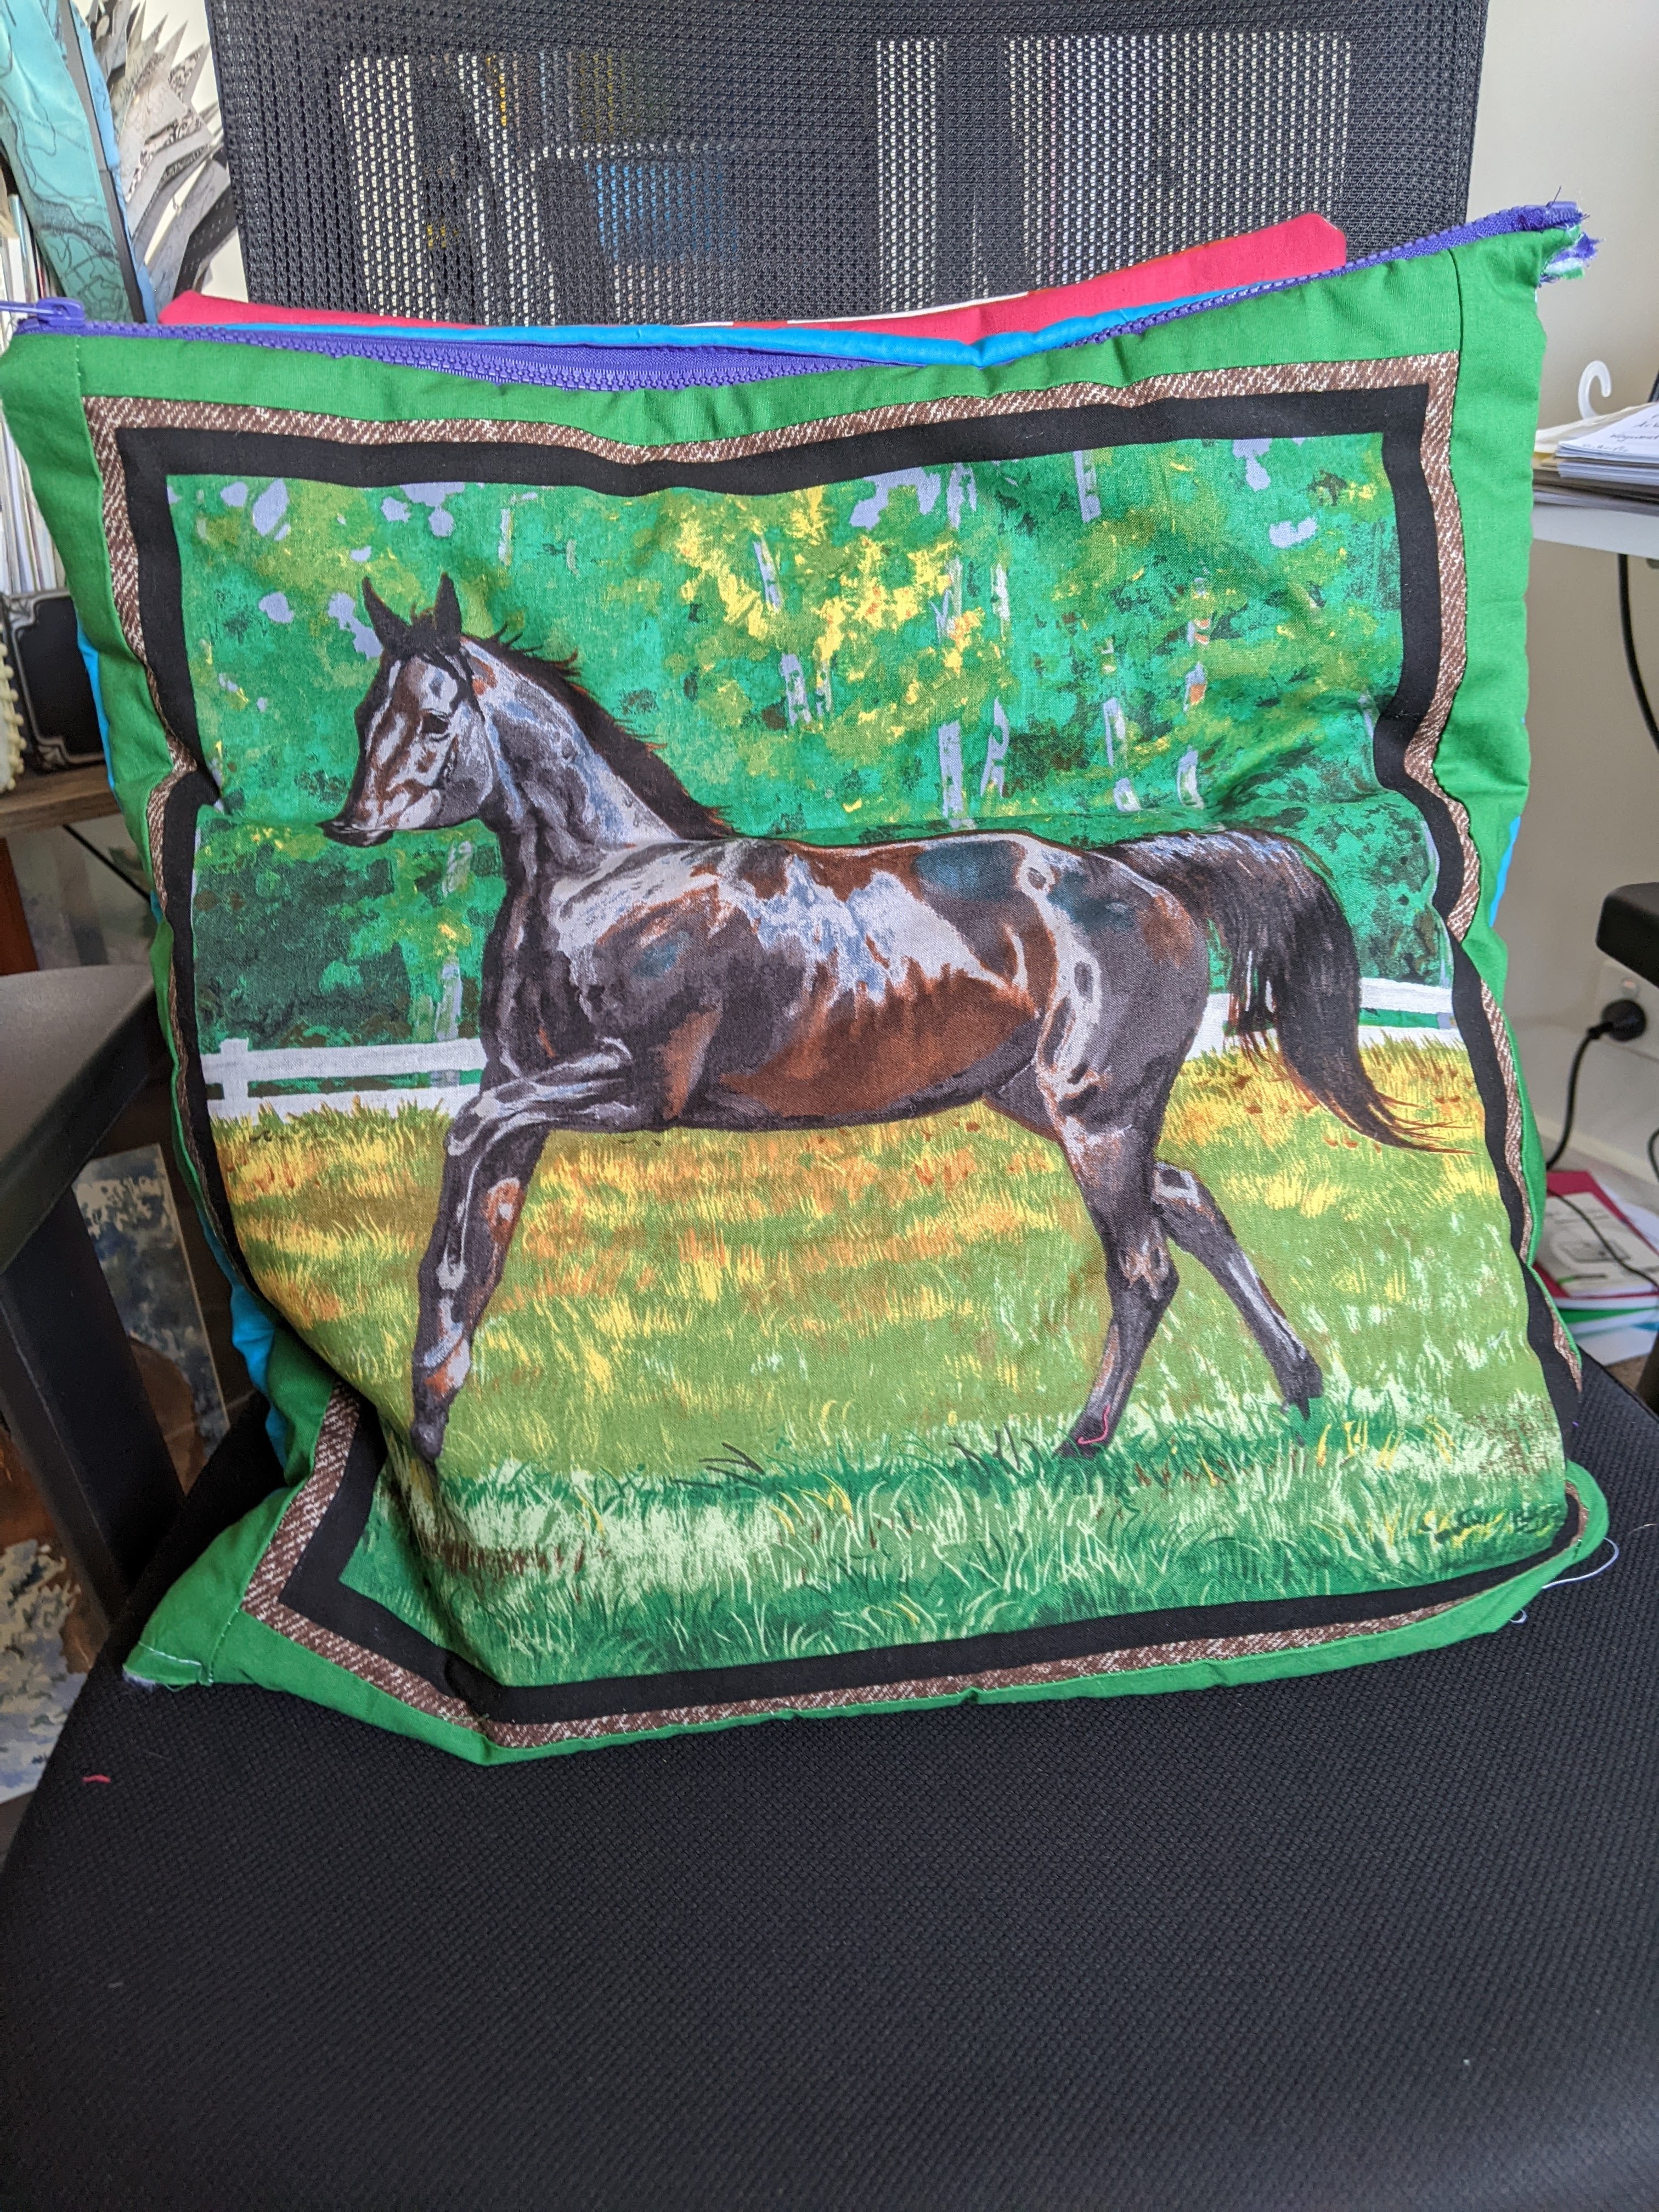
So far I’ve created three bags and thankfully each time I’ve improved and learnt my lessons from the previous bag – to then create new lessons for future bags! The above images show both sides of the bags and the inside of them where I’ve tried to line them with some fabric as a point of interest.
The additional aim of these bags is to help me keep my physical cross stitch patterns organised. The horse, teddy bears and dog project bags hold cross stitch patterns on those things – horses, teddy bears and dogs.
My eventual aim is to attach cards to the zippers that will say what the project is inside, as the need arises.
Lesson 1 – Padding’s a nice idea but the type of padding used is more important, if it’s going to be used
The positive is that I successfully attached my first zip to some fabric using a special foot that came with my sewing machine!
The negative is that I’m not going to use left-over batting I used for my cross stitch quilt! As much as I tried to keep things as lined up and straight as possible, the padding gave the bag a mind of its own when it came time to stitching – even when I was using pins! If I due use padding again, I’ll definitely use something thinner and use special quilting clips like the ones below (that I could purchase from a craft store):
Image of multi coloured sewing clips – courtesy of Google Image Search
Lesson 2 – Securing the ends of the zipper will help with opening and closing
The images below are from the first bag I created and it opens and closes smoothly. The ends however aren’t neat and they need to be. That’s partially due to the type of zipper I used for this bag and the other part is due to me ‘winging’ it and not following a specific pattern. My initial logic was – it’s just a bag, it should be simple enough!
Lesson 3 – Following a pattern and paying attention to that pattern is important
To toot my own horn, I’m good at writing procedures and instructions. I have trouble following instructions and procedures though. It does depend upon what I’m doing and the complexity of what I need to do. If I have to do something practical like making a project bag, then I find it easier to follow a series of images than written instructions.
For the second bag, I tried to follow a tutorial that Elizabeth Ann Can Stitch posted about a year ago. It worked reasonably well to begin with. There was a bit of re-watching certain parts to be sure I was on the right track. The hardest part I found was attaching the front to the back. That was partially due to me getting to the point where I thought that I was okay and on the right track and didn’t need to keep re-watching!
Because of this thought pattern, I had to get creative at times and add more fabric to the bag to make it all line up!
Image of the second project bag – additional fabric added to make it square
This is where and why I can never be a builder or work in construction where supplies are very expensive. As much as I measure twice and cut once, I can measure 10 times and cut once and still get it wrong!
The positive to come out of this bag is my improved zipper attachment to the bag – much to the detriment of a needle on my sewing machine that was sacrificed as part of the sewing process. I had learnt from my first bag to really keep my seams straight and make sure everything lined up. For the majority of the bag I was able to do this and that’s when the needle broke when I was sewing a part of the zipper. However, there was still one part of the bag where I hadn’t quite gotten the whole seam of the fabric, as shown below:
Close up of the second bag where some of the fabric wasn’t captured in the seams – just above the zipper.
Lesson 4 – Converting inches to centemetrs to ensure precision of the pattern
One of the things I struggled with creating the second bag was all of the measurements were in inches. Normally that wouldn’t be a problem because I have a tape that uses both types of measurements. The challenge came when I wanted to use a specific panel of fabric that wasn’t to the inch or half inch and my ability to determine if it’s a quarter of an inch, an eighth of an inch etc. That’s when I started using a mixture of inches and centemetres and noting down the measurements where I adjusted them. That’s when the additional fabric had to be added to the bag!
Lesson 5 – Leaving it to memory then winging it
For the most part, I’m really happy with how my third bag turned out since I had made some adjustments to the dimensions and I was going by memory for how to assemble it. I’m happy with how neat the seams are and I don’t have any frayed edges where I’ve not been able to capture all of the edges!
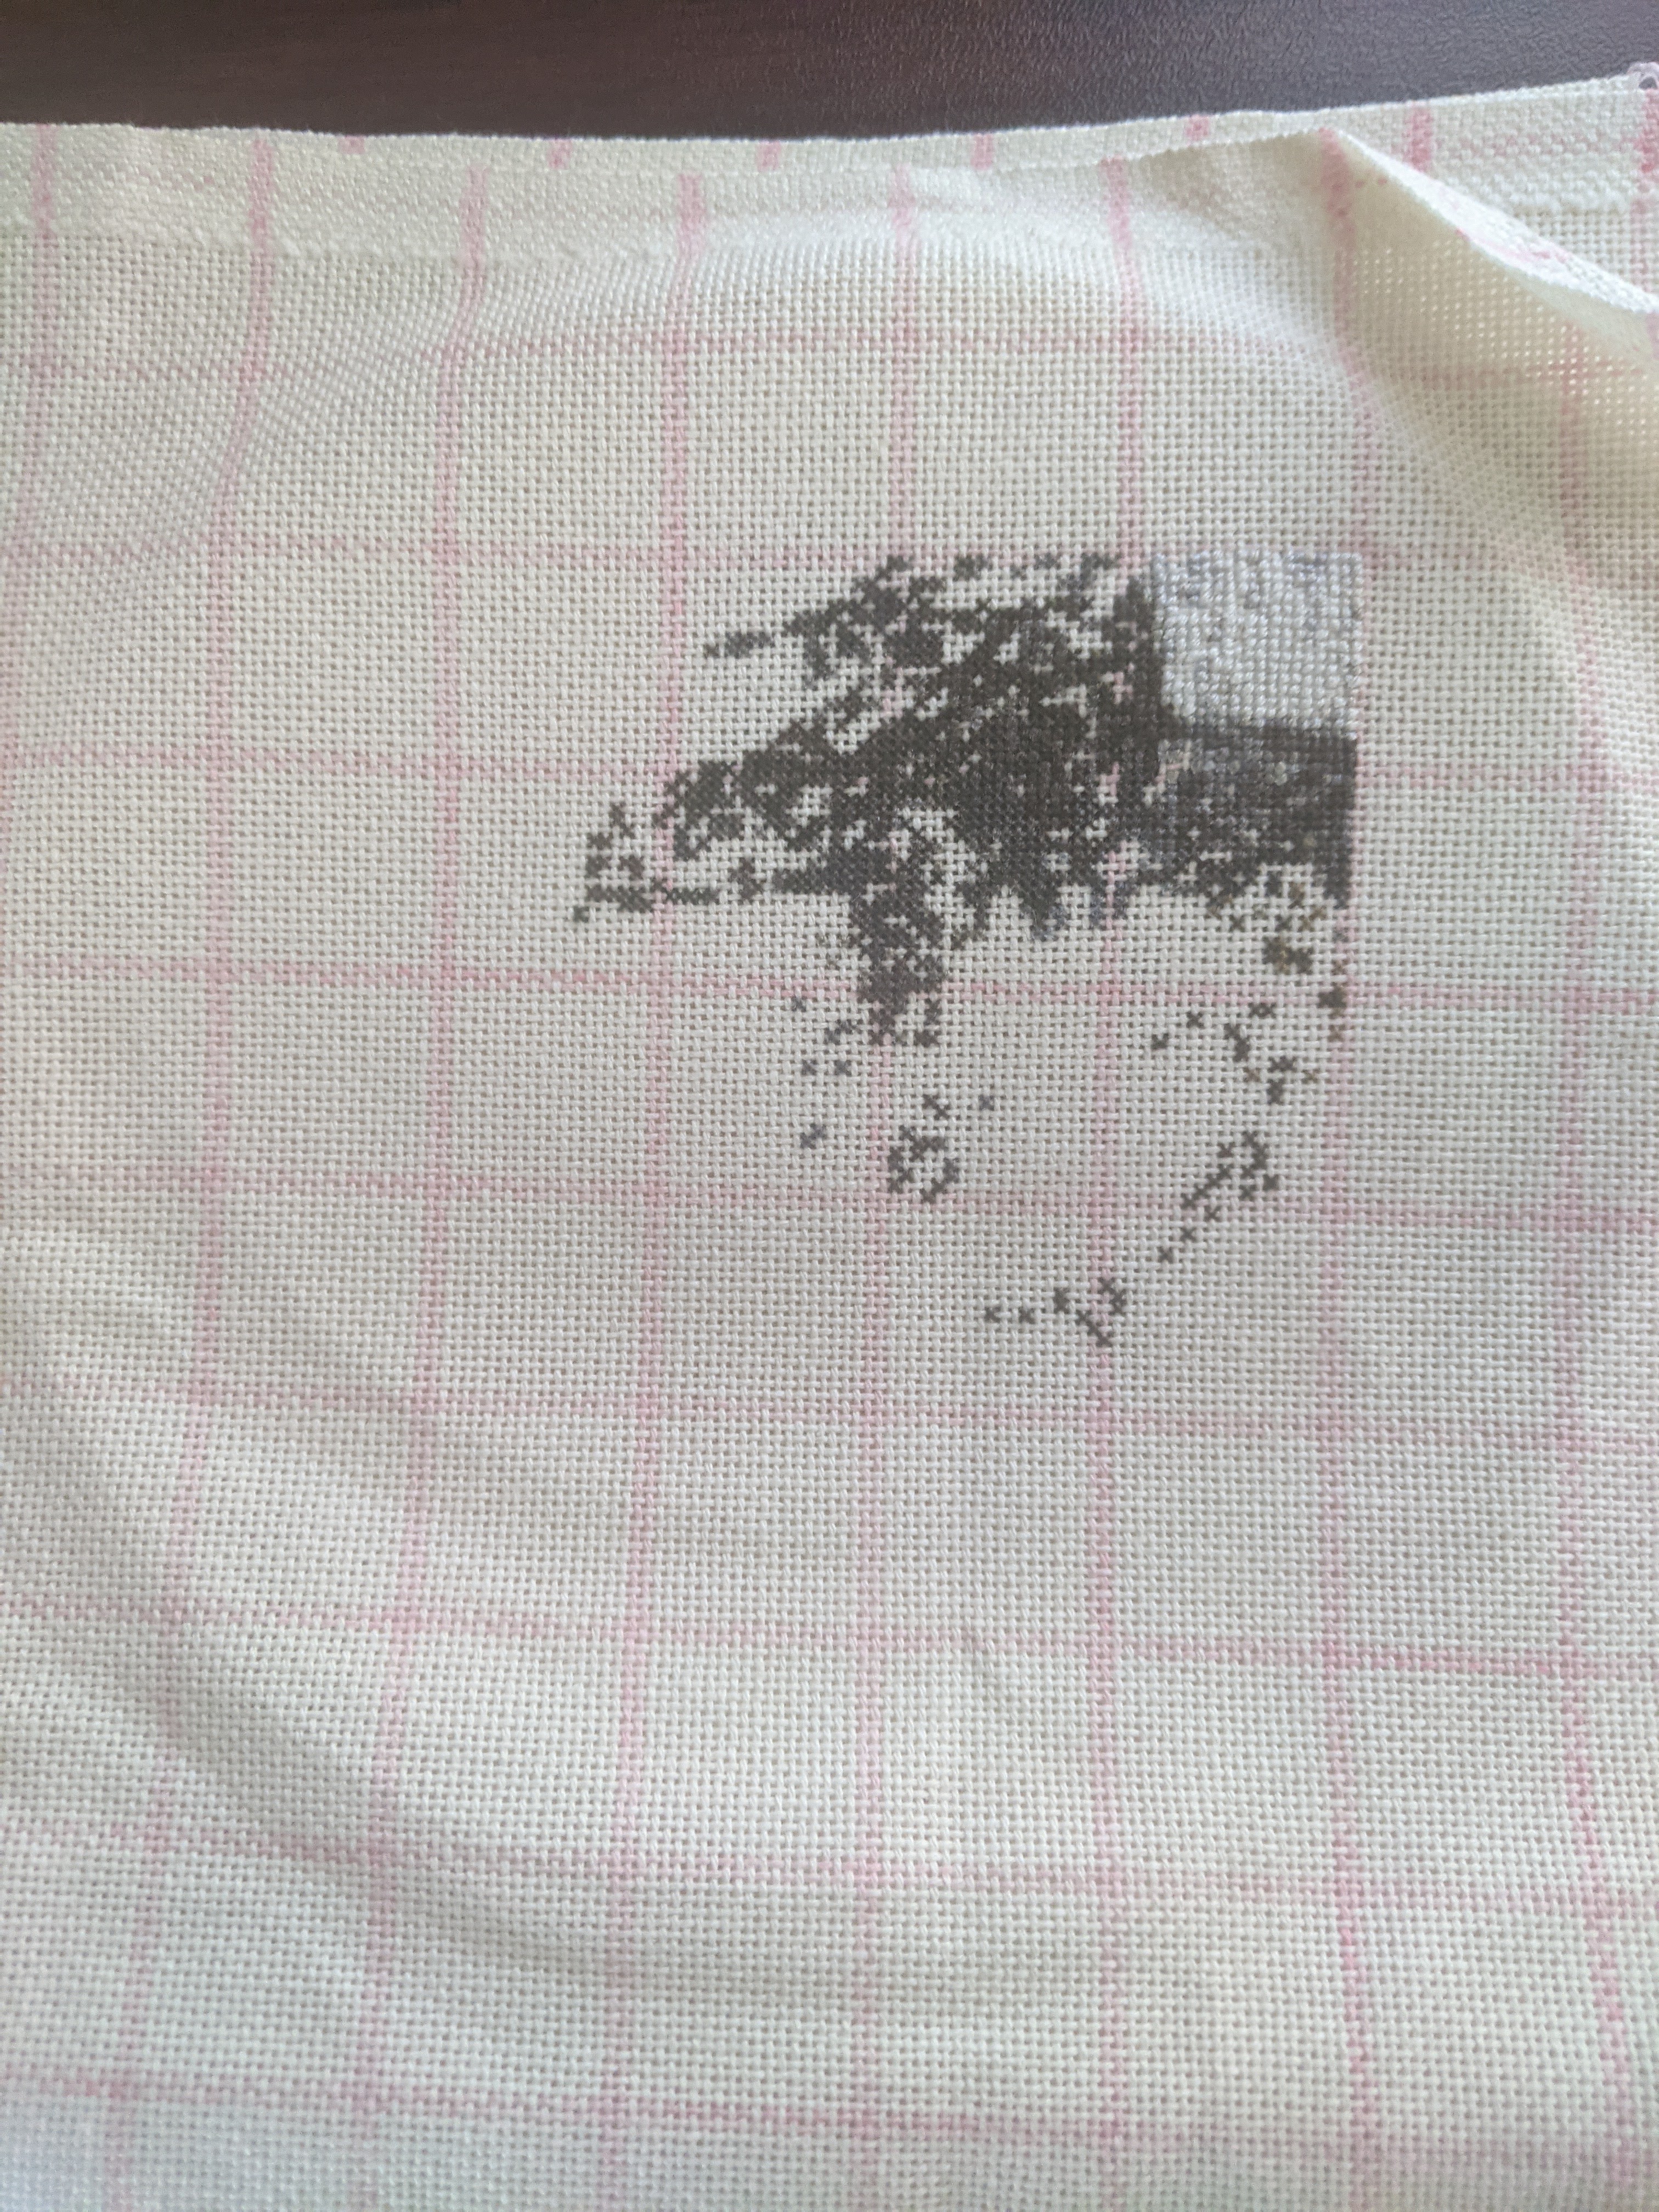
You may notice that the centre image below shows a yellow vertical strip of fabric just above the Golden Retreaver’s head. That’s where I needed to get creative and try and use some of the fabric I’d already cut up.
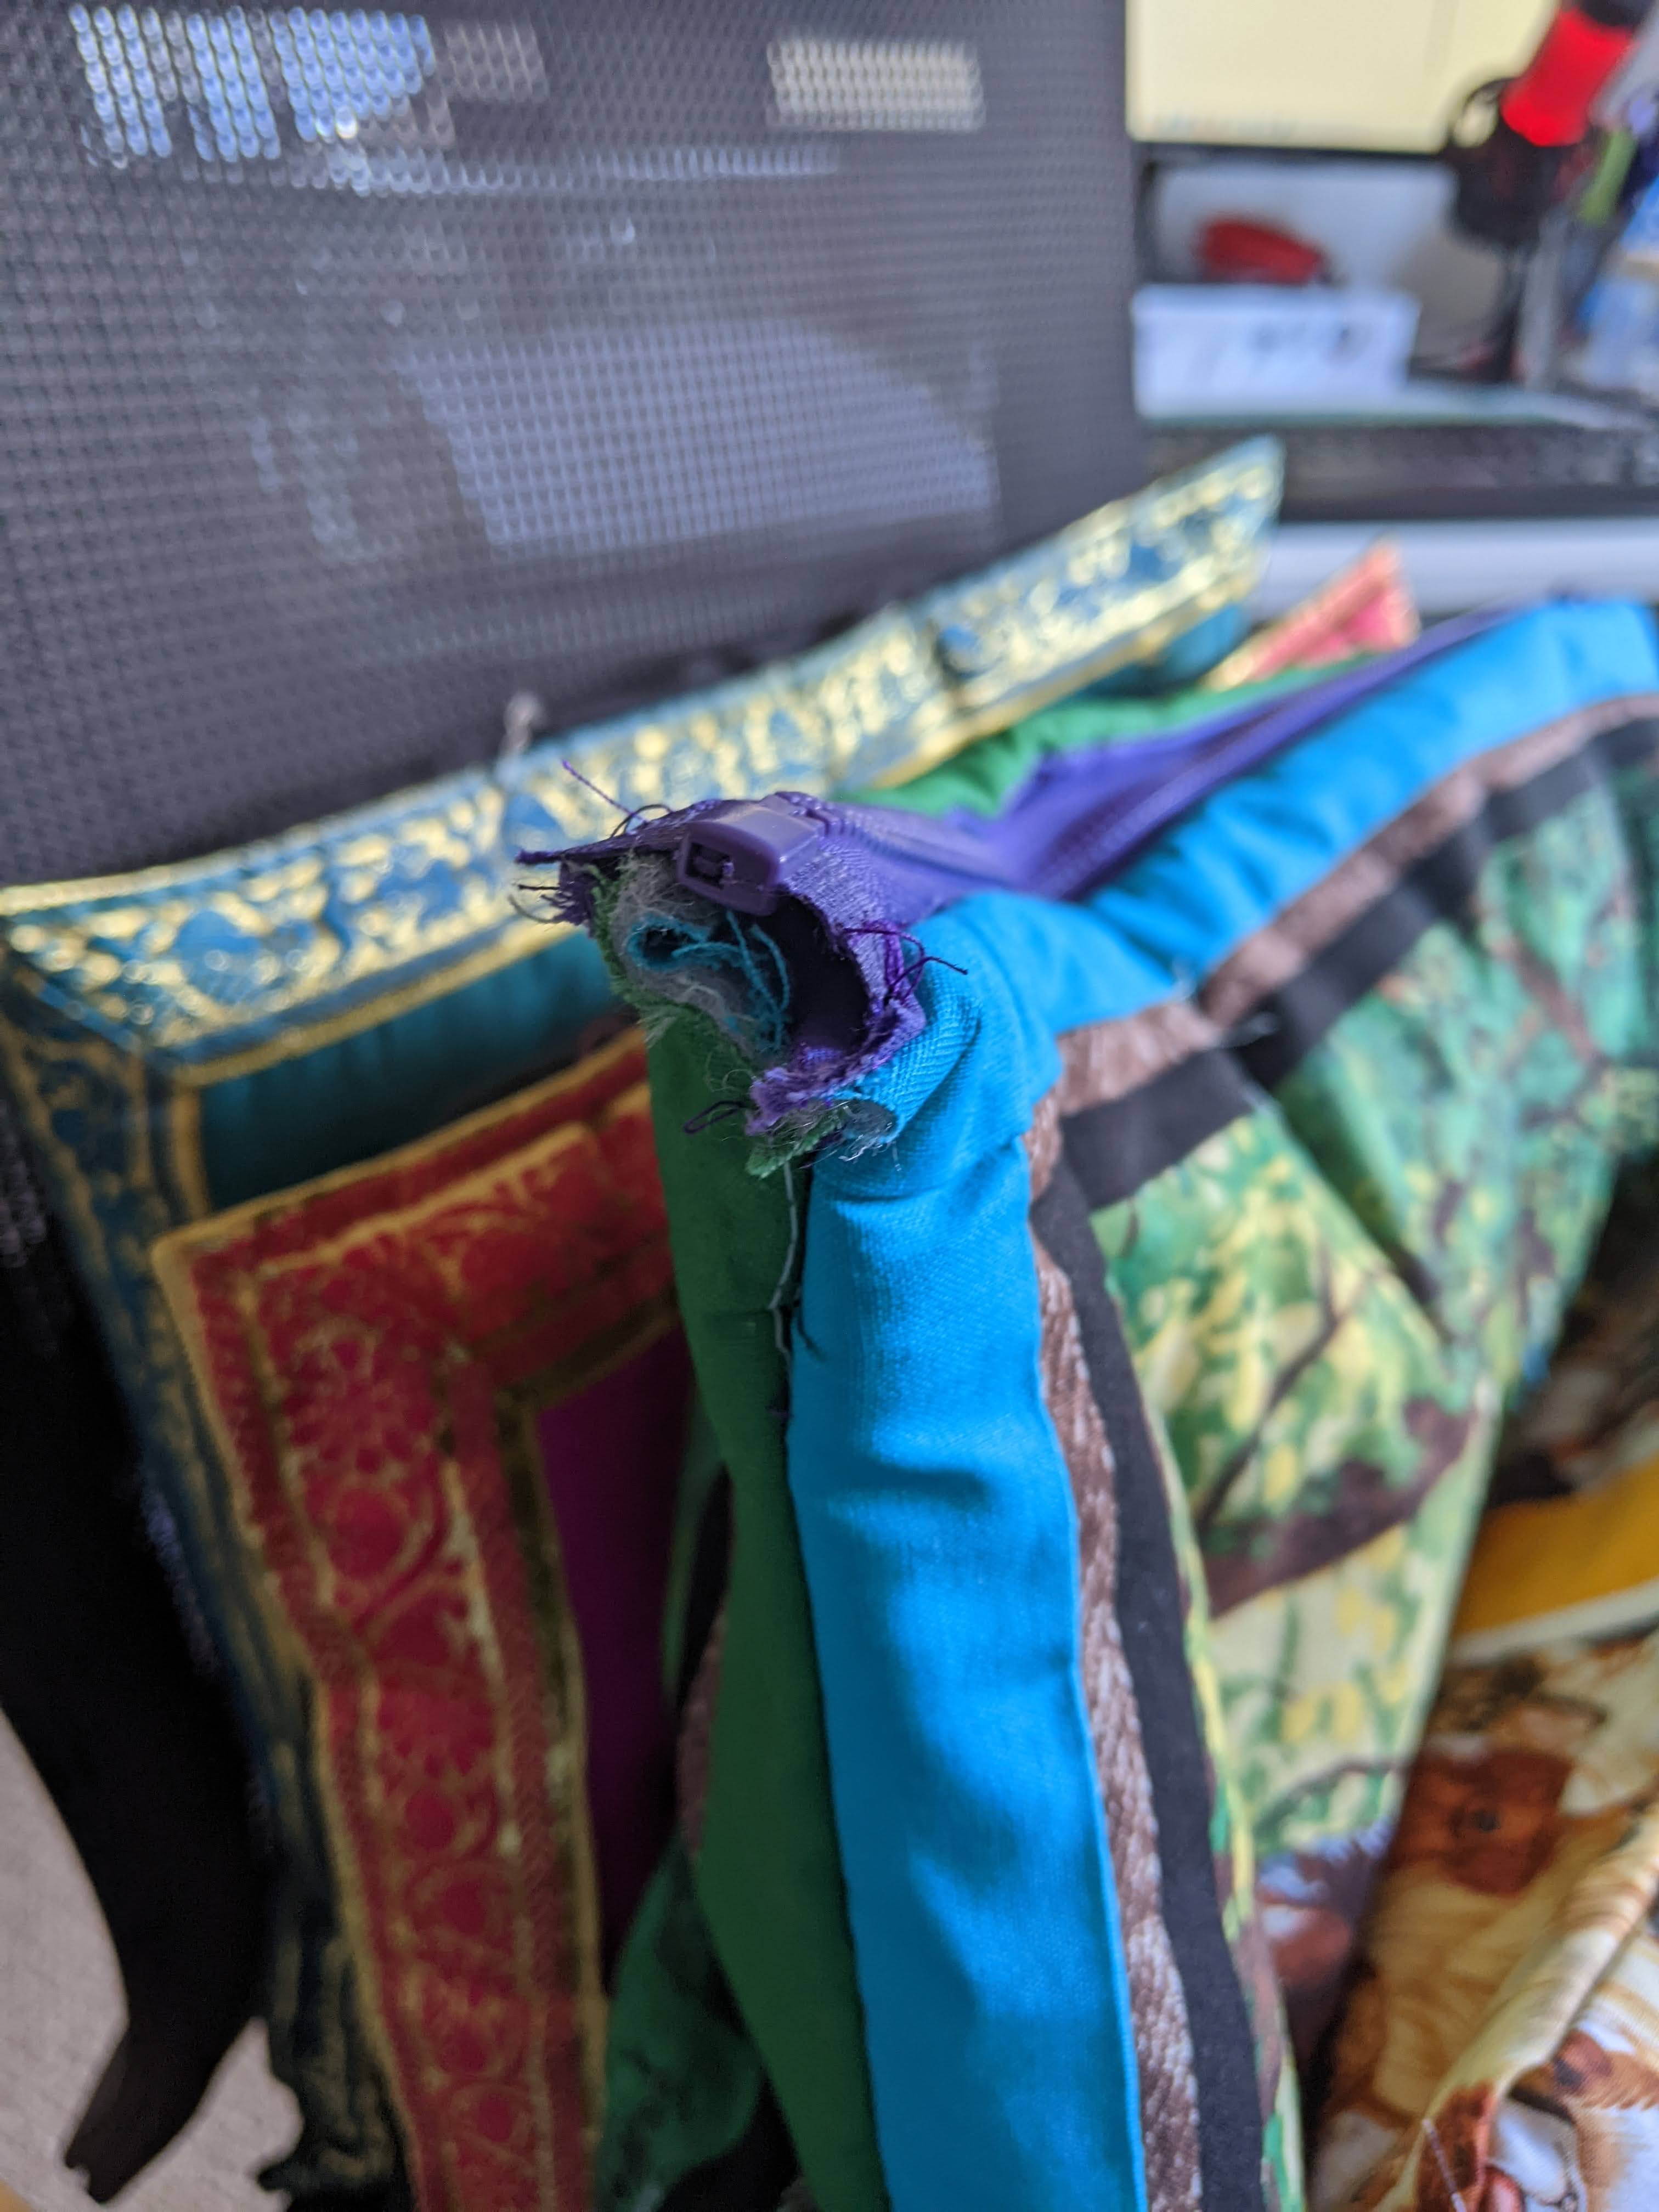
Learning my lesson from breaking a sewing machine needle from the second bag, I wanted to be safe than sorry but also have a really nice and neat bag for my third one. I achieved that by not breaking another needle and allowed some extra fabric either side of the zipper to try and make it neat.
Close up of zipper end on third bag
I’m not completely happy with this end, but it may be something for the fourth bag that I can improve on. I could add some extra fabric that covers this end, but something I can easily attach without breaking another needle!
Lesson 6 – Do I dare use clear vinal?
I haven’t purchased any yet but I’m considering it. I’ve seen on Flosstube that some people have project bags that have a clear panel of vinal at the front to help them see what project/s they have in the bag. I’ve even seen one creative endeavor where a Christmas stocking shaped project bag had been made and the creator had included clear vinal but in a pocket format, to enable the user to keep their floss/threads organised. To me that will be the ideal thing to do or / and create a bag that is large enough to fit my fishing tackle boxes that I use to store and organise the thread for my large, full coverage pieces. The box below is an example of how I use the tackle box and I’m using it for three different projects!
Overhead view of the fishing tackle box I use (one of three) for storing floss for full coverage projects.
I hope you’ve found this read useful, if not entertaining! My aim is to write more posts for this year and interact with you all more!
In the meantime, you can catch up with me regarding my cross stitch progress and new patterns etc. on my Flosstube channel, The X Stitching Runner.
It’s been a while since I’ve posted something and I can’t wait until the end of June / early July to tell you all about some of the things that have happening in my world of cross stitch!
Haul
A couple of weeks ago I went to the Crafty Frog store in South Canberra and I picked up a few things I can’t wait to use on as many projects as possible. The image below shows overall, the things I purchased:
Haul from the Crafty Frog store
What you see in the picture
Starting from the bottom of the picture:
Easy Grab Ball Tip Needle – sizes 28 and 26. I’ve never used these types of needles before and I’ve heard a bit about them on a few Flosstube channels (I can’t remember who exactly, as it’s been a while since I’ve heard anyone talk about them). The special thing about these needles is that the ball tips are meant to make it easier for cross stitchers, embroiderers and hand-sewers find the holes in the fabric they want their thread to go through. The other special thing with these needles is that they are not pointy in any way, shape or form because of the small ball at the end of the needle. Which should mean that I don’t poke myself any where near as much as what I’m doing at the moment! I’m also hoping that I can use these needles when I fly up to Queensland in two weeks time. I’ve never stitched on a plane and there are some strict (understandably so) rules in Australia for having or using certain sharp objects in carry-on luggage.
Heart-shaped pendant – is deceiving because it’s also a thread cutter! Towards the pointy end of the pendant are small indents on the sides that can be used to cut the thread I’m using for my projects. I’ve been aware of this type of product for a a while, because I’ve seen it in some cross stitch magazines and craft stores. By memory DMC have similar products to the pendant you see in the picture. I’m also planning on wearing the pendant on a necklace and using it as part of my trip to Queensland!
Fabric – The pink fabric is 32 count linen that’s hand-dyed and has a marbled colour to it. I have a few ideas of what I’ll stitch on it. At the moment I’m thinking I could stitch the elephant biscornu on it (also picured) or a couple of other patterns I’m charting up, soon to be released!
Underneath the pink fabric is 25 easy count Lugana. The grey squares you see are gridded at 10 by 10 which will make it even easier for me to work on some full coverage projects I’m chomping at the bit to start!
The fabric the heart-shaped pendant is resting on is 28 count Lugana Brittney Gold. My eyes lit up and did an internal squeal when I saw this fabric. I have seen people on Flosstube use similar fabric and I have wondered how they have come across such fabric and I wasn’t sure if I would ever get to see such fabric in-person. The holes on this fabric are quite small for 28 count, so the ball-tip needles will come in handy when I start stitching on it! At the moment I’m not sure what I’ll stitch on it because the fabric is so pretty to me – it glitters in the light! I could stitch the lion biscornu (also pictured) or see if there’s anything else in my collection that could do the fabric justice.
Lion and elephant biscornu patterns – The first time I went to Crafty Frog and had a really good look at what they had, I had a fan girl moment when I saw that they stocked Tiny Modernist’s patterns! I have seen and heard many people talk her patterns and stitch them and I’ve really liked them. I don’t know why I’ve waited so long to buy any of the patterns. The other cool thing with these patterns is I’m looking forward to stitching up some more biscornus because they are fun to stitch and I love seeing it all come together!
Threads – I bought two colours/threads from the Brindabella Threads range, one thread from Cottage Garden Threads (CGT) and one from the WonderFil range (the one on the spool). I really, really love the WonderFil thread because it feels so nice and silky!
I’ll most likely use all of the threads on a couple of charts I’ve got planned – one of which I’ve already started stitching…
New Pattern Progress
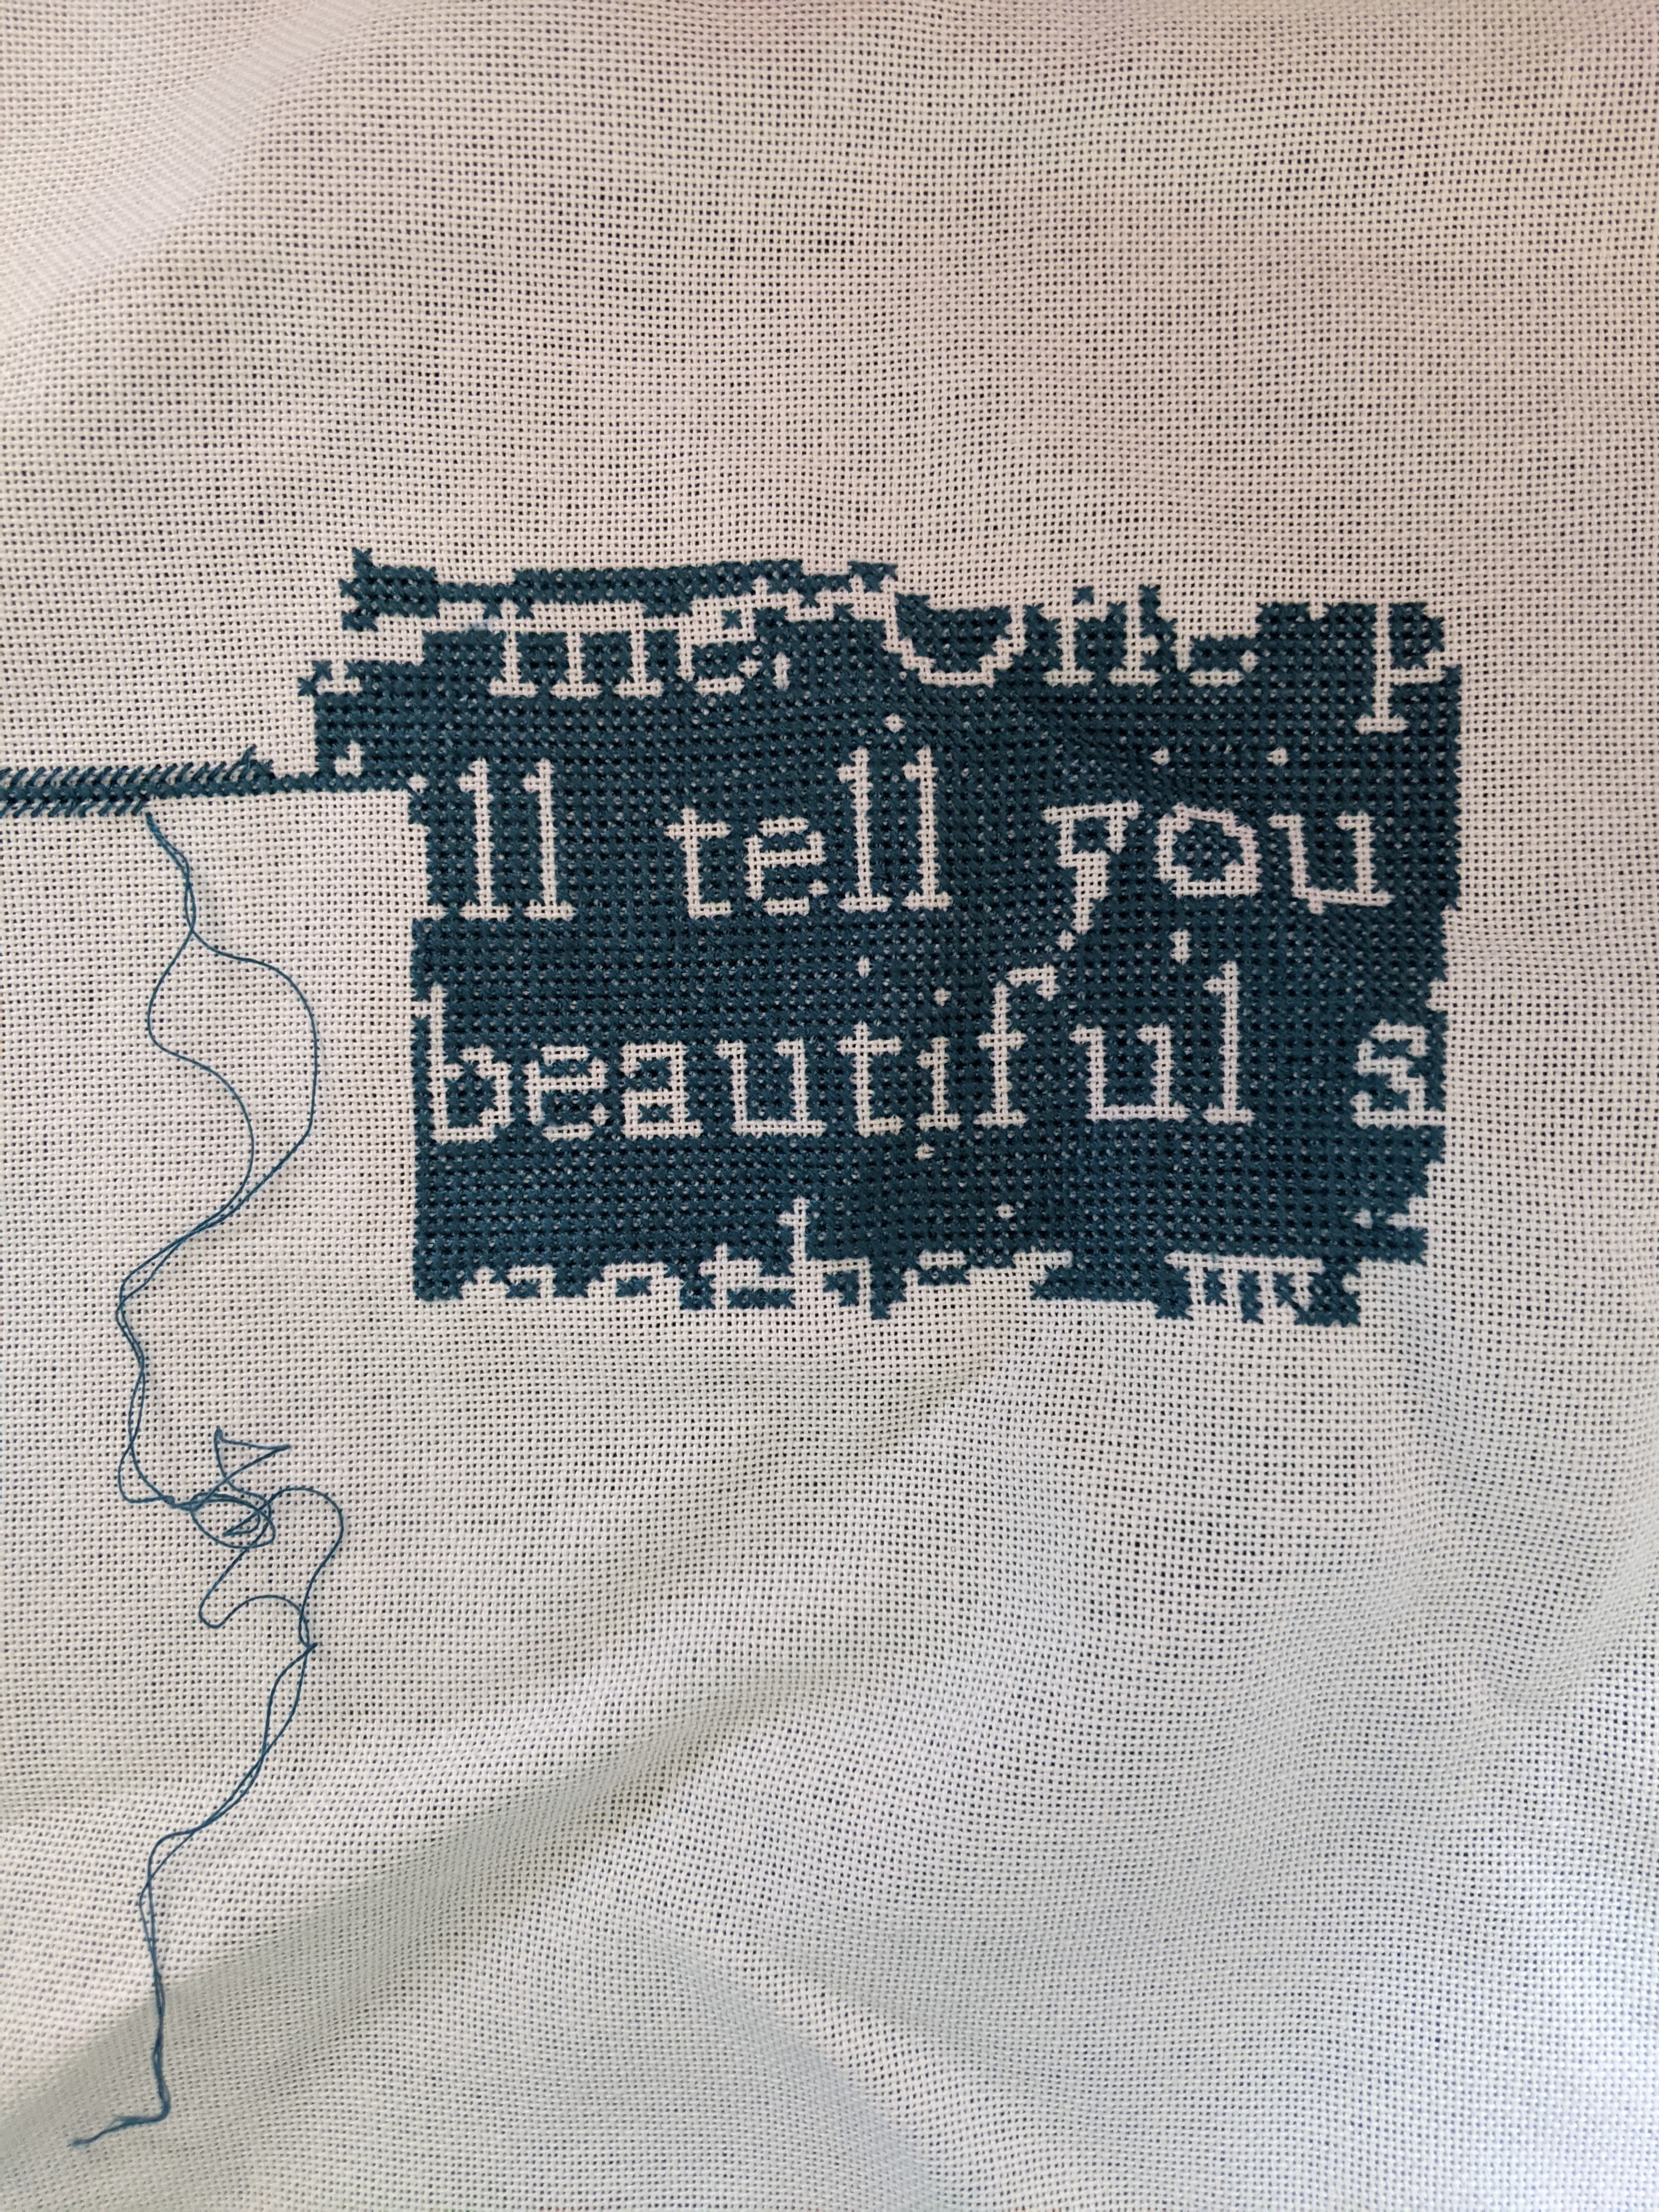
I haven’t quite decided what the official name of this project will be, but it is going to be part of the Flosstube Made Me Do It series. The project below is just a prototype and the finished project that will eventually be made publicly available may look different:
‘Flosstube made me do it’ series – prototype – designed by Kristen Gawronski – Frog by Rucni Prace
This project is stitched on 14 count light blue / baby blue Aida that I’ve had in my stash for a really long time. By memory I bought it from Spotlight or Lincraft – one of those stores. The border and frog are stitched in DMC threads and the words are stitched in the Cottage Garden Threads Oxalis Pearle 8.
The frog you see in this picture is a free download from the Rucni Prace website. I’ve modified it a little to help it fit into the space I needed it to be. The rest of the design is all me with some creative guidance from by boyfriend.
I really struggled to get the circle to meet up properly and there was a lot more frogging (un-picking) in this project than I would have liked. A lot of that was because of the way I had printed out the pattern for the circle and the symbols were way too small for my liking. The words I had changed significantly and I’m quite proud of how they have turned out – especially since there’s a larger gap than I would normally like between “the” and “circle’s” – but I think it really ads to the piece and the amount of ‘mistakes’ that are in it. I’d like to think that many cross-stitchers, embroiderers and crafty people alike will be able to relate to this project and see the humor in it!
Final note
Before I sign off for today, I just wanted to let you all know that the website Hot Cross Stitching is back up and running. On the site you will find:
full coverage cross stitch patterns for sale
classes you can sign up to, to learn how to cross stitch
It’s been a while! Since my last post, I’ve been working on a variety of projects and filmed two flosstube episodes – one of which is uploading today (29 May 2021)!
Flosstube
I’ve decided to start up my own flosstube channel on YouTube as a way of starting to promote my Hot Cross Stitching website and this blog to a new group of people to see how things go. My first introduction episode is very quiet, so you’ll need to have the volume up very high for it. I’m hoping I can upload a replacement episode with improved volume, so that when you go to watch it, you won’t be straining to hear what I’m saying!
Stitching update
Currently I’m at the coast and I don’t have all of my projects with me. Since the start of May I’ve been working on:
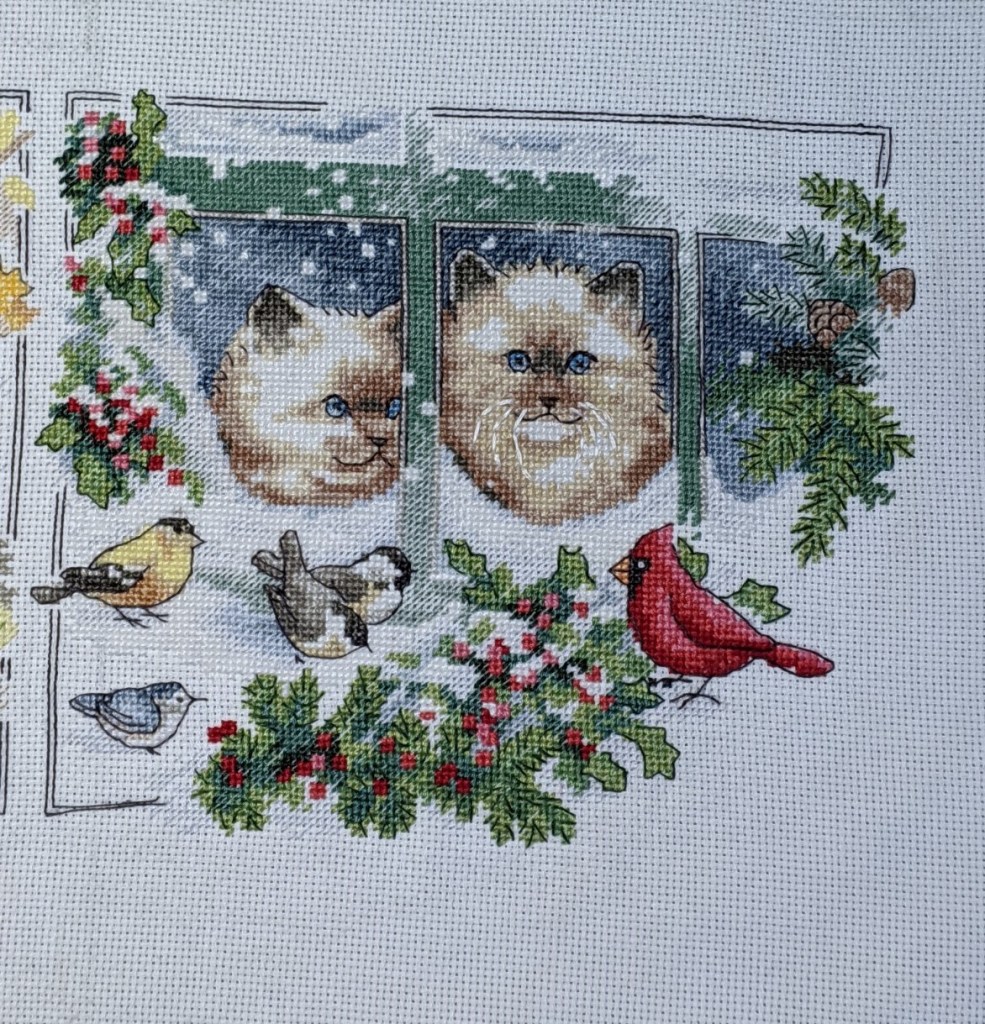
Ryan’s been a good boy (Christmas project)
Pisces
Jaffy – a new start
Gundaroo Mini Mushroom
Blue Mountains Walking Trail
Ryan’s been a good boy
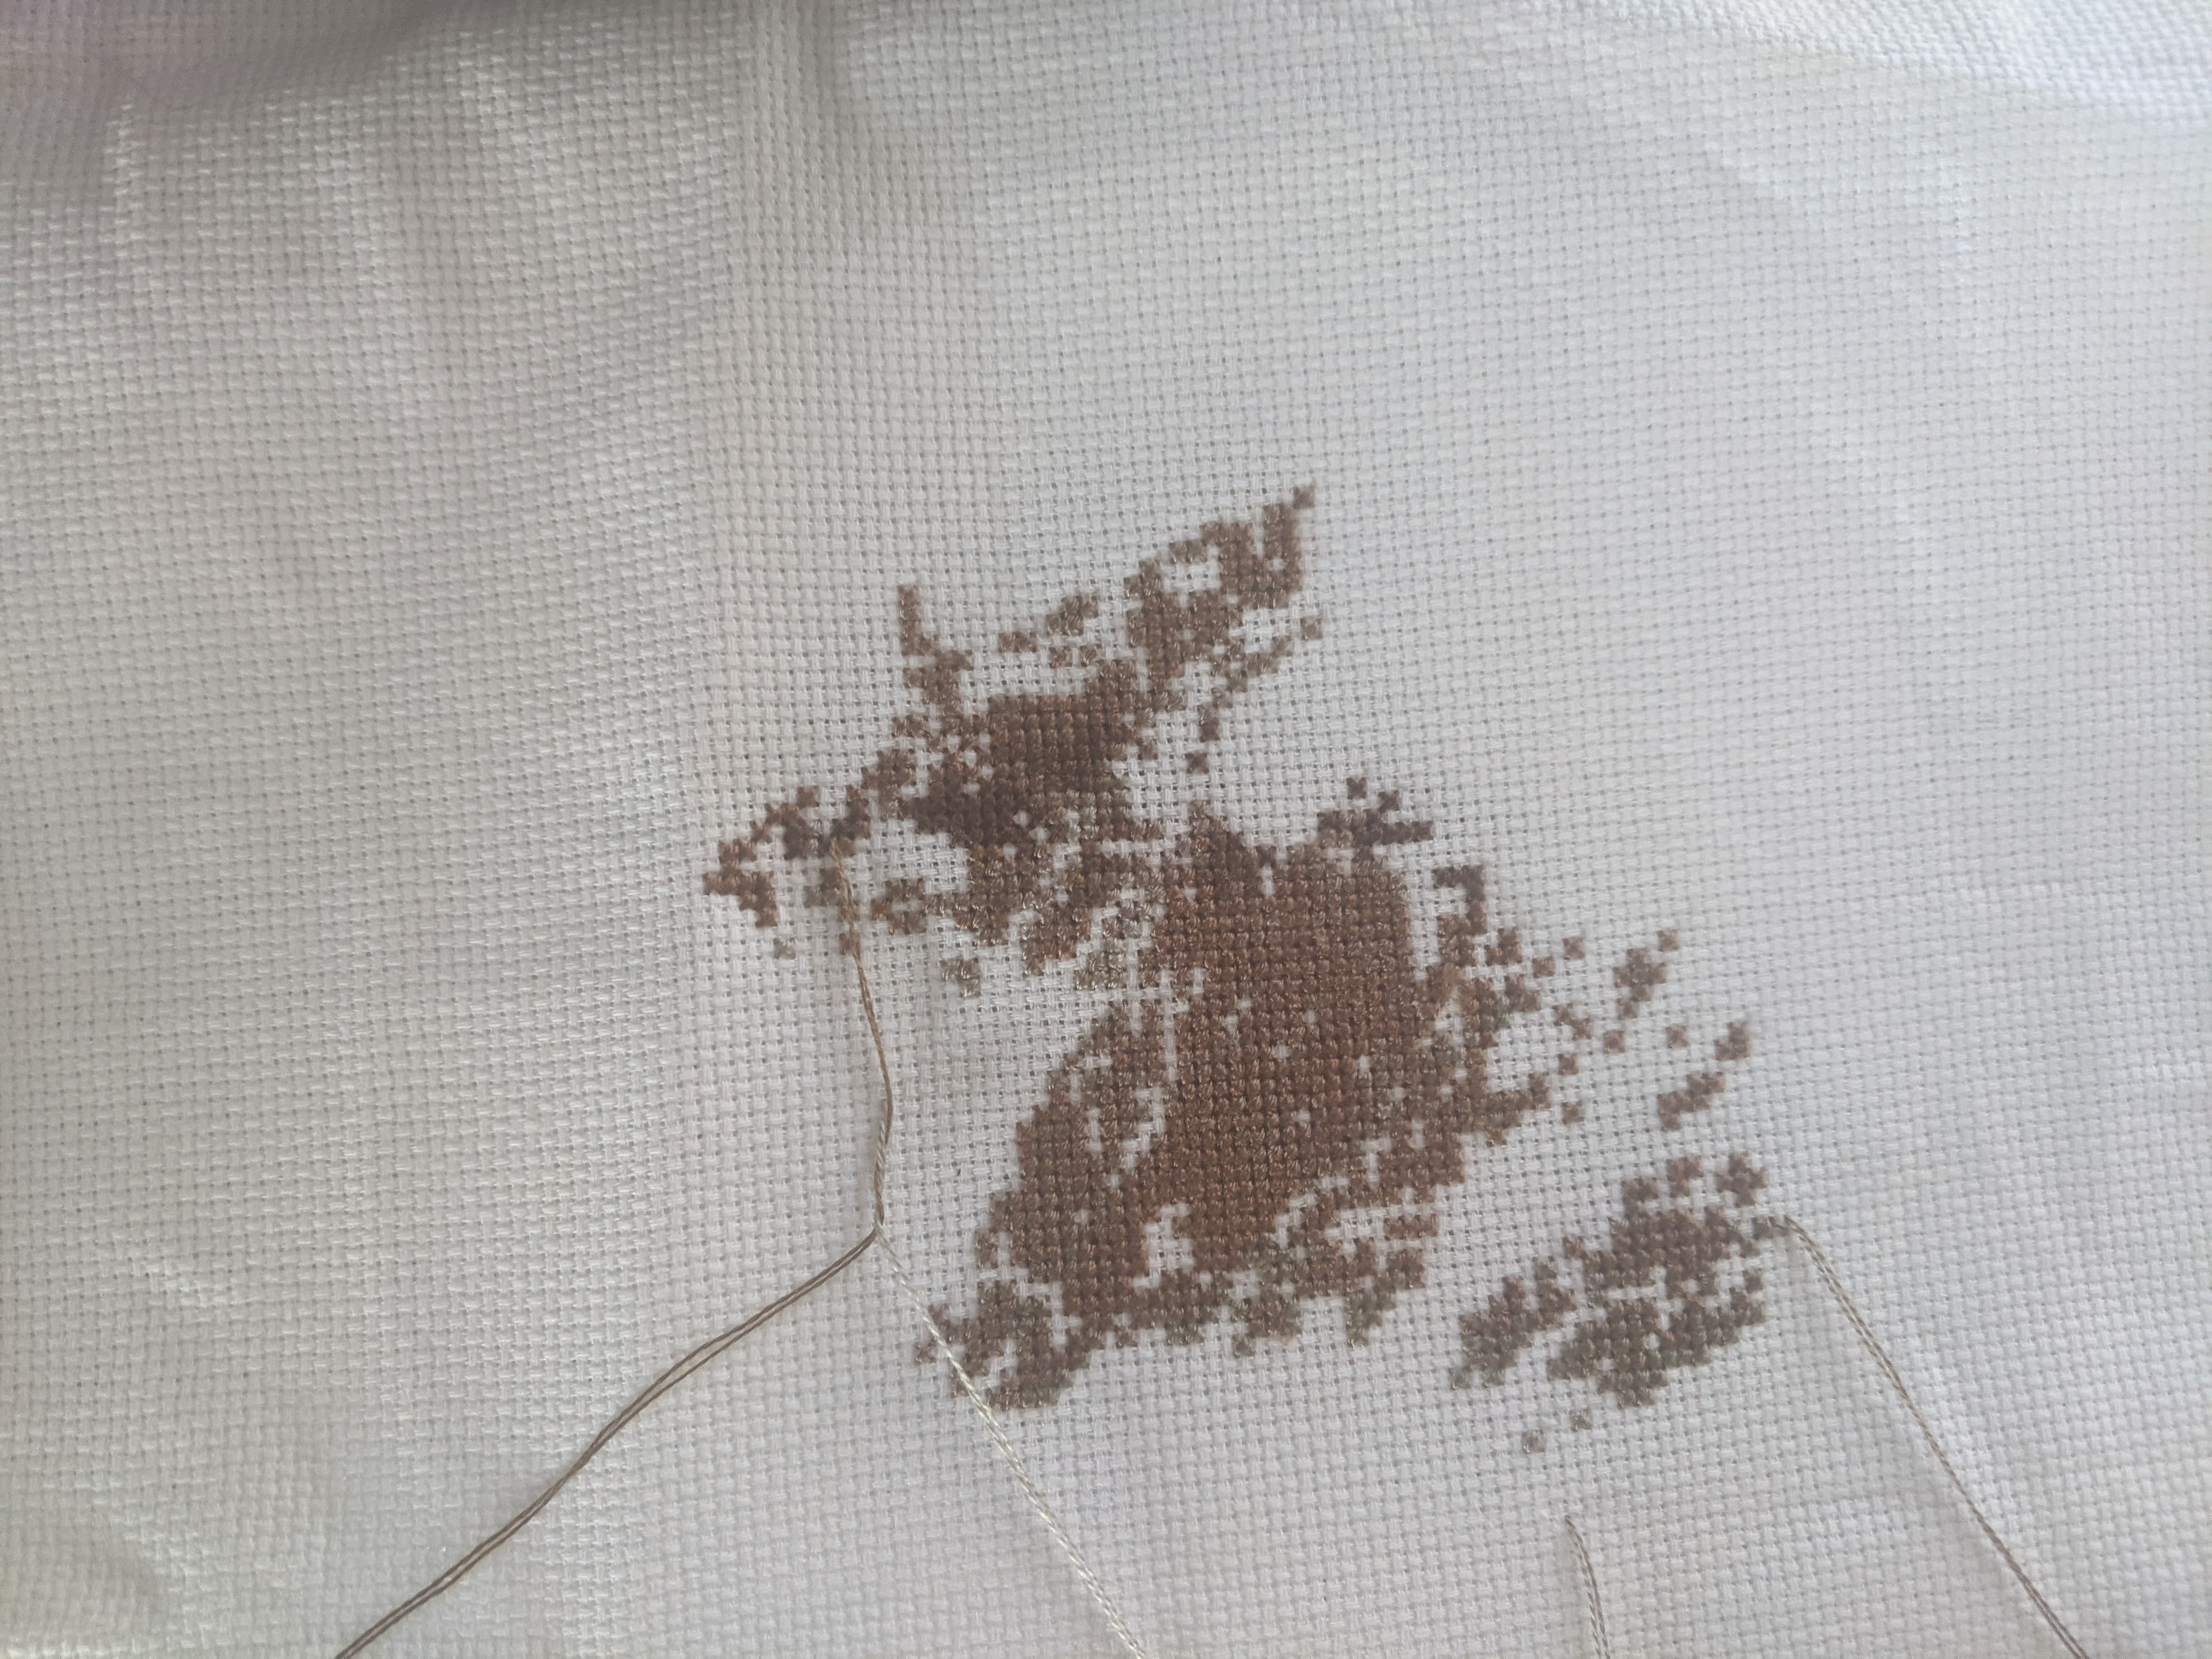
I’ve made some progress with this project and I’ve made an error along the way. I’ve some how mis-counted a part of the project, which in some ways is a good thing, because it means that I’ve not got as much to stitch. It will mean that I’ll need to fudge things when I go to do the backstitch. I don’t have any pictures for this project to share at this point in time. Hopefully later this year I’ll have it completed!
Pisces
I’ve run out of the DMC colour 3808, so I’ll need to get creative with how I stitch some some parts until I pick up a new skein. I’ve also come to realise with this project, that I’m going to run out of fabric because I’m stitching it two over two on 25 count fabric. I could get creative and stitch the fish two over one or one over one or adjust how much I’m stitching so that I still have enough fabric to frame it.
Jaffy
This is one of my own designs. At the moment it won’t look like much and I could have it sitting in any direction and it could look like it’s almost any part of the picture!
Jaffy
Progress of Jaffy as of 29 May 2021
I’ve started in the middle of the fabric and pattern because I don’t think I have enough for this project and I want to see how it will turn out on 18 count Aida. With this project, I really want to focus on Jaffy’s face and a little bit of the background.
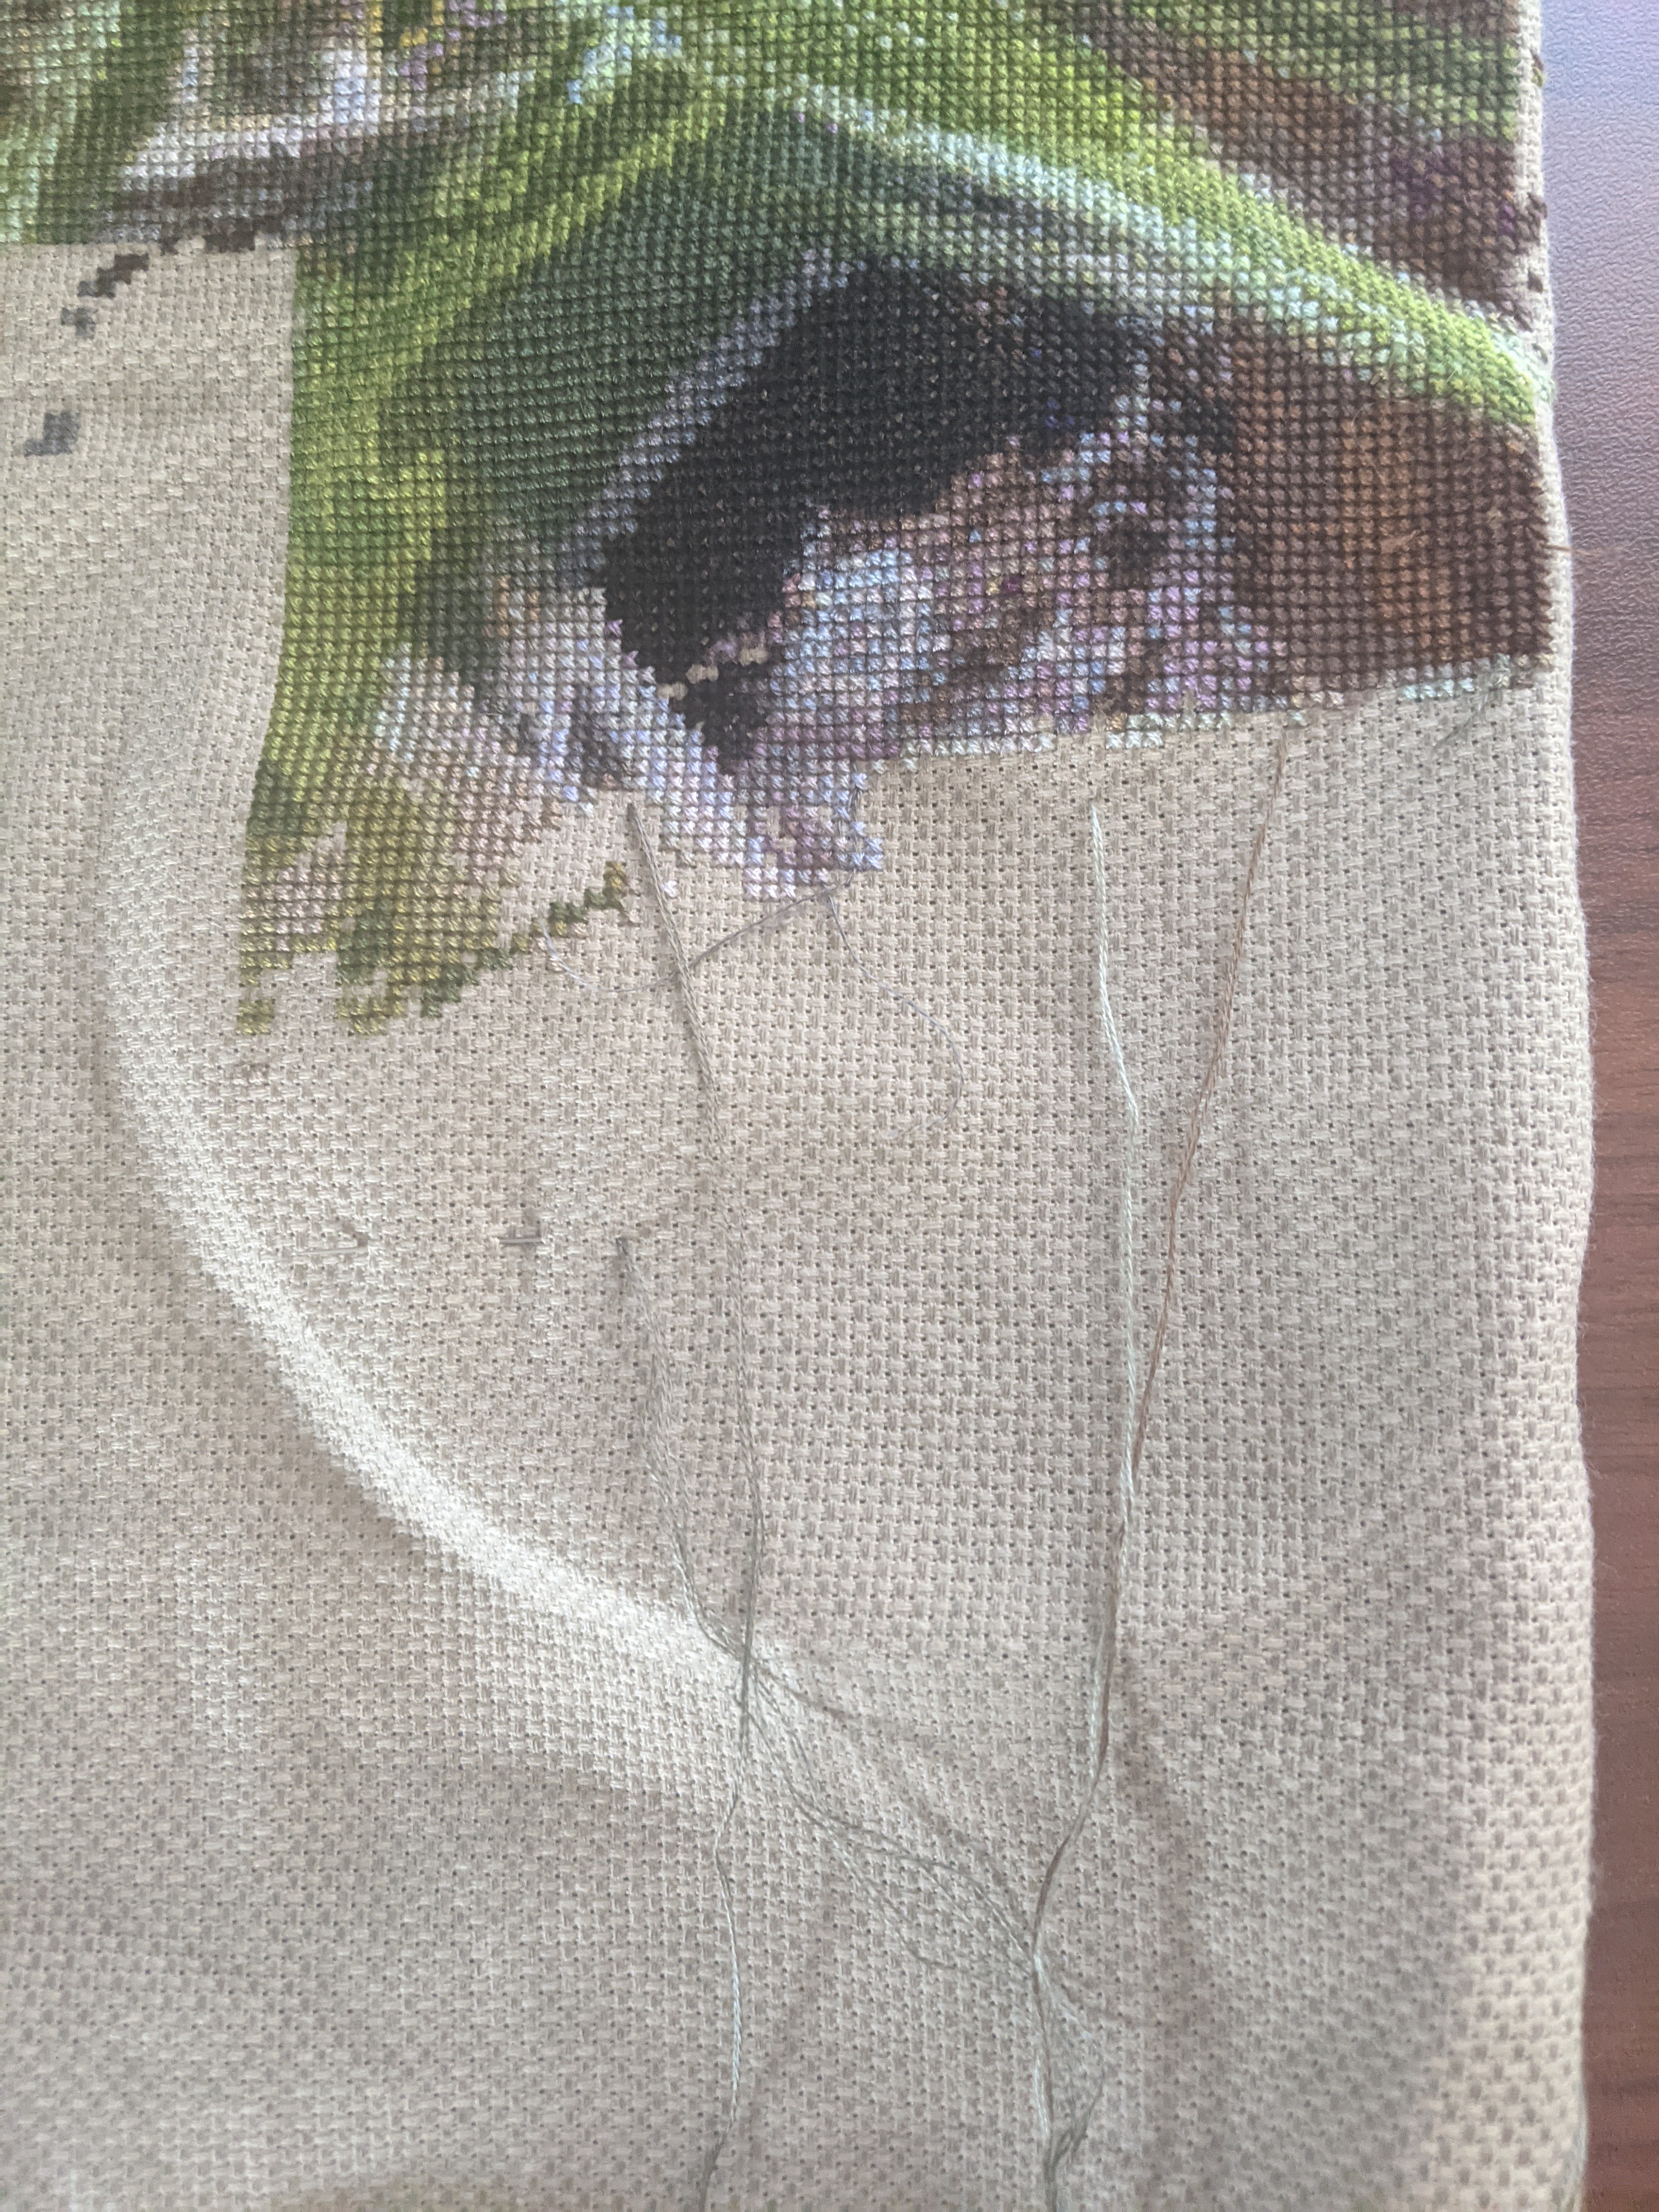
Gundaroo Mini Mushroom
I’ve just started stitching this one again because it’s been too long since I’ve worked on it. I’ve probably not worked on it since some time last year. I’ll have to go back through my log to see when I last took a photo of it and talked about the project.
That said, this project has been called for the June WIPGO board! I’m really happy about this, because I’d really like to make some progress on it. The images below show my progress so far, where I’m currently up to and what it should look like when it’s complete:
Current progress
Progress from last time
How it will look at the end (something similar to this)
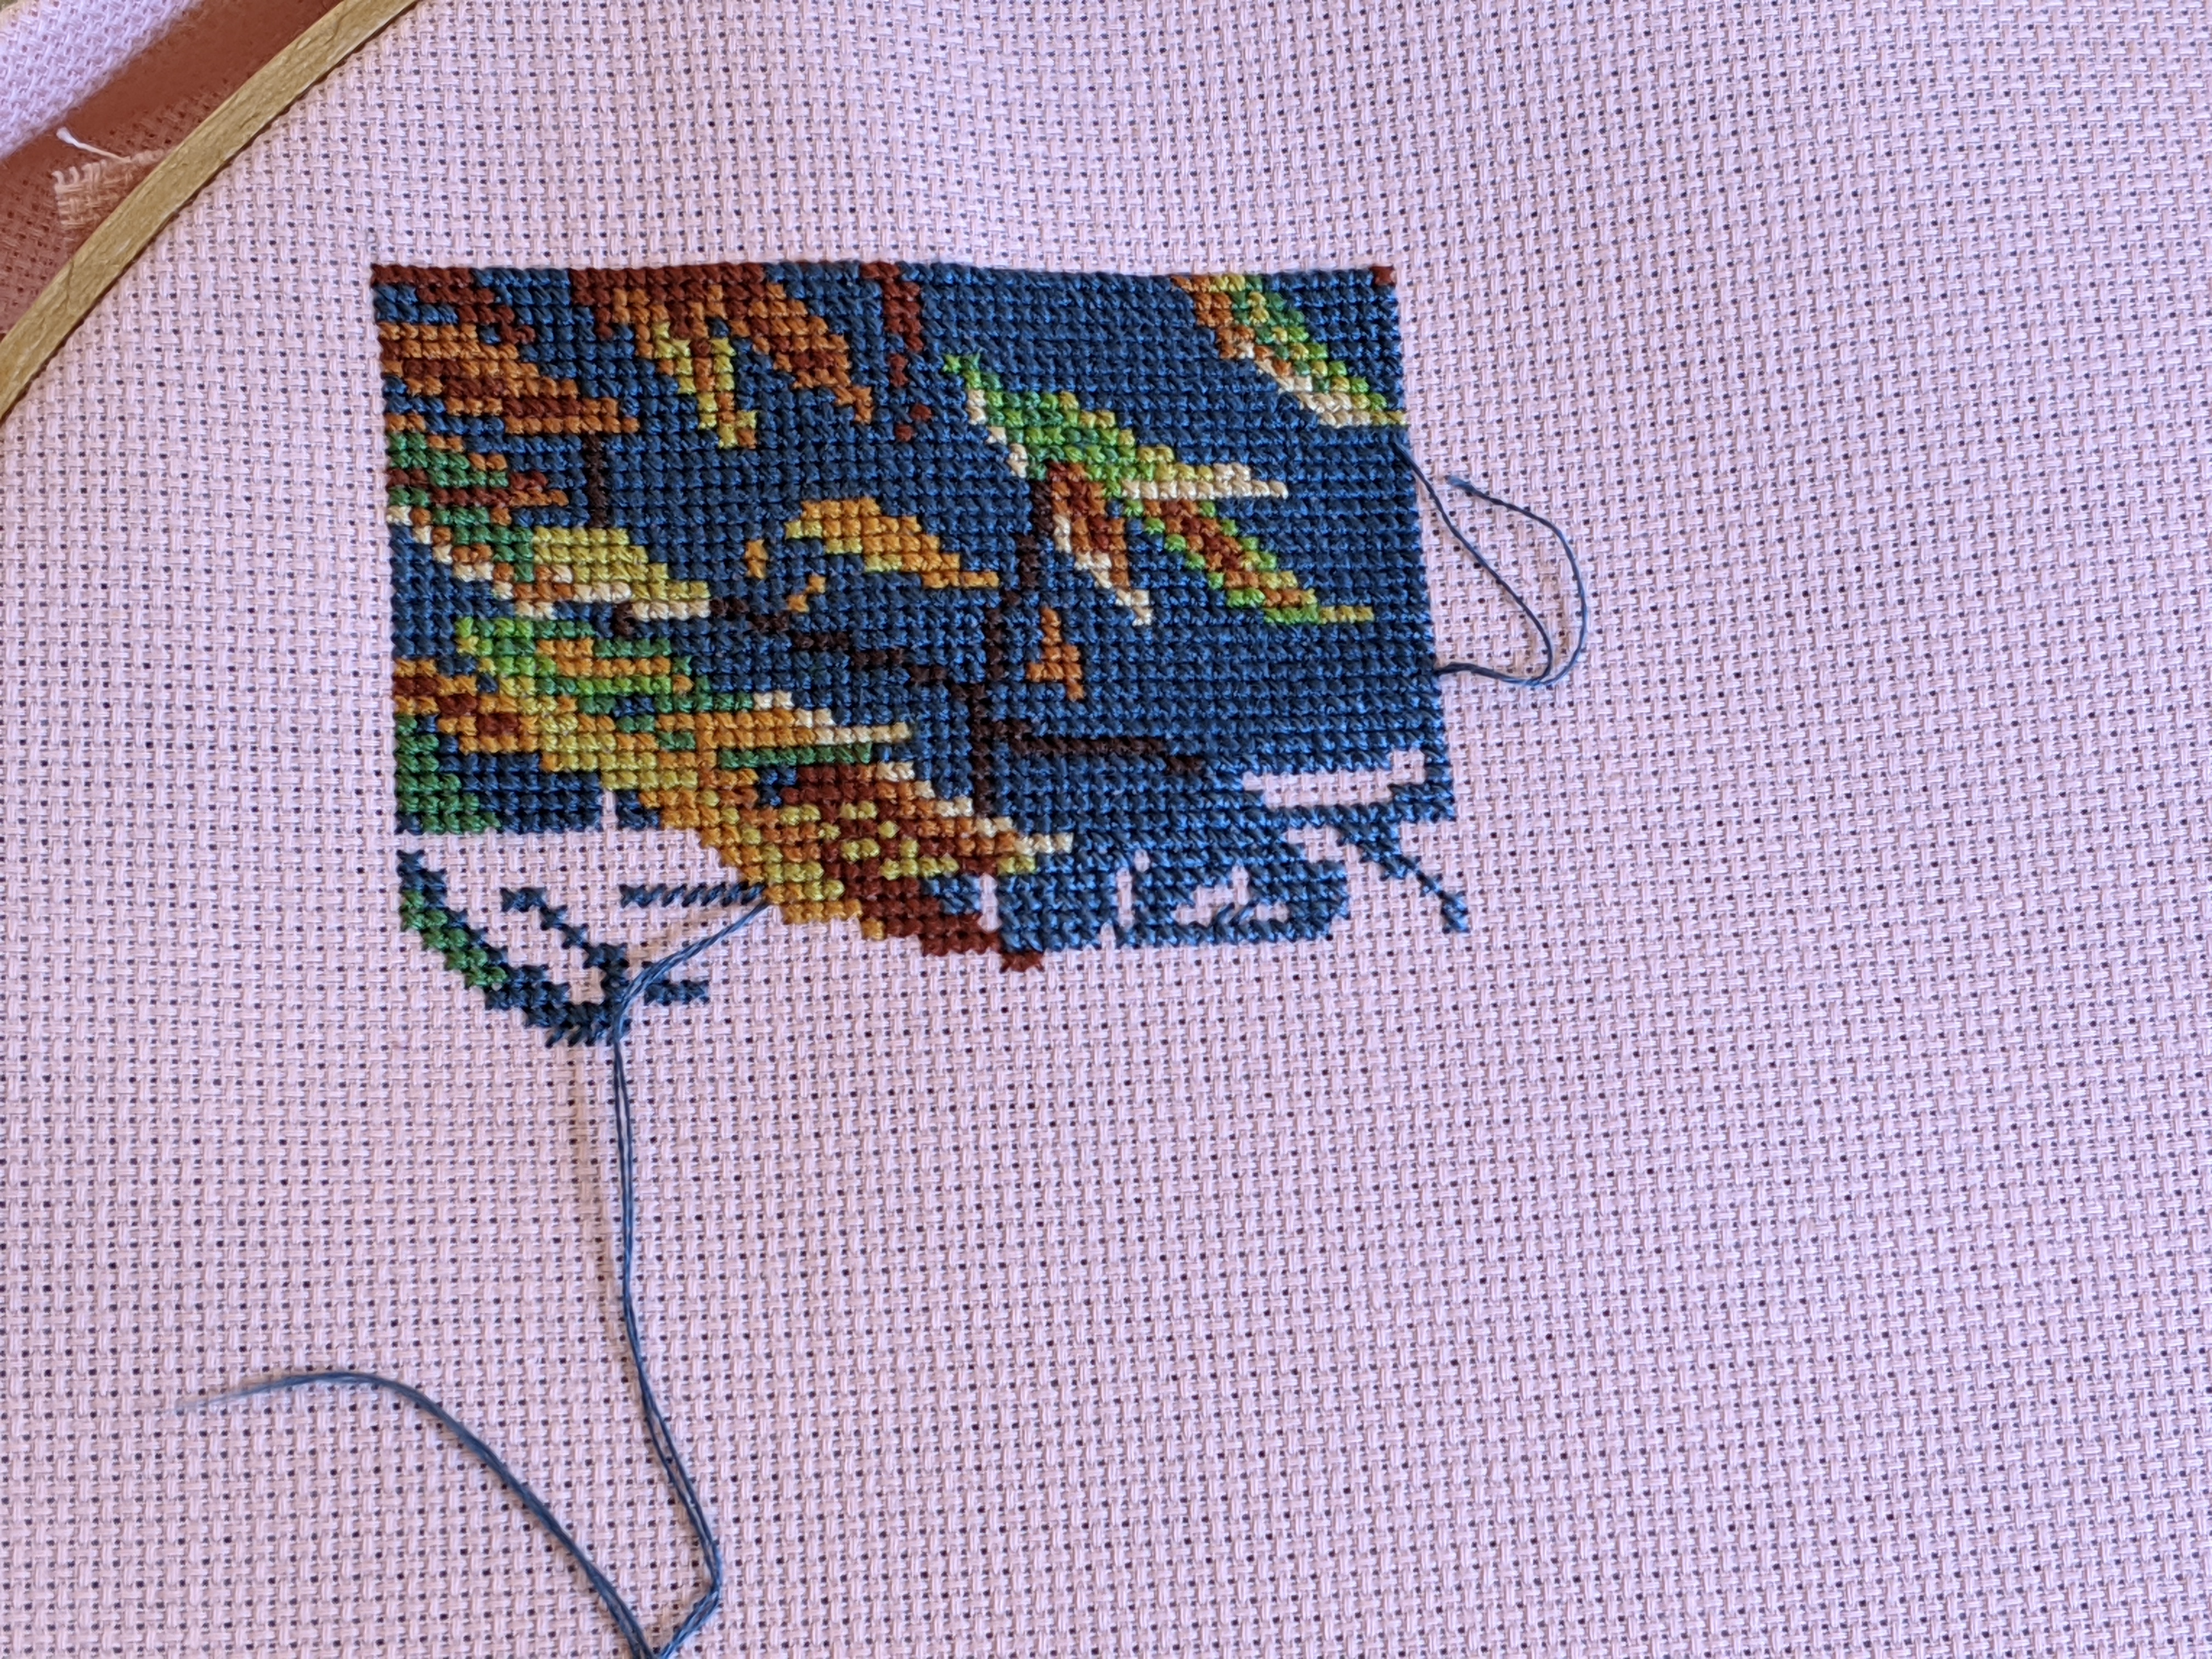
Blue Mountains Walking Trail
This is my own design and I’m stitching it on 25 easy count fabric. The pink squares are 20 stitches by 20 stitches, so I need to be careful and not have a lapse in memory, thinking that they’re 10 by 10 and misread the pattern!
Blue Mountains Walking Trail – how it should look when finished
Current progress as of 29 May 2021
I started stitching this two over one out of curiosity and I quickly learnt that one over one was plenty of coverage! It was also getting too thick and making life difficult to stitch. I have fallen in love with this fabric though. It really is easy to stitch on because the holes are easy to access with my needle and thread.
June plans
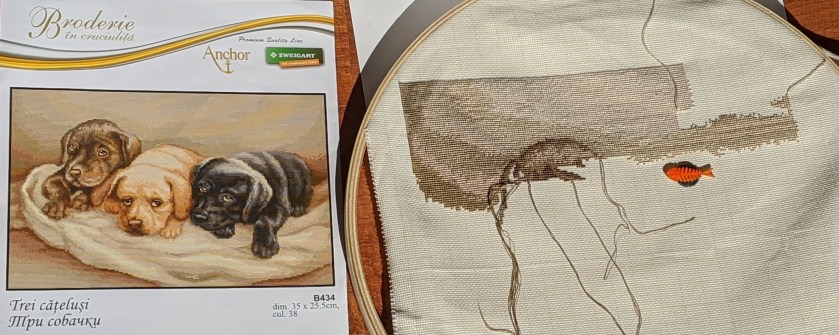
For WIPGO, the two numbers called are connected to my projects the Gundaroo Mini Mushroom and the Three Dogs (aka the Three Labs as I’ve nicknamed them). I’m hoping to make some progress on both projects that will be noticeable.
The Three Labs
It’s been a long time since I’ve worked on this project and as long as I don’t get too annoyed with it – mostly because of thread breakages – I should be okay!
The three labs – what it should look like and my progress so far
Wow, it’s the end of January 2021 already! Where has the month gone? Here in Canberra, Australia we’ve had a pretty mild summer so far and it’s a vast difference to last summer thankfully!
As I’m writing this post, it’s overcast and there’s a very light drizzle rain. The temperature is comfortable enough for me to be barefoot with the windows open for fresh air and jumper to keep me warm enough. Over the last couple of days we’ve had some really nice rain falls to help put a little bit of water into the dams and water the plants.
WIPGO Update
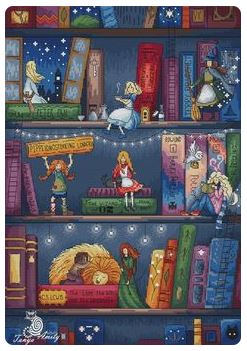
All of which has been a really good excuse (if I really ever needed one!) to get a bucket load of cross stitch done. WIPGO has also made the world of difference and provided me with the additional motivation I’ve needed to make some significant progress on my projects. For the month of January, the numbers 13, 18 and 6 were called, which meant that I needed to work on Gingerbread Train (allocated to square number 6), Four Seasons Kittens (allocated to square 18) and square 13 being a free space where I could leave it as is or do whatever I wanted with it. For example, I could start a new project, buy a new project or threads, or work on another project that may or may not be on the board shown below:
My WIPGO board as of 31 January 2021
The squares you see coloured in with a lavender or light purple were the numbers called for January. The cross or X and green Y mean that I have finished that project and met the goal or challenge I had set for that project. Also, the purple squares will never be called upon again for the rest of 2021. Which is why I have set my board up like I have in case I’m unable to meet the challenge I’ve set for each project and many of them are big projects, so I’m not going to be able to complete them by the end of this year.
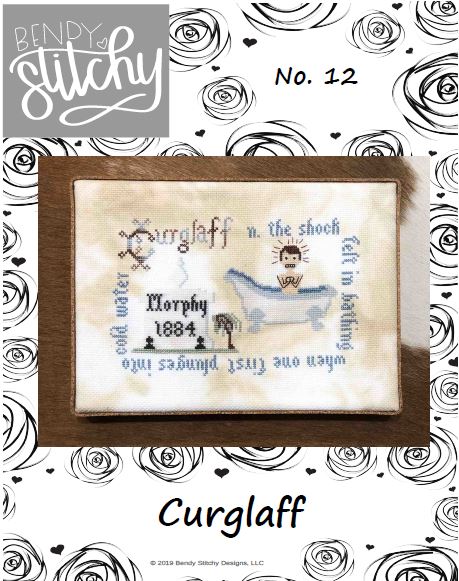
The light blue squares are the numbers called for February. Because I finished the Gingerbread Train (second allocation, square 20) earlier than I expected, I get to replace it with another project that I’d forgotten about. Initially I was going to have Curglaff in square 20, but with the number 13 called in January, I started stitching it anyway because I wasn’t sure when the number 20 would be called and I really wanted to work on Curglaff (see January Finishes for pictures).
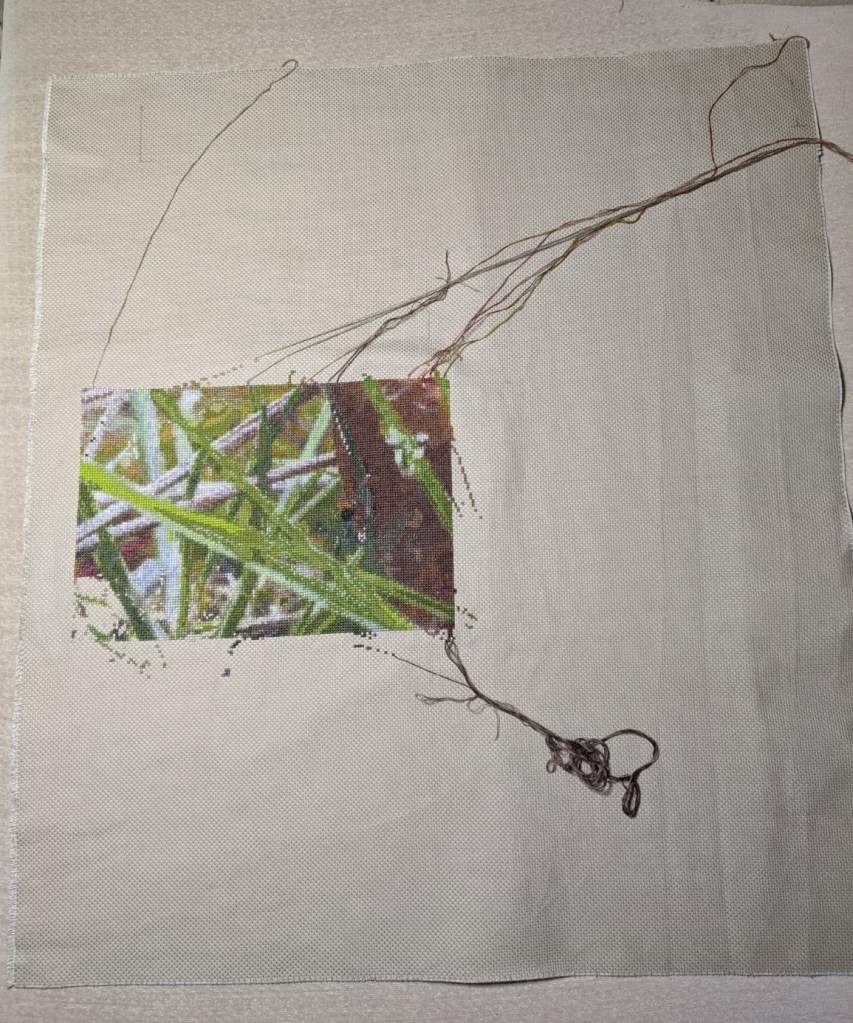
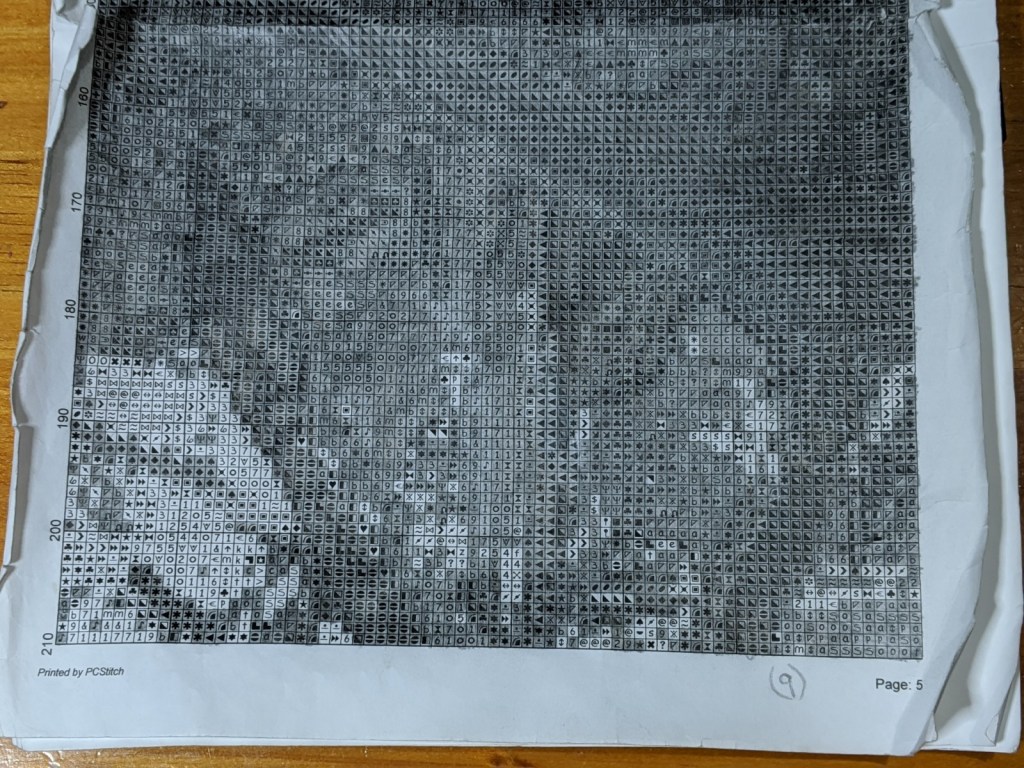
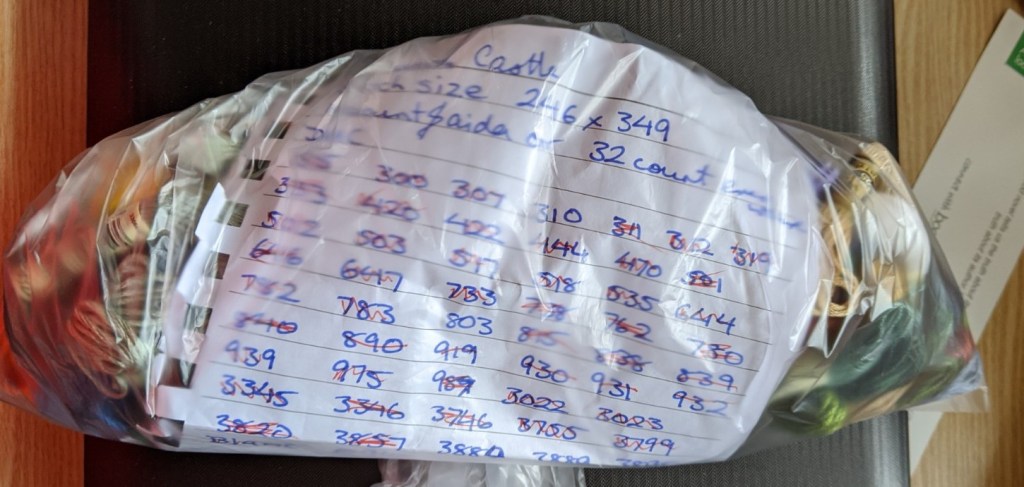
Autumn Castle
This project has been selected for square 4 and the image below on the left is what I’ve stitched as of December 2020 and the image on the right is what it will look like.
This project has been riddled with counting problems and fudging that it will be interesting to see how things go. It’s also a good thing that it’s on the WIPGO board so that it can get some attention!
Rainbow Zebras…or maybe a change?
The really good thing with this project is that it’s colourful and not full coverage (i.e. there’s still fabric showing through parts of the project).
However, I don’t know what it is about this project, but I’m starting to think I should swap this out for something else. It may have something to do with me working on some more patterns for Hot Cross Stitching that has me wanting to work on those instead of this one.
That said, there shouldn’t be anything stopping me from working on this one, Autumn Castle and working on anything else I want right?!
January Finishes
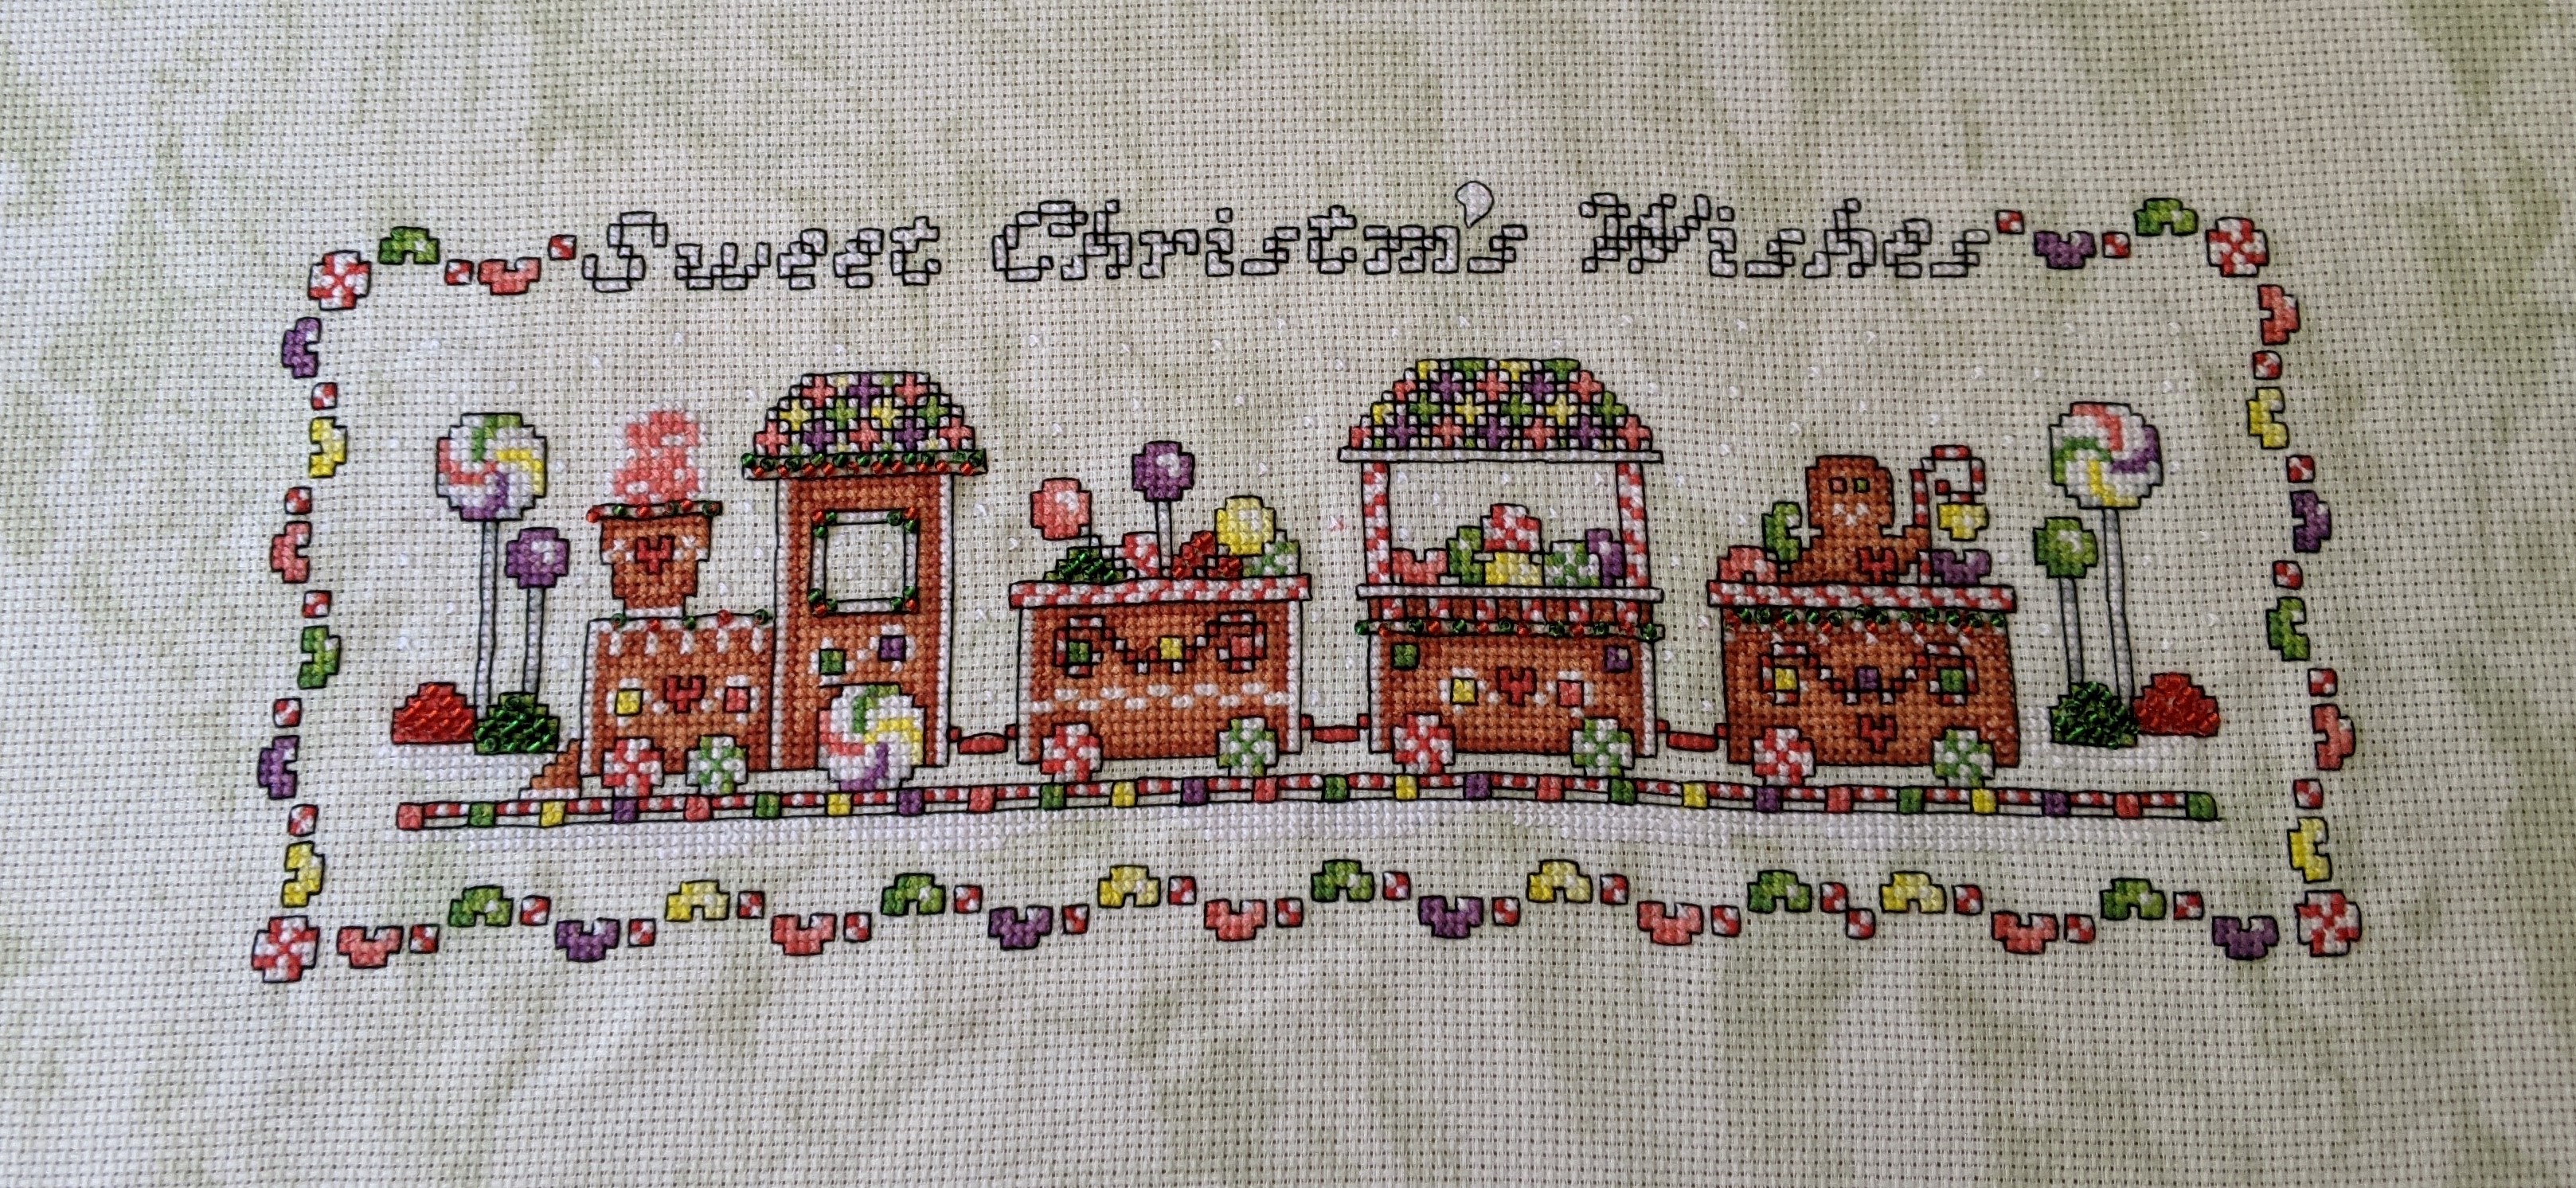
Gingerbread Train – Designed by Shannon Christine Designs
In an earlier post, I may have mentioned that I had finished the Gingerbread Train by Shannon Christine Designs and posted some pictures. In case you missed it, below is my finish and a comparison image of what the finished model looks like in the Ultimate Christmas magazine/book I got the pattern from:
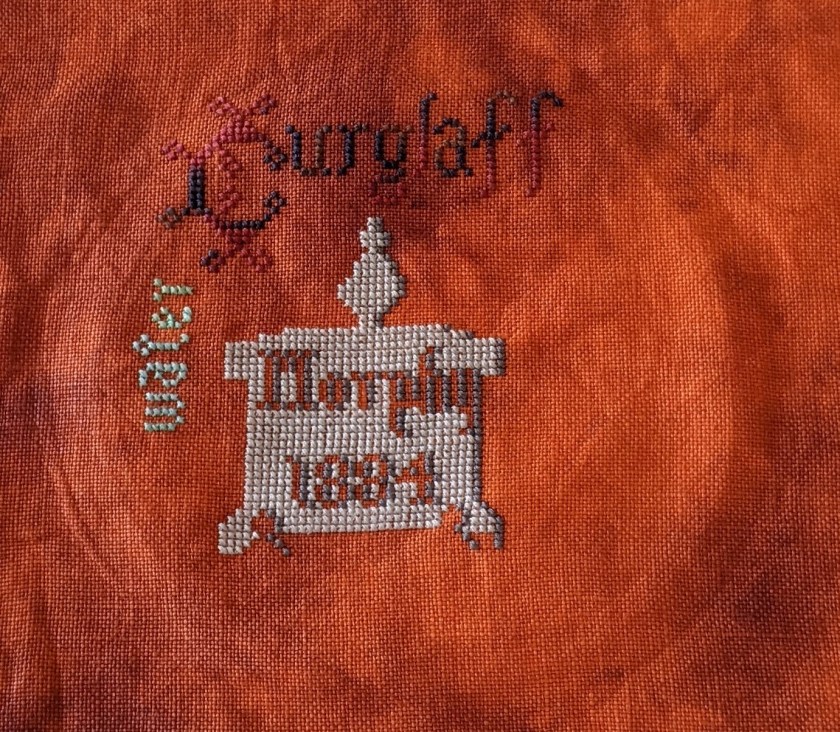
Curglaff – designed by Michelle Bendy Stitchy
I’m a little surprised by how much I enjoyed working on this project. What made it so enjoyable and exciting were some of the threads I was using and knowing that it was designed by someone who I watch on a regular basis via Flosstube. If I hadn’t watched flosstube and Michelle Bendy or Mich Stitches of Punk Poodle Designs, I’m not sure if I ever would have come across this pattern! So ultimately, I was fan-girling a bit throughout the project!
Designed by Michelle Bendy of Bendy Stitchy Designs
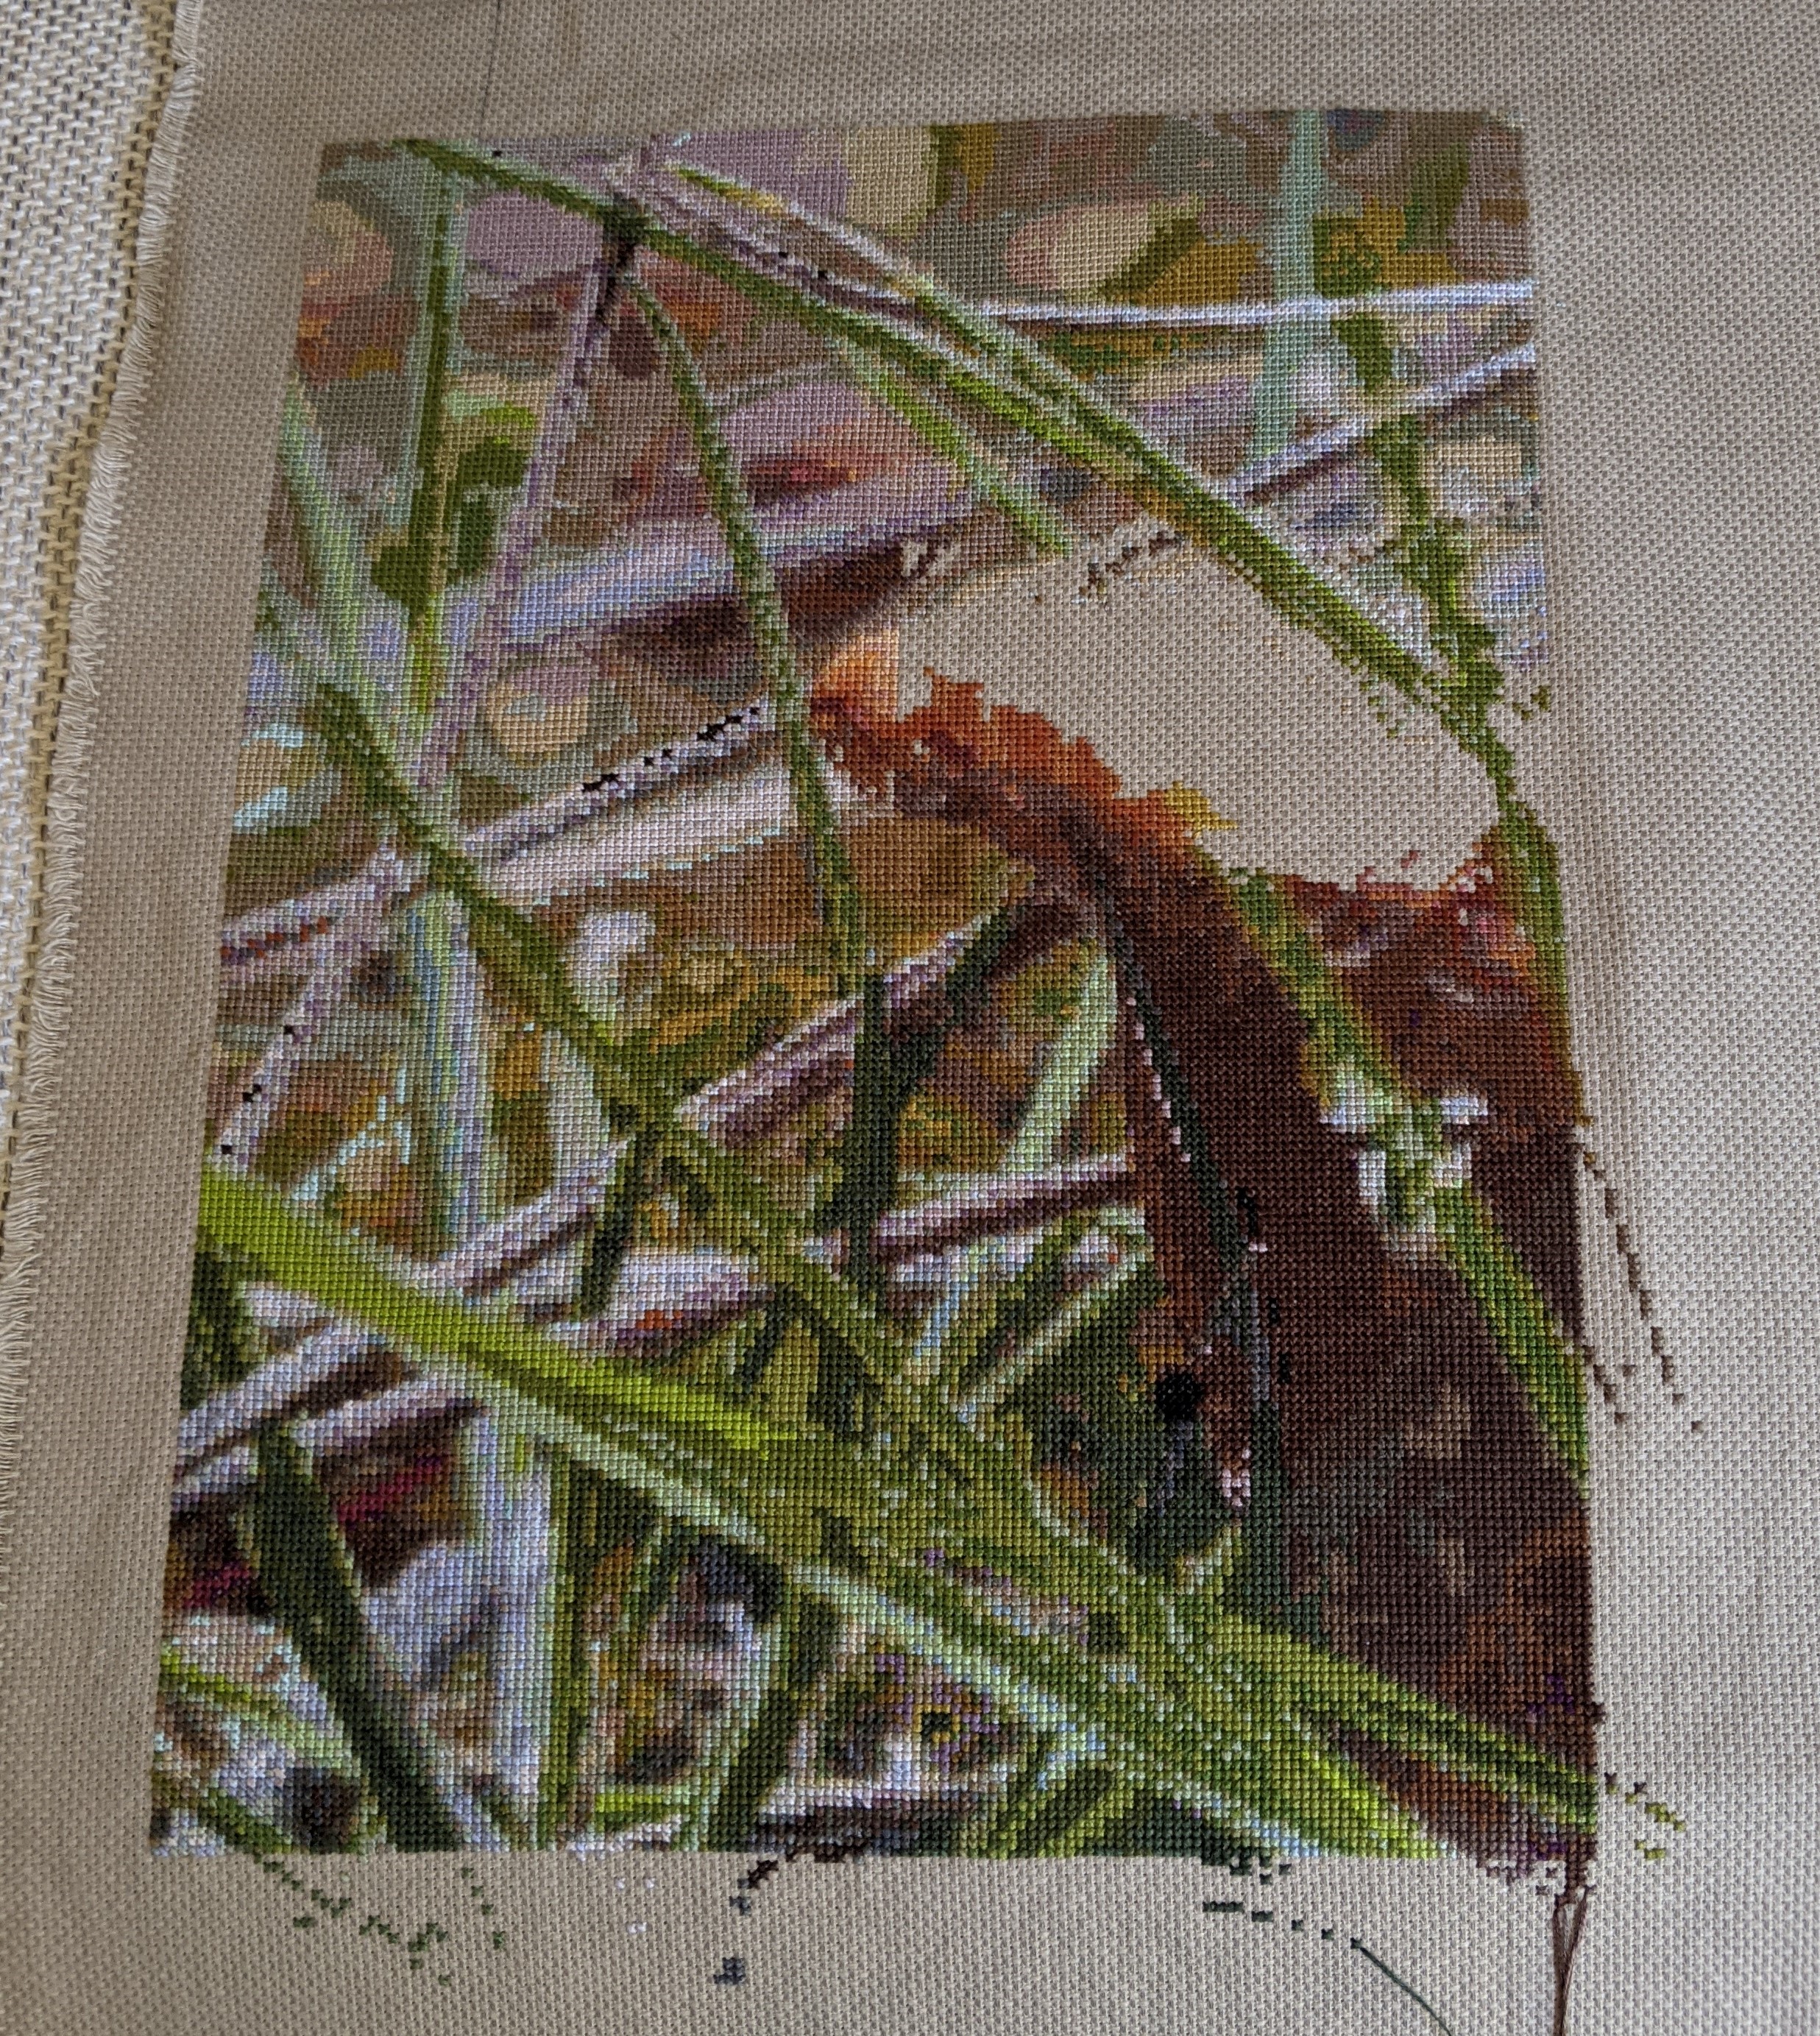
Curglaff designed by Michelle Bendy Stitchy – progress as of November / December 2020
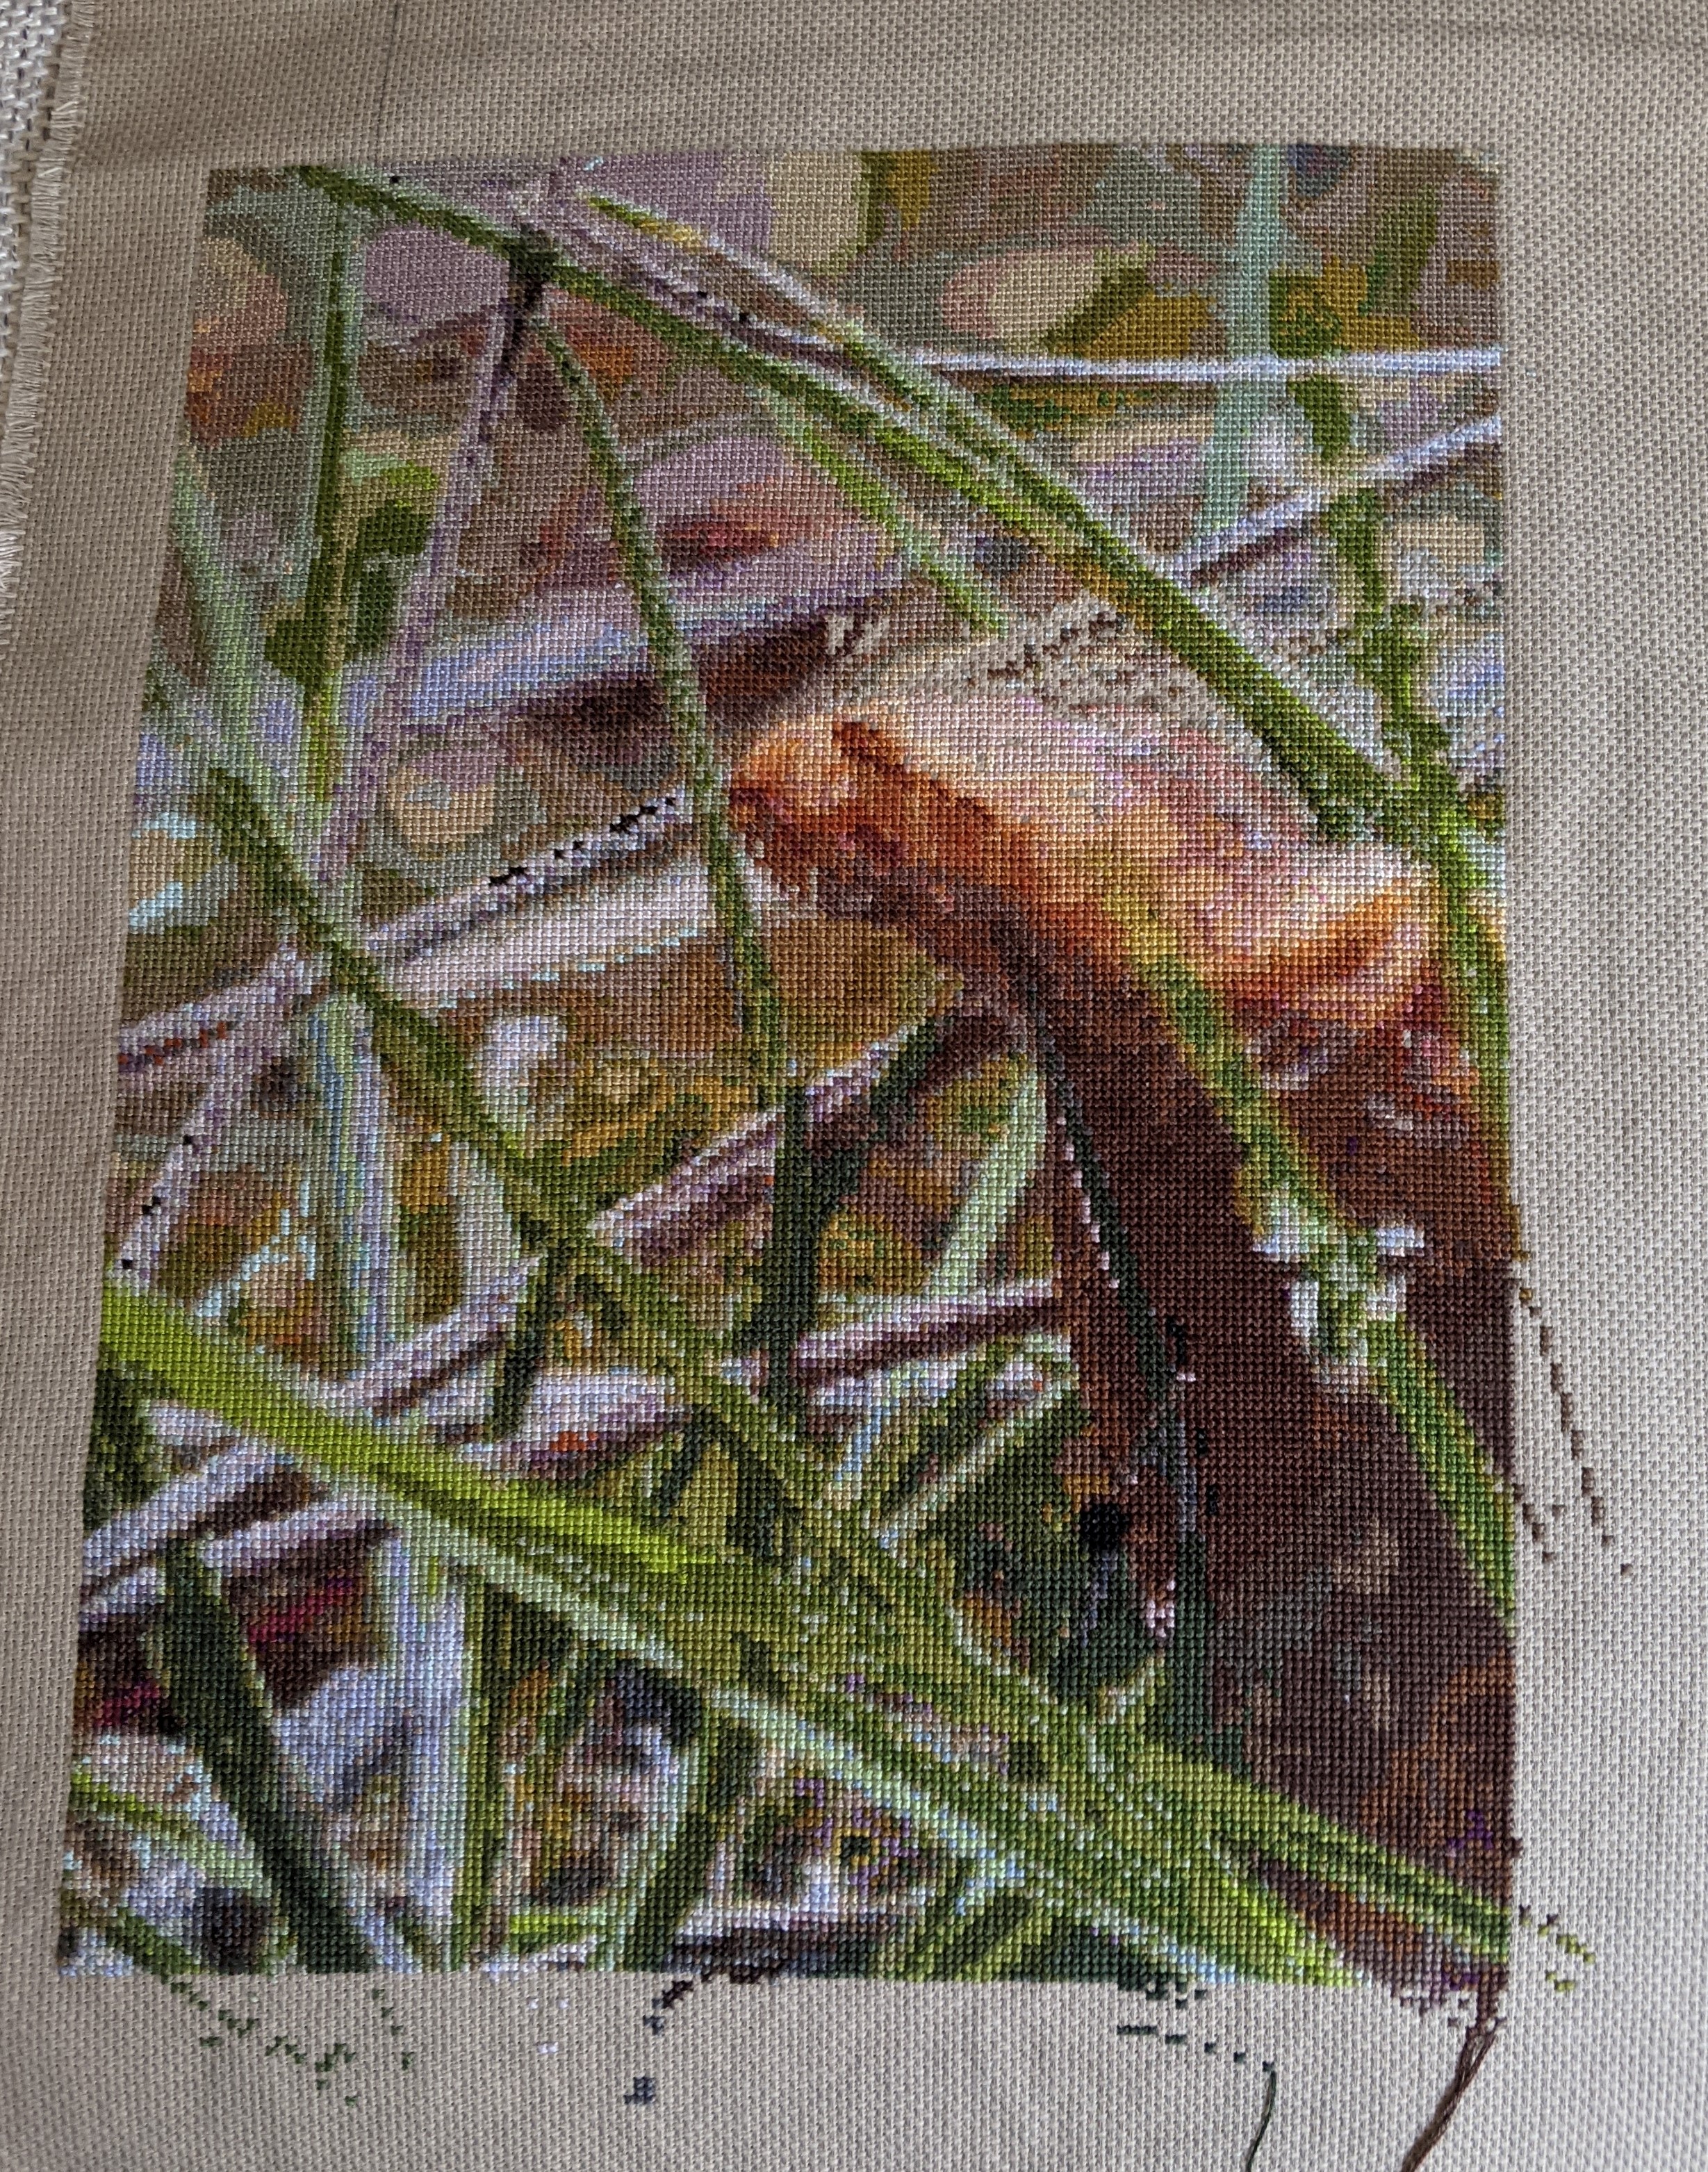
Curglaff designed by Michelle Bendy Stitchy – completed on 30 January 2021
It’s important to note that I’ve only stitched this project once and that the lighting for when I take the photos has a huge impact on how the fabric looks. The first image that shows my progress for the end of 2020 shows the truer colours of the fabric than the second image. However, the second image shows off the stitching!
I stitched this on 32 count (I think! My memory has faded a little) Belfast Linen that I dyed using orange and purple dyes from Spotlight and I stitched it using two threads of cotton over two threads of fabric (aka two squares).
For the word Curglaff, I used Cottage Garden Threads ‘Raisin’ and for the definition of Curglaff and the bath water, I used Cottage Garden Threads ‘Sherbert’. The rest of the project was stitched in DMC threads – some of them were the called for colours, some of them I swapped out for other colours because I didn’t want to go hunting through my other projects for the called for colours!
I might finish this one like the ideas I have for the Gingerbread Train (check out the related posts list at the end of this one) or put it into my smalls finish book…more to come on that one in later posts!
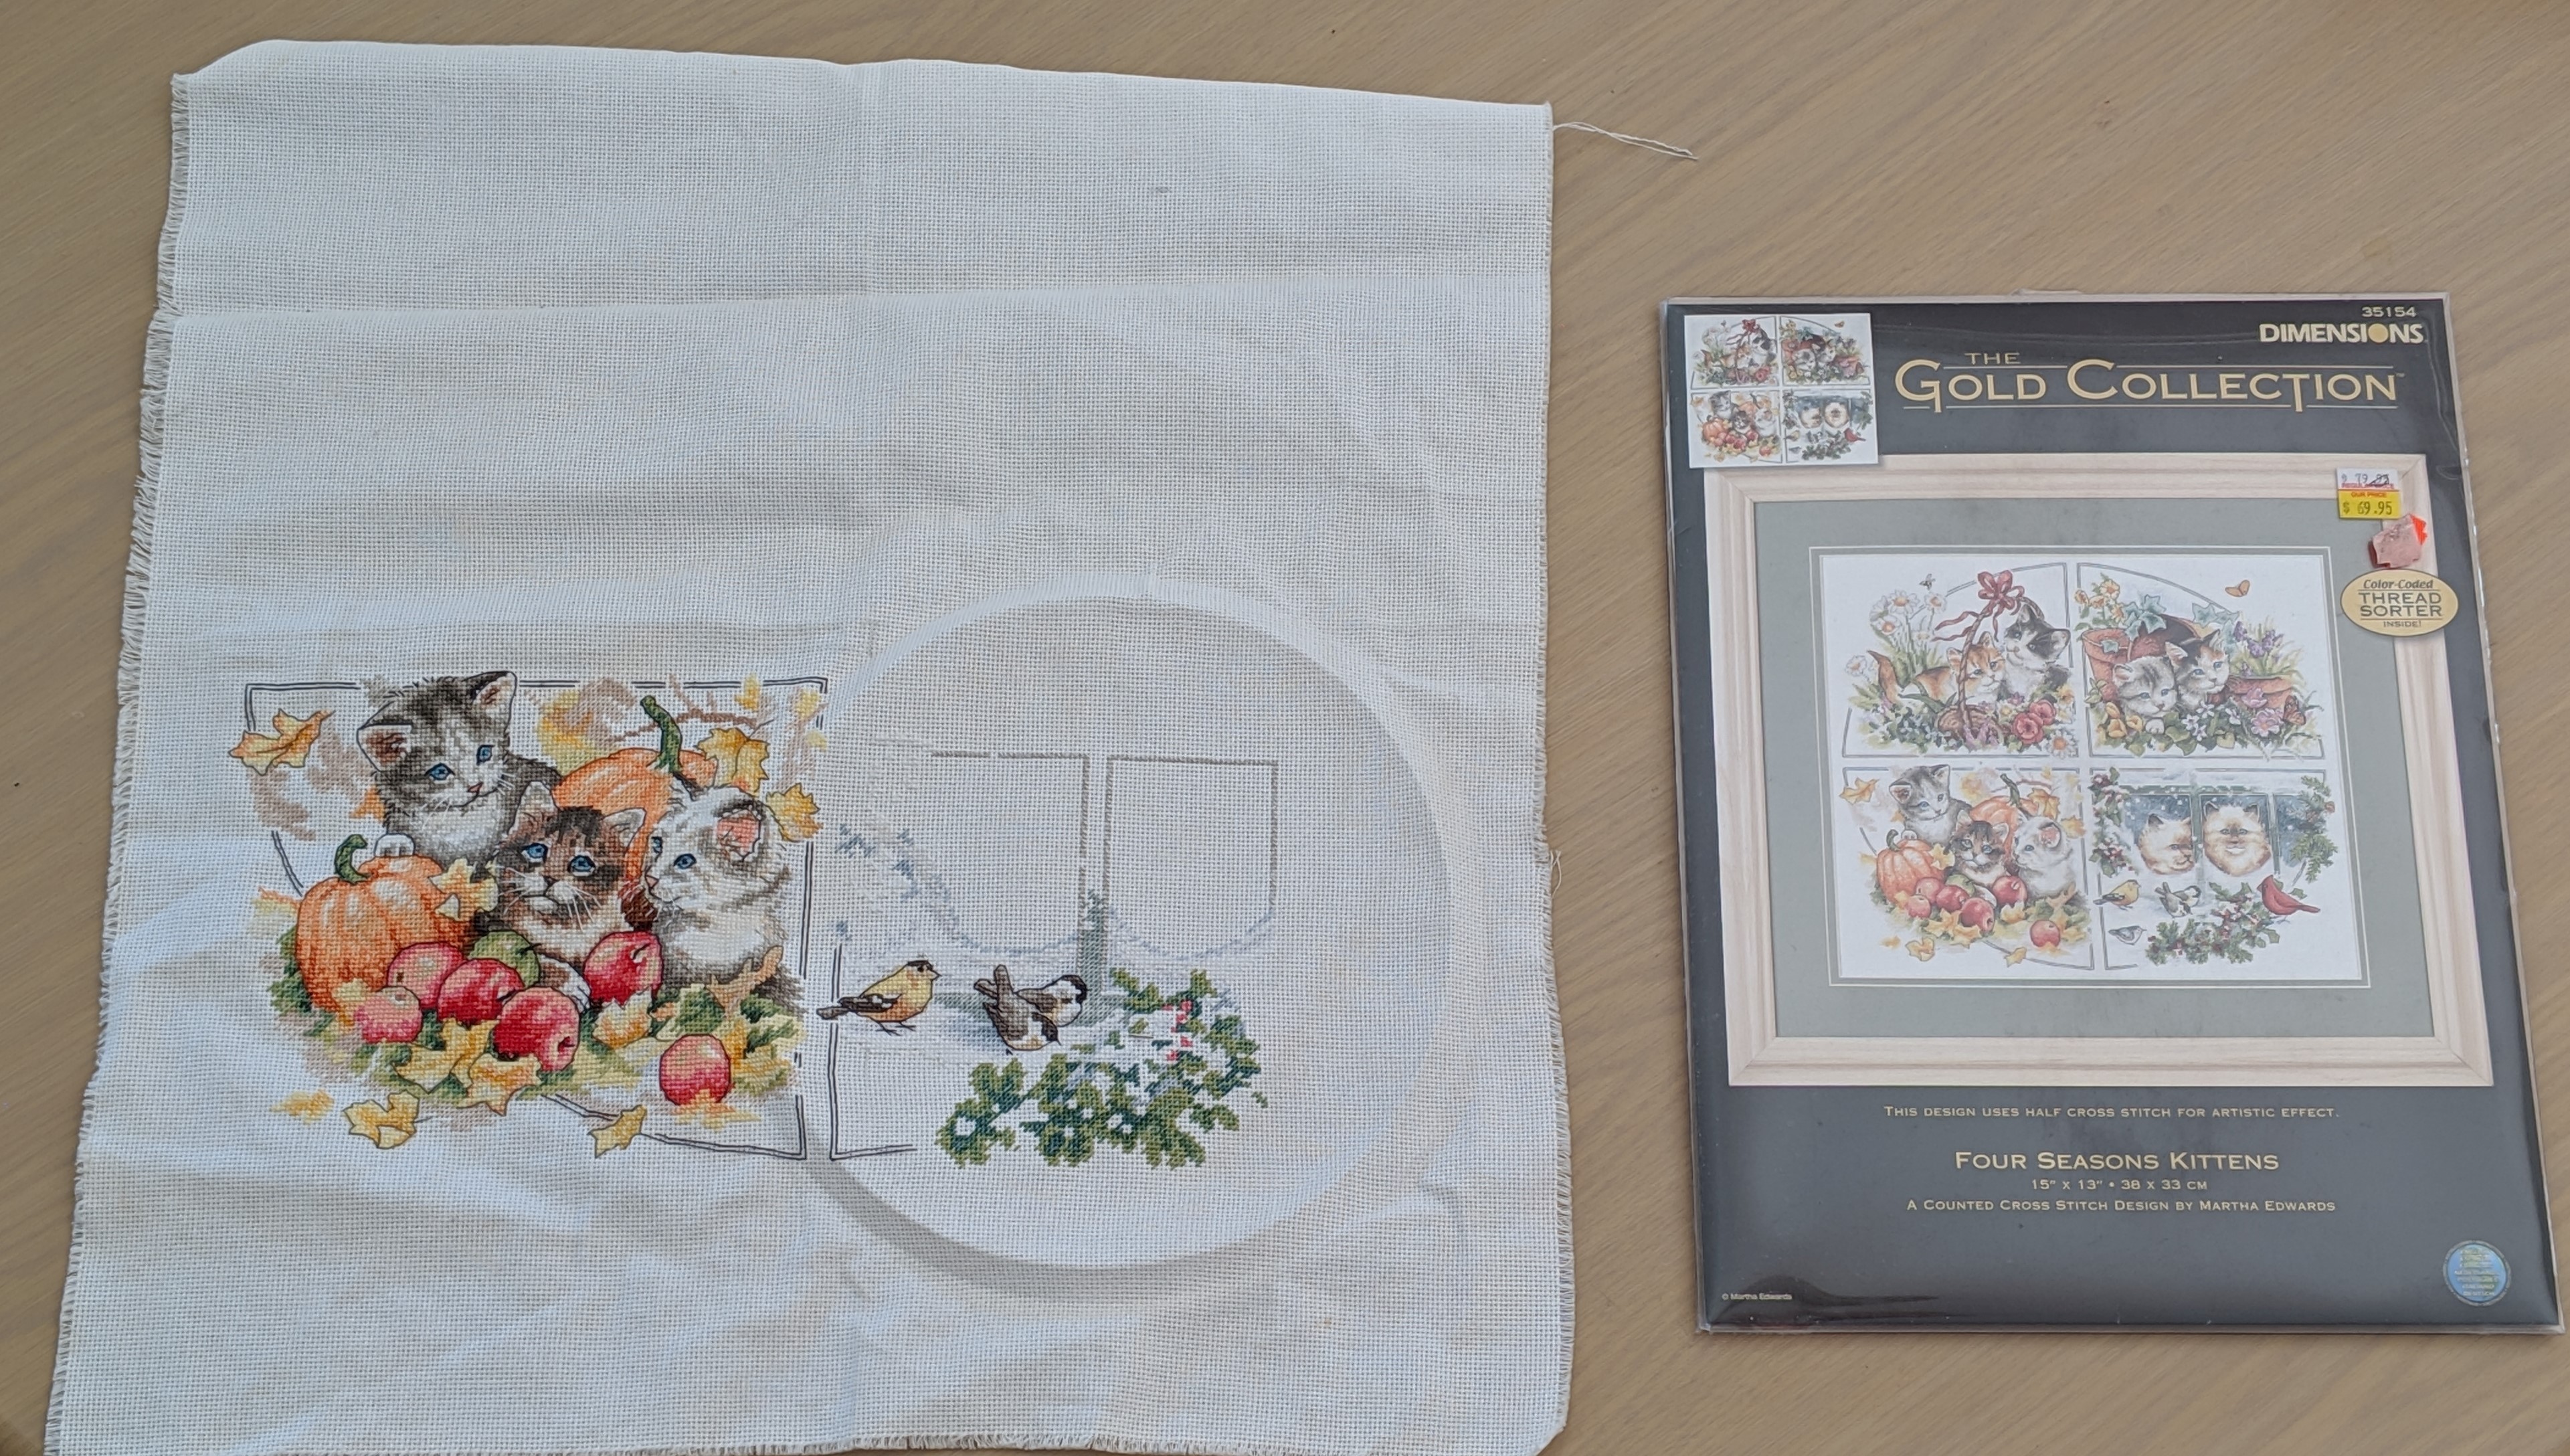
Four Seasons Kittens – Dimensions Gold kit
*Big sigh* I’m looking forward to completing this project. To me, it feels like I’ve been procrastinating its finish for so long that I’ve forgotten when I started it! Which is why having this project on the WIPGO board for this year is so important. I’ve surprised myself during January with how much I’ve gotten done and having time off work has helped too! So much so, I’ve gotten the Spring quarter completed and I’m looking forward to this project’s number being called later in the year. My fingers are crossed in hope that it’s in a month when I have a bit of time off work so that I make some significant progress on it.
Four Seasons Kittens – Dimensions Gold kit – Progress as of 31 January 2021
The above images show how far this project has come since I started this blog and talking about this project back in February 2019. Which further highlights why I’m so keen to get it finished!
The good thing now is that I can breath a sigh of relief knowing that I’ve achieved my goal for this project during January 2021, and I can focus on the projects for February.
Haul
I’ve been aware of a craft store called the Crafty Frog at Kambah, ACT for many years. However, it wasn’t until the major bushfires of 2019/20 that I went to the store to deliver some donations and last week, to purchase something! In the grand scheme of things, Kambah is roughly a 30 minute drive from where I live and it’s a very comfortable and straight forward one. It’s taken me so long to do the trip because I’ve grown accustomed to the stores closer to where I live and being in the mind set that if I’m going to travel that distance, I need to make my trip worthwhile. For example, there may be some other stores I want to visit or a friend or family member.
In this case, I have a friend who lives in roughly that direction (still about a 20 minute drive away from the store), but close enough to warrant a round trip. I’d also reminded myself enough that the Crafty Frog has some specialty threads I wanted to check out and below is what I bought:
Threads purchased from the Crafty Frog – January 2021
Dinky Dyes, Brindabella Threads and CGT (aka Cottage Garden Threads) are all Australian based – the Brindabella ones being Canberra Region based!
I’m not completely sure what I’ll stitch with these yet, but I just love looking at them! The time, effort and creativity that each company / business has put into making these threads is awesome and amazing. To me, they are definitely worth the extra money!
A fair bit has happened since I last published a blog post. I’ve been procrastinating starting some of my projects, attended an online stitchers retreat, done some shopping and dyed some fabric for the first time! I’ve also gotten some stitching done in between sneezing and blowing my nose because of hay fever.
Online retreat and a fan girl moment…
The weekend we just had (21st and 22nd November) was my first online stitching retreat and it was really cool! It was the Mittagong Stitcher’s Retreat and the organisers did really well to setup Facebook rooms where attendees could do a video style stitch and chat. There were challenges with prizes, free charts that some designers had charted and donated to the retreat and links to some online stores with discount codes.
My nerves got the best of me for the first online stitching room I joined and which added to me being awkward and trying really hard not to fan girl too much. Mich Stitch was one of the organisers for the Mittagong Stitchers Retreat and I love watching her Flosstube channel. She’s an Aussie flosstuber and she had been one of the people in the first group I had joined on Saturday morning. It was great being able to chat with her and two other people in the group who were based in America.
Unfortunately the internet dropped out after a while. But I took it as a hint to get up and go for a walk. Over the weekend my boyfriend and I were at the coast and we had changed internet providers. This was the first time we had used the internet at the coast since signing up with new providers.
The second time around I joined the stitching group, I used me phone as a hot spot and it worked out really well. I was able to meet some new people and my nerves weren’t anywhere near as bad as the first time around, so my fan girling wasn’t too bad and I got to meet Kelly (aka Animal Instinct on flosstube) who is another Aussie flosstuber and I love a lot of the projects she’s working on and has completed. I also got to meet a number of cross stitching Canberran’s. I was buzzing with excitement by the end of it!
Stitching progress
Throughout the Mittagong Stitchers Retreat weekend I was working on the Gundaroo Mini Mushrooms. I’m really happy with how it’s tracking and when I was taking photos of my progress to date, I’m starting to think that I could get away with reducing the number of pages in the project!
I was also able to get some work done on the Black and White Daisy before we headed to the coast and I’m happy with the progress – even though I’m going to have to take a bit more care with this one! I found that I was a bit too relaxed with this piece when using Pattern Keeper and I’ve miscounted some part of the white petal. I’m hoping that over time I’ll be able to amend whatever mistakes I’ve made!
First time dyeing fabric
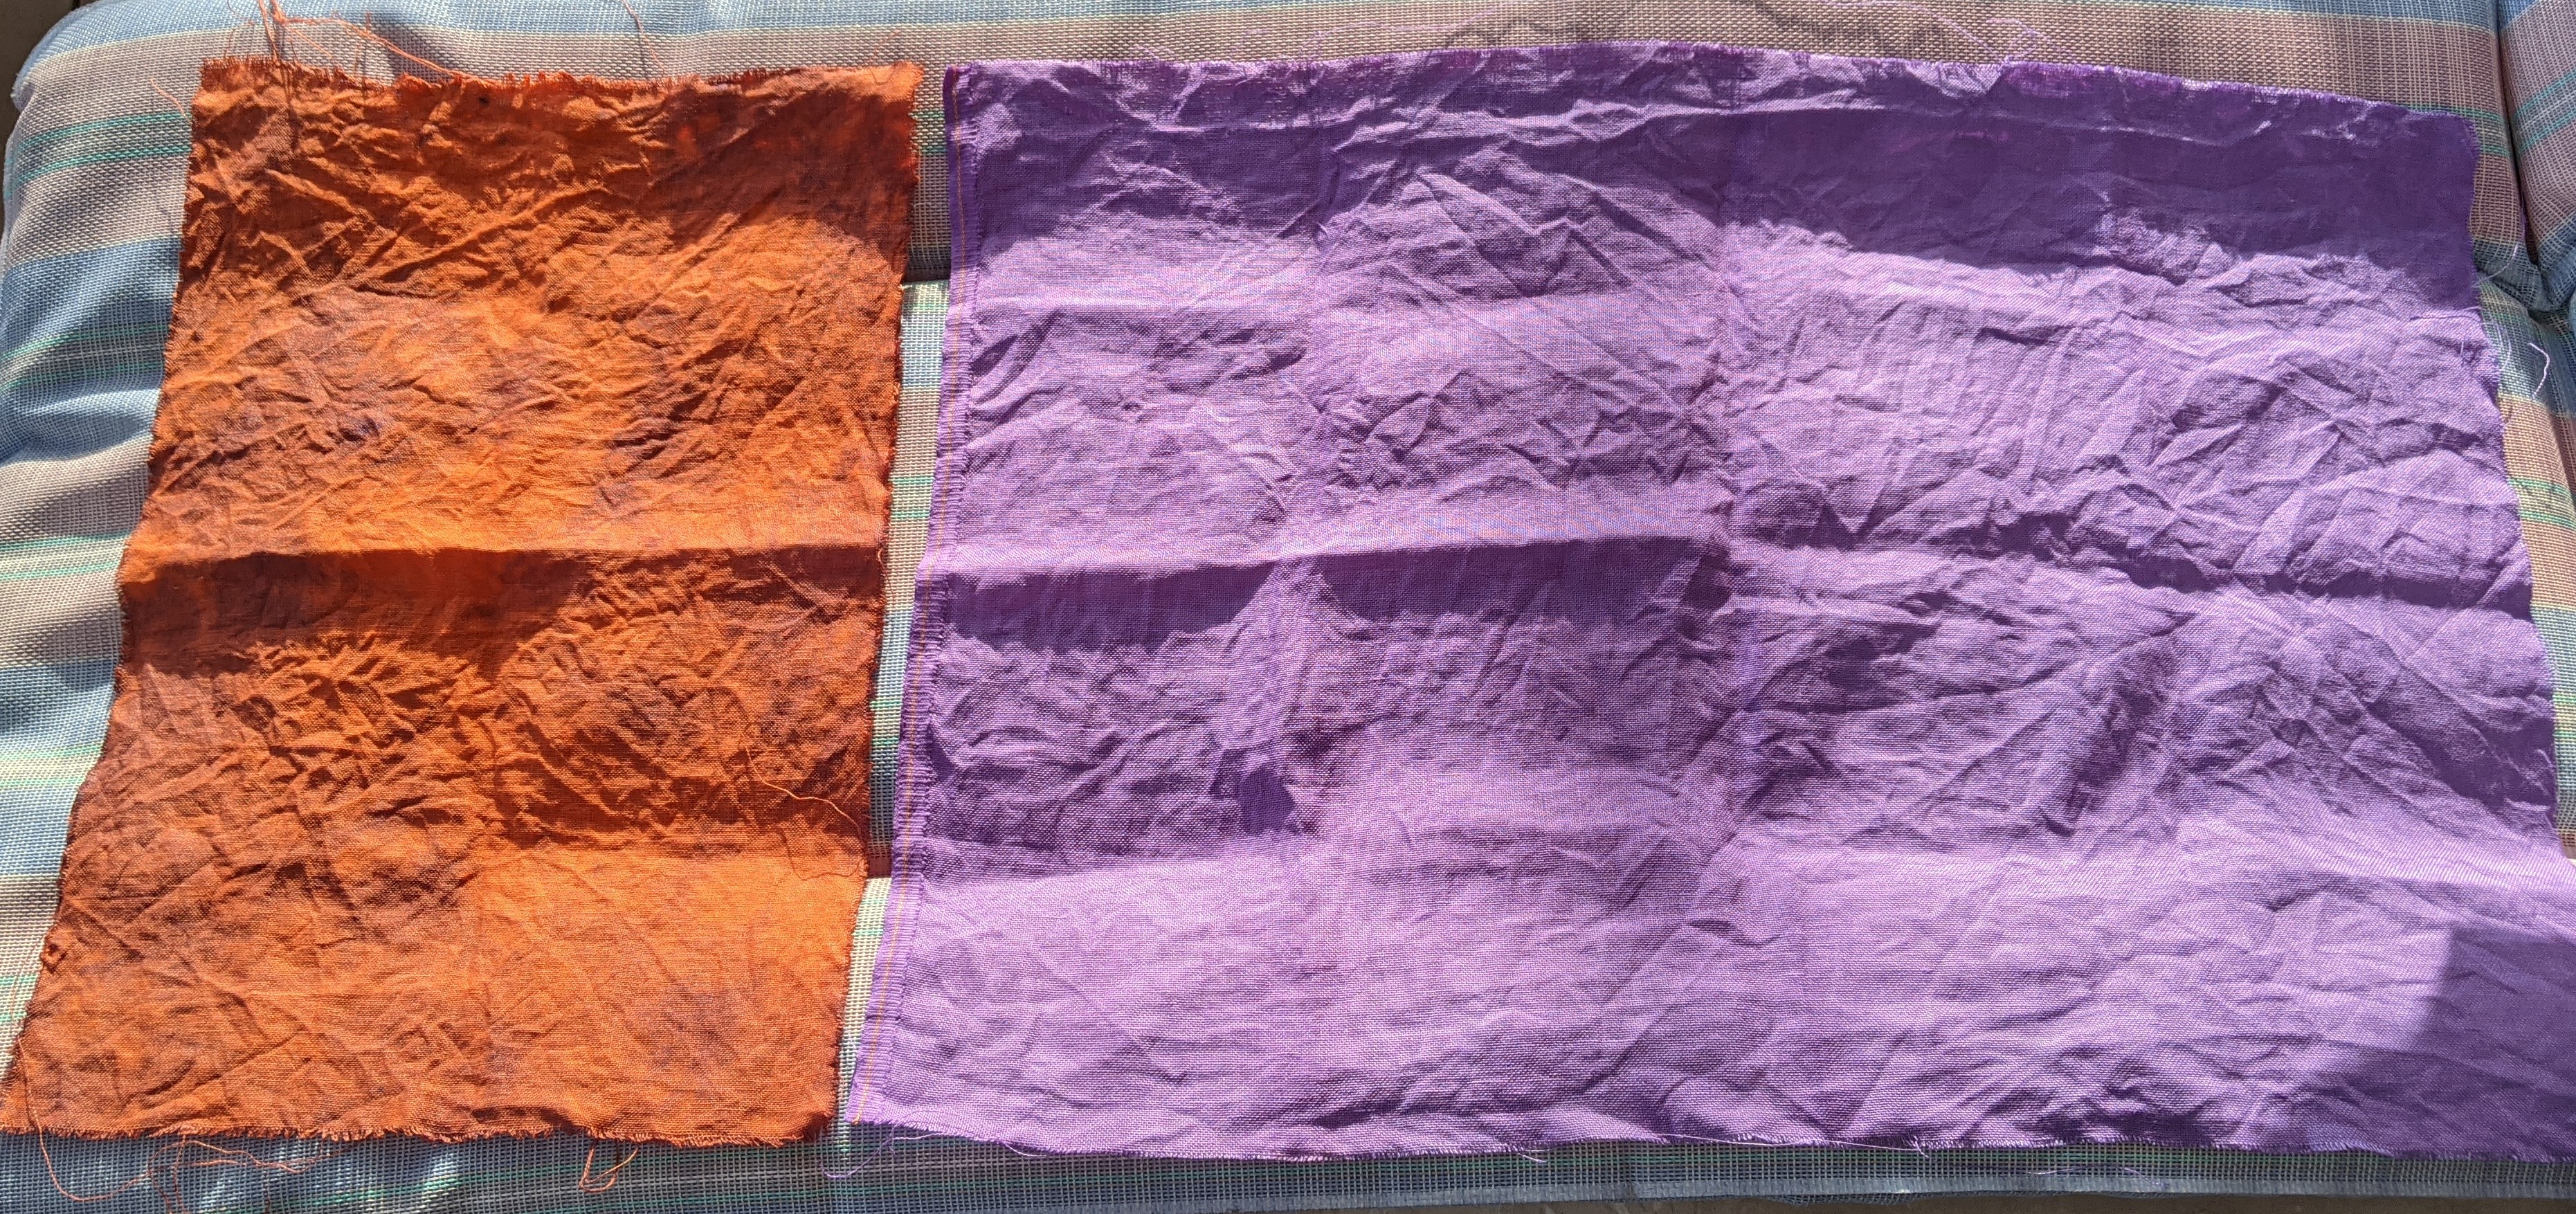
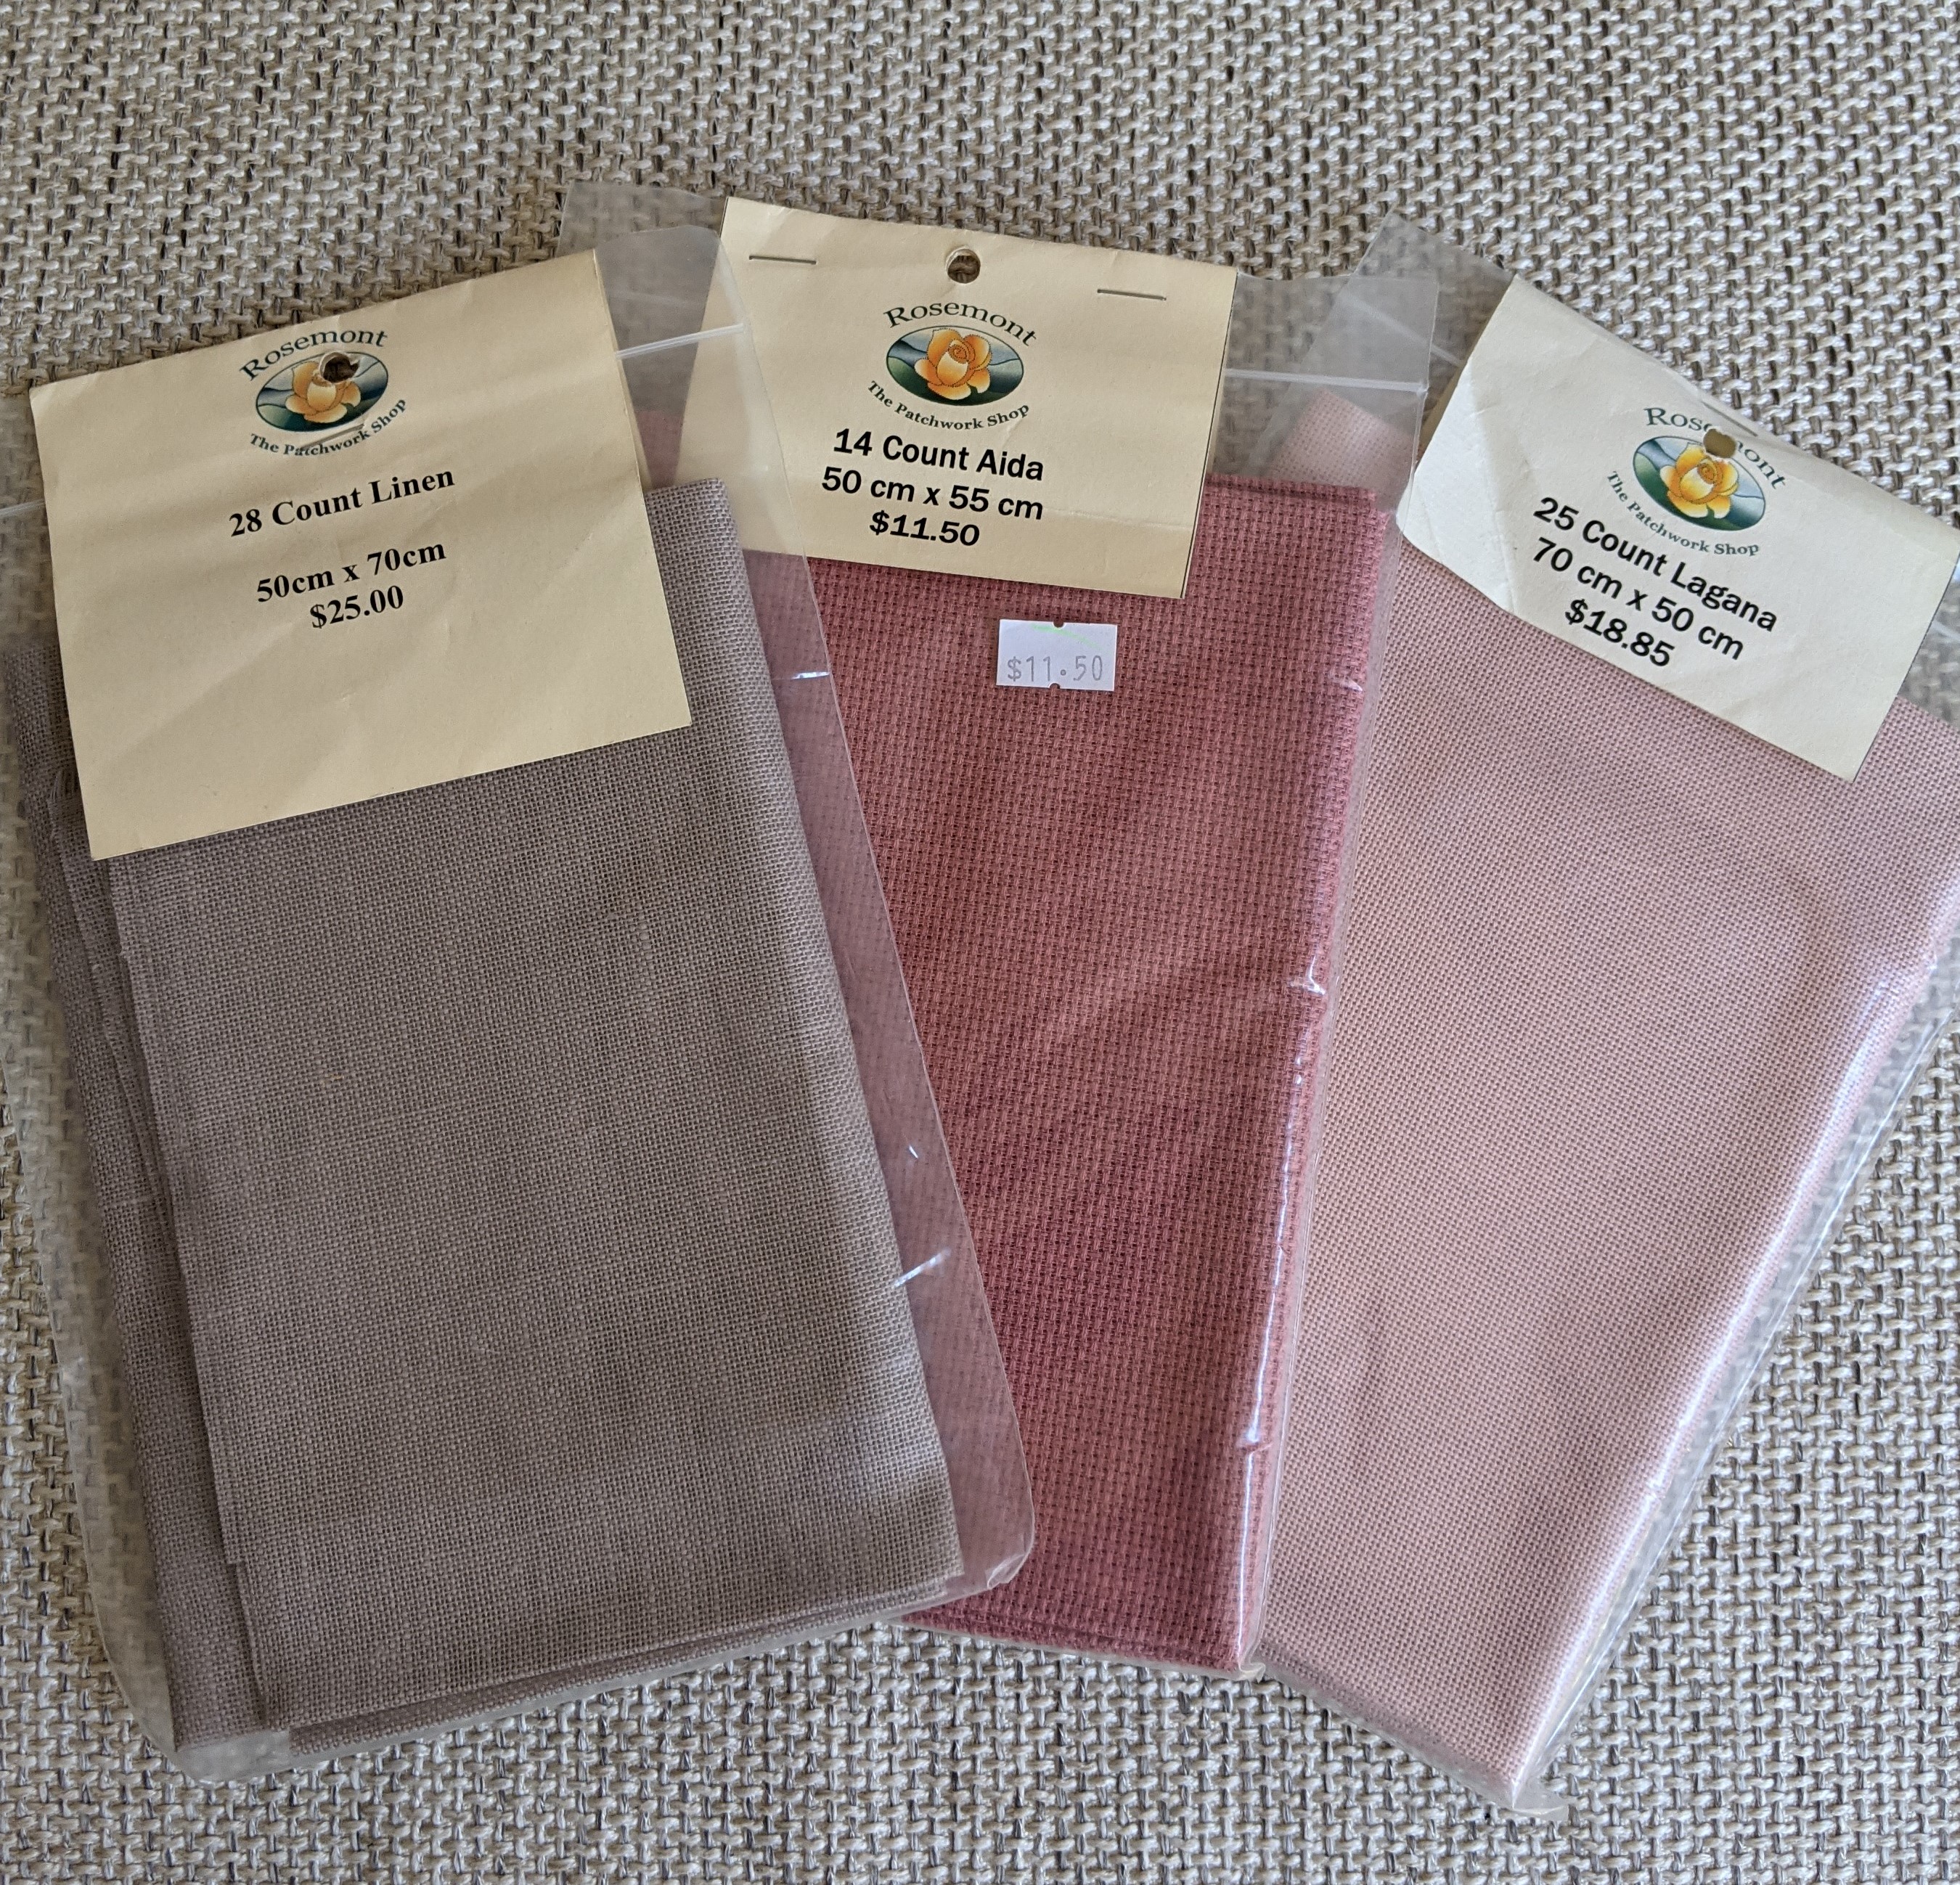
Over the weekend I finally dyed some fabric for cross stitch! It’s something I’ve been wanting to do for a while – especially after watching a number of Flosstube episodes from America. A while ago I had purchased some pre-cut 32 count Belfast linen and some iDye colours from Spotlight, with the intention of dying it and using it for one of my patterns. Over the weekend I also purchased some fabric from the Rosemont The Patchwork Shop in Mogo and I used one of the pieces of fabric for the dyeing job.
I decided to use orange and purple as the main colours and on the orange piece I wanted to try some tye-dying with some purple to give it a bit of a marbled look. Below are the two pieces I dyed. One of the images is a close-up of the orange piece to show you the marbled purple:
The orange piece is the 32 count Belfast linen and I stitched a free pattern from the Mittagong Stitchers Retreat on it. My head is spinning even now, just thinking about it. The pattern turned out really well. I found that I was starting to get a bit of a headache because of the focus my eyes needed to do for the fabric.
I’m really happy with how both pieces turned out and I’m keen to dye some more fabric! I’m thinking that I’ll try my hand at some 14 count brown fabric I have in my collection to see how that goes. Because both fabrics I used for my first dying attempt were light colours and I’m curious about how the iDye colours will go on a darker colour.
Stitching Haul
I mentioned earlier that I had done some shopping at Mogo and I was able to get my fix at the Rosemont The Patchwork Shop by purchasing some beautiful cards and fabric. They have the softest pink Aida there, I couldn’t help but pick up some more!
I’m not sure what I’ll stitch on the fabric yet. The good thing is that I have plenty of patterns to choose from. The tricky part will be deciding on which pattern to stitch on which piece of fabric!
I also have some more haul on it’s way that I will have to show later. As part of the Mittagong stitchers retreat, I purchased some hand-dyed silky threads! I’ve never stitched with these types of threads before and I have a couple of patterns in mind that I think I’ll use them for. When the threads come in I’ll share pictures of them with you and the patterns I’ll stitch them on.
I’m not sure about you, but I’m sad that Maynia is coming to an end for this year and a tad relieved. Towards the end I felt like I was trying to keep a number of plates spinning at the top of sticks, by trying to make sure I had spent enough time on all of the projects I had started during May or continuing to work on from previous starts.
Stitch Maynia Stats
In May, I started Fight Like a Girl, Candy Train, Who’s Been Good? and Autumn Castle as my new projects and continued with Moon Lit Fairies, Four Seasons Kittens, Gundaroo Mushroom, Barnyard Kittens and Three Dogs as my continued WIP’s.
Autumn Castle designed by Evgenia Kolesnikova
Most of my time was spent on Autumn Castle designed by Evgenia Kolesnikova. I think I’ve raved about this project before. What I’m loving about it is the colours and it’s something different to what I normally work on. But it makes sense that I’ve started working on something like this, because I love spooky things, ghosts and things relating to the supernatural/paranormal!
I was able to stitch about 884 stitches, which works out to being nearly half a page and I’m stitching it on 18 count pink Aida. When you look at the cover picture, you will see that I’ve started in the top left corner.
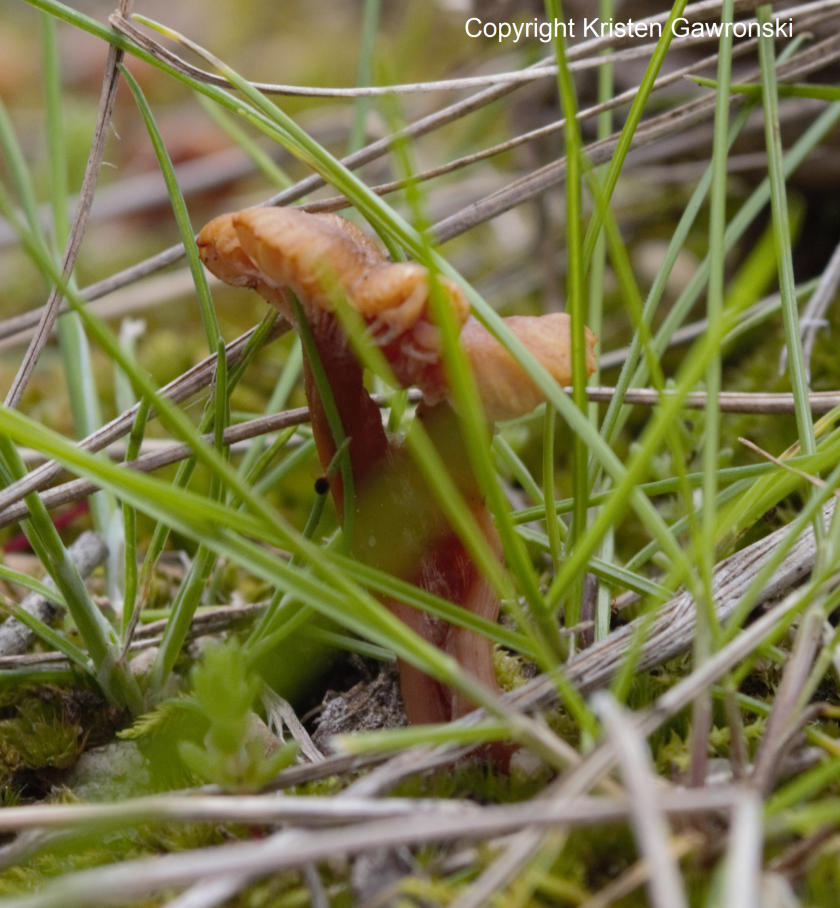
Gundaroo Mini Mushroom designed by Kristen Gawonski
I feel like I’ve been working on this project for ages. It doesn’t help that I’ve now got so many other projects to distract me! In May, I was able to work on it for 7 of the 31 days and I was able to get a total of 1000+! I’m actually quite surprised that I got so many stitches in because there were certainly times where I felt guilty for not stitching on this project and I some days I felt like I needed to guilt myself into stitching it because I really wanted to stitch the shiny new ones! The pictures below show my progress and what it will look like when I’m done:
For anyone who’s new to my blog and reading this for the first time, the special thing with this project, is that it’s my own design. The image on the right is a photo that I took on my parents farm at Gundaroo, NSW, Australia and using the software PC Stitch 11, I was able to convert it into a cross stitch pattern. The thing that I’m testing with this project is how well it will turn out on 14 count Aida. My additional aim with this project is to enter it into the Canberra Royal Show. Fingers crossed it gets there!
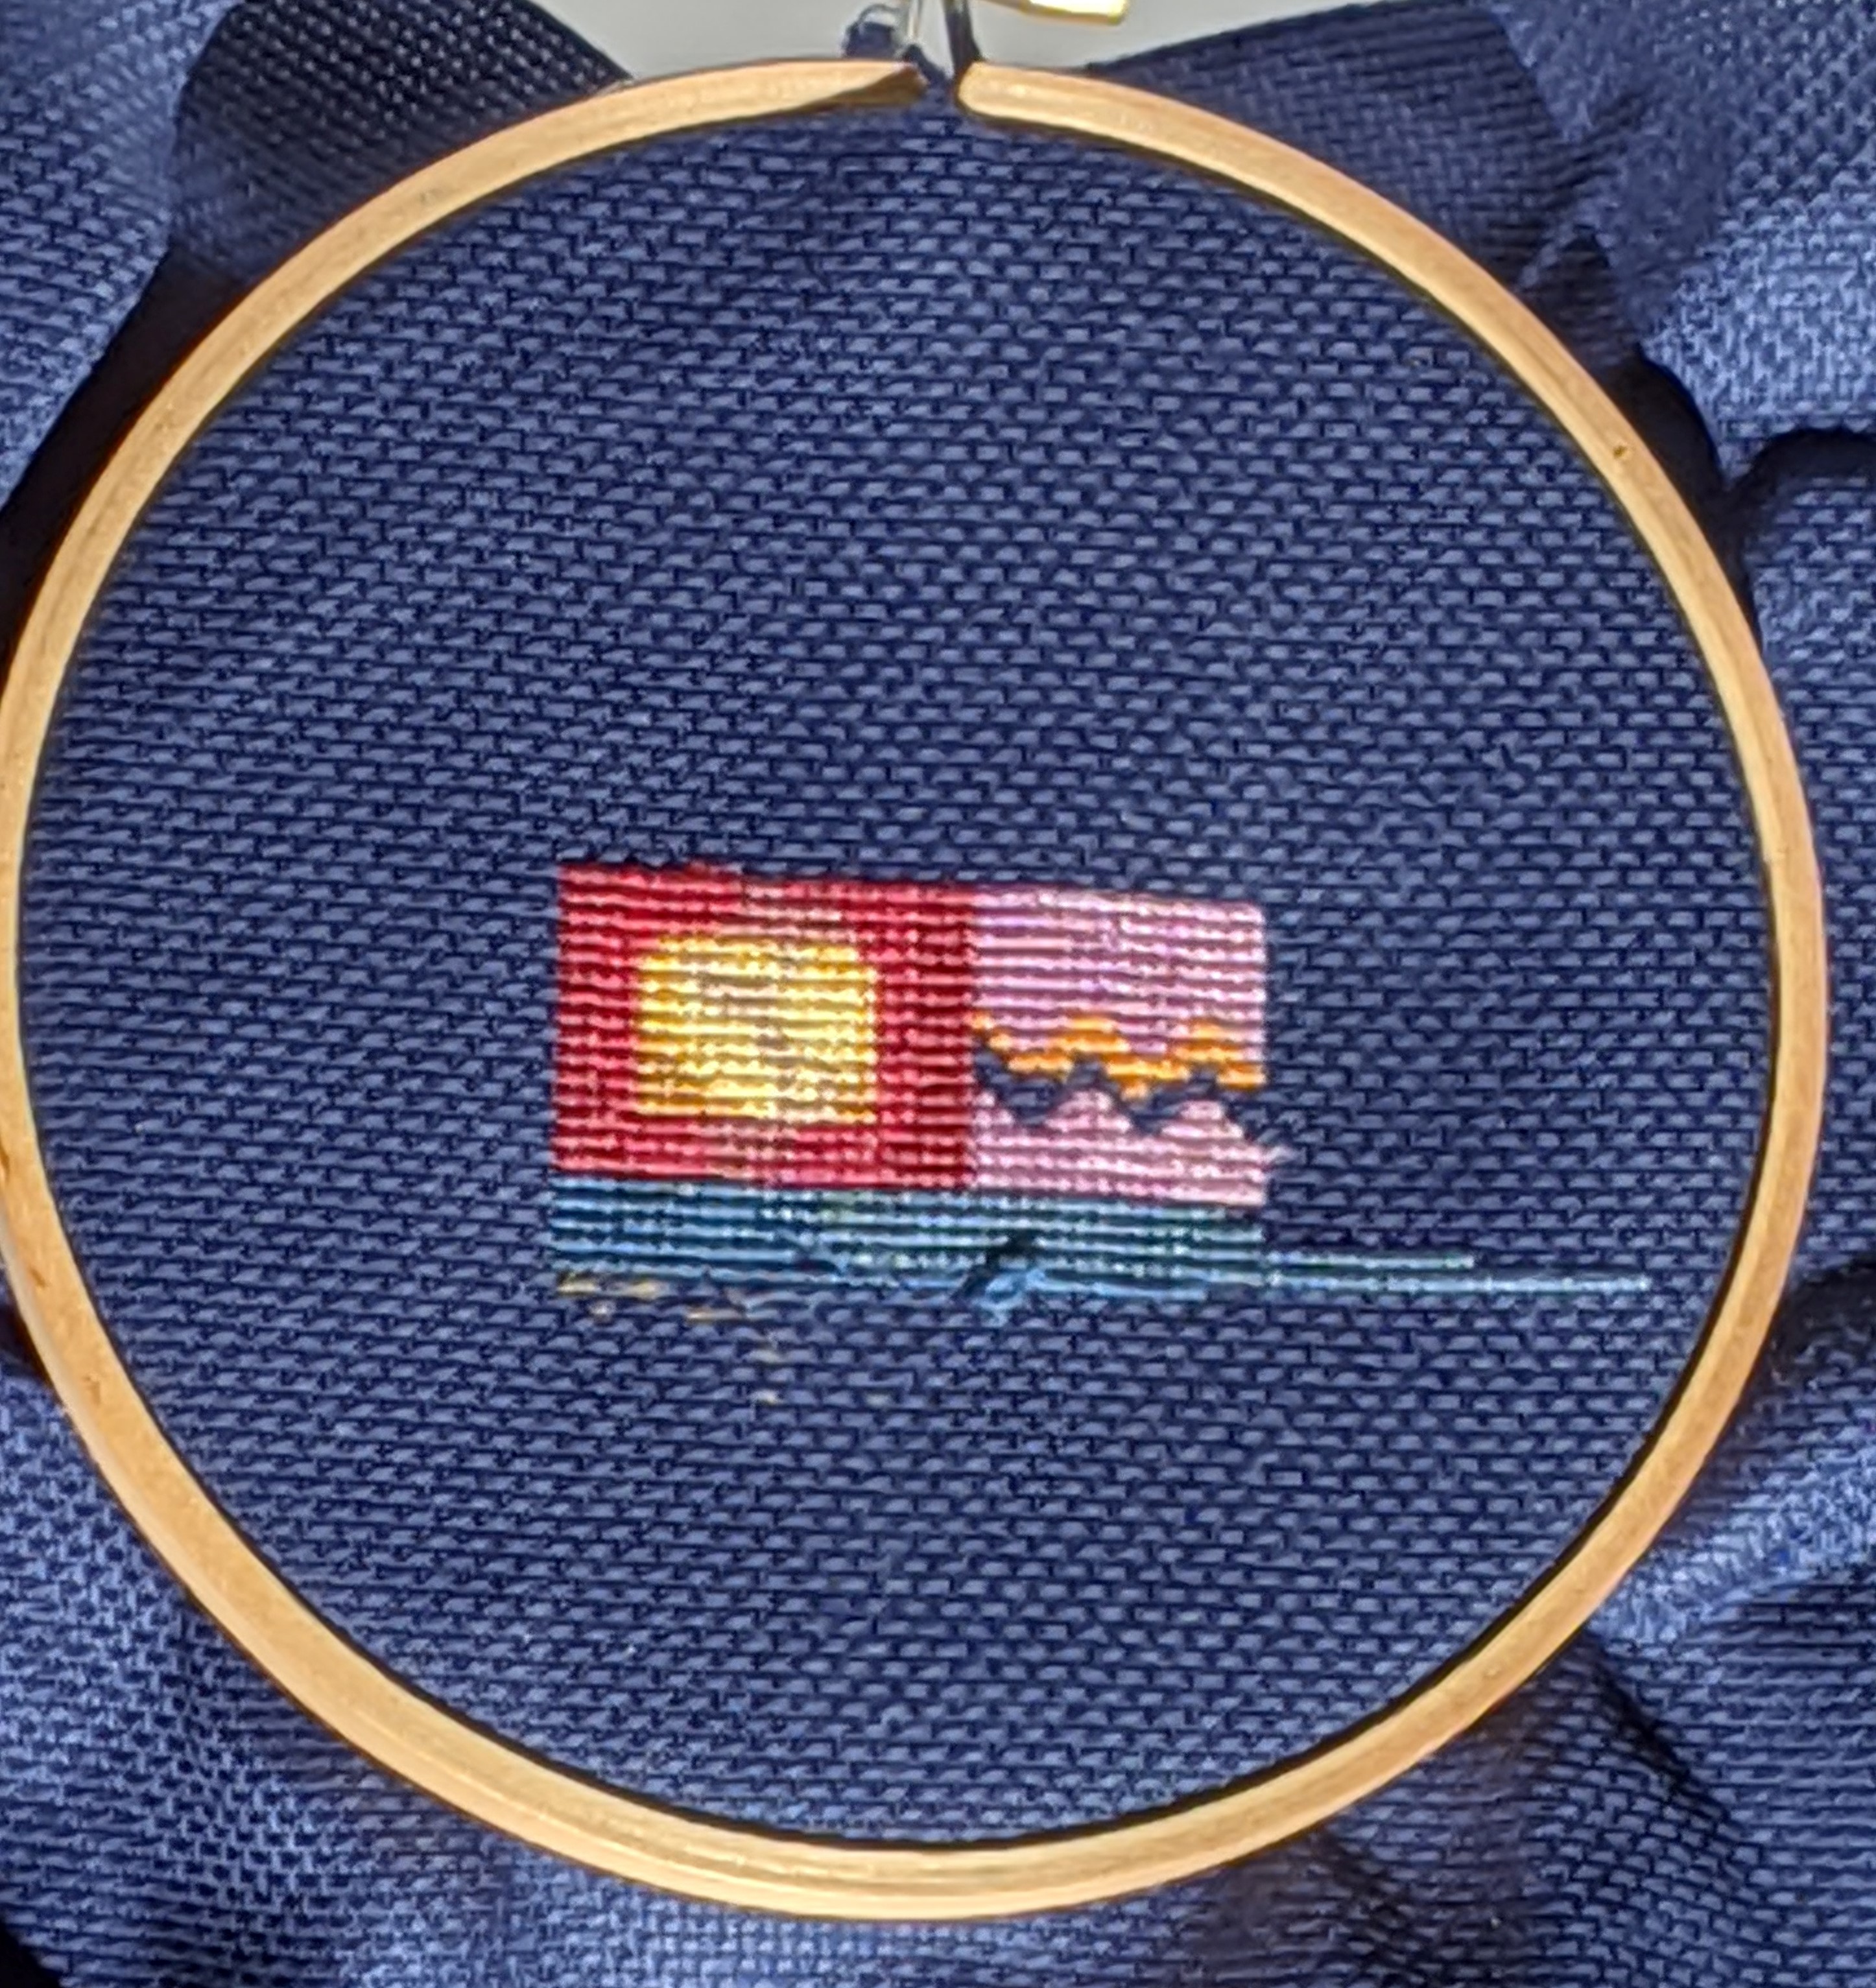
Fight Like a Girl Designed by Tanya Amity
I’ve really struggled with this project which is surprising me. I really thought that I would have an easier time with getting into it. The main challenges I have with it is the amount of fabric this project potentially needs, the colour of the fabric and how I’ve loaded the pattern into Pattern Keeper.
Tanya has been fantastic with providing me (and I’m assuming anyone who purchases the pattern) with 3 versions of the pattern – black and white without the back stitch and special stitches, a colour version without the back stitch and special stitches and a colour pattern with the back stitch and special stitches. Me not thinking, loaded the whole PDF onto Pattern Keeper and I’ve stitched myself up as a result! Pattern Keeper has done well to interpret the pattern the best way that it can and what I will need to do is see if it’s possible to separate the PDF into the 3 versions and see if that makes any difference for me. The biggest challenge with that will be the way Pattern Keeper interprets the key for the chart. At the moment, Pattern Keeper is able to highlight the symbol on the chart, but at the moment it’s unable to tell me what the corresponding thread colour is. So I’m needing to refer to the paper version and progress from there. Below are the pictures of my progress and the cover picture to show what it will look like completed:
I’m stitching this pattern on 18 count navy blue Aida and I’ve stitched 744 stitches according to Pattern Keeper. The pattern recommends 28 count Navy Blue Lugana. I haven’t figured out how much fabric that would be, but the fabric I am using (from Victoria House Needlecraft) measures 76cm wide by 79cm high. I figure that if I have roughly an 8cm border, I should have enough fabric!
You may notice in the image on the left that I’ve had to do some frogging as part of the struggles I’ve had with mis-counting. A lot of which is to do with me working on it when I’ve been a bit tired and awkward. Because there’s so much fabric (see image on the right), I tend to try and roll it up a bit and have the project up side down and I’m reading the pattern right side up. It’s a weird quirk of how I stitch sometimes, but it works – mostly!
Barnyard Kittens by Dimensions
I’d started this project what feels like ages ago and put it down for a while. When I’d first started it, I had made the wise decision of updating the floss holder by drawing the symbols on it.
Floss card from Barnyard Kittens by Dimensions (kit)
This has helped me so much more than I had initially thought it would. The only reason why I need to refer back to the key on the pattern is when I need to check how many strands of each colour I need to use. And as I’m writing this, I’m making a mental note to add to the floss card, how many strands I need for each symbol. For many Dimensions kits, the number of strands per colour vary from 1 to 3. Sometimes 4. It can also vary in terms of the combination of colours. E.g. 1 strand of white and 3 strands of pink or 1 strand of black and 1 strand of light blue. This helps to create texture and depth to their designs. Below are pictures of how I’ve progressed and what it will look like at the end:
I’ve started in the middle of this project and 90% of the time I’ve stitched this during my lunch break when I’ve had the sun streaming in and it’s felt nice and warm on the couch. I’ve stitched a reasonable 891 stitches on the black 14 count Aida the kit came with. This is definitely one of those projects I need to stitch when I’m awake enough and with plenty of light!
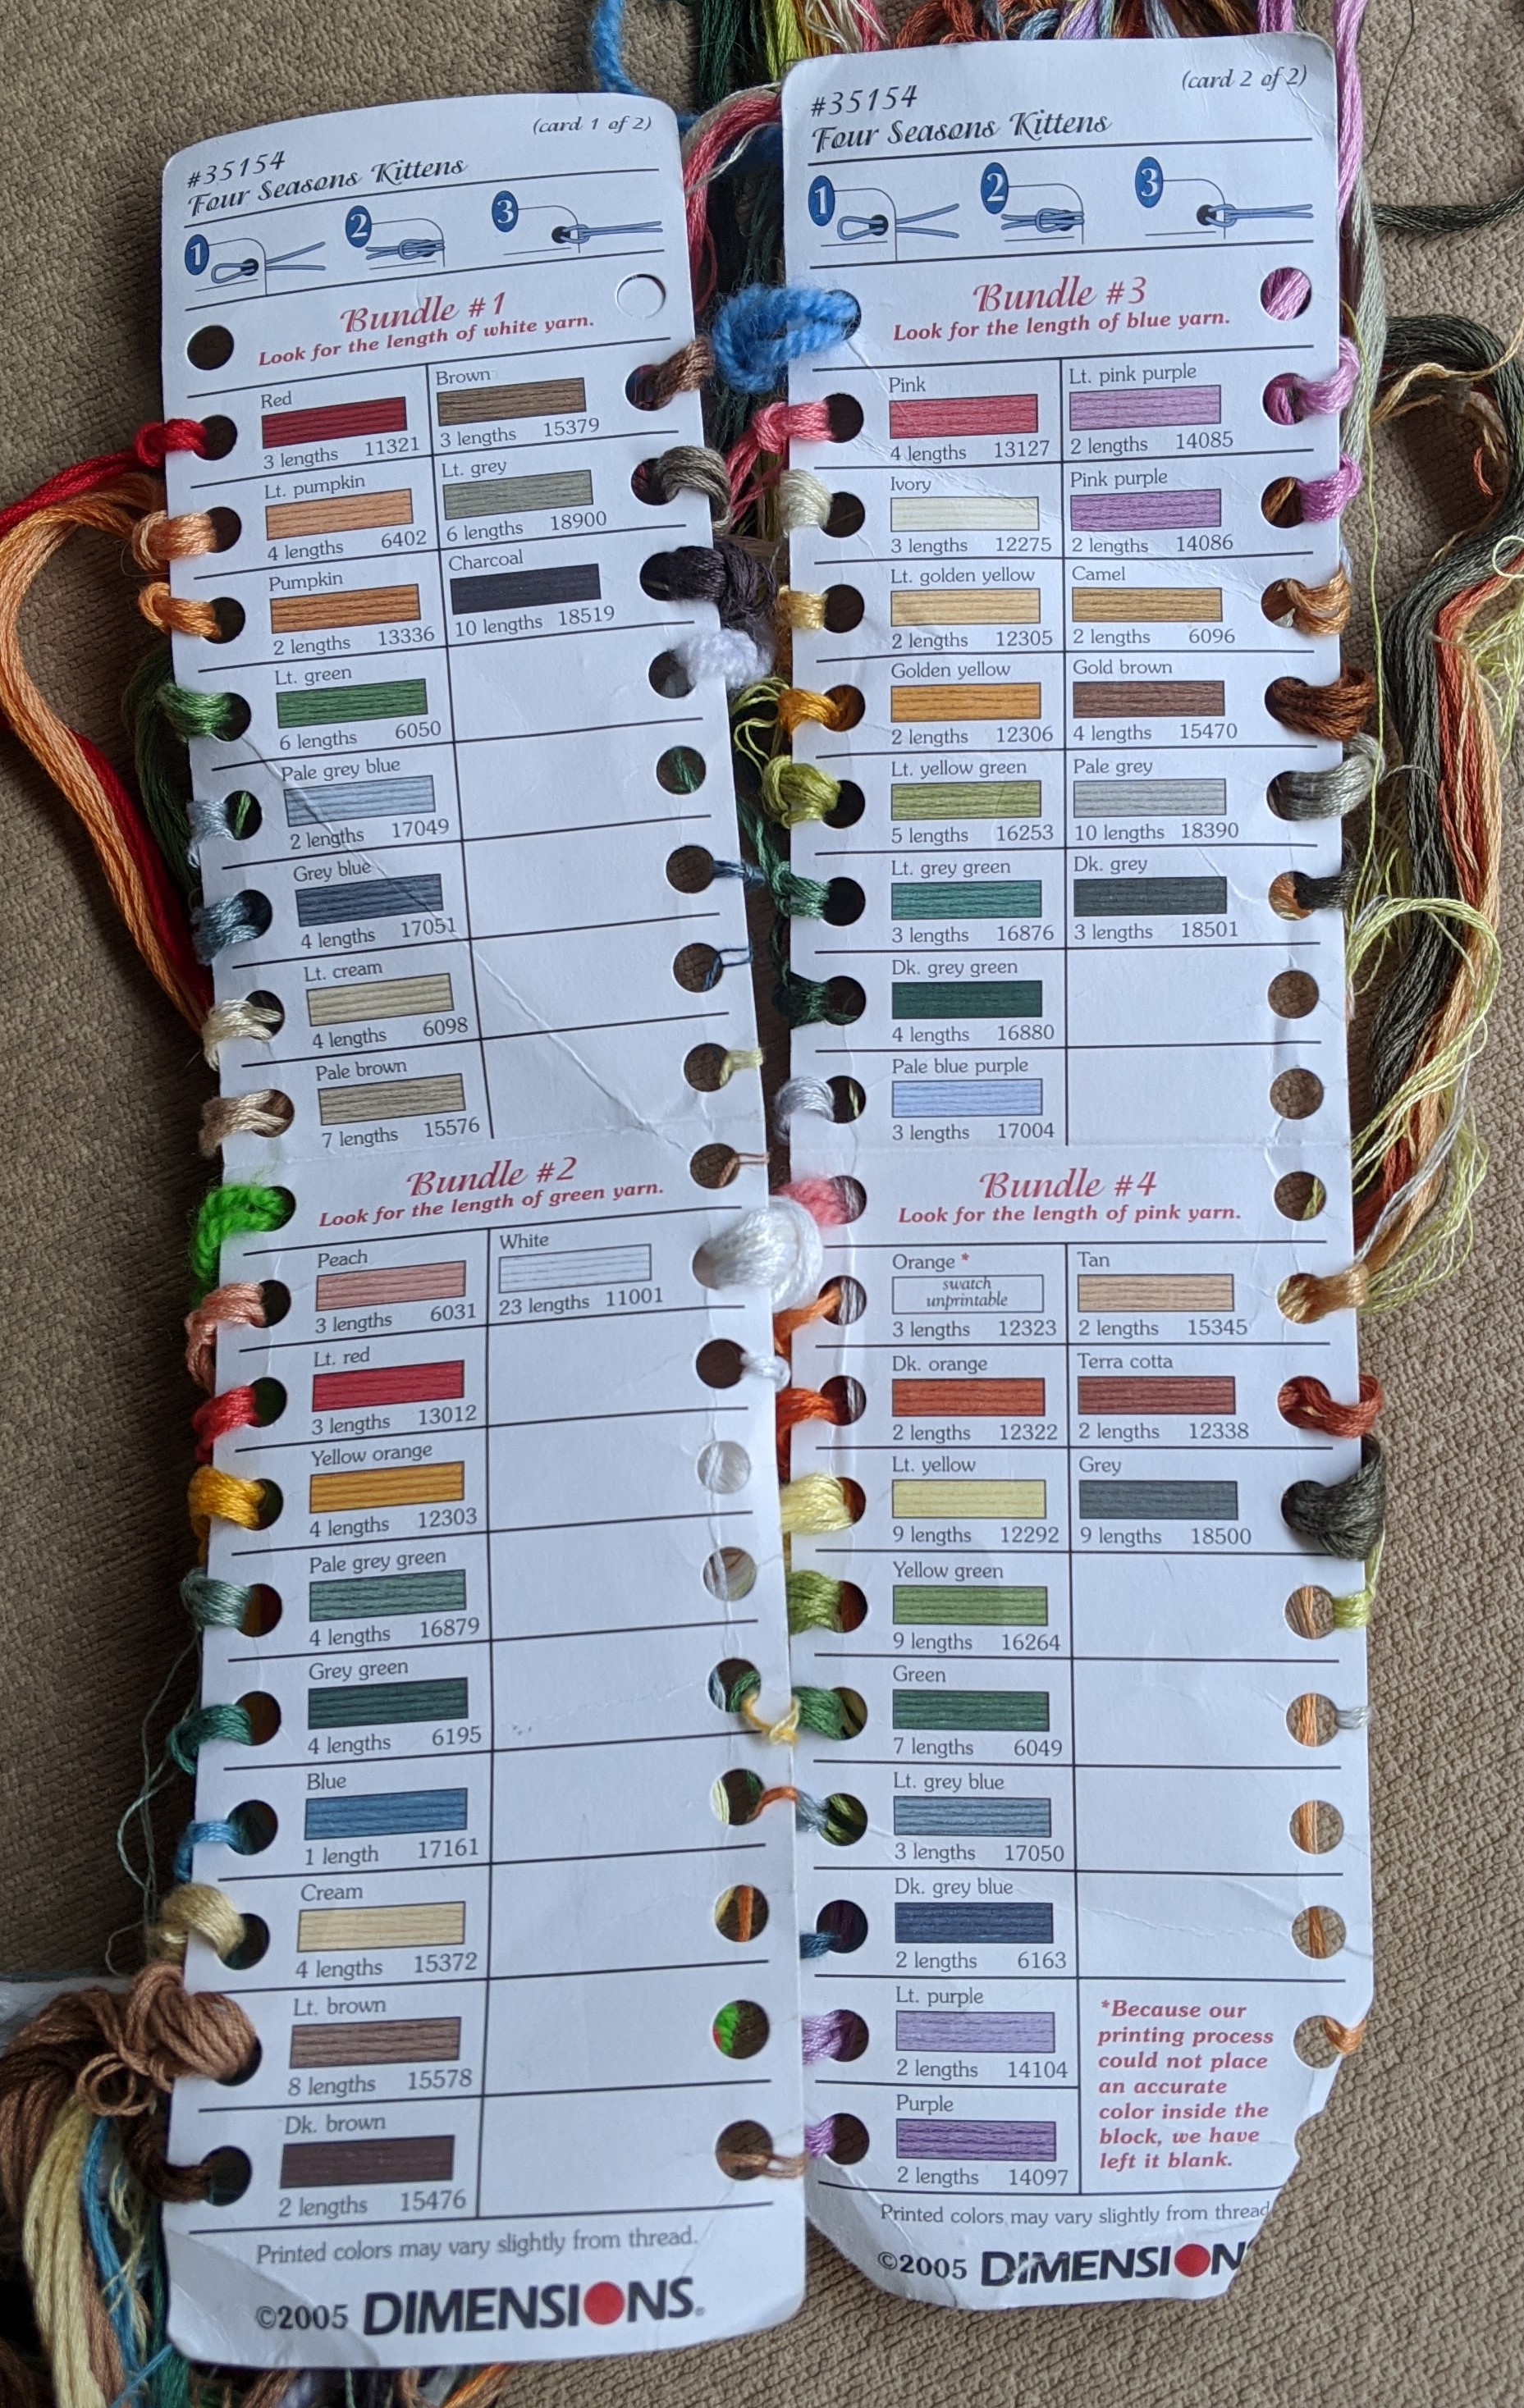
Four Seasons Kittens by Gold Collection Dimensions
This project is taking a lot longer than it should to complete. One of my struggles with this project is that there’s not enough space on the floss card to update it like I’ve done for Barnyard Kittens. I could put all of the details on the other side of the card where there’s nothing printed…I probably should and will after this post!
Meanwhile, I’ve been able to get about 792 stitches in – about 137 of which has been back stitch – and when that’s compared with some of the other projects, my desire to stitch other projects shows! Below is my progress in comparison with the finished picture:
Santa’s Coming! – Designed by Durene Jones
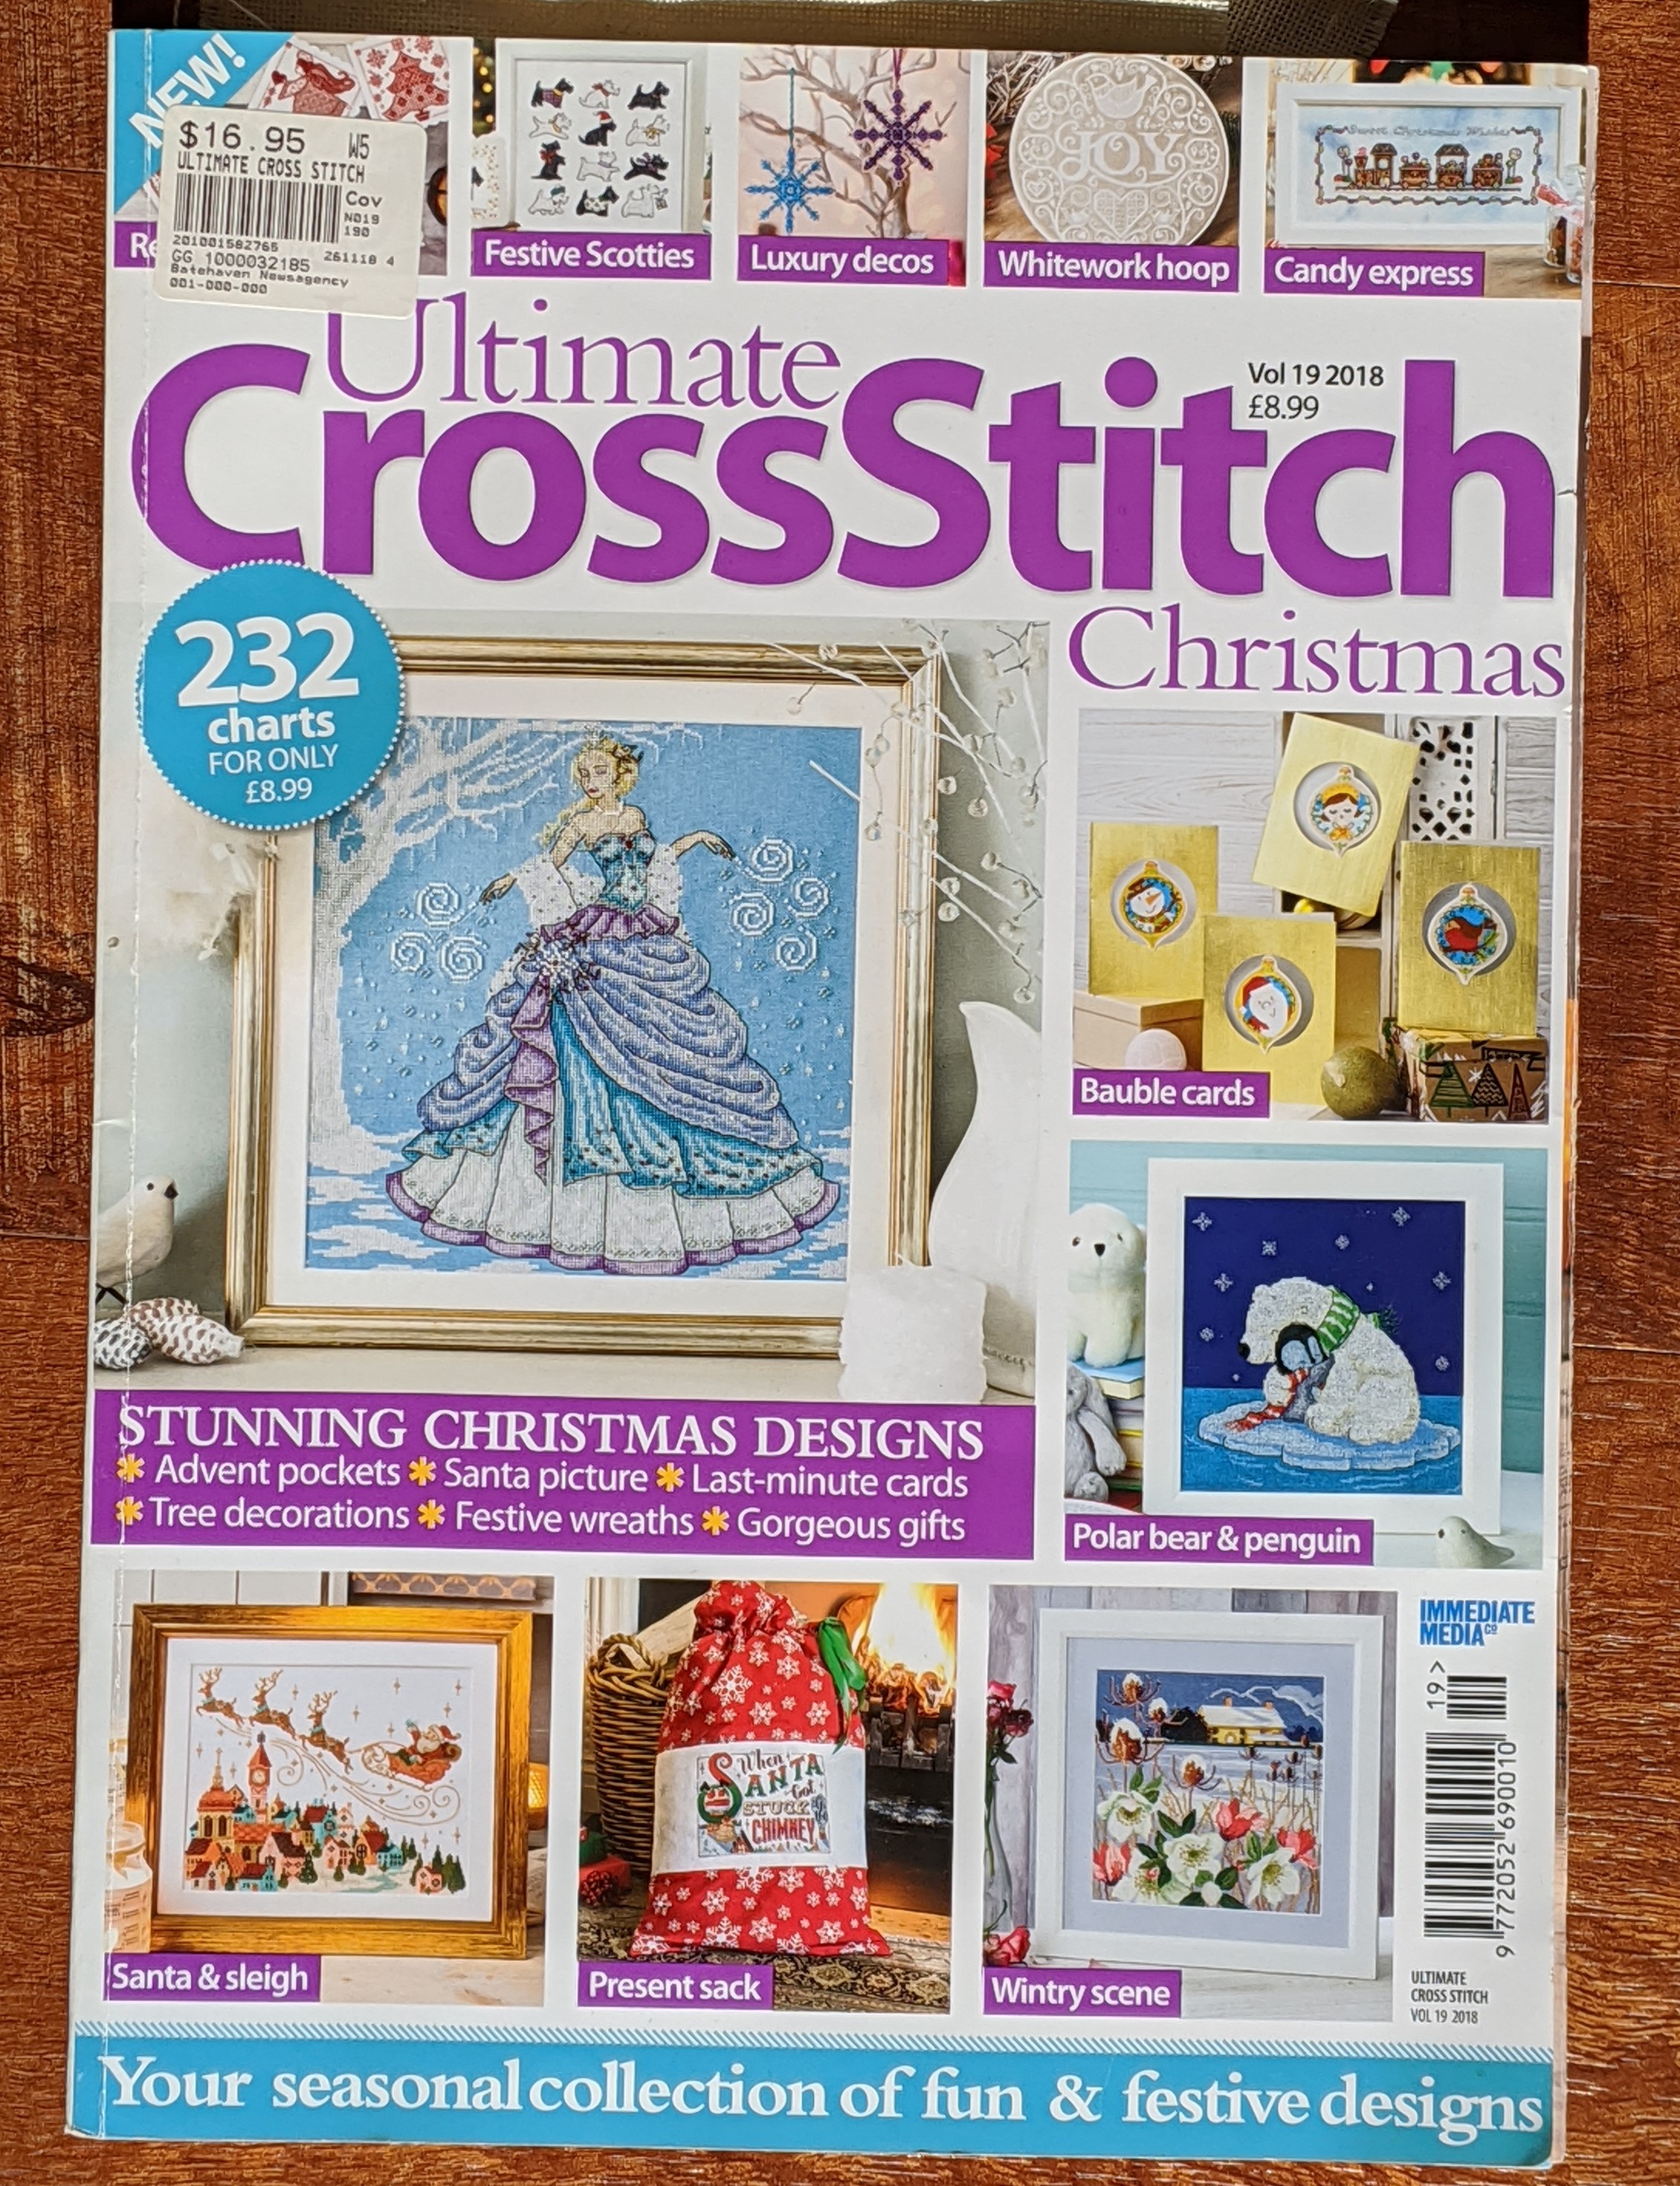
This was a new start and a project I’d been eyeing off since September or so last year. The pattern is in the Ultimate Cross Stitch Christmas magazine/book (volume 19, 2018) that I picked up when I was at coast – before all of the bush fires and “fun” we’ve been experiencing.
I’ve decided to stitch it on some 14 count Aida that I purchased online from the Australian company Threaded Needle and unfortunately I’ve lost the slip that came with the fabric, so I’m not sure what the name of the fabric is. I’m using DMC threads to stitch the pattern and if all goes well, I will hopefully have it finished by Christmas this year!
When I get around to it, one of the challenging things will be stitching my nephew’s name instead of the name Angela, as you may see in the above image on the right. You may also notice with the fabric I’ve chosen to stitch on, is marbled green. This is how the fabric came and why I chose to purchase it.
So far, I’ve been able to stitch about 304 stitches…hmmm. I was not expecting such a low number. I can’t believe that I’ve neglected this project! But I have a plan…check out my next post and you’ll see what I have in store for it!
Candy Express! – Designed by Shannon Wasilieff
This project also comes from the Ultimate Cross Stitch Christmas book/magazine, volume 19, 2018. Every time I look at the finished picture in the book or when I’m looking at the pattern, I just want to eat it! It looks so yummy! That could also be my sweet tooth talking…
Like the ‘Santa’s Coming’ project, I’ve decided to stitch this on the same fabric – 14 count Aida, marbled green (My name for the fabric. I’m still not sure of the exact name). The pattern recommends the use of 28 count sky high evenweave. I have 28 count fabric, but I really like the marbled look the image in the magazine/book has, so that’s why I’ve chosen to go with the 14 count marbled green Aida.
During May, I was able to get 818 stitches done!
Three dogs – Designed by Luca S
I hope I have the designer right for this project. It’s an Anchor kit that I think I purchased through the Fox Collection website many moons ago and I had started it not long after I’d finished a fishing project.
I’ve had a love/grumble relationship with this project. I love that the fabric is pre-gridded. I’ve never stitched on anything like it before. What I’ve struggled with is the thread becoming too thin and breaking. A part of it’s my fault because I’ve had the thread too long for what this thread needs to be. The other thing I’ve struggled with is the background of the project. In hindsight I should have decided to go with half stitch because it would make it so much quicker. Then there’s the colours…so much brown! Especially after stitching some of my other colourful projects.
What I do like about this project is the pattern has been printed on A3 paper and it makes my life a lot easier to see the symbols. Which should mean that I’ve been able to get about 800 or so stitches in…but unfortunately no. I was able to get 631 in.
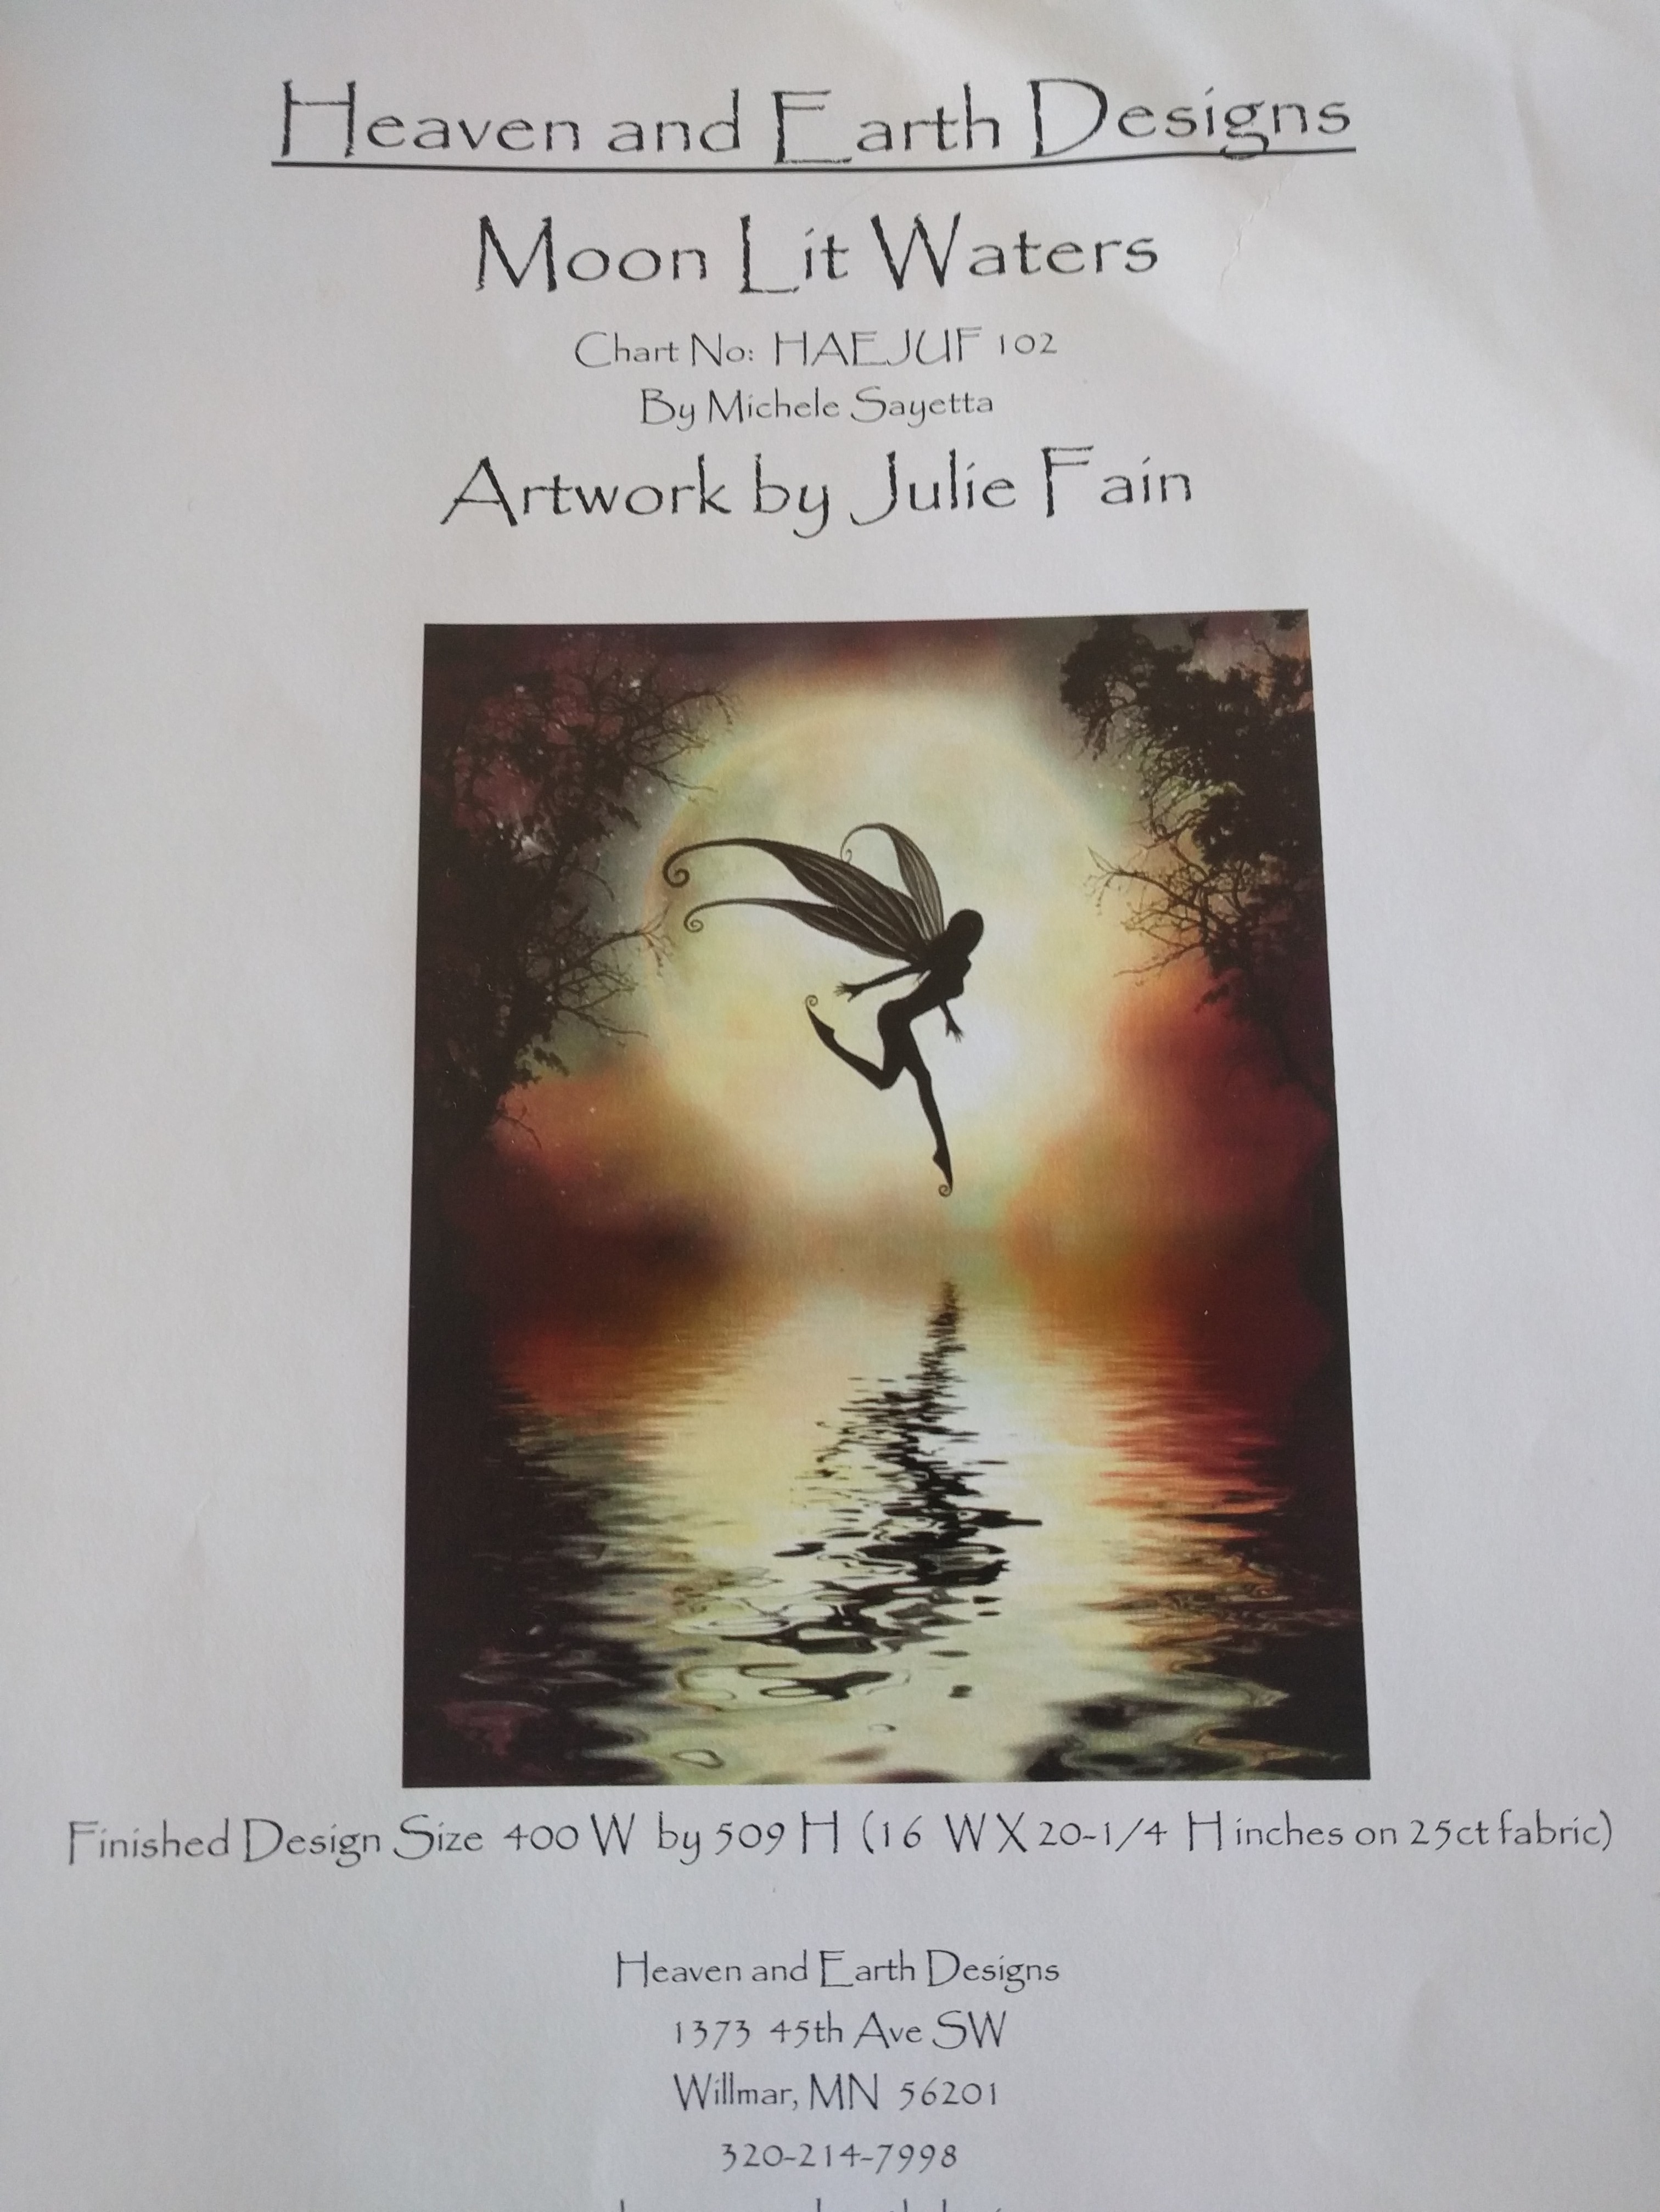
Moon Lit Waters – Artwork by Julie Fain, charted by Michele Sayetta, Heaven and Earth Designs
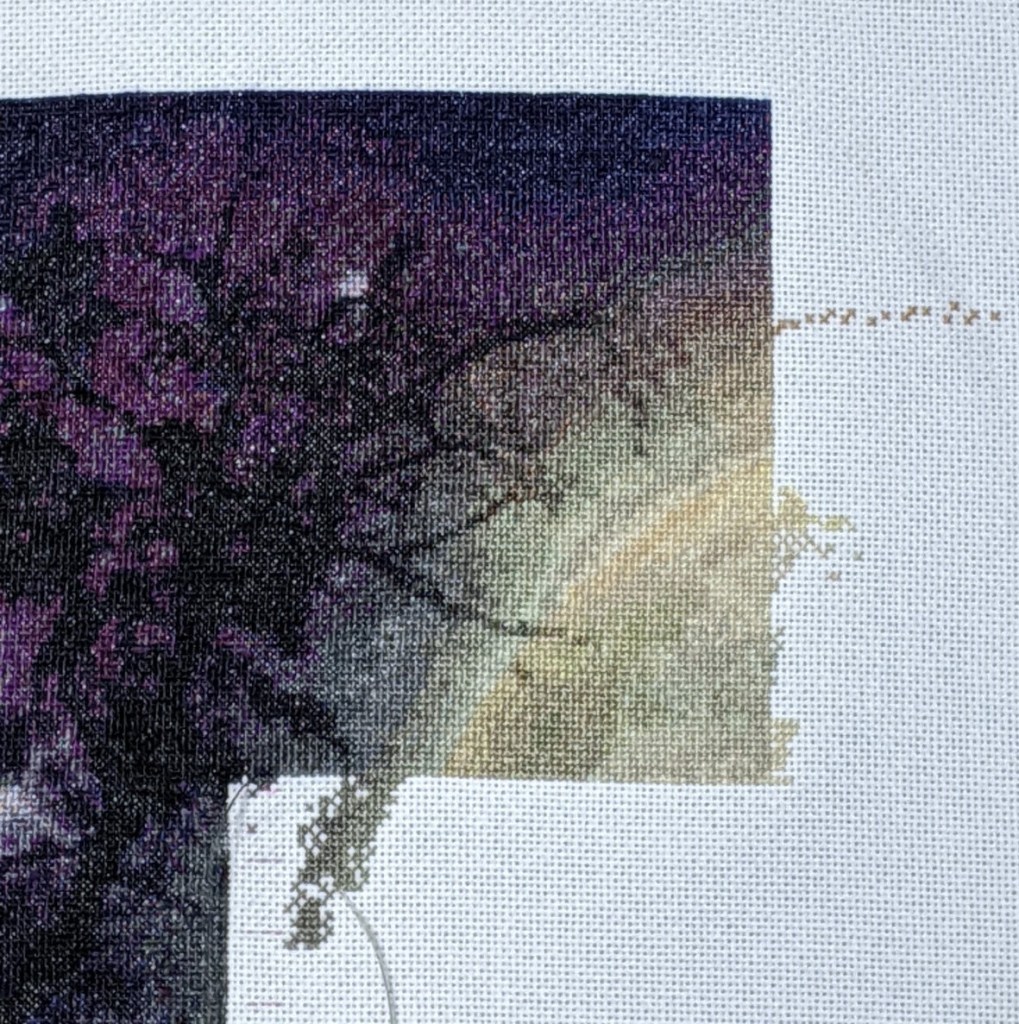
For anyone who has been following my blog for a while, will know that I’ve been working on this project for a long time – with limited progress to show for it. At the start of May I purchased the digital copy of this pattern and loaded it into Pattern Keeper. This has been a good thing and a bad thing. Pattern Keeper is awesome! If you haven’t tried it yet, I strongly recommend you give it a go.
The app has made it a lot easier for me to clearly see where the symbols are on the pattern for the colour I’m stitching at the time. I’m able to clearly mark off where I’ve stitched and frog areas that I’ve made mistakes on. What I hadn’t initially counted on, was the incorporation of some new colours that DMC had released within the last 12 months or so. This is where I have a small grumble and yet another page of my project will have a heavy amount of creativity going into it to balance out what I’ve already stitched with the areas that are yet to be stitched. The incorporation of the new colours has meant that the symbols have changed and what colours are stitched where has thrown me off balance by one or two stitches in some places and about 3 to 4 stitches in other places.
Thankfully with HAEDS, there are so many colours that make up the big project, that I can get away with a bit of creative license. And I end up being the only one at the end of the day that has an idea of what I’ve needed to change around. So without further adieu, below is what I’ve stitched during May and what the finished picture will be.
At the moment I have no idea how much I’ve stitched in May and because of how small the crosses are I’m not going to count them all. If anyone knows how I can find the monthly total in Pattern Keeper, please let me know!
What’s next?
Now that May is done and as I’m finishing this post, it’s 1st June 2020 I’m looking to figure out what I’ll do for June and the rest of the year. For June at least I’ll definitely keep working on the WIP’s I now have from May and I’ll stitch what I feel like stitching, rather than needing to keep the projects on a regular rotation.
This month I might also start some of the other projects I had wanted to start in May, but didn’t get around to it. The projects I have in mind are the really colourful ones and a spooky one:
This of course will most likely change. Especially since travel restrictions in Australia are slowly easing. I live in Canberra (aka the Australian Capital Territory (ACT)) – Australia’s capital – and we are surrounded by the State of New South Wales (NSW). As of today, Monday 1st June, we can now travel anywhere we want in NSW and as far as we want in NSW, as long as we abide by social distancing and health and safety requirements! This is huge news for everyone living in NSW and ACT because we can travel to the coast, go bush, go to the snow (when the snow fields open up in about a week or two) and anywhere in between.
What my boyfriend and I are planning on doing is going to the coast as soon as we practically can. We could travel today, but about half of Canberra will be travelling to the coast and we have to work tomorrow (we’re still working from home). Also the weather today is true Canberra winter weather! So we’d rather stay home and enjoy the warmth and comfort of our home and worry about the stresses of travelling later. Practically, we’ll most likely travel to the coast in about 2 weeks. This will give us enough time to get our logistics sorted out and it’s my brother’s birthday next week – Queen’s Birthday long weekend – and he has the coast house booked for that weekend. Lucky duck!
Before I completely wrap things up for this post, I just want to do a quick shout out to Jemma Jones, Dreaming in Aida. Thank you for mentioning me in your post from 17th May 2020! I hope you continue to have such awesome results in your Cross Stitch Diploma Course!
It’s a quick post from me this week because I want to rave about some Aida I’ve just finished stitching on.
I never thought it would be possible. I’ve heard people talk about soft Aida on Flosstube and for a long time I thought it was a myth. However, a few weeks ago my boyfriend and I travelled to the south coast again for the Canberra Day long weekend. On the public holiday Monday we headed over to Mogo and I got to spend a bit of money at one of my favourite stores – Rosemont The Patchwork Shop. I was able to purchase some more fabric and some beautiful cards that can be used for most events.
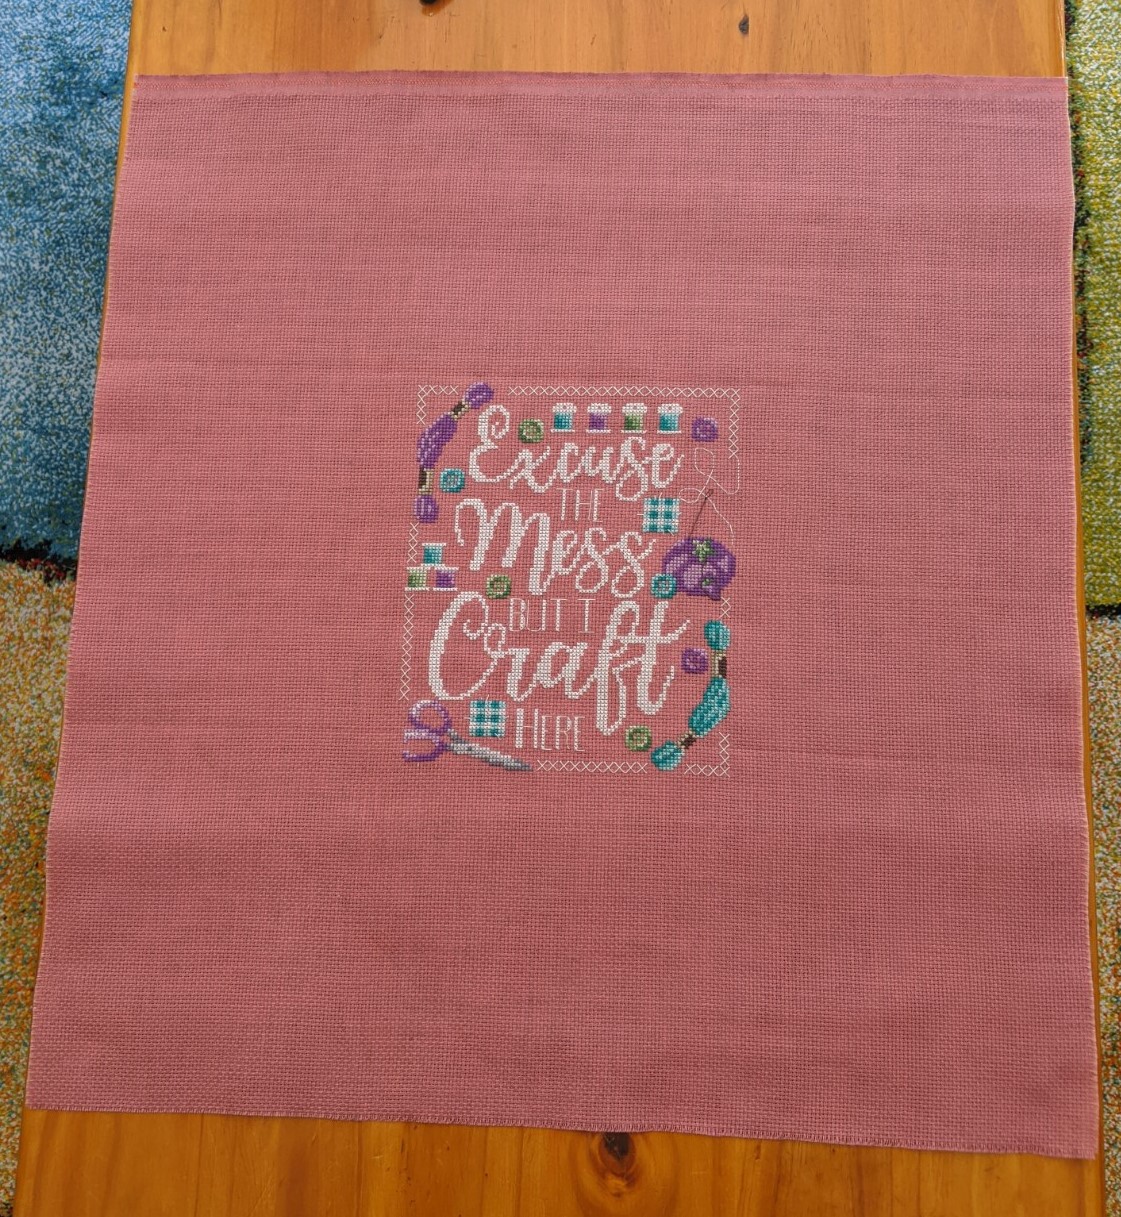
One of the pieces of fabric I purchased was some 14 count pink Aida. When I opened up the pack and started stitching, I fell in love. It was so soft and easy to work with I had to check the packaging every so often to make sure I wasn’t seeing things!
Pink Aida from ‘Rosemont The Patchwork Shop’ in Mogo, NSW Australia
I decided to stitch the pattern called ‘Excuse the Mess, but I Craft Here’ by Shannon Christine Designs and I tested out the Pattern Keeper app with this pattern. The results of my efforts are shown below:
To make the hanging, I trimmed around the finished piece and I have the trimmings stored away. After trimming the piece, I trimmed down a thin piece of cardboard to attach it to, using some double sided tape (that I also use for scrapbooking). As you can see in the above images, I’ve used some ribbon to hang it from the door handle into my craft room.
Because I stitched this pattern on pink Aida, I changed out the pink threads that were called for, in exchange for purple threads and I think it turned out pretty well. I also used some dark brown on the skeins which was not intentional until I was halfway through stitching those areas. I had misread the pattern and used DMC 844 instead of DMC 822. Oops!
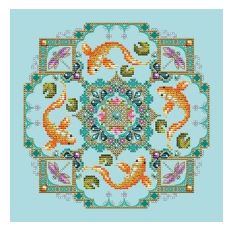
After having more a look at the Shannon Christine Designs website, I hadn’t properly realised until now, that they had also designed the Gingerbread Train pattern (see below) that I have in my Christmas Cross Stitch book that I really, really want to start stitching. I also really want to start stitching Koi Pond and Craft Room as shown below.
Until next time, I hope you all stay safe and happy stitching!
At the start of this month, I set myself the goal of finishing the page I was working on for each of the active projects I have on rotation. I have been stitching my little heart out for most of this month and I think I’ve done pretty well. Especially since last post I was feeling a bit down and flat and not thinking that I would be able to achieve the progress I’ve wanted for each project.
There have been a few days where I’ve not stitched because I’ve been too tired from work and I’ve not slept well the night before, or I’ve been busy with other things. So without further adieu, lets get into it and see how I’ve gone!
Four Seasons Kittens
I have finished all of the half stitch and full crosses the pattern has asked for and I’ve gotten the majority of the back-stitch around the called for areas. I just need to give one of the kittens some whiskers and finish off the frame for the quarter, and I’ll be able to move onto spring or summer!
‘Four Seasons Kittens’ by Dimensions – Progress as of 29 February 2020‘Four Seasons Kittens’ by Dimensions – progress as of 11 January 2020
Midnight Fairy
A page finish and then some…
Moonlit Waters Fairy by Heaven and Earth Designs – Progress as of 29 February 2020
Because there was some confetti that I had to finish on this page, I wanted to make the most of the thread I had on the needle at the time. So I started looking at neighbouring pages to see if I could stitch anything there and what you see is the result of what I found.
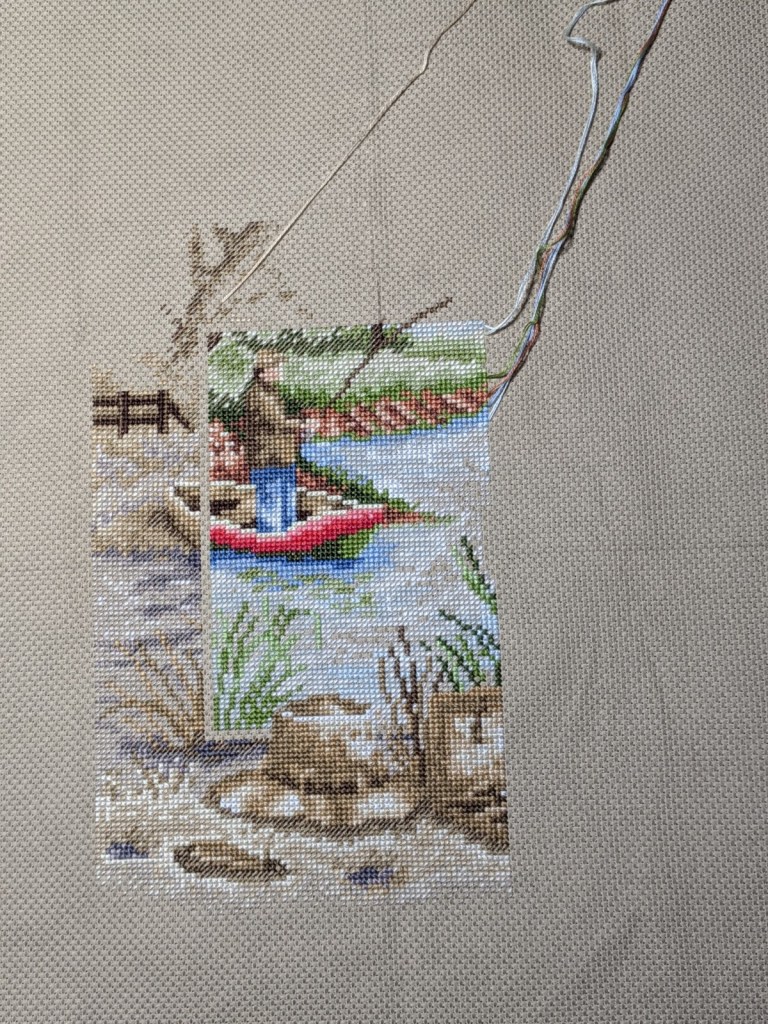
Fishing
I achieved a page finish with this project! The area I have been focusing on for February, is the bottom of the pattern that has a lot of greys and browns it. There is a bit of back-stitch needed for this area to help give the hat, some bullrushes and fence some definition. I’ll get to that when I’ve finished all of the full and half stitching for the project. Theoretically it should be easier if I do that!
‘Fishing’ progress as of 29 February 2020‘Fishing’ close-up of my focus area and page finish as of 29 February 2020
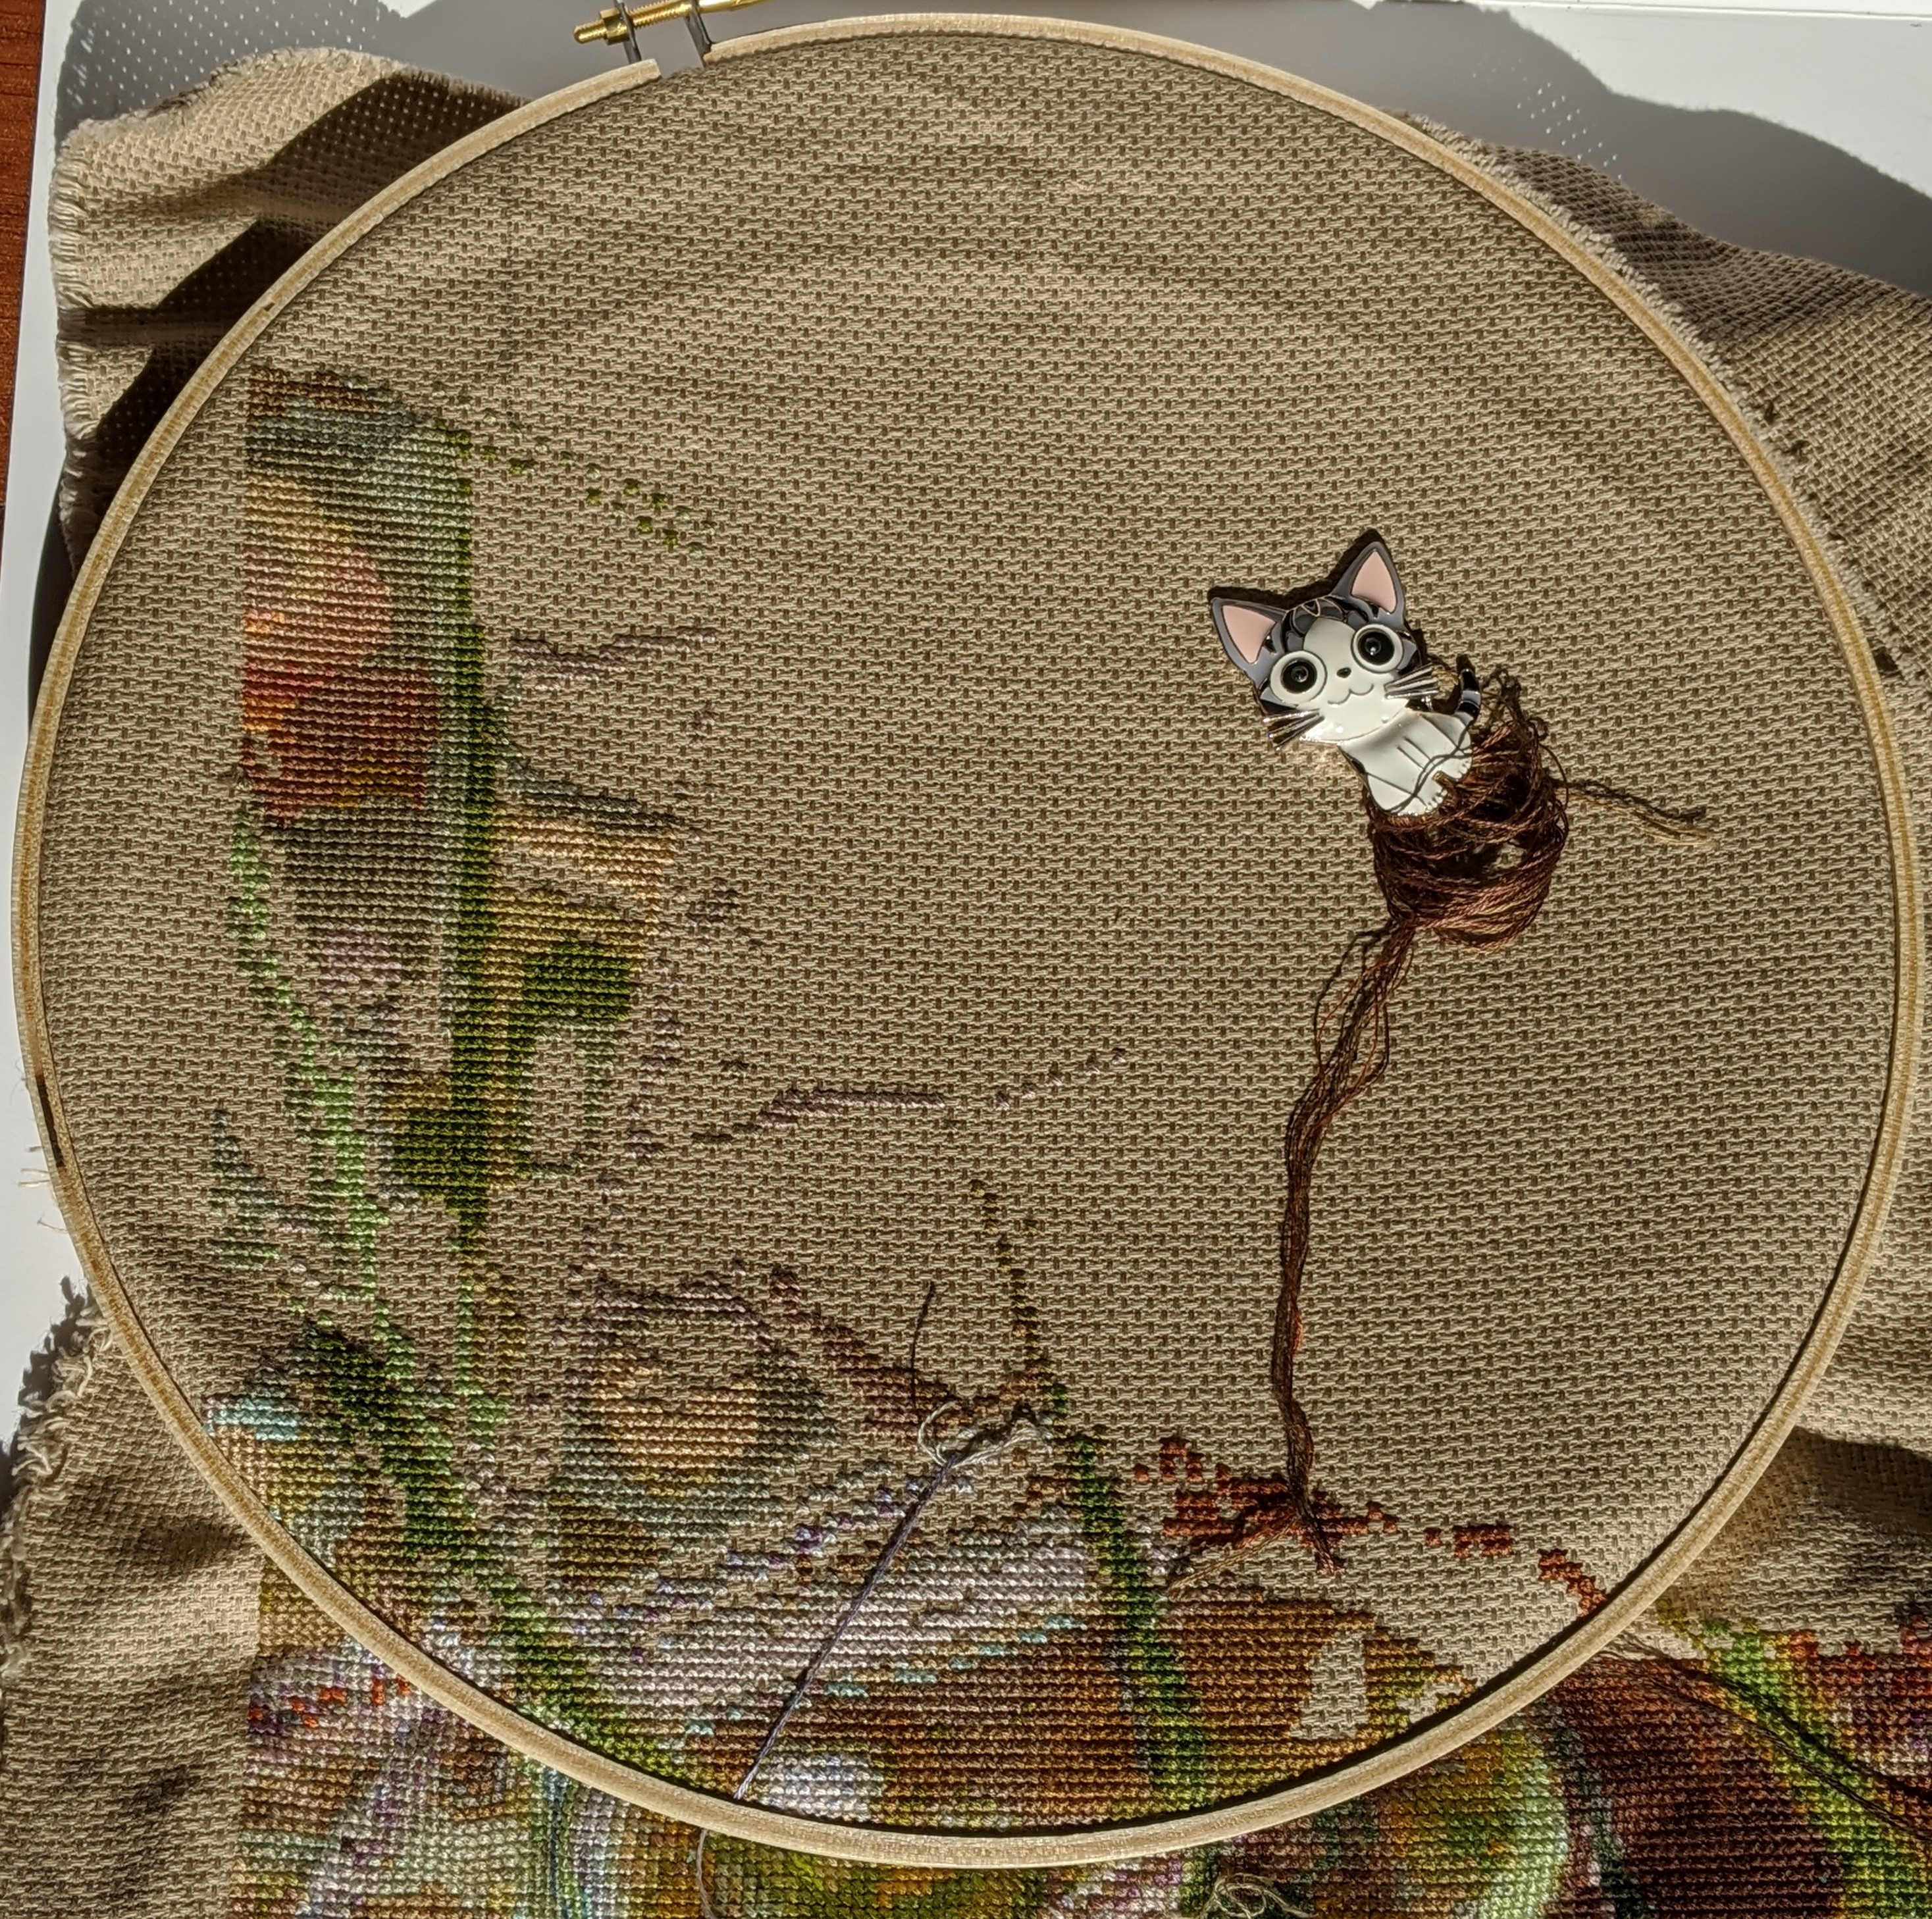
Gundaroo Mini Mushroom
I’ve been battling some leg pain while stitching some of this page and I’m really annoyed that I haven’t gotten more done. The short story is that I don’t stretch as much as what I should after my gym sessions and runs and I’m an office worker. As a result of so much discomfort I’ve been experiencing lately, I haven’t been able to finish the page for this one. I am frustratingly close as you will see in the pictures below…
‘Gundaroo Mini Mushroom’ by Kristen Gawronski – progress as of 29 February 2020
To help put the image below into context, I’ve completed page 6, which is more the the centre of the fabric, and I’m close to finishing page 5. I’ve decided to start in the centre of the fabric because I’m not sure if I’ll have enough fabric to finish the entire project. The other thing to bear in mind with this project is, when I first put this pattern together, I had told the software that it would need to fit onto 28 count fabric – or there abouts. I then changed my mind and decided to keep most of the dimensions but try and stitch it on 14 count fabric instead…
‘Gundaroo Mini Mushroom’ by Kristen Gawronski – progress as of 29 February 2020
The annoying component with this pattern is the amount of confetti stitching for the bottom left corner of this page, which you will see in the photo I’ve taken of my pattern. It’s not as bad as other projects I’ve worked on over the years or even now with the HAED I’m working on.
However, in recent days when I’ve been stitching it, I’ve been seriously been contemplating scanning the pattern and seeing if it would be compatible with pattern keeper app. If it does work, it would make my life soooo much easiser! Because there are 148 colours in this pattern and some of the symbols are very similar. So it can take me a few minutes just to find the symbol on the key, to figure out which thread I need for a couple of squares!
‘Gundaroo Mini Mushrooms’ by Kristen Gawronski – pattern showing the confetti stitching and what remains to be stitched for the page as of 29 February 2020
Now that February is over for another year…
What now?
As I’m writing this post, Sunday, 1st of March is drawing to a close and whilst I have many new projects lined up and ready to go, I’m not sure if I’m ready to start them yet. Starting new pages of my existing projects would be exciting and I’d be significantly closer to getting the projects finished and off rotation for good. The question is though, do I need a break from them because I’ve been working on them so intensely for the last 20 odd days? Should I bring back into rotation some other projects that have been sitting idol?
One of the positive things for March though and the rest of this year is that I’m not going to be doing any official study with uni. Earlier this year, I had written about being accepted into the University of Canberra to complete a graduate certificate and I had been really excited about doing it. However, as time got closer to classes starting and getting the schedule for them organised, it all became a bit too hard. That process also helped me to realise that I really wasn’t as keen to do the study as what I thought I would be, when I had enrolled in the course back around August 2019! The good thing through, I that I have shown myself that I can get back into uni if I want to and it’s still an option later down the track. I’ve got work to focus on at the moment and I really want to keep progressing things with this blog and my stitching.
Small running update
It’s been a long time since I’ve talked about running and how things are going there. For the last few weeks I’ve been experiencing some muscle pain in my left leg that has stemmed from me not stretching enough. It has also meant that I’ve not been motivated to get out and about and go for a run or walk. With the help of my trainer at the gym and a remedial massage with a physio, the muscles are getting better. So much so that I’ve been able to get out running again! They’ve been short runs so far – 2 to 3km in distance and intervals, meaning I would run a full kilometre and walk for a minute or two then run again until I was done.
I need to pick up my game a lot more for this month because of the 5km fun run I’ve booked myself in for the first weekend of April 2020. I really want to feel prepared for the run rather than be feeling too casual and hoping for the best. Also, the course is different this year and I’m feeling pretty confident with it because it’s a similar course I’ve run during my own free time.
Anyway, that’s enough from me for this week. Stay tuned and until next time, happy stitching!
By the time you’re reading this, it will have been a couple of weeks since my boyfriend and I travelled from Canberra, Australia to the New South Wales south coast area of Malua Bay and surrounds. It had been roughly 2 months since we had been able to travel down there since the bush fires and the Kings Highway being open for an extended period of time. Our aim for travelling to the coast was to have a change of scenery for the weekend and to start supporting some of the local businesses.
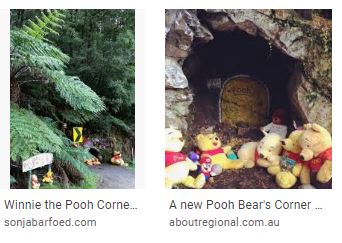
To us and many Canberran’s who holiday there, it’s our second home and we had seen many news reports and images on the television, and heard about the devastation from a variety of people. But the reality was something different for us as we travelled along the Kings Highway and over the Clyde Mountain. Seeing Pooh Bear’s Corner and the areas that had been burnt and the areas that had been saved was quite difficult for both of us.
Results of Google image search for Pooh Bear’s Corner
Up and down the Clyde Mountain we are accustomed to seeing this beautiful rainforest with a road that winds through it. To me at least, it’s a magical area of the drive and holds a lot of memories of going to the coast for holidays and escaping from every-day life for a little while. To give you an idea of what I’m talking about, below are two images I’ve come across on a Google Image search. The image on the left was before the fire and to the right is after the fire.
Images from Google Image search conducted on 9 February 2020
Everyone who has been involved in fighting the fires has done a phenomenal job. They have saved homes where they could and not all of the drive looks like the image on the right.
The hardest part for my boyfriend and I was seeing the reality of what the landscape and people who were there, (and many who still are) went through during the Christmas holiday break.
Interestingly, as I’m writing this post and looking out my craft room window in Canberra, it’s grey, windy, cool and a little drizzly at times. A stark contrast to last week – even a couple of weeks ago! It also means that the rain we have received – in Canberra and surrounding areas – especially along the coast – the Currowan fire that had caused so much devastation along the south coast and had joined up with other fires is finally out!
It’s going to be years before anything feels like it’s going to be back to normal for the locals along the coast, let alone the tourists like my boyfriend and I. What I’m really looking forward to – now that we’ve all gotten a heap of rain – is seeing the regeneration of the forest. The fire as been a long time coming and I know we’re all glad it’s over for now.
Supporting local businesses
So while we were at the coast, I really wanted to go to Mogo to see the how the town fared after the fire and to support the local businesses. On the Saturday, my boyfriend and I had lunch at our favourite cafe in Mogo and I got to stuff myself silly on an iced chocolate and ham and cheese toasted sandwich. It was really good!
One of the things I was also relieved to see was that the Mogo Trading Post was still standing! I had been really worried that it had been one of the stores that had burnt down. Whenever I step into that store I feel relaxed and it smells really good. I love the smell of the incense, soaps and candles they have and seeing the different gifts they have, ranging from jewellery to crystals and semi-precious stones, home-wares and clothes. I was able to get some really nice presents from there!
The other place I was relieved to see at Mogo was the Rosemont Patchwork Shop. I absolutely love this store. The owners are so lovely, helpful and kind and they stock an awesome range of patchwork and embroidery materials and kits and gifts. What makes this place unique is the sewing machine museum that’s attached to the store. I love it! Every time I have visited the store, I have always found the majority of what I’ve needed and many other things I didn’t know I needed, but had to have! This time around, I knew I wanted to purchase a bucket load of DMC threads for some patterns I’ve purchased in recent weeks. Below are images of my haul…
Threads for ‘Autumn Castle’
Threads for ‘Craft Room’ by Shannon Wasilieff
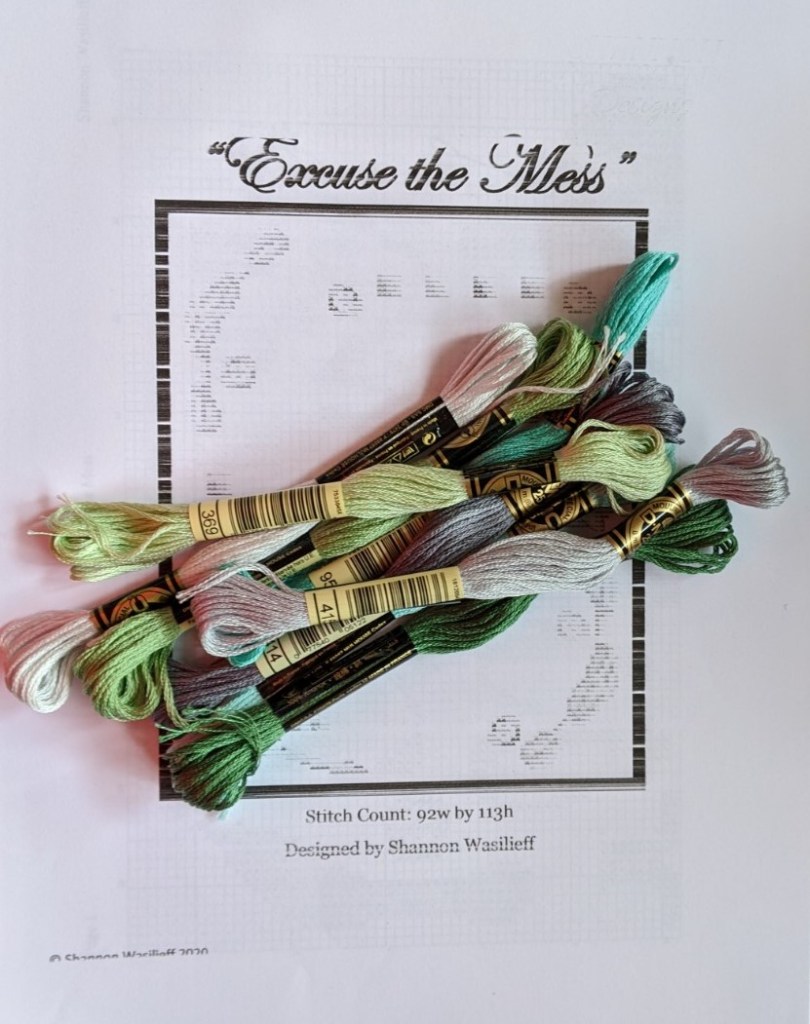
Threads for ‘Excuse this mess’ by Shannon Wasilieff
Threads for ‘Fight like a girl’
Threads for ‘Koi Pond’ by Shannon Wasilieff
Thankfully I had my boyfriend with me and that he is really tall and has long arms. He was able to reach some of the taller shelves for me to get the threads. By the end of it all, we walked away with about 120 threads! I still need to pick up some more threads, but I’m pretty happy with my haul because I was able to support the business.
How do you support your local crafty store?
To me, purchasing goods from a store is the best way to support a business. The next best thing is to spruik it. How do you support your local crafty store? Especially when times have been tough or you may not have been able to afford to shop there?
Related posts:
Volunteer Defence Corps – web page that provides you with a history of how Pooh Bear Corner came to be.