Hi Everyone
It’s been a while since I’ve done a stitchy update and I’ve made a tonne of progress since I’ve last posted an update. Some of the things that have significantly helped is in September 2019 I had some planned time off work and I ended up getting sick during those holidays. In hindsight, I believe that it was my body’s way of saying that I’d been under too much stress for so long that now I have the time to relax, my body was going to make sure I relaxed! It also meant that I was able to get a lot of stitching done and binge watch a huge amount of Gossip Girl, Netflix and Flosstube! Then in early to mid December 2019, I got sick for a few days because I’ve finally relaxed into my new job (it was around the three month mark of being in the new job that I got sick) and I got even more stitching done. With all of this stitching I was able to do – let alone years – I’ve given myself RSI (Repetitive Strain Injury) – self diagnosed – in my right hand. Specifically the knuckle for my index finger that connects to my palm and some of the muscles around my wrist, palm and muscles for my middle finger.
The slight positive is that I purchased a number of months ago, some fingerless support gloves (see images below) that are intended for embroidery and similar work. I purchased the gloves from the Australian website Thread and Needle. If you’re in the market for some support gloves, I highly recommend them! I’ve started using them a lot more and they’re really helping at the moment. I will need to go and see a doctor or physiotherapist about it though, because I don’t want it to get worse.

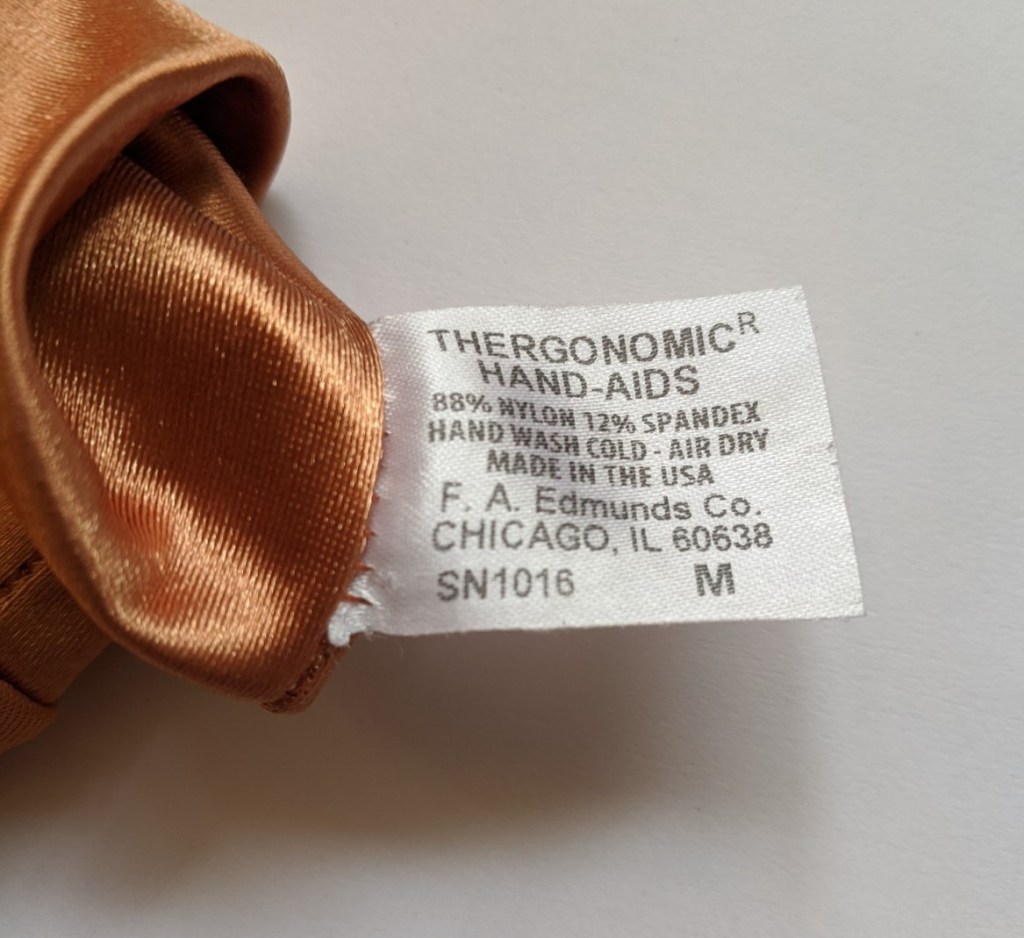

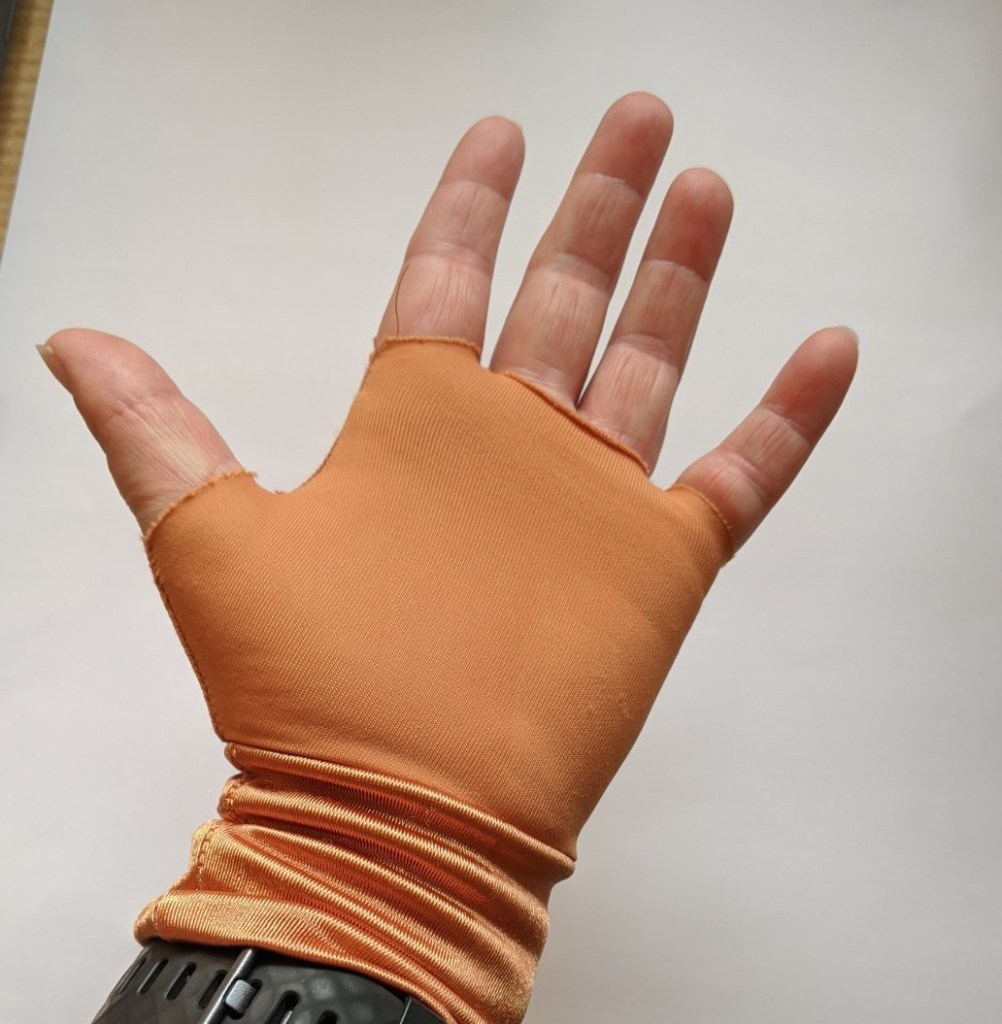
As you may have seen, I have pretty small hands. I’m about 151cm to 155cm tall – depending on the time of day I’m measured. In my opinion, my hands – fingers especially – are chubby, so I find the medium size to be really good. Additionally, they are light weight and I’ve found that it doesn’t matter which hand I put the gloves on, because I can flip them around and as long as my thumbs go through the designated hole, I’m okay! The cuffs are super supportive and I’ve found that I can stitch for a lot longer with the gloves now that my right hand becomes fatigued quicker than my left hand.
The other thing I’m surprised by with these gloves is how quickly I’ve become use to stitching with them! I’ve stitched a little bit without them and my right hand has been fine, but I’ve felt a bit naked without the gloves.
WIP’s
Moon Lit Waters Project
The increasing annoyance with this is I’ve got my mojo back for stitching the Moon Lit Waters (Heaven and Earth Design) project. It requires a finer needle to stitch the project because I’m stitching it on 25 count fabric. The good thing is that I have it in a hoop that’s being held in a stand.
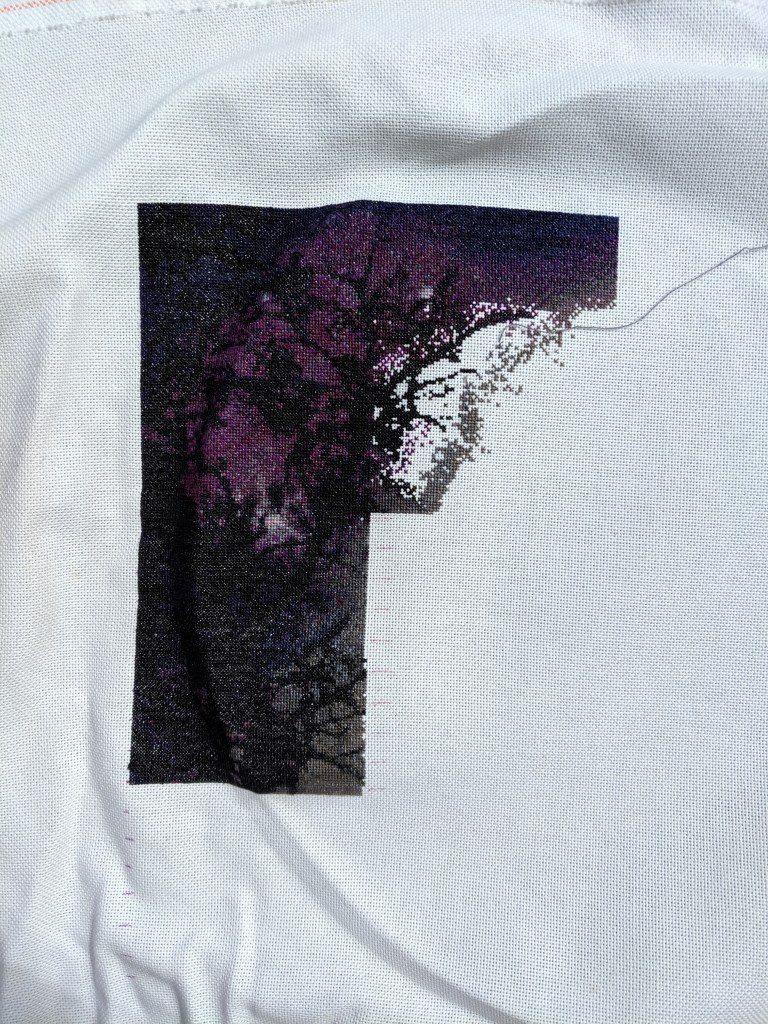

Based on the cover image, I have started on the edge of the moon and I have a bucket load more to do! What I’m excited about is what the future pages of the pattern look like. There’s a little bit of confetti, but mostly solid blocks and I’m feeling really positive about making more progress through the year.
Gundaroo Mini Mushrooms – my own design
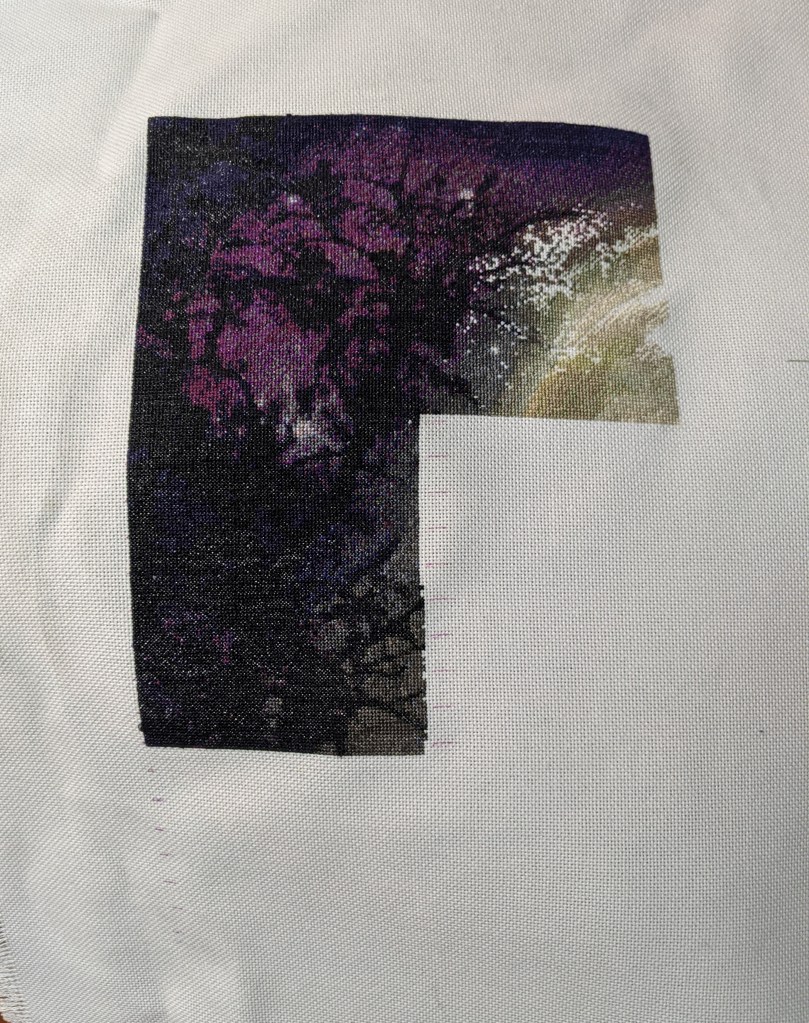
Before I got my mojo back for Moon Lit Waters, I was going great guns on the Gundaroo Mini Mushrooms. This is my own design that I’ve converted into a cross stitch pattern from a photo I took.

The last time I wrote about this project was back on 24th June 2019 and below was the progress I had made…


Since then, I’ve finished the first page and I’ve moved to the left and I’m about half way through the second page. Looking at it from a distance and especially looking at it through the lens of a camera, I’m really happy with how it’s coming out. Sometimes when I’m working on it, I start doubting myself and the decisions I’ve made with the picture and pattern. I’m mostly doubting myself about the size of the photo when I imported it to the PC Stitch 11 and the measurements I’ve entered into the system to enable it to develop the pattern. I’ve looked at other pictures that people are working on that are photos that’ve been converted to cross stitch and the cross stitch project looks awesome!
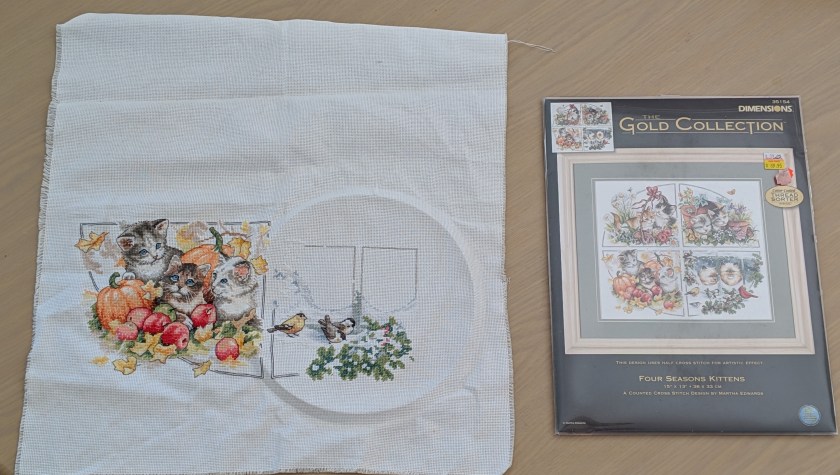
Four Seasons Kittens
I’ve made a little bit more progress with the winter kittens. They’re my go-to if I need a break from the HAED or my own design. The last time I’d written about these kittens was back on 25th October, 2019 and below was the progress I had made then. By memory I may have talked about some of the fudging I needed to do. If I didn’t mention it, I had to get a bit creative with the top left corner of the winter kittens.


Plans for 2020
Becoming a uni student…again
The first half of this year at least is going to be super busy for me and I don’t think I’ll be getting much stitching done. I’m going back to uni – this time I’m enrolled at the University of Canberra (Uni of Canberra) to do a Graduate Certificate in Creative and Cultural Futures, commencing 10th February. The difference for me this time is that I’ll be attending lectures and tutorials instead of doing the majority of it online. Two years ago I graduated from Charles Sturt University with a Bachelor of Information Studies with a specialisation in Records and Archives. It took me 6 years of part-time study and working full-time to complete it and it was well worth the experience. I valued the flexibility studying online gave me. What I hadn’t realised, was how much I missed being in the class room until I decided to enrol in a course at the Uni of Canberra. I’m hoping that the Certificate will provide me with an introduction to working with cultural organisations and what it is to deal with cultural heritage information and artefacts. Something I hope will compliment my degree and who knows what it may lead to!
Work
The other thing that will be busy will be work. I’m contracted until mid to late September and by October-ish my workplace is due to move from its current office to a new location, roughly 1km away. My aim is to try and improve my self promotion at work and let people know that I am there to help them and what I can help them with. My fear factor is people leaving it too late to be organised for the move or them making some avoidable decisions if they had consulted me. One of my biggest difficulties is self-promotion. I know I have the skills. I’m just super scared of putting myself out there, for fear of failure and criticism.
Fitness and running
My goal for this year is to run 5km in 30 minutes. A few years ago I got really close to that time and I want to beat it. But in order to do so, I need to stop using the poor air quality conditions as an excuse and use the treadmill at the gym until things get better. For the last two to three months (at least), Canberra has been inundated with smoke and dust due to the bush fires to the East of us and the drought that has been surrounding us.
This morning (Sunday, 12 January 2020) was the first time in what feels like a very long time, I went for an interval run outside. Probably not one of the smartest things I’ve done considering the air quality this morning was rated as being unhealthy. My run covered just over 5km in the space of 44 minutes give or take. By the end of it my eyes felt raw and I had a bit of a headache from the smoke. When I did run though, it felt good. So when the smoke and dust clears, I am really looking forward to more running outside.
To keep myself motivated, I have entered into the 5.3km leg of the Canberra Times Marathon Festival, to be held in early April. This year the course has changed and the event is sponsored by a different company. I’m really looking forward to the different course. It’s quite similar to the course I’ve run many times when I worked in the suburb of Parkes and would run around Lake Burley Griffin during my lunch break or parts of it after work. It’s a beautiful spot and I’m really hoping that I don’t get injured between now and then!
Travel
When the air is clearer and the roads are safer, I can’t wait to get to the South Coast – specifically Malua Bay and the surrounding region. It’s my second home (like many Canberran’s) and when I first get down there, I may spend half my time in tears and being a ball of emotion because I’ll be able to properly see what the residents and tourists went through. I want to help the businesses there as much as I can by purchasing their goods and services whenever possible. I want to help the area get back on its feet and see the beautiful bushland regenerate.
Stitching
Stitching wise, I’ll still be plugging along on the same projects. My aim is to get as much stitching done before I start uni because I don’t know how much time I’ll be able to make for it when assignments and exams are due. I will be really happy if I could get the Gundaroo Mini Mushrooms fully finished this year so that I can enter it into the Canberra Royal Show for 2021. I’ll also be really happy if I could get about a quarter of the way through Moon Lit Waters by the end of the year. Any other finishes that happen this year will be gravy!
I want to use February as my motivation for finishes. Considering the complexity of the Gundaroo Mini Mushrooms and Moon Lit Waters, my aim is to get a page finish for both projects and hopefully a start on a new page.
March madness may see me having a break from the main projects and stitching a small, like a card or something along those lines. Though the madness may also be preparing for the fun run I’ve got early April and uni assignments/exams and a public holiday in there somewhere!
April however, may bring some holidays for Easter and ANZAC Day and hopefully a trip to Malua Bay and some crafty purchases.
I am curious about Stitch’May’nia this year and what that might bring for me. Life may get in the way too much, but if last year on Flosstube is anything to go by, I think it could be fun to be part of!
By June/July if all goes well, I should be finished with uni and then I’ll be able to be stitching mad again and life will be good!