Posted in Uncategorized

How many secrets does your cross stitch hold?

Hi Everyone

I hope you’re all well.

As I’m writing this post, it’s Mother’s Day in Australia and restrictions are starting to be lifted a bit more and we’re starting to get some more normality back to our lives! If all goes well, hopefully by the end of July/early August, life will be as close to normal pre-pandemic as possible.

As a result of staying home a lot more, I’ve been trying to catch up on a lot of the Flosstube clips people have been posting and it’s been really nice seeing what people are working on and how they’re going. When I was partly watching and listening to a Flosstube clip, the person at the time said something that I thought was quite interesting and quirky. They are not a fan fudging their stitching. If they make a mistake in their stitching, they’ll frog it (undo the stitches) and re-stitch the correct amount. Because to this person, they see fudging a project as a form of lying and being dishonest. To me, this is admirable. They have the patience and integrity to correct their mistakes.

The biggest ‘secret’ of them all

Nearly every project I’ve worked on and finished has at least one mistake in it and I haven’t been bothered to fix it for various reasons. The biggest mistake I’ve made on a project has been quite recently and I’m contemplating whether or not to do anything about it. Below is the project that I’ve made the biggest mistake and when I realised what my mistake was, I couldn’t help but laugh at myself and wonder why I hadn’t picked up on it sooner! Can you see the mistakes I’ve made?
I can’t remember what the fabric count is. I used DMC’s varigated thread to stitch the project and the pattern was from …

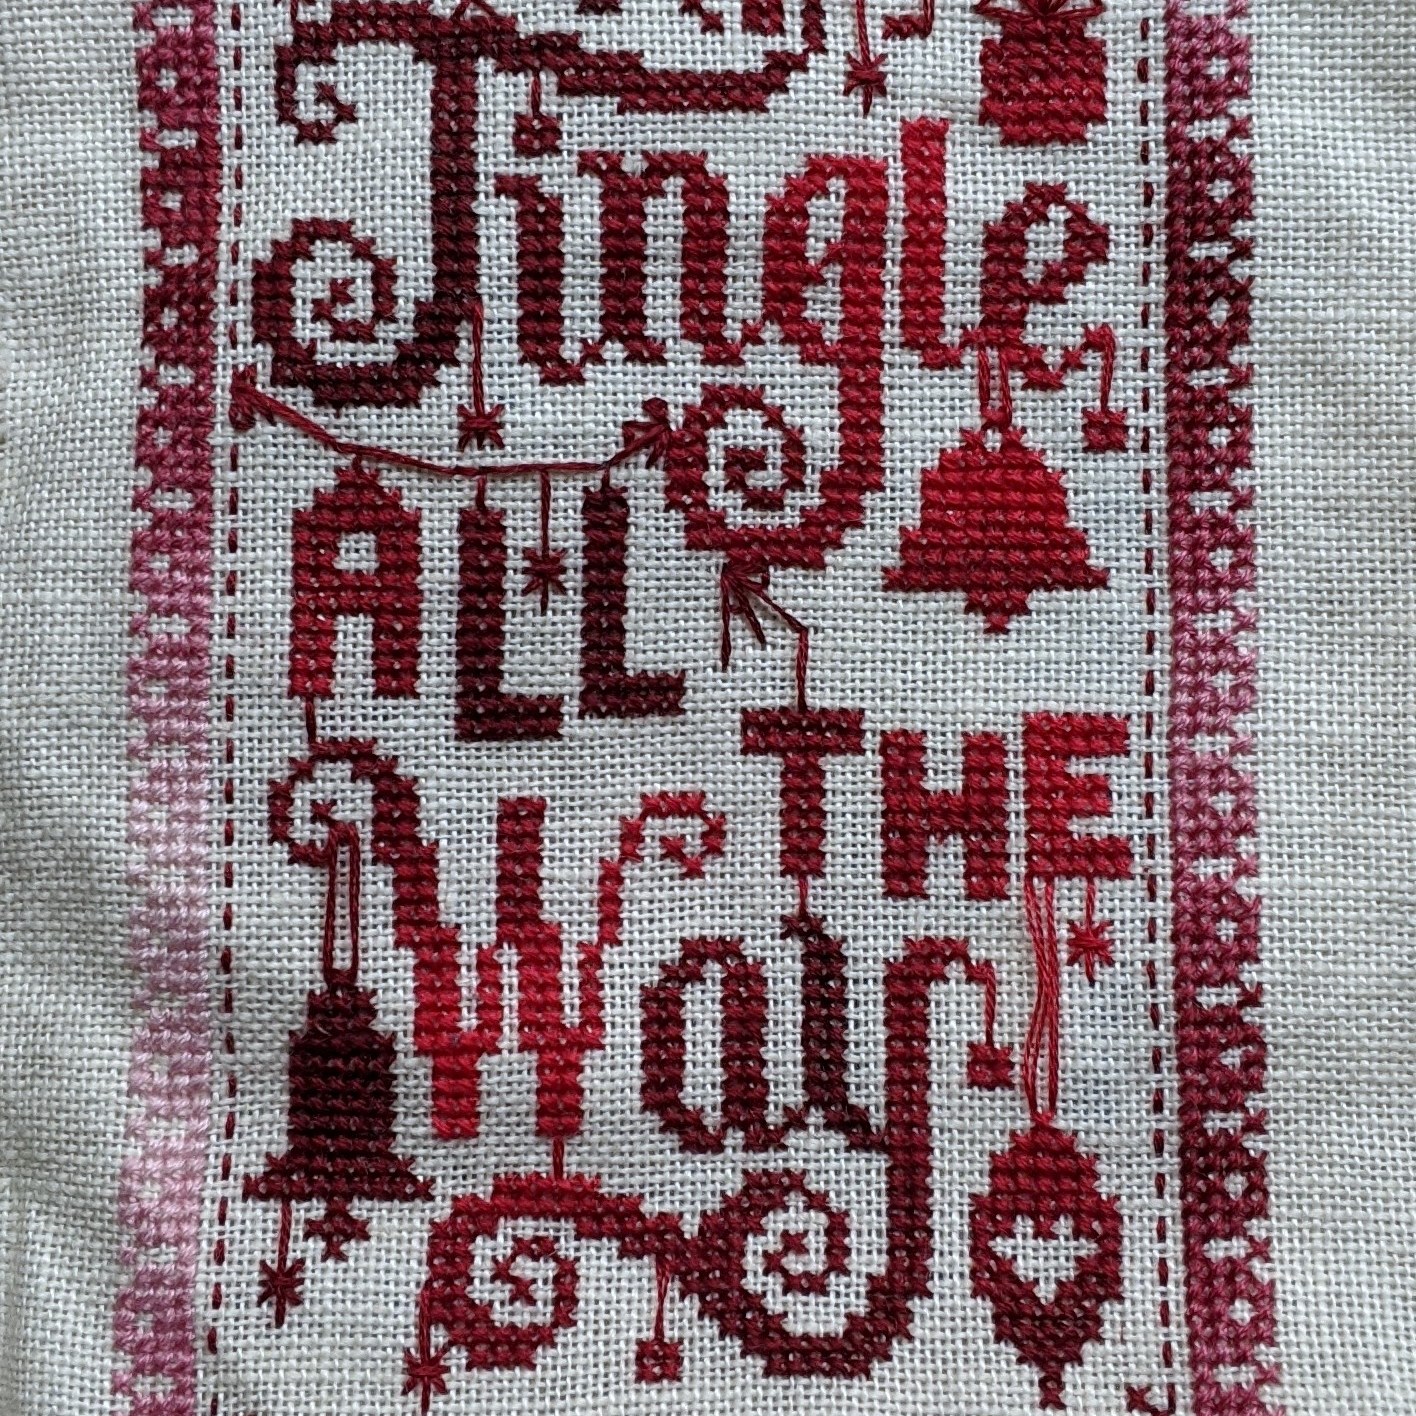
The picture on the left is the finished project. The centre picture show mistake 1 and 2. The picture on the right shows mistake 3. When I was stitching this project – specifically the border, I made the novice mistake of rotated or turned the project based upon which side of the border I’m working on. So the picture on the right will show you that the direction of my stitches on the border is a different direction to the stitches in the centre of the project. You may also notice that the direction of my stitches at the top of the project (the centre picture) is different again and the width of the border is one row less than the other 3 sides. That’s because of my first mistake. When I started stitching the centre of the project, I had started it a row lower than I should have, which has thrown out the balance of how many rows I needed to stitch for the top of the border. If the rest of my stitches had been okay and the direction they should I have been, I could have added an extra row and some extra stitches to balance the border out.

How many secrets can a project hold?

If we don’t tell each other what our mistakes are and have a comparison picture of what it should be, does that make it a secret? Alternatively, if we show each other what we’ve done and show each other what it should look like, does it then become a ‘Where’s Wally?’ / find the mistake puzzle?

With my first HAED – ‘Moon Lit Waters’ that I’m working on, it will hold the largest amount of secrets and I’m totally okay with it! For anyone who’s been following my progress with this project, will know that it’s been a very slow work in progress! Over the last couple of years or so, I’ve been able to complete three pages and I’m starting on my fourth. The pictures below show my current progress, what it will look like at the end and the comparison shot of the cover sheet as a comparison of where I’m at:

Just before Stitch Maynia started, I downloaded the Moon Lit Waters pattern onto the Pattern Keeper app. I needed to purchase the PDF pattern to easily and honestly onto the app, as I’ve been working on the paper copy for too long and the edges are too awkward to send through the scanner.

One thing I had not anticipated or expected with this PDF is the updates and changes that the team at HAED and the associated artists have made to the pattern. I love that they have incorporated the new colours that DMC have released and I’m looking forward to incorporating those colours into the project when I get to it. What had me cursing and swearing as I was trying to figure out where I’m at on the pattern and marking off what I’ve completed. The symbols on the paper pattern have changed a little in comparison to the digital pattern and it means that I’m going to be doing a lot more fudging to make it all work!

When I’m done with the project, it will be for my sister and because of the nature of HAED’s, the odd colour being mis-stitched to me is not a big deal. I know that there are a lot of mistakes and fudging happening with the project and I’m okay with that. I’m going to continue using Pattern Keeper with this project because of the confetti in it and there being well over 100 different colours for it!

Now that I’ve rambled a bit about Moon Lit Waters and some of my challenges with it, have you found some of the secrets my stitching holds?

If you’re able to see any of the secrets, I am in awe of your eye sight! I know for certain where some of the secrets are, but my memory has faded a bit with what the exact secrets are. I’d like to think that I’ve blended them in well enough with the rest of the project, that it hasn’t thrown the intended design off at all.

What secrets do your projects hold?

As a stitcher, would you go back and fix it all up or would you leave it? Also, how honest are you with your stitching? At what point do draw the line and allow the mistake to remain in your project and you try to work around it?

Related reads:

Posted in Stitch Maynia, WIP's and Plans

Stitch Maynia. Big versus small projects

Hi Everyone

Since I’ve started watching Flosstube, I’ve become increasingly aware of Stitch Maynia and each year I’ve been increasingly tempted to participate. because it looks like a lot of fun and I’m really good at starting a bucket load of projects! My challenge will be to finish everything that I start!

Based on what I’ve seen on the ‘Net and Flosstube, Stitch Maynia had started in May 2015 and based upon the year 2015, Stitchers were encouraged to started 15 new projects. The projects could be whatever the Stitchers wanted them to be and the aim was to get as many of those projects completed by the end of 2015. If Stitchers hadn’t been able to finish their 2015 starts by the time 2016 rolled around, they would need to include those WIP’s (works in progress) and whatever new starts they wanted to make up the 16 projects for 2016 Maynia. If Stitchers had completed all of their 2015 Maynia WIP’s, then they would be able to have 16 new starts for 2016 Stitch Maynia!

If I participate in Stitch Maynia this year, it would mean that I would need to have 20 new starts and I could start these in any which way I want – as long as they’re all started by the end of May.

Big versus Small Starts

Considering that there are meant to be 20 new starts this year, having 20 big starts may be overwhelming because of the amount of floss each project would need, where to keep it all, how to manage it etc.

Big Project Starts

Working on a big project is a challenge within its self because of the shear size of it, the amount of colours it may require, the length of time you need to spend on stitching it and that strong sense of achievement when you’ve finished it. To me, a big project is something that will take years to complete – especially if it’s the only thing I’m focusing on. Heaven and Earth Designs (HAED’s) are the first thing that comes to mind when I think of big projects. In some of my earlier posts, I’ve talked a bit about my progress on my first HAED – Moon Lit Waters.

My first HAED

If you choose to do at least one large project, check out the Pattern Keeper app if you haven’t already. It will let you know which designers are compatible with the app and if you’re trying to narrow down what to stitch, its compatibility with Pattern Keeper may be the decider!

If you choose to do 20 big starts as part of Stitch Maynia, the awesome thing is that not all projects need to have a bucket load of colours to give it that wow factor. One of the trends I’ve noticed with a lot of the Flosstubers is the amount of people who are in love with samplers – especially samplers based on or inspired by ones from over 100 years ago. Many of these samplers don’t have a lot of colours in them. Some of which are just mono-chrome or use variegated threads and make the most of the different hand-dyed fabrics available.

Another option for your big starts is to be part of a Stitch-A-Long (SAL) that releases patterns at the start of each month and by the end of the designated time frame, you will have a beautiful large piece.

Small Starts

To me, there’s something exciting about starting a new project – once I’ve decided on what I’m stitching and I have everything kitted up (unless I’ve chosen a kit). The excitement is in the new beginnings, fresh starts and seeing something come to life on the fabric. It also has bit to do with my attention span and getting the itch to start something new every few months or so.

Therefore, to me a small start is something I can complete within a week or two – a month maximum. It may just take me a while to fully finish it!

One of the things I really enjoy stitching are cards for various celebrations – even though I don’t stitch them very often. Partly because I struggle with fully finishing them as cards. However, with Stitch Maynia I now have the excuse to stitch a heap of Christmas and birthday cards and related paraphernalia! It may also prompt me to start some Halloween projects that I’ve been eyeing off for a while now and talked about in some of my blog posts.

The other cool thing with stitching cards is that I’m able to use some of the off-cuts of fabric I have floating around the house!

A bit of both?

Since there are meant to be 20 new starts this year, there’s nothing wrong with mixing it up and having a combination of big and small projects. Which means that you should be able to get a sense of achievement by the end of May because of the small starts being finished or nearly finished. And you should also be able to see a bit of progress with some of your bigger projects.

Theoretically, this will satisfy my need to stitch a mixture of small, medium and large projects. I’ll be able to continue working on my current WIP’s and get some small cards done. My main challenge will be deciding on what to start and when. I can plan something to the last inch of its life. My struggle point is putting those plans into action! Mostly because I’ve put so much time and effort into the planning phase, that in my mind I’ve already put those plans into action and I feel like my job is done. Funnily enough, I’m not always able to follow other people’s plans as well. There’s something about my need for independence and flexibility. There’s also an element of trying to follow something exactly and then there’s a change to my routine and I struggle to get back to the regular program.

But I digress…I’m still hopeful that I’m able to stick to the plans and projects I’ve put together for Stitch Maynia and that I can keep it flexible enough to keep me happy. The other thing that I’ll be testing during this maynia month is the use of coloured pencils on my paper patterns I can’t load into Pattern Keeper. My aim is to use a different coloured pencil for each day that I work on those patterns so that I can see how much progress I’m able to make. My goal is to stitch a minimum of 200 stitches for each medium to large project before I can move onto the next project. I’ve found that for most projects this is achievable because I’m able to spend a couple of hours at least on them, and for most projects I’m able to easily get the 200 stitches in!

Until next time,

Happy Stitching!

Related Reads:

Posted in Tips and Tricks, Uncategorized

The Joys of More Stitching. What are you gaining?

Hi Everyone

I hope you’re all doing as well as you can at the moment. As I’m writing this post, it’s Good Friday and it’s been raining steadily for a few hours and it’s wonderful! I’m loving the sound of the rain and knowing that there’s barely a breeze to blow it all away. The Bureau of Meteorology (BOM) is predicting a range of 8 to 20 millimetres of rain! This is where I’m so thankful to be home to enjoy the rain, have Flosstube playing on the tv, be surrounded with my cross stitch stuff and be writing this post.

Meanwhile, by the time I publish this post, we will have experienced Easter and Australia and New Zealand will have celebrated/commemorated Anzac Day on Saturday 25th April. It will have been the first Anzac Day that Australian’s and New Zealander’s will not have been able to have special dawn services and parades that are typically held at National/State and Territory memorials. Many people however, chose to stand in their driveways with candles to hear the last post and special service being played online.

Technology

I have a love hate relationship with technology. It has made life 10 times easier for many of us until it stops working and something breaks! When technology is working, I love that I can still talk with friends and family over the phone or by using apps such as Skype and Zoom. Technology enables me to find out what’s happening around me without actually getting out there and “getting my hands dirty”. There’s a time and place for that and Bear Gryles will always be in the back of my mind when it happens!

Technology also means that I can catch up on what’s happening in the world of cross stitch. You Tube and similar applications has for many years, been a fantastic platform for all crafters to share with each other what we’re working on, what we’ve learnt and how to do things. Flosstube has also helped me come across so many other designers that I otherwise would not have known about, based upon my own interests and Google searches. Because of Flosstube, my stitching collection will continue to grow and I’m going to need a number of companies and individuals to sponsor me so that I can stitch on all of the things full time!

Things I want to stitch because of Flosstube…

Because of Flosstube, I want to stitch:

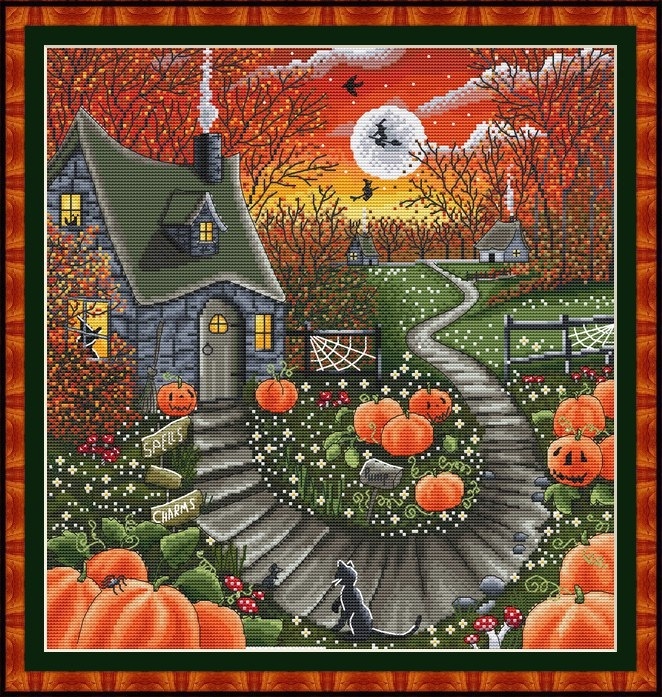
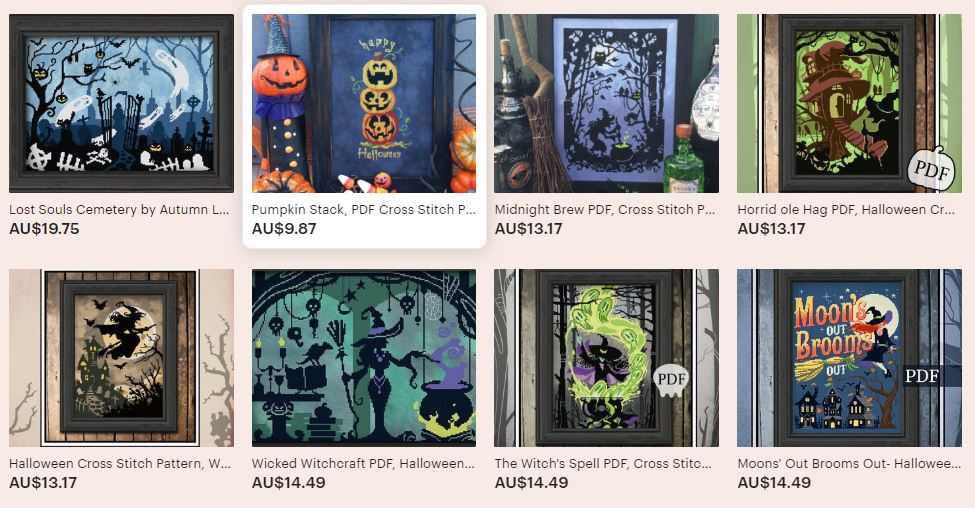
  • Many of the Halloween patterns from Autumn Lane Stitchery (available on Etsy);
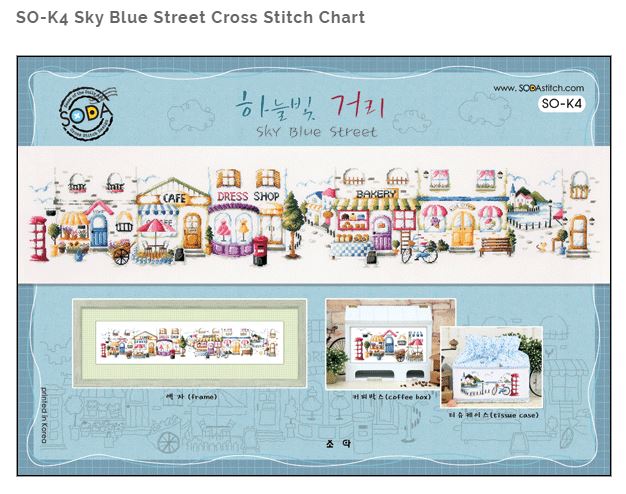
  • Sky Blue Street by Soda Stitch Canada;
  • all of the colourful cats by Kitty and Me Designs (available on Etsy);
  • Fight Like a Girl by Tanya Amity;
  • Halloween Night by Alena Koshkina;
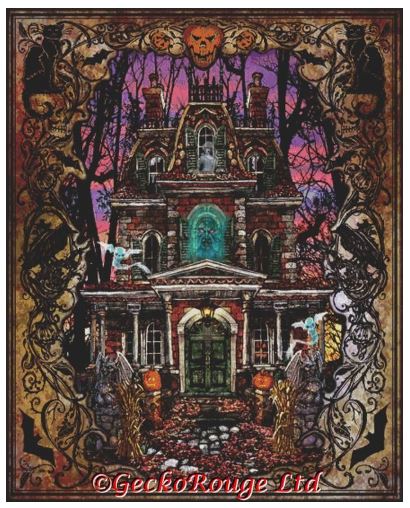
  • Fright Night by Lewis T Johnson; and
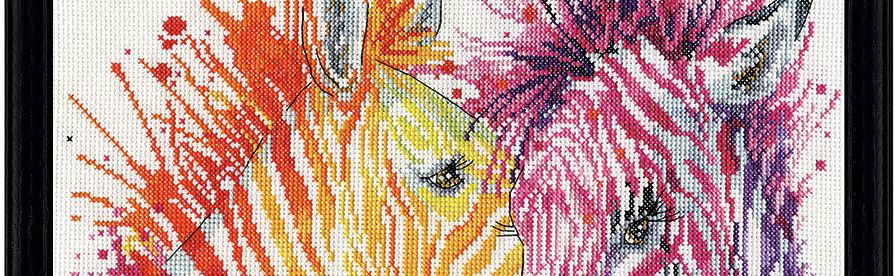
  • Colourful Zebras by Artecy Cross Stitch.

This is not an exhaustive list by any means. There’s still so many more I want to stitch that many Flosstubers have shown and talked about. Let alone the numerous patterns I have had in my collection for years that I haven’t started yet and the projects I’m currently working on!

Nature

I’ve always had an appreciation for nature and what it can offer – even though it’s a struggle to get me out there at times! If I can’t leave my home or I don’t want to venture too far, I love being able to sit out in my backyard and enjoy the sunshine. Or on days like today, I love being able to sit hear the window and listen to and watch the rain coming down nice and steadily. Also, without nature, I wouldn’t have some of the beautiful photographs I have on my walls. More broadly speaking, as cross stitchers, we wouldn’t have some of the beautiful projects to work on that have been inspired by amazing landscapes, animals and gardens the world has to offer.

Right here, right now

Mindfulness has been a big thing for many years and is more important now than it has ever been. What are you thankful for right now? What did go right for you today? Do you have a roof over your head? Some warm blankets and a comfortable bed? Do you have running water – hot and cold – and food in your pantry? Do you feel comfortable in the clothes you’re wearing right now? What sounds can you hear right now?

These are a lot of questions, but ones that I ask my self a lot and very similar ones as I’m putting one foot back into reality, to test the waters and remind myself that life is still pretty good!

My other ‘right here, right now’ moments tend to come when I’m going for walks with my boyfriend or I’m sitting out in the backyard or generally chilling out at home. I’m really lucky to live near some bush land and we have kookaburra or family of them that lives nearby. Some days we can hear the kookaburra laughing away or we’ve spotted it as part of our walks around the block. We also have a number of houses around the neighbourhood who have dogs and early in the morning or early evening (the typical witching hours!), the dogs will have a howling session. It’s awesome! The howling sessions always make my boyfriend and I laugh and it reminds me of my family’s Jack Russell, Russell. In Russell’s younger years, I would get to have a howling session with him whenever I arrived home at my parents farm or would head out there to visit. If Holly the Blue Heeler was around, she would join in and howl along too. These sessions would always make us laugh and howl along with them.

Dream on

Many years ago I use to dream about what I would do if I won the lottery. Like many people, I would have done the standard things like travelling, buying a house, sharing it with family and friends and make some donations.

Now, I still dream of travelling, but it involves taking a year or so off work to do it and road tripping to many parts of Australia I’ve never been to or I want to see again. I’ll still have my moments of wanting to hibernate and needing a few days to recharge the batteries. Which will work out perfectly, because that would enable my boyfriend to go fishing and I can get a bucket load of cross stitch done.

Saving time and money

As much as I miss the freedom at the moment to be allowed to go out and do whatever I want (within reason), I am not missing the journey I have to take to get to work and paying for parking. On average, I pay $39 per week for parking and however much money it is for fuel consumption and the general wear and tear my car experiences when I drive it. Additionally, I’m not missing what my imagination does to me when I’m walking through Civic when it’s dark to get to the gym. In my mind, I worry about people jumping out at me from the shadows and being assaulted in whichever shape it may be. Civic is the centre of Canberra and a central location for many homeless and low income people to be, because of the services that are available to them. Towards the end of the working week, Civic is also known to be the location for people to go to unwind, catch up with friends at the pub or a food place. So, early Thursday or Friday mornings at Civic can be an interesting place to navigate (especially in the warmer months) because of the number of people recovering from the night before. Being a short female, and keeping an eye out for potential dangers isn’t fun! I’ve been lucky to not be severely impacted by this. I have had the occasional encounter with someone asking me for money and they’ve been good when I’ve told them I don’t have any on me.

That said, as you can see in the image above, Civic can be pretty at night if you forget about any of the dangers that the location may have. For about a week each year, we have an event called Night Fest, that encourages people to come out at night and experience Civic and nearby locations under different lights.

Because of this stress, time and money saving, I’m able to sleep in a bit and go for more shorter walks with my boyfriend and we’re able to meet in the kitchen for tea/coffee and lunch.

What about you? What are some of the things you’re happy to be missing out on? What have you been able to do as a result of what’s happening at the moment?

Until next time…

Happy Stitching!

Related Reads:

Posted in Uncategorized

Digital versus Stitched Pattern Cover Sheets… Does it matter?

Hi Everyone

I hope you’re all going well. I’ve been working from home for the last two weeks or so and I’m finding that I’m not as inclined to be in front of the computer as much. I’m also finding that I don’t even want to go near my craft room unless I’m working now. But I digress…

I’ve been watching a bit of flosstube and I’ve fallen in love with Autumn Lane Stitchery. Cassandra and her husband Aaron are awesome. Aaron’s the designer of all of their patterns that are available on their Etsy store. I absolutely love all of the Halloween themed designs they have and I’m keen to start stitching some of them when we get closer to October! Below is one of their recent flosstube episodes to give you a bit of a taste what they’re like.

Autumn Lane Stitchery Flosstube episode 5 – Uploaded to YouTube on 13 April 2020

One of the things that I’ve been mulling over for a while now, and Autumn Lane Stitchery have reminded me of this question – how important it is for the project cover sheet to be stitched?

Digital Cover Sheets

I’d never really thought about it too much until Java Girl Stitches talked about one of the patterns she stitched by Shannon Christine Designs (two examples are shown below that I’ve purchased).

From a design and small business perspective, I understand that it may not be possible for businesses to pay someone to stitch a model, or wait for the model to be stitched before the patterns are released . I’ve also found that from stitching perspective, if the cover image is really cool, then I won’t care if it’s not been stitched. I’m placing enough trust in the designer to convey the way the finished picture is meant to look, that I’ll purchase the pattern and stitch it.

A similar thing can be said about photos that have been converted to cross stitch. On some of the social media groups I’m part of, some people have shared their progress of projects from photos and they look really good! Jan Hicks is one example, where she has converted some of her travel photos to cross stitch patterns – aka Jan Hicks Creates. Other examples include Cross Stitch Collectibles and Mystic Stitch. The images below are from the Mystic Stitch website.

Stitched cover sheet

For the majority of the time I’ve been stitching, I’ve only known cover sheets to have a stitched image on it. For example, below is the cover of a pattern that’s currently in my WIP (work in progress) pile.

When I started stitching, seeing a stitched image would give me really good idea of whether or not I’d be able to stitch it. It seems strange to say that because in theory at least, any pattern can be stitched. It’s just a question of how long it will take to stitch it! What I’m finding as time goes on, is I’ll gauge a picture by how much back stitch is in it versus how big the project is and how much confetti stitching it may have – e.g. a HAED.

Being able to see the actual stitches (rather than the digital stitches) helped me in my early years to see how the stitches needed to look. Also, aside from following the pattern, seeing the finished picture helped to reassure me that I was on track, and that my finished project looked as close as possible as what it was meant to be.

Summary

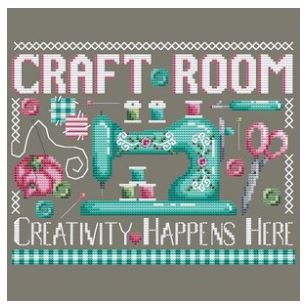
I’ve found that at the end of the day, it doesn’t matter if the cover page is stitched or digital. The most important thing is what the picture is of. The picture needs to jump out at me and make me want to stitch it. It could be because of the colours or the theme – e.g. Shannon Christine’s Craft Room picture. It could also be because of the main subject – e.g. a cute puppy sitting under a Christmas Tree.

What do you prefer – a digital cover image or a stitched one? Does it matter? Why?

Posted in Cross Stitch Haul and Stitching Progress, WIP's and Plans

I’ve fallen in love with soft Aida fabric

Hi Everyone

It’s a quick post from me this week because I want to rave about some Aida I’ve just finished stitching on.

I never thought it would be possible. I’ve heard people talk about soft Aida on Flosstube and for a long time I thought it was a myth. However, a few weeks ago my boyfriend and I travelled to the south coast again for the Canberra Day long weekend. On the public holiday Monday we headed over to Mogo and I got to spend a bit of money at one of my favourite stores – Rosemont The Patchwork Shop. I was able to purchase some more fabric and some beautiful cards that can be used for most events.

One of the pieces of fabric I purchased was some 14 count pink Aida. When I opened up the pack and started stitching, I fell in love. It was so soft and easy to work with I had to check the packaging every so often to make sure I wasn’t seeing things!

Pink Aida from ‘Rosemont The Patchwork Shop’ in Mogo, NSW Australia

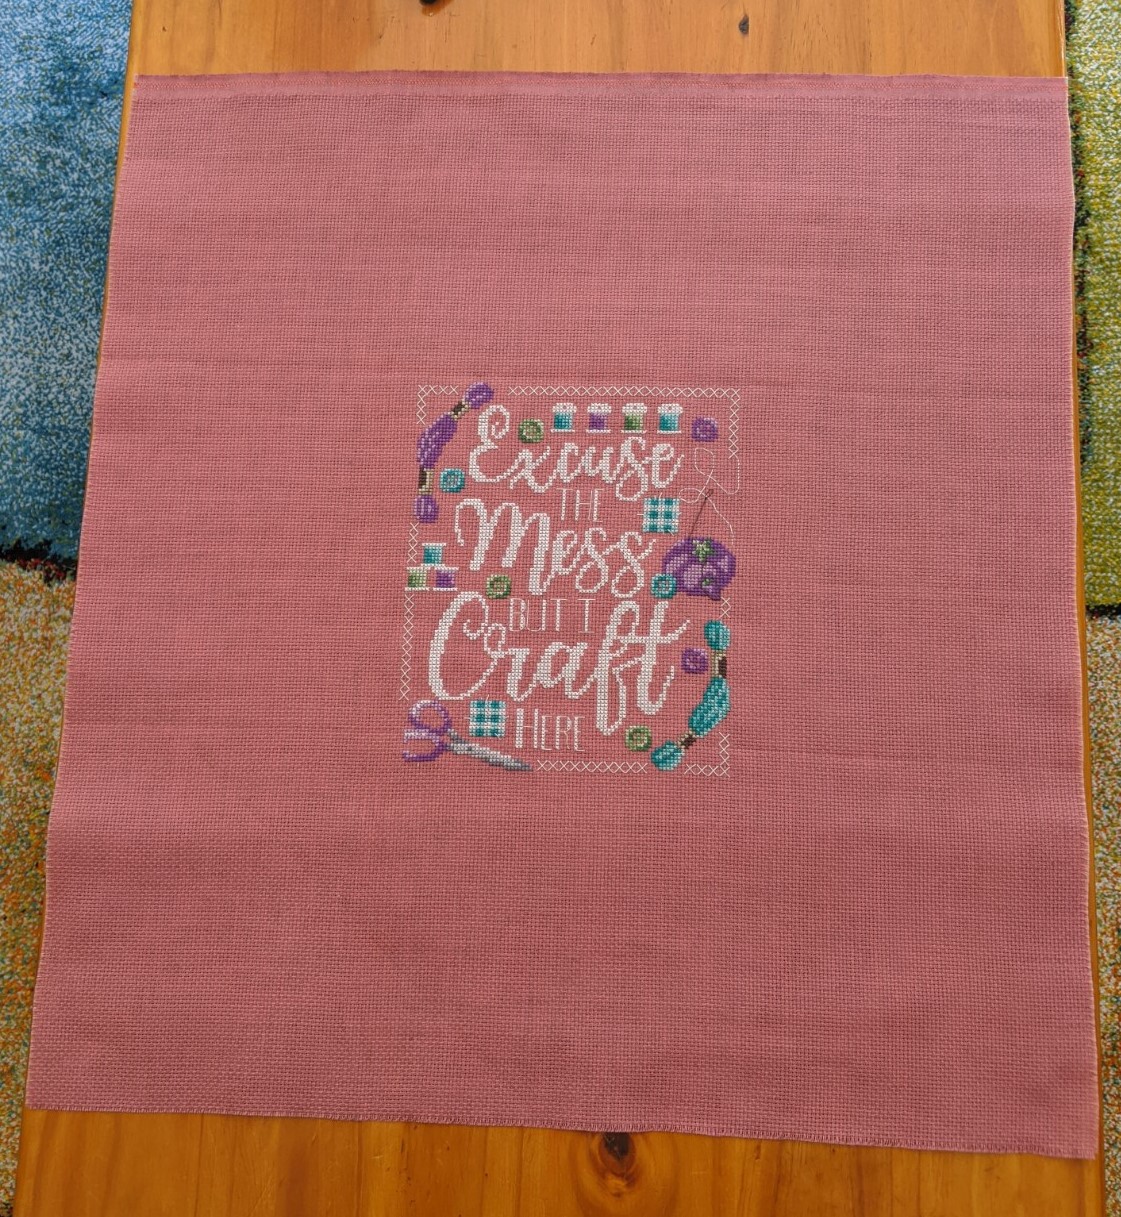
I decided to stitch the pattern called ‘Excuse the Mess, but I Craft Here’ by Shannon Christine Designs and I tested out the Pattern Keeper app with this pattern. The results of my efforts are shown below:

To make the hanging, I trimmed around the finished piece and I have the trimmings stored away. After trimming the piece, I trimmed down a thin piece of cardboard to attach it to, using some double sided tape (that I also use for scrapbooking). As you can see in the above images, I’ve used some ribbon to hang it from the door handle into my craft room.

Because I stitched this pattern on pink Aida, I changed out the pink threads that were called for, in exchange for purple threads and I think it turned out pretty well. I also used some dark brown on the skeins which was not intentional until I was halfway through stitching those areas. I had misread the pattern and used DMC 844 instead of DMC 822. Oops!

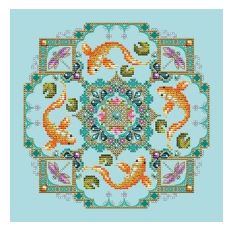
After having more a look at the Shannon Christine Designs website, I hadn’t properly realised until now, that they had also designed the Gingerbread Train pattern (see below) that I have in my Christmas Cross Stitch book that I really, really want to start stitching. I also really want to start stitching Koi Pond and Craft Room as shown below.

Until next time, I hope you all stay safe and happy stitching!

Posted in How To, Tips and Tricks

What do you need to know about framing your cross stitch?

Hi Everyone

How many variations are there for you to use to frame your cross stitch? Using the phrase “how to frame cross stitch” – including the quotation marks – 21,000 results came up in my Google results. Many of the results in this search talk about the possibilities of using glass, not using glass, stretching your project over canvas, using sticky board to assist with the framing, using matting board and not using matting board.

Considering how many posts and YouTube clips there are on how to frame cross stitch, the aim of this post is to share with you, some of the most popular ways to frame your cross stitch on a shoestring budget.

The most common threads from the most popular results will tell you about:

Washing your finished project

This can be a personal choice and be dependant upon your choice of fabric and threads. There are some threads may run if they are washed or weren’t pre-washed before you stitched with them. I’ve been really lucky with all of the projects I’ve washed before framing. I’ve only used Anchor or DMC threads, mostly because they’re the most accessible brands to me and up until the last 12 months or so, I hadn’t known about or heard of any other type of threads to stitch with! Tapestry wool being the exception!

I have accidentally spilt coffee and chocolate crumbs on my projects and I’ve been very lucky to have them easily wash out. Or I’ve been able to stitch over the spots without any worries – if a mark has been left after the washing.

One of the important things I want to note is that for the majority of my projects, I’ve hand washed them in the basin of my bathroom with a little bit of hand soap – liquid or bar – in warm to cool water. I’ve tried not to rub my stitches too much, but enough to remove any crumbs or marks if there had been any. I’ve also rinsed my project with warm to cool water to remove any soap residue. I’ve then lightly squeezed my project to remove the excess water and laid it flat on a towel to dry over night.

From an audio-visual perspective, below are a couple of clips that may help you with washing your projects, if you’re feeling a bit uncertain about what to do…

‘My gridding pen washed out super easy…’ by Stitching Jules – uploaded to YouTube on 8 December 2017
‘Washing your cross stitch and embroidery’ by Peacock and Fig – uploaded to YouTube on 17 September 2016

Once dry, I’ve ironed the front and back side of my project, taking care with areas that have beads and backstitch. You may find that some people are quite particular about which side of their project should be ironed – if at all. I’ve been lucky and not had any problems. It’s also been the main times I’ve brought out the iron and ironing board!

Measurements

How large your finished project is will have a major influence on the frame size you choose. The measurements will also impact your choice in mat board and what board you have to back your project. It’s also important to note that the amount of excess fabric you have around your project will have an impact on how you frame it. For example, do you really need a metre of fabric around your project? This example is excessive, but you get my point! On average, having an inch or two – 4 maximum (5 to 10 centimetres) around your project is the perfect amount because it gives you enough room to effectively stretch your fabric and have it centred in the frame.

Choosing acid-free materials

The acid-free materials will range from the foam and mat boards to the sticky board or threads you use to lace your project. This is important because they will ensure the longevity of your project and hopefully it will become a family heirloom!

Lacing

When I first started cross stitching and the term ‘lacing’ was mentioned, I thought it was something to do with lace in fashion and homewares. But it’s actually to do with the process of stretching your project over some foam board or cardboard, so that it’s nicely centred in your frame. Below is a clip to help further explain how lacing works and how you can do it too!

‘Lacing the lazy way’ by Lindy Stitches – uploaded to YouTube on 8 August 2019

Mat board

This can be a personal choice as well. Many frames you can purchase from the shops come with its own mat board. When you have pulled apart the frame, place the matting board over the top of your project to see if the matting board enhances or detracts from your project. It’s also important to note that the purpose of mat board is to stop your project from touching the glass – if you choose to frame your project with glass. According to the Frame Shop, mat board can protect your project from moisture because of the small gap it creates between the project and the glass.

If you find the perfect frame, but you need to adjust the mat board it comes from, Peacock and Fig has put together a great clip on how to customise the mat board to suit your needs.

‘How to cut a mat’ by Peacock and Fig – uploaded to YouTube on 28 May 2015

Frames

Whenever I’ve decided to frame a project, I’ve taken my project with me to the shops I want to get my frame from. This enables me to see what’s on the shelf and see if the project works with the frame. Felt Magnet recommends this in their post about framing your project as well. The aim is to find a frame that compliments your project. Tip: choose a colour in your project that you have used a little bit of. Find a frame in that colour or find some paint that you can use to paint the frame you’ve chosen. Alternatively, you may choose to wrap the frame in fabric or paper or any other medium that suits your project. Additionally, your frame can be made out of whatever materials you think suit and compliment your project. I’ve seen on the internet, how creative people have gotten with their frames. Some people have chosen to utilise materials from around their home or local stores that enhance their projects. Below are some images of what people have done:

Image from Google search. See diyinspired.com for a closer look at this frame and more ideas.
Image from Google search. See websiteherpetologistsleague.com for a closer look at the image and more framing ideas.
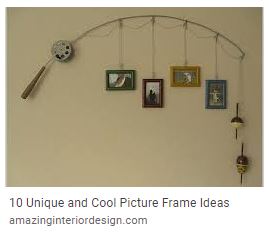
Image from Google search. See amazinginteriordesign.com for a closer look at this idea and more framing ideas.

Summary

When I’ve framed my own projects, I’ve taken a stab in the dark. I’ve not looked up anything on the internet. I’ve usually had an idea of how I’ve wanted the project to look in the frame and had a go at making it right. I’ve made the mistake of racing out to purchase a frame without my project with me and purchased a frame that’s been too big or too small. I still have some of those frames hanging around my home, in the hope that one day I’ll have a project that will suit it.

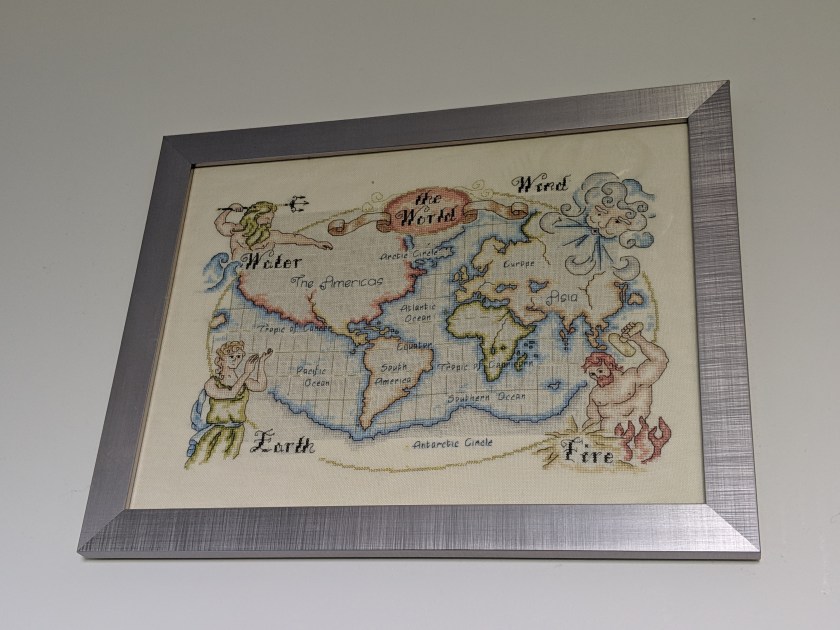
I’ve kept the glass in all of my projects and I’ve taken the risk with some of the projects by not using matboard and having the project right up against the glass. This is a huge risk with ‘The World’ project (see image below) because I’ve got it hanging up in my ensuite.

I’ve rarely used the lacing method of securing my projects in the frame. More often than not, I’ve used acid-free double sided tape to secure the project to the paper or board that has come with the frame. I have had to be careful to not have the standard picture that’s come with the frame showing through my project. I made that mistake with my ‘The World’ project (see below), but I think it’s worked out for the better. What do you think?

‘World Map: The Elements’ designed by Maria Diaz – notice the darker background. This was unintentional. The darker colours you see in the background are because of the side I used for backing the cross stitch project.

I also recommend you check out YouTube for tutorials on how to frame your cross stitch projects. They will give you the confidence and guidance on how to do what you want with your project. They may also enhance what this post has touched on.

Until next time, happy stitching!

Related reads:

Posted in How To

How to kit up a cross stitch project from scratch

Hi Everyone

If you’re like me and started your love affair with cross stitch with kits helped a lot with learning to stitch and see the finished project. So, progressing to kitting up your next project yourself seems like the next logical step!

What you need

Some of these things may seem blatantly obvious, but can easily forgotten in the rush and excitement of starting a new project. I’ve also purposely not talked about scissors, lighting, stands, hoops, frames, needle minders or any other tools of the trade that can be used while stitching a project. If you are curious about these things, check out some of my previous posts!

The pattern

Many patterns, regardless of where you’ve gotten them from, have some really handy instructions for all stitchers. I strongly recommend you have a read through them, just in case there’s something special you need to pick up from your local craft store. The instructions will tell you what the stitch dimensions are of the finished piece and many of the designers will recommend what fabric size to stitch the project on. Sometimes, the designer may suggest what needle size to use for the corresponding fabric count.

The other component of the pattern is the key that lists all of the threads you need and how much of each colour you will need to complete the pattern. This can be in the form of number of skeins or metres. Below is an example from one of my own patterns I’ve converted from a photo I’ve taken. This is only a partial list:

Example of floss list for a cross stitch pattern, minus the symbols for each colour

The numbers you see in the column for number of skeins, shows that you would need a partial of each skein. By memory, each skein comes in 8 metres in length and you may need about 1 metre of each skein. So you will have quite a lot left over with the exception of black, where you will need the full skein / 8 metres.

I strongly recommend that you take this page of your pattern to your local craft store and use it as part of your shopping list and tick or mark off each colour as you put it into your basket.

Fabric

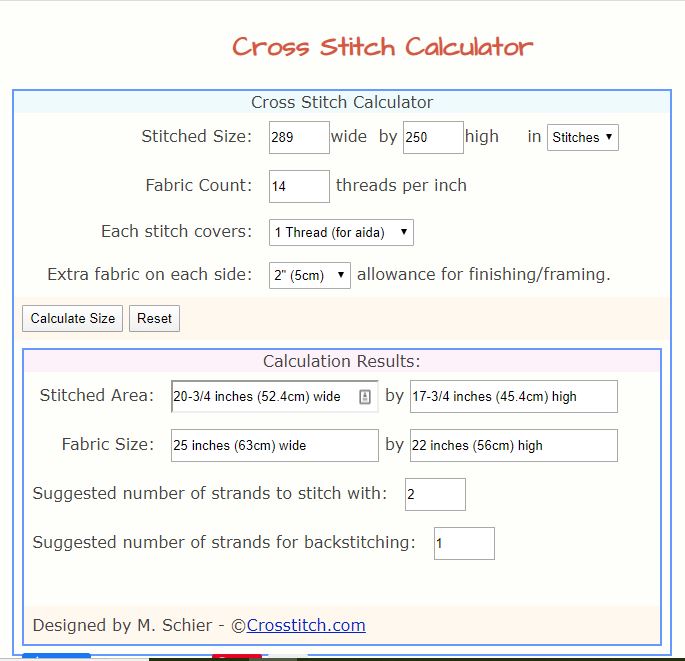
Sometimes the designer may not state how much extra fabric you will need to stitch your project. They will just state how big the project is and recommended fabric. For example, the stitch size may be 289w by 250h on 14 count navy blue Aida. This is where a fabric calculator can be helpful to calculate how much you will actually need. The website Crosstich.com has an awesome calculator that’s very easy to use. Below is an example of how it works, using the dimensions I’ve used in this paragraph:

Snippet from Crosstitch.com website calculating how much fabric is needed

You may also see in the above snippet, is the option to select how much extra fabric you want around the edge of your project. I’ve selected 2 inches/5 centimetres. There is the option to have 3 inches/8 centimetres. This is your personal choice and potentially how much you can afford to pay for fabric.

The additional reason why I’m talking about the amount of extra fabric you need, is to help with stitching the project and finishing it. The extra fabric will mean that your project can be snugly in a hoop or stand or whatever you choose to keep the fabric taught and your stitches neat. If you choose to frame your project, there’s enough fabric to stretch it into place so that it looks just the way you want it!

It’s also your choice for the numbers you enter for the number of strands for your project. This won’t have an impact on the size of fabric the calculator recommends for you. It may have an impact on how many skeins per colour you choose to purchase!

Purchasing your fabric

In this digital age and the internet at our fingertips, we can choose to purchase our supplies online or we can find out where our local craft store is that sells the fabric we want and need. In Australia, the two major craft stores closest to where I live are Lincraft and Spotlight. From there I can purchase pre-cut Aida in a some colours, counts and dimensions. I can also go in store and purchase some fabric off the roll in a size that I need. The fabric they have on rolls will vary from store to store. Thankfully, there are smaller business that I can purchase other fabrics from and they have a wider variety of fabrics, count size and dimensions.

I’ve also really enjoyed going to craft shows and checking out the fabric section of store to see if they have any off-cuts I can purchase for potential projects down the track. I find that they have many fabric colours that I haven’t seen on the internet.

Preparing your fabric

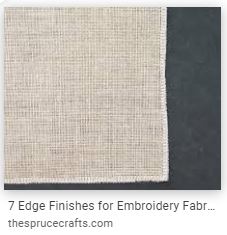
Some people hate it when the edges of their fabric start fraying while they’re working on their project. I’ve seen on some American floss tube clips that the edges of their fabric already have been serged as part of the process that American shop owners choose to do. If you have an overlocker or know someone who has one, you can use it to go around the edges of your fabric. Another option is to use your sewing machine and use the zig-zag stitch or you can hand sew the edges.

Example of serged edge – image from Google search

If you are choosing to use Aida, some people have complained about how stiff it can be when they start using it and it’s turned them off from wanting to use it ever again. I’ve certainly experienced some stiff Aida and it has been annoying to get it into the hoop. I have found that over time, the fabric softens as I continue to work with it. I’ve also heard of people washing it before they use it and trying to soak it with fabric softener or similar products. How successful they are, I’m not sure. All I can say is do what works for you!

Floss

The size of your project will depend on how many colours you need to purchase. If you’re needing to purchase a lot of colours, you could:

  • purchase a few colours at a time and stitch with them until you need to purchase some more
  • purchase all of the colours in one go
  • raid your stash to see if you have some left overs from previous projects
  • have a chat with stitchy friends and family who may be able to give you some of their left over colours

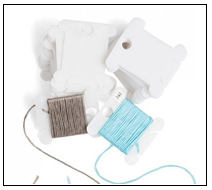
Tip: If you’re purchasing your floss from a craft store, I strongly recommend you include in your basket some floss holders (aka bobbins) and a storage container to hold all of your colours. The image below is an example of what you can purchase.

Plastic Bobbins – image from the DMC.com website

You may hear of people talking about ‘bobbinating’ their threads. What they’re doing is winding their threads onto the bobbins, like the image above (that come in plastic and cardboard) and writing on the bobbins or using stickers like the ones you can purchase in the image below. If you conduct a search in your preferred search engine, you should be able to come up with some stores who stock these awesome stickers!

DMC Floss Stickers – image from Google image search

Needles

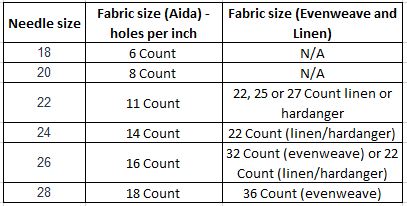
The size of the needle you use for your project will depend on the size of fabric you’re using. Using the right needle size will mean you’re stitches will be neater and there won’t be any obvious holes from your needle. Below is a table of what needle size you’ll need for the fabric size you may be stitching on:

Needle and fabric chart – information from the websites DMC.com and mystitchworld.com

Another thing to consider with your needles, is whether they’re silver all-over or have a gold or brass colour around the eye of the needle. This comes down to personal preference. Some people find that the needles that are gold plated move through the holes in the fabric smoother than the silver needles. Some people also find that the silver needles tarnish over time from the oils and other excess moisture and crumbs from our fingers, and may impact the ease of the needle moving through the fabric and thread on their projects.

Armina from Stitch Floral wrote a great post about ’10 things to remember about hand embroidery needles’ and suggests the use of ‘a strawberry cushion filled with gritty emery powder, pull the needle all the way through it in one direction.’ The aim of this is to sharpen the needle and remove any moisture on it, resulting in your needle remaining sharp and moving through your fabric smoothly.

Admittedly, I’ve been pretty lucky with my needles in the sense that they have tarnished a bit over the years through wear and tear and moisture on my fingers. The only adverse affect my projects have had from me using these needles is me using the wrong needle for the size of the fabric I’m working on. More often than not, I’m using needles from previous kits I’ve stitched or snaffled out of my sewing box.

That said, I agree with Armina from Stitch Floral when she says that needles are inexpensive. It’s possible to pick up a pack of needles from your local craft store or online for a few dollars. If you’re not sure on what to do with your old needles that you don’t want to sew with anymore, check out the post by Superior Threads in the related reads at the end of this post!

Putting it all together

Thankfully there are many, many Flosstube clips from a variety of stitchers who have been wonderful in sharing how they organise their projects. Hopefully you find some of the clips below of use and interest!

‘How I Approach My Cross Stitch Projects’ by CatCrazyCreations. Uploaded on 13 October 2015
‘Floss Tube 8: How I Setup and Start Large Cross Stitch Projects’ by Stitching Jules – Uploaded on 2 March 2017
‘How I do large cross stitch projects’ by Stitching Jules – Uploaded on 5 December 2017
‘Tutorial – How to start a cross stitch project’ by Stitchin’ Mommy – Uploaded on 20 April 2017

Final thoughts

I hope this post has helped you with kitting up your own project. It’s been a long time since I’ve started a project that’s been kitted up for me and I find kitting up my own project can be rewarding and it can show me where the gaps may be in my collection. My boyfriend has been amazingly patient when he’s been with me in the craft stores and I’ve been busy finding all of the threads I need. He’s also started helping with finding the threads as well and that’s helped a lot!

At the end of the day, the strongest recommendation I can provide you is do what works for you. If a pattern recommends the use of linen, but you find that the count size is too small, use the calculator to find out how much fabric you need for a smaller count size. If floss bobbins aren’t your thing, floss organisers like the ones you get in your kits can be re-used. Have a chat with fellow stitchers and find out what they do. They may have a different system to what I’ve suggested in this post that works really well for you.

Until next time, happy stitching!

Related reads:

Posted in Cross Stitch Haul and Stitching Progress, WIP's and Plans

February Page Finishes

Hi Everyone

At the start of this month, I set myself the goal of finishing the page I was working on for each of the active projects I have on rotation. I have been stitching my little heart out for most of this month and I think I’ve done pretty well. Especially since last post I was feeling a bit down and flat and not thinking that I would be able to achieve the progress I’ve wanted for each project.

There have been a few days where I’ve not stitched because I’ve been too tired from work and I’ve not slept well the night before, or I’ve been busy with other things. So without further adieu, lets get into it and see how I’ve gone!

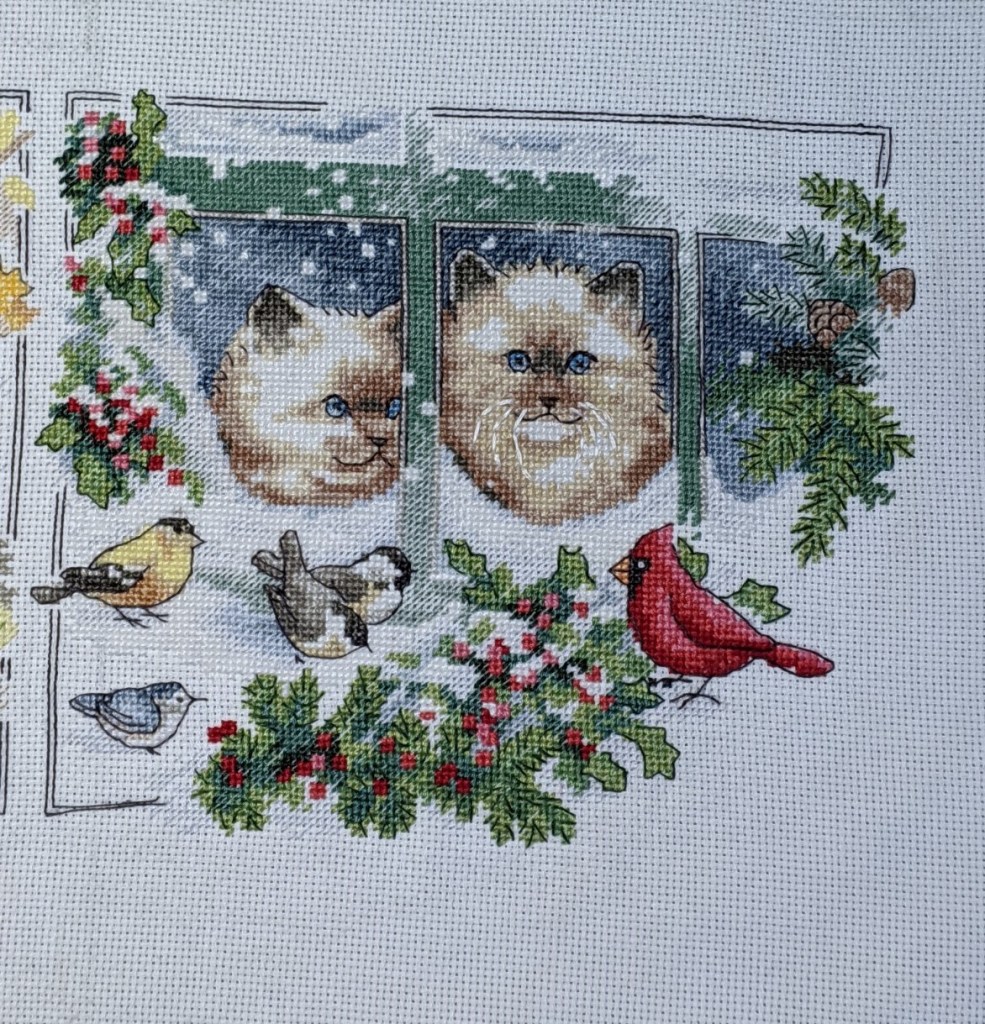
Four Seasons Kittens

I have finished all of the half stitch and full crosses the pattern has asked for and I’ve gotten the majority of the back-stitch around the called for areas. I just need to give one of the kittens some whiskers and finish off the frame for the quarter, and I’ll be able to move onto spring or summer!

‘Four Seasons Kittens’ by Dimensions – Progress as of 29 February 2020
‘Four Seasons Kittens’ by Dimensions – progress as of 11 January 2020

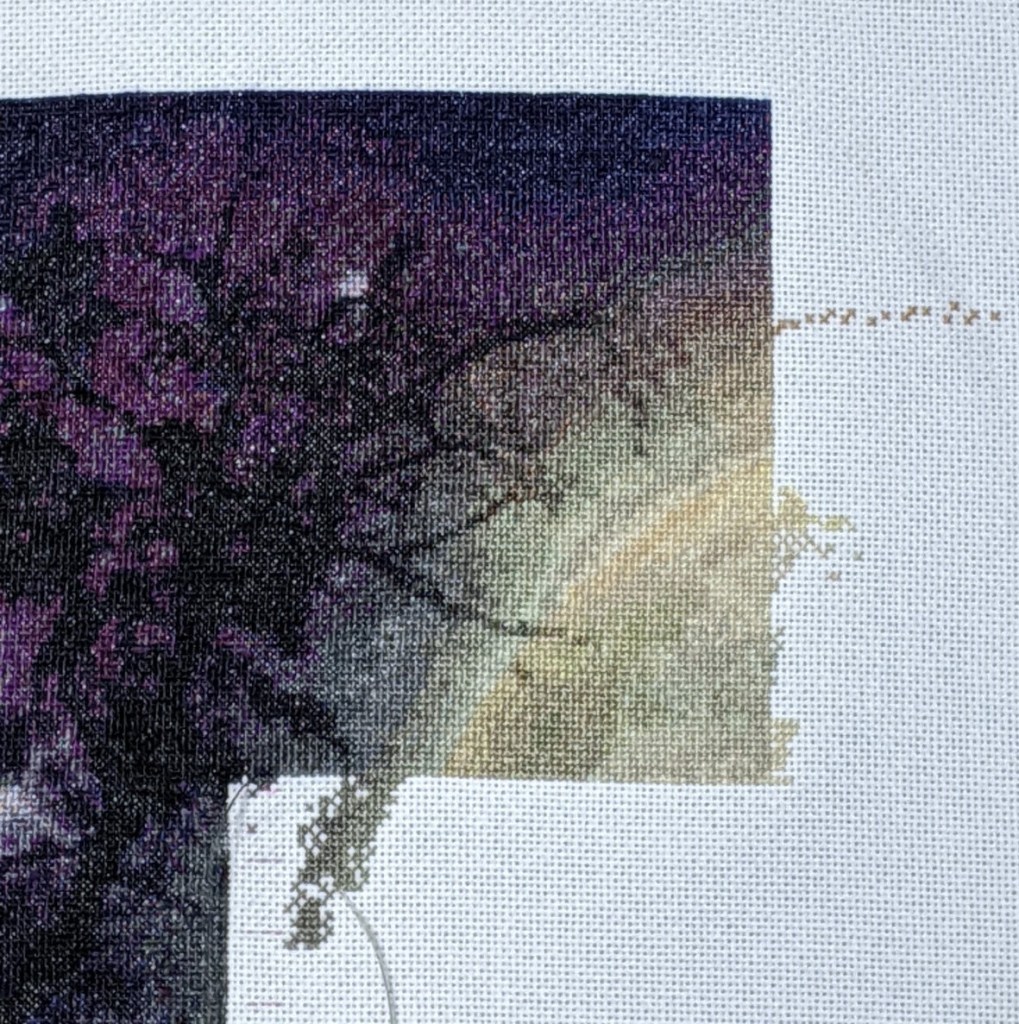
Midnight Fairy

A page finish and then some…

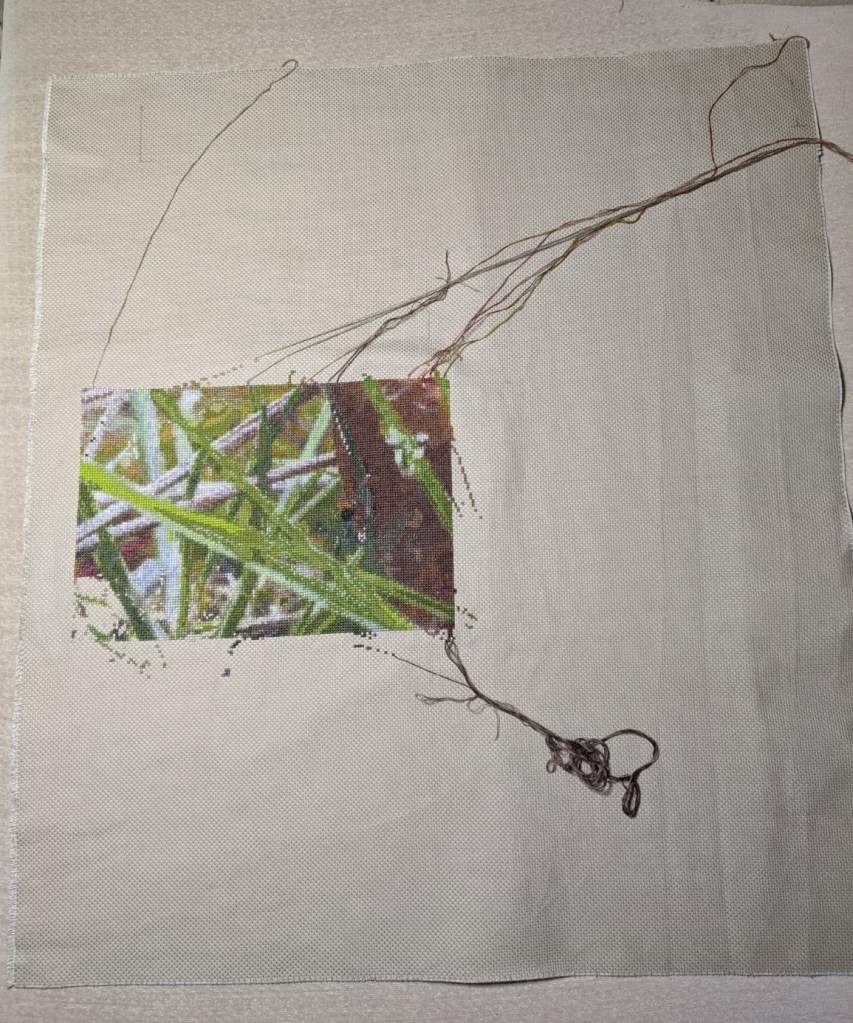
Moonlit Waters Fairy by Heaven and Earth Designs – Progress as of 29 February 2020

Because there was some confetti that I had to finish on this page, I wanted to make the most of the thread I had on the needle at the time. So I started looking at neighbouring pages to see if I could stitch anything there and what you see is the result of what I found.

Fishing

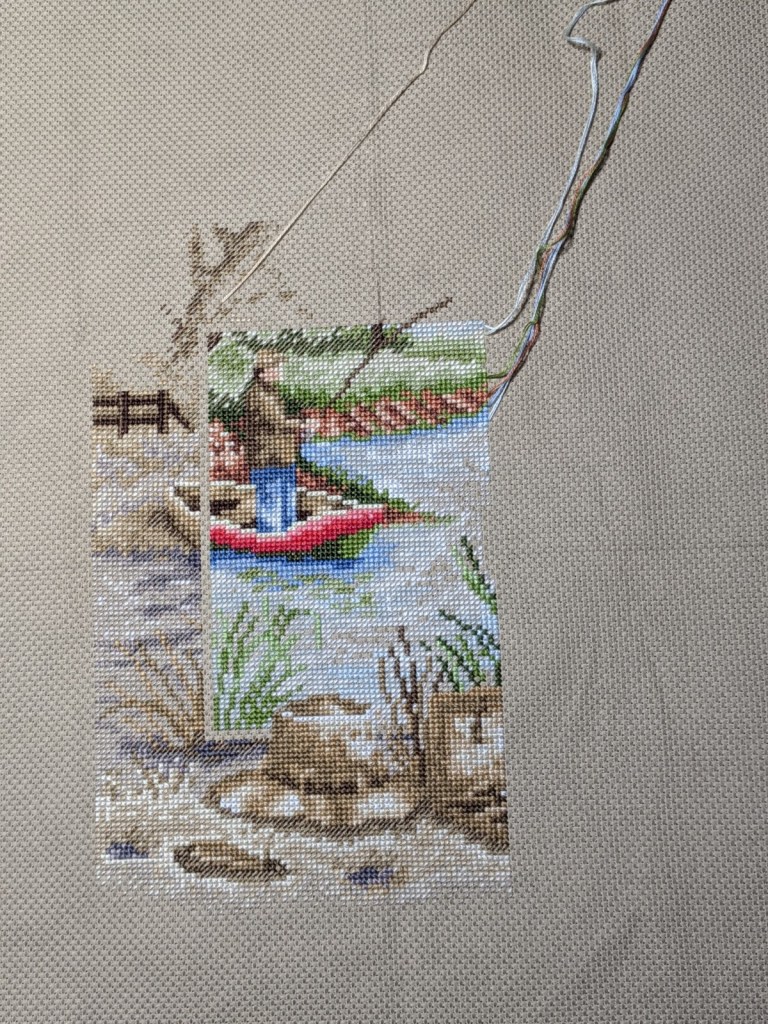
I achieved a page finish with this project! The area I have been focusing on for February, is the bottom of the pattern that has a lot of greys and browns it. There is a bit of back-stitch needed for this area to help give the hat, some bullrushes and fence some definition. I’ll get to that when I’ve finished all of the full and half stitching for the project. Theoretically it should be easier if I do that!

‘Fishing’ progress as of 29 February 2020
‘Fishing’ close-up of my focus area and page finish as of 29 February 2020

Gundaroo Mini Mushroom

I’ve been battling some leg pain while stitching some of this page and I’m really annoyed that I haven’t gotten more done. The short story is that I don’t stretch as much as what I should after my gym sessions and runs and I’m an office worker. As a result of so much discomfort I’ve been experiencing lately, I haven’t been able to finish the page for this one. I am frustratingly close as you will see in the pictures below…

‘Gundaroo Mini Mushroom’ by Kristen Gawronski – progress as of 29 February 2020

To help put the image below into context, I’ve completed page 6, which is more the the centre of the fabric, and I’m close to finishing page 5. I’ve decided to start in the centre of the fabric because I’m not sure if I’ll have enough fabric to finish the entire project. The other thing to bear in mind with this project is, when I first put this pattern together, I had told the software that it would need to fit onto 28 count fabric – or there abouts. I then changed my mind and decided to keep most of the dimensions but try and stitch it on 14 count fabric instead…

‘Gundaroo Mini Mushroom’ by Kristen Gawronski – progress as of 29 February 2020

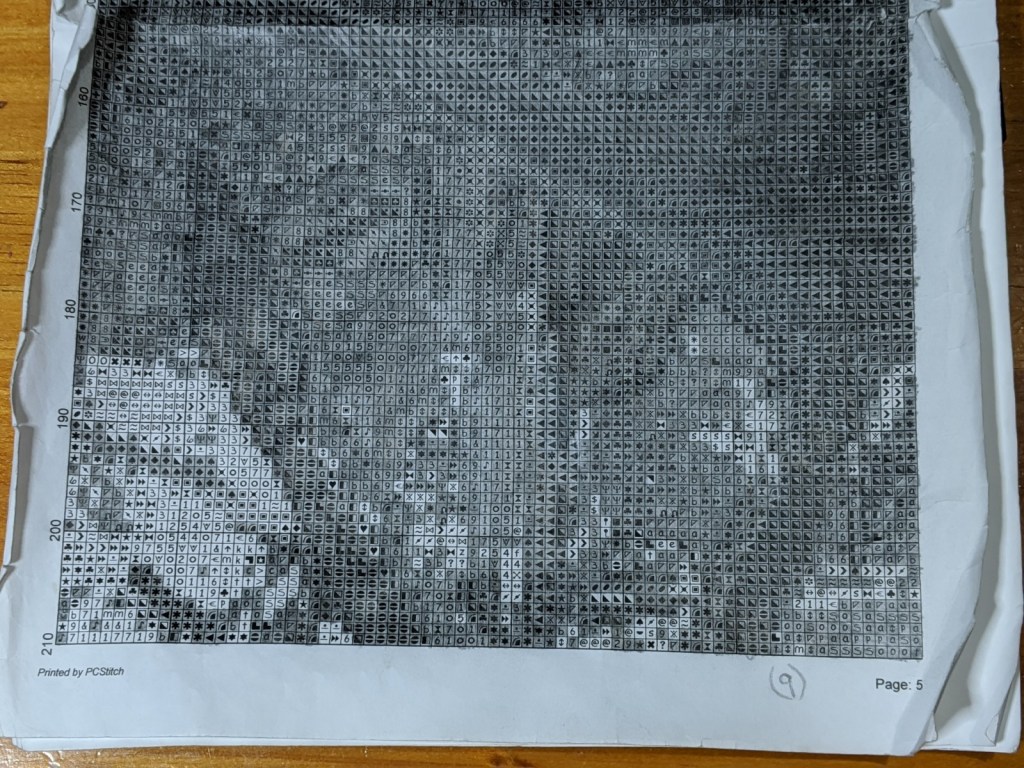
The annoying component with this pattern is the amount of confetti stitching for the bottom left corner of this page, which you will see in the photo I’ve taken of my pattern. It’s not as bad as other projects I’ve worked on over the years or even now with the HAED I’m working on.

However, in recent days when I’ve been stitching it, I’ve been seriously been contemplating scanning the pattern and seeing if it would be compatible with pattern keeper app. If it does work, it would make my life soooo much easiser! Because there are 148 colours in this pattern and some of the symbols are very similar. So it can take me a few minutes just to find the symbol on the key, to figure out which thread I need for a couple of squares!

‘Gundaroo Mini Mushrooms’ by Kristen Gawronski – pattern showing the confetti stitching and what remains to be stitched for the page as of 29 February 2020

Now that February is over for another year…

What now?

As I’m writing this post, Sunday, 1st of March is drawing to a close and whilst I have many new projects lined up and ready to go, I’m not sure if I’m ready to start them yet. Starting new pages of my existing projects would be exciting and I’d be significantly closer to getting the projects finished and off rotation for good. The question is though, do I need a break from them because I’ve been working on them so intensely for the last 20 odd days? Should I bring back into rotation some other projects that have been sitting idol?

One of the positive things for March though and the rest of this year is that I’m not going to be doing any official study with uni. Earlier this year, I had written about being accepted into the University of Canberra to complete a graduate certificate and I had been really excited about doing it. However, as time got closer to classes starting and getting the schedule for them organised, it all became a bit too hard. That process also helped me to realise that I really wasn’t as keen to do the study as what I thought I would be, when I had enrolled in the course back around August 2019! The good thing through, I that I have shown myself that I can get back into uni if I want to and it’s still an option later down the track. I’ve got work to focus on at the moment and I really want to keep progressing things with this blog and my stitching.

Small running update

It’s been a long time since I’ve talked about running and how things are going there. For the last few weeks I’ve been experiencing some muscle pain in my left leg that has stemmed from me not stretching enough. It has also meant that I’ve not been motivated to get out and about and go for a run or walk. With the help of my trainer at the gym and a remedial massage with a physio, the muscles are getting better. So much so that I’ve been able to get out running again! They’ve been short runs so far – 2 to 3km in distance and intervals, meaning I would run a full kilometre and walk for a minute or two then run again until I was done.

I need to pick up my game a lot more for this month because of the 5km fun run I’ve booked myself in for the first weekend of April 2020. I really want to feel prepared for the run rather than be feeling too casual and hoping for the best. Also, the course is different this year and I’m feeling pretty confident with it because it’s a similar course I’ve run during my own free time.

Anyway, that’s enough from me for this week. Stay tuned and until next time, happy stitching!

Posted in Uncategorized

February Funk and Festivities

Hi Everyone

In roughly a week, we’ll be done and dusted with February and we’ll be moving into March. As I get older, I’m hearing more often from family, friends and work mates ‘where has the month gone?’ or ‘wow! the year is flying by!’ February is a short month – we all know this. But are the months and years flying by because we’re getting busier and not keeping track of our time as much as we did when we were younger?

Nostalgia and reflection is kicking in because it will be my birthday on Tuesday! Getting older doesn’t worry me. Bring on the wrinkles and grey hairs and battle scars. They show I’ve lived a life and survived it! If the wrinkles are in the right places, it shows that I’ve been able to smile at those challenges once they’ve passed.

My birthday on Tuesday also means that I’m a Pisces. Which means that I’m in a constant battle with making quick decisions because I take into consideration all aspects of situation. For example, which chocolate bar should I get from the lolly shop? There are so many options! I don’t want to feel like I’m missing out on anything because I know that all of them will taste really good. But what do I feel like? Will I regret choosing plain chocolate over the gooey caramel? What about the one with honeycomb? The taste and texture and crumbs can be pretty fun to experience. What about trying something new or a little different? What if I don’t like it? I’ll feel like I’ve wasted my money. What if I do like it?

It’s too much overthinking for a chocolate bar, I get it! That said, the image below is one of the signs for the Pisces and shows one fish swimming up and the second fish swimming down in a circular or oval shape. As airy-fairy as this sounds, the image below to me, helps to explain why it can take me forever to make a decision about some of the most simplest of things.

Image found on Pinterest. See Etsy store BirdBlackEmproium for similar images.

Another reason why I’m feeling like I’m in a bit of a funk is that I’m coming down from an amazing last week of January 2020. With this blog I like seeing how my statistics are going for the frequency of visitors, what posts people have been clicking on and which countries the visitors are from. For me, a good week or good day will be a couple of people to 7 people. Sometimes a touch more. During the week of 25th and 26th of January, Oh. My. Gosh! My stats were through the roof! I’m talking an average of 150 or so people visiting my blog in one day! What’s got me stumped is the details. For example, what prompted so many people to come and take a look at my blog all of a sudden? Why that particular week? And how can I make it happen again and keep it constant?

So what does any of this have to do with cross stitch or running or many of the other things I’ve talked about on this blog to date?

Cross stitch gets me out of my head for a while. It stops me from over thinking things. I can just relax and focus on what I’m doing. I don’t need to think about or worry about the feelings of others or if I’m offending anyone by sitting wherever I choose and keep to myself. Cross stitch combined with some really good music, tv show or Flosstube I can partly watch and listen to, is one of the ways in which I can recharge my batteries and become again the person my family and friends know and love.

Meanwhile, the challenge I’ve set for myself with cross stitch for this month, it’s got me thinking I’ve bitten off a little more than I can chew. I’m not sure if I’m going to be able to finish the current pages for my current pages by the end of this week. Even with the time I’m spending on writing this post, I feel guilty that I’m not stitching. But when I take a break from stitching, I’m then feeling guilty that I’m not writing a post for this blog. Agh, that inner turmoil kicking in again!

So, my call to action for you this week is – what can I do for you cross stitch wise? What do you want to know about? How does cross stitch get you out of your funk?

Related posts:

Posted in Cross Stitch Haul and Stitching Progress

How do you support your local craft store?

Hi Everyone

By the time you’re reading this, it will have been a couple of weeks since my boyfriend and I travelled from Canberra, Australia to the New South Wales south coast area of Malua Bay and surrounds. It had been roughly 2 months since we had been able to travel down there since the bush fires and the Kings Highway being open for an extended period of time. Our aim for travelling to the coast was to have a change of scenery for the weekend and to start supporting some of the local businesses.

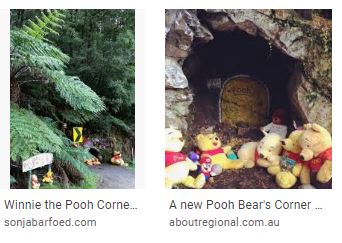
To us and many Canberran’s who holiday there, it’s our second home and we had seen many news reports and images on the television, and heard about the devastation from a variety of people. But the reality was something different for us as we travelled along the Kings Highway and over the Clyde Mountain. Seeing Pooh Bear’s Corner and the areas that had been burnt and the areas that had been saved was quite difficult for both of us.

Results of Google image search for Pooh Bear’s Corner

Up and down the Clyde Mountain we are accustomed to seeing this beautiful rainforest with a road that winds through it. To me at least, it’s a magical area of the drive and holds a lot of memories of going to the coast for holidays and escaping from every-day life for a little while. To give you an idea of what I’m talking about, below are two images I’ve come across on a Google Image search. The image on the left was before the fire and to the right is after the fire.

Images from Google Image search conducted on 9 February 2020

Everyone who has been involved in fighting the fires has done a phenomenal job. They have saved homes where they could and not all of the drive looks like the image on the right.

The hardest part for my boyfriend and I was seeing the reality of what the landscape and people who were there, (and many who still are) went through during the Christmas holiday break.

Interestingly, as I’m writing this post and looking out my craft room window in Canberra, it’s grey, windy, cool and a little drizzly at times. A stark contrast to last week – even a couple of weeks ago! It also means that the rain we have received – in Canberra and surrounding areas – especially along the coast – the Currowan fire that had caused so much devastation along the south coast and had joined up with other fires is finally out!

It’s going to be years before anything feels like it’s going to be back to normal for the locals along the coast, let alone the tourists like my boyfriend and I. What I’m really looking forward to – now that we’ve all gotten a heap of rain – is seeing the regeneration of the forest. The fire as been a long time coming and I know we’re all glad it’s over for now.

Supporting local businesses

So while we were at the coast, I really wanted to go to Mogo to see the how the town fared after the fire and to support the local businesses. On the Saturday, my boyfriend and I had lunch at our favourite cafe in Mogo and I got to stuff myself silly on an iced chocolate and ham and cheese toasted sandwich. It was really good!

One of the things I was also relieved to see was that the Mogo Trading Post was still standing! I had been really worried that it had been one of the stores that had burnt down. Whenever I step into that store I feel relaxed and it smells really good. I love the smell of the incense, soaps and candles they have and seeing the different gifts they have, ranging from jewellery to crystals and semi-precious stones, home-wares and clothes. I was able to get some really nice presents from there!

The other place I was relieved to see at Mogo was the Rosemont Patchwork Shop. I absolutely love this store. The owners are so lovely, helpful and kind and they stock an awesome range of patchwork and embroidery materials and kits and gifts. What makes this place unique is the sewing machine museum that’s attached to the store. I love it! Every time I have visited the store, I have always found the majority of what I’ve needed and many other things I didn’t know I needed, but had to have! This time around, I knew I wanted to purchase a bucket load of DMC threads for some patterns I’ve purchased in recent weeks. Below are images of my haul…

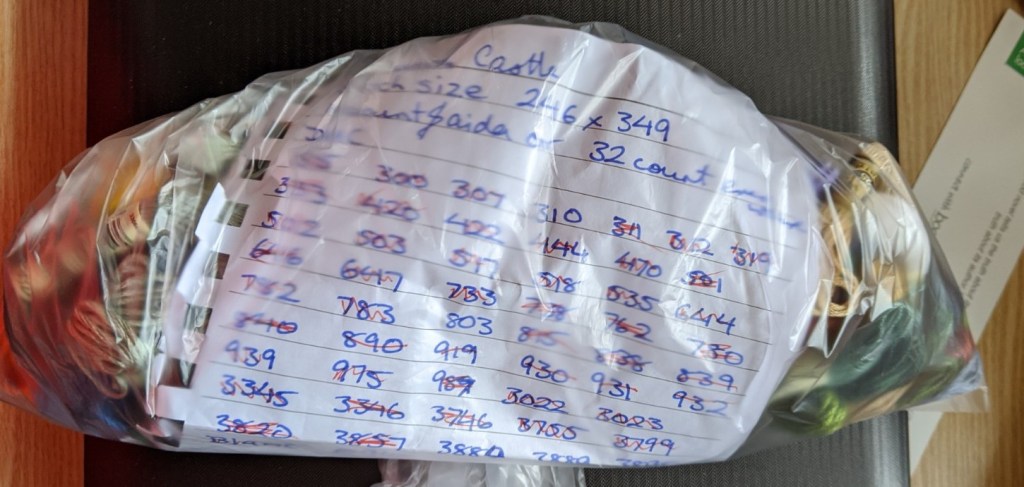
Threads for ‘Autumn Castle’
Threads for ‘Craft Room’ by Shannon Wasilieff
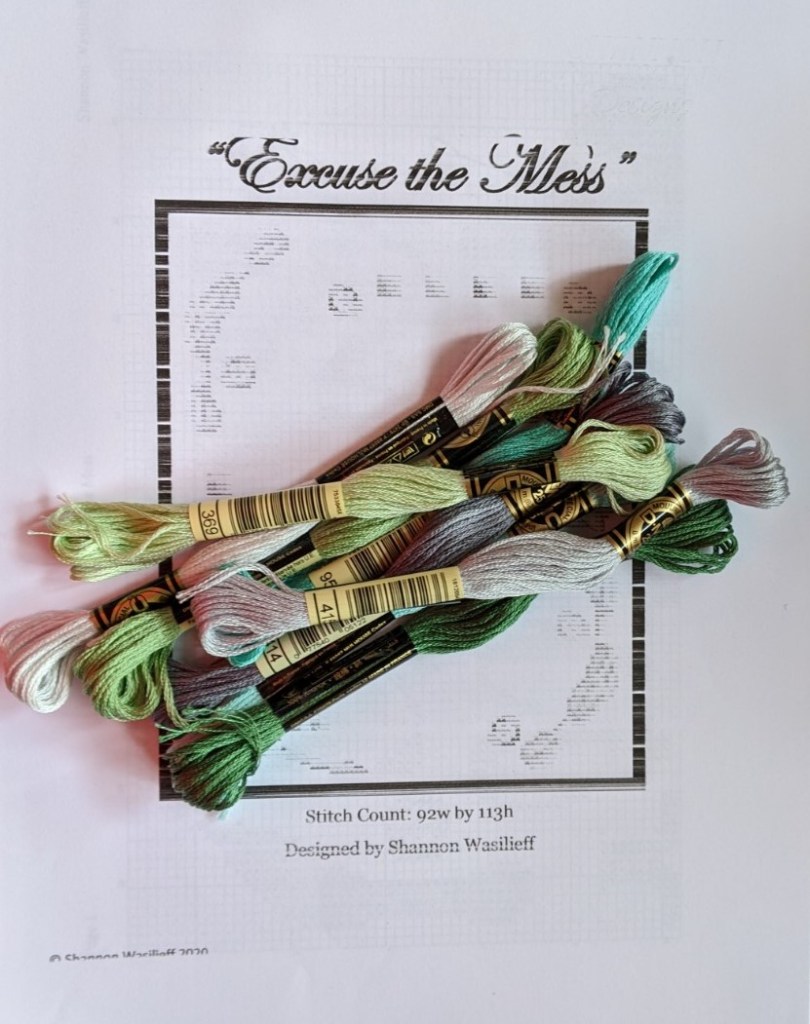
Threads for ‘Excuse this mess’ by Shannon Wasilieff
Threads for ‘Fight like a girl’
Threads for ‘Koi Pond’ by Shannon Wasilieff

Thankfully I had my boyfriend with me and that he is really tall and has long arms. He was able to reach some of the taller shelves for me to get the threads. By the end of it all, we walked away with about 120 threads! I still need to pick up some more threads, but I’m pretty happy with my haul because I was able to support the business.

How do you support your local crafty store?

To me, purchasing goods from a store is the best way to support a business. The next best thing is to spruik it. How do you support your local crafty store? Especially when times have been tough or you may not have been able to afford to shop there?

Related posts: